

Salvagedcircuit
-
Posts
1381 -
Joined
-
Last visited
Content Type
Profiles
Forums
Gallery
Everything posted by Salvagedcircuit
-
 This is indeed a valid method. Did this with my '97 chevy astro rear drums. Worked like a charm.
 -
Master cylinder rebuild kit
Salvagedcircuit replied to Dandxj's topic in MJ Tech: Modification and Repairs
I have a genuine mopar 52008647 master + booster kit for a ~1996 XJ. The booster came damaged from omix-ada. The master is likely still useful. If you are interested let me know. Thanks. -
Watched the whole video. Holy crap that's thoroughly documented. I am amazed you were able to find those little green wire clips. Very nice.
-
1990 Comanche Eliminator
Salvagedcircuit replied to pizzaman09's topic in Member Projects: Your Comanches
Looking extra fine here. Nice -
Fuse panel corrosion
Salvagedcircuit replied to NSWelding's topic in MJ Tech: Modification and Repairs
I have found that fiberglass pens work wonders at cleaning corrosion and oxidation off terminals. They are non conductive and not as abrasive as a file or sandpaper. You can literally shove the fiberglass bit into the terminal, wiggle it around a bit, then blow it out with compressed air and it will be a lot better. Things to note: a fiberglass pen will remove gold plating from a surface. It does not remove nickel plating that easily, which is why I tend to use it on automotive applications. Generic ebay / aliexpress fiberglass pens: https://www.amazon.com/Fiberglass-Scratch-Brush-Pen-Applications/dp/B0C31DXTR4/ Better quality: https://www.amazon.com/Faber-Castell-Glass-Eraser-Drawing/dp/B0007OEBM2 -
Brake fluid gets everywhere when troubleshooting. I had to paint the entire right side of my engine compartment after I did the WJ brake upgrade. Diagnosing the braking situation was not an enjoyable process, but to me it sounds like your passenger front brake line is clogged or passenger side speed bleeder has failed. One of my speed bleeders failed because of over-tightening, making the hole into a line. Fluid did not flow well after this. The passenger side front line runs from the back of the master cylinder block along the top back of the firewall, under the firewall seam and then down to the passenger front wheel. Every brake line in my '88 had failed when I was diagnosing my brakes, except this passenger front brake line. The armored brake line tends to hold dirt and debris close to the line and rot it out. Originally, before I even tried the WJ booster + master upgrade, my dual chamber MC was full of mud. I cleaned it out with paper towels and added new dot3 fluid, then pumped and pumped. The fluid came out brown on the driver side rear. After a half a quart, the fluid looked a little less brown, but the line exploded and started spewing out fluid from 2 pin holes in the brake line just about around the fuel filter area. At that point, my brother and I decided to replace every armored brake line on the vehicle. The passenger brake would flow fluid just fine, was not the armored kind and on inspection looked to be just fine, so I am still using it today. I used nicopp nickel-chrome line for all the replacement brake lines, you can find it online or at the auto parts store. It's nicopp CNC-325 or often labeled by the parent company, AGS. I also had what I thought was a "leak" down the booster front, but it was from me accidentally not holding the MC level and spilling some onto the surface of the booster. Unfortunately, some of the fluid entered the front of the booster and that booster was no longer fit for use (brake fluid eats rubber). I understand your pain and shear frustration with your vehicle. I've been working on my comanche for a year straight and it just finally passed inspection. It was a lot of work and stupid little things that added up to a lot of time and headaches. Hopefully your headaches should be over soon. I am by no means a master at doing this, but in my opinion, your bleeder may have failed or your front brake line is clogged. I wish you the best of luck man! I know the pain all too well.
-
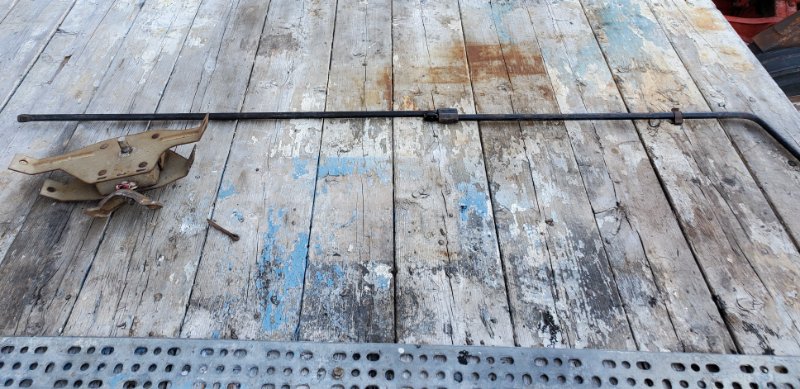
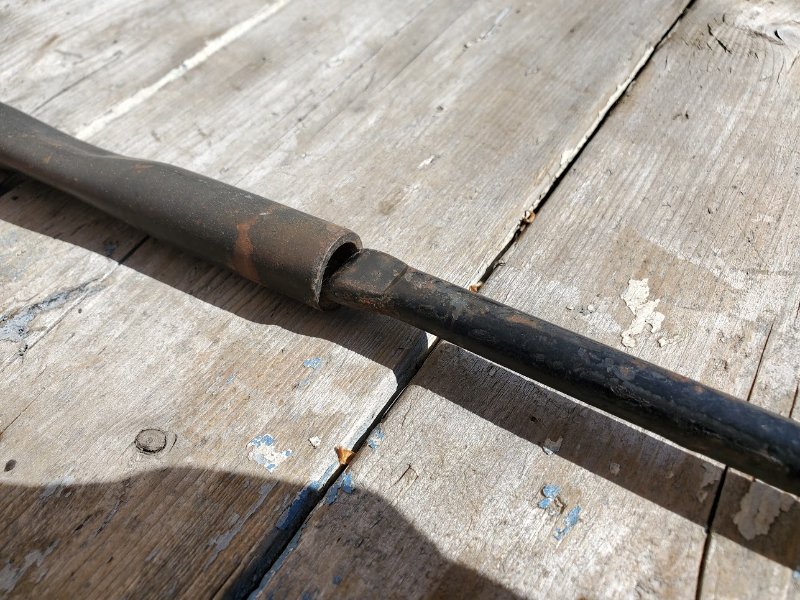
Dang. Does anyone have an 86 tire rod / wrench? Does anyone want an ~86 tube? Where can I find an 88+ tube? What does an 88+ tube look like? Thanks.
-
I feel like it's sacrilege to modify the handle to fit the tube. Does anyone has a photo of what the end should look like? I'd rather buy the right handle and not ruin something. Thanks!
-
I have a 1988. I purchased the tire carrier from you and the tire rods from @Muncher. I'm going to ask him what year it came from. I had no idea there were different tire carriers and tubes. Every year is a transition year in jeep world
-
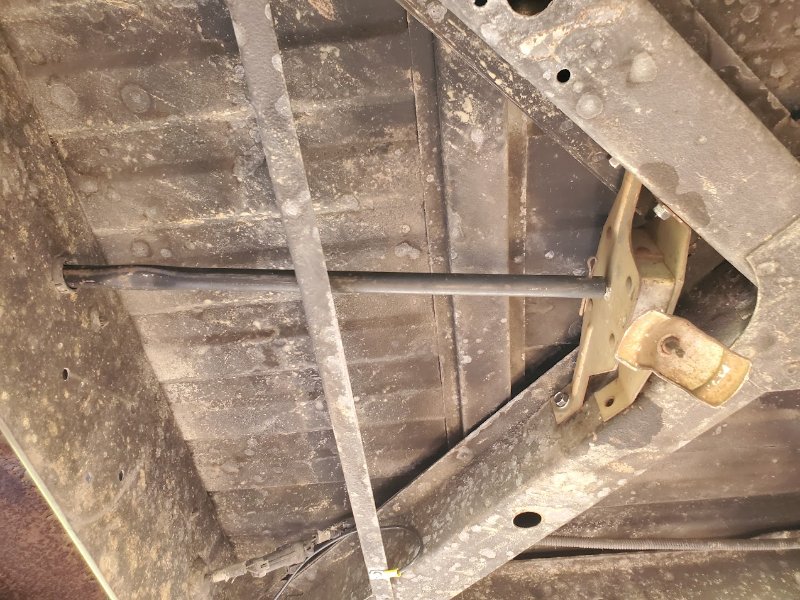
My long bed comanche was missing the under bed spare tire carrier and the tire rods that go behind the seat. I grabbed both from forum members. It's finally warm enough again to work so I put the parts together and they don't match up. Is there 2 different versions of the tire rods behind the seat? Mine does not fit into the tire carrier tube. I'm pretty sure I bolted up everything correctly. The folded rod would probably work in the rube I have if I made the tube hole oval, but I don't want to damage an extremely rare part especially if it's user error or I just got the wrong one. Thanks a ton!
-
Order of operations: Make sure you bench bleed the master cylinder Measure your booster rod and adjust like in the lexus document. Add loctite or a group of washers then snug down the adjustable rod so it's not loose and changes position when the vehicle is moving. If you use washers make sure they are a similar outer diameter to the shaft. The booster should have an adjustable knurled threaded bolt and a knurled shaft. Grab the knurled shaft and tighten the threaded bolt against it. Have a helper push the brake pedal on the comanche, which pushes the booster rod out, then install the master cylinder. This way you properly line up the booster rod into the master cylinder. Keep the master cylinder level as best you can. You can install the master onto the booster with the booster bolted to the firewall. Or you can bolt the booster to the master on a bench table then install into the vehicle. It does not matter which way. I did not do this at first, and my booster rod did not seat in the master cylinder and instead just scraped the outside body of the master cylinder. Yes, it is possible to install a booster with the rod miss-aligned, it will still bolt up. Take your time and make sure everything fits right. I used speed bleeders because it's not worth the hassle of tightening and loosening the brake bleeder when pumping. It just becomes cumbersome. It's a whole lot easier to just pump and not have to worry about when to tighten on the back stroke of the brake pump. Do not over tighten the brake bleeders. My brothers like to show off their super human hand strength and doing so damaged all 4 of my brake bleeders. Brake bleeders should have small "o" shaped holes, not oval holes or lines. If your brake bleeders do not have circular holes, throw em out and buy new ones. That there alone will prevent brake fluid from flowing properly and releasing air bubbles.
-
You are using a new Brake Booster, right? Have you adjusted the booster push rod? That was the end result of my WJ dual diaphragm brake booster upgrade saga. A1 CARDONE ships new boosters with rods fully seated. They are not adjusted from factory. You have to adjust the threaded center rod to match your master cylinder or your booster push rod will never push the master cylinder fully and pump. If you call their "ASE master technician support line" they will tell you how to prime the master cylinder, but they have no literature or documentation on their boosters. For a major corporation, it is unacceptable that they do not possess the documentation on the parts they make. It is possible that other booster manufacturers are also shipping boosters with push rods fully seated. Booster push rod adjustment issues might pop up more on this forum in the future because there are very few bendix / mopar brake booster + master parts left. I ended up buying a dual diaphragm 1996 XJ era booster+master combo from omix-ada. It turns omix-ada still has the genuine mopar booster+master cylinders, but they are ~20yrs old from when the previous owner purchased what was left from a closing dealership nearby. Why I am mentioning this? The booster push rod in the omix part was properly adjusted to the master cylinder. It's possible that the mopar boosters were adjusted properly on purchase and owners never had to deal with adjusting the booster push rods in the past. It's clear to me that the 3rd party vendors are taking a vacation on QC or they are just enjoying slapping their logo on someone else's part. I went through ~3 pints of brake fluid diagnosing my issues before I caved in and checked the booster push rod. I thought it was air in my lines but it was not. I thought it was my helper being sloppy with pumping or over torquing my brake bleeders, so I installed speed bleeders. I have to say, speed bleeders (brake bleeders with ball bearing checks inside) work wonders and are worth every penny. They made the job a lot easier, even with 2 people. Cruiser54 has a document from lexus on how to properly adjust the brake booster push rod. This is the way to adjust it. I could not find a single piece of documentation from Jeep, AMC or chrysler on how to adjust the booster push rod. The lexus document is very detailed. Before I adjusted my booster push rod, my pedal was like softserve icecream. I adjusted it and my brakes work properly now. I would seriously look into this. That's the conclusion to my problem. It might be yours too. I attached the document and post from @cruiser54 below.
-
Project “Tomahawk”
Salvagedcircuit replied to ghetdjc320's topic in MJ Hardcore Tech: Epic Journeys to Greatness
That radiator looks properly chunky. Very nice choice. That looks like it completely fills the top bracket! -
LQK MJ in Florida
Salvagedcircuit replied to Drahcir495's topic in Craigslist/eBay... i.e. Not Your Stuff
I use pirateship a lot for shipping quotes. It's free no strings attached and it gives you commercial base shipping prices for USPS and UPS, which is great. -
This reminds me that I really should replace my springs and shocks. Keep up the good work!
-
Project “Tomahawk”
Salvagedcircuit replied to ghetdjc320's topic in MJ Hardcore Tech: Epic Journeys to Greatness
Looking good! I was thinking of just buying a new set of refinished turbines because they cost so much to properly restore. -
Project “Tomahawk”
Salvagedcircuit replied to ghetdjc320's topic in MJ Hardcore Tech: Epic Journeys to Greatness
This is going to be one of the straightest comanche's on the road. Nice job -
There's a Mennonite Diesel repair shop in Pennsylvania that has (2) Kei trucks. I believe they use them as shop trucks and move things about between buildings. Pretty neat. I have no idea about the internals of them, but it's pretty neat to see something so completely oddball being put to use.
-
This is one of those parts that needs to be drawn up with the pinouts of both mating ends in a basic schematic. I'm guessing wiring harness vendor changed and harness somehow changed as well.
-
So I thought I saw a Street Comanche….
Salvagedcircuit replied to NorthwestMJ's topic in Member Projects: Your Comanches
Holy Jamolies! What a find. Clean her up good and polish to the moon. What a score indeed. Plz update us with your restoration work -
Project Rattlecan
Salvagedcircuit replied to AverageJoe10's topic in Member Projects: Your Comanches
@eaglescout526 Are you talking about the 56009324 headlight delay module? Thanks -
USPOS - 77’ DJ5
Salvagedcircuit replied to JordanTMiller's topic in Member Projects: Other Cool Stuff
This thing looks sweet. Nice job on the restoration. -
Lucky The ones above were from mine. I was able to save them, but boy were they a bit hairy in spots. I would have 100% purchased replacements if they were available and just grinded mine out. I would have avoided the entire pry-but-be-careful process and saved hours.
-
I believe they are the sub-frame mounts that go above the comanche floor but below the seat. They are usually destroyed on east coast trucks and overall make the floor replacement process a real PITA.
