
500 MJ
-
Posts
3241 -
Joined
-
Last visited
-
Days Won
2
Content Type
Profiles
Forums
Gallery
Everything posted by 500 MJ
-
I can't think of anything more Rob...I should be good to go. Thanks for doing this!
-
Anyone else dressing up as someone/something? I've got a party over at the neighbors to go to Saturday night, going as the original (not drunk and eating hamburger) David Hasselhoff. No pics yet, still compiling the costume.
-
best prices on gas tank and fuel pumps?
500 MJ replied to lostissues's topic in MJ Tech: Modification and Repairs
I replaced the SWB tank on mine and got the best price from www.rockauto.com - very good tank too! -
Rob, this is awesome. I'll think about some serious angles that I would like to see and then get back with you within the week about it. A few shots I know I would like are going to be of how the spare is held in the bed and the tonneau cover (if they will get into that much detail) and how they constructed that fiberglass thing on the back of the cab. Also if they are willing to take a quick measurement it would be nice to know the outside length of the bed, from the front edge to the rear one (or the tail-light, some easy reference point...) and what the wheelbase measures out at? - For some reason the bed looks shorter than the SWB to me...? :dunno: Thanks for letting us know - Brent
-
You are correct in ordering the vacuum harness online, that the best way to do it. However, you'll need to get the other half of it as well if yours is all messed up like it sounds. The harness separates into two pieces at that "block". It clips together there and you then hook up the rubber boots and you are good to go. Also, check that the small S shaped line from the grommet on the top of the valve cover is clear of oil and gunk. If its clogged and your line is still flexible you can cut up and straighten a metal clothes hanger to run through it to unclog it. De-greaser helps too. A good cleaning (scrubbing with a toothbrush) of the throttle body with paint thinner or mineral spirits will make sure things in there are nice and clean and functioning properly too. Just put your TPS back the way you found it or don't touch it at all! Good luck. :thumbsup:
-
I spent the evening rebuilding the door catch from my '90 MJ. The pin and bearing had come out of it recently and it was just not doing its job anymore, time for me to do something about it. I've tried to get new door catches from the junkyards but all of the ones I seem to find have issues. Either the brackets are broken or they have lost their bearing and pin like the one I have. I finally broke down and got a pair of Cherokee rear door ones that were in good shape from Geonovast this summer. I thought they would be the same part but they weren't. The catch strips are different between the two styles, so I set out to just swap over these strips and all my problems would be solved... Here is a shot of what I started with. This one came out of the MJ, in two peices... Here is the 4 door Cherokee rear door catch assembly that I cannibalized. I first removed the pin I stored on it, I found that long nose vice grips work the best for this. Punching out the dowel pin that holds the bearing. This is the pin that I lost from the one on my truck. I used a 3/16" pin punch for this step. It fits perfectly. Tapping the catch strip out from the assembly. This is how the "bearing" (more like a wheel) rides on the catch strip. Cleaning up the Comanche catch strip. Here they are: Comanche/Cherokee front door on the left, Cherokee rear door on the right... An exploded view of how things go back together. Putting the catch strip and bearing back in the bracket can be a pain. You need to hold back the spring on the bracket with a screwdriver to get the bearing perfectly centered with the pin hole. Using an awl (or scribe) helps to center everything. Once everything is lined up, drive the pin back in. You can see the standard screwdriver blade shimming back the spring and inside bearing to allow things to line up. All back together and ready for another 20 years :thumbsup: Here are the tools I used: 1/4" Blade Standard Screwdriver 3/16" Pin Punch Scratch Awl (Scribe) Claw Hammer Grease - pick your type Wire Wheeled Angle Grinder - Safety Glasses and Ear Plugs 4" Bench Vise I also show a 10mm Wrench and the 6LN Vise Grips in the photo because they were used to remove the door catch assembly from the door. Overall it was way easier doing this than I thought it would be. Pretty simple if you have a good vise to hold everything. It took me about an hour to complete the first one. Good Luck!
-
mini beast Project: Stock To Beast!!!
500 MJ replied to MiNi Beast's topic in MJ Hardcore Tech: Epic Journeys to Greatness
Yah, but remember you are STILL building an XJ... :shake: -
Nice gun, oil is your friend, take care of that little bit of rust while you can easily do so! :cheers: I'm the proud owner of a Model 94 Winchester .22 rifle, a Model 77 Mark II Ruger .270 rifle and my Browning 12 ga. Gold Hunter semi-auto Shotgun. Between those three I've pretty much got everything covered except bow season. I won't even get into how much of a bow season nut I am. I'm very thankful to live where hunting is still an everyday activity :USAflag: I know that CC is somewhat of a safe place but I still suggest you get the pic with that serial number off the internet. You never know who is looking... :thumbsup:
-
We are bringin sexy back! I finally got a free weekend to undo the swap of the '97+ front end. I used parts that I had from the original front end as well as LOTS of parts that I got for free from Geonovast over the summer for helping him scrap out a few Cherokees. Thanks Again Correy! This stuff is all temporary until I get the good stuff to put on there. Both fenders have some dents in them and the passenger one (original to the truck) also has some rust on the inside of it. The header panel that is on there was hanging on my wall as a display but in times of dire straits it came through and somehow bolted on to the front. It looks nice but it is cracked under neath, I'm holding it together with some hood shims. There's nothing wrong with the bumper other than I don't have end caps for it. All in all it came together nice for free parts. I'll be making the swap for the clean parts soon. They will get a nicer paint job on them over the winter or next spring and then I'll pop them on and give the truck the white paint for it all to finally match again. For now, this works. :clapping: You might have noticed all of the fender flares are off the truck, they will be going back on. I'm just rustproofing the bottom side of it right now and wanted them out of the way. I also replaced my coolant overflow tank with one from Crown Automotive. This one is SOLID, shouldn't have any more issues with it getting hot and morphing/cracking like I was having. I'll keep you all posted on how it performs. Everything so far seems good.
-
Very good prices for nice and clean work! Thanks for all the info! :thumbsup:
-
How'd you get money? Sell something while you were out there? Knowing you, you would have been outside MT Rushmore selling elevator passes to the top as people were coming through the gate. :no:
-
Darren, From what I can see it looks like your new rockers are welded onto the side of the frame only and then to the body of the truck. Am I right or did they weld the tube steel through the frame to the inside of it as well? I had an XJ that I did a similar thing to once...I like the look of them and how they are so tight to the bottom of the truck, however I can't bring myself to cut into my rocker panels. When I put mine on I think I'm going to make them detachable so I can take them off for easier clean-up, repainting and winter driving... Truck is coming along nicely as usual, all the best, -Brent
-
What DID that accomplish? Sad thing is that someone funds this guy's work...
-
Been there twice, once for the 4th of July (July 3rd). THAT was a fireworks show! :USAflag: See you on Saturday Roger, like I said give me a ring and let me know when to plan on you getting here! Anyone else is welcome to come with us too! Roger is right, I'm buying dinner... :help:
-
:laughin: Its so true!
-
Scroll down a bit and you'll find this... viewtopic.php?f=2&t=19025 Sounds like you and I are having the same problem...
-
What is in Rapid City, South Dakota? Taking I-90? I'd be up for meeting you somewhere for dinner if you wanted to, on the way there or whenever you are coming back...
-
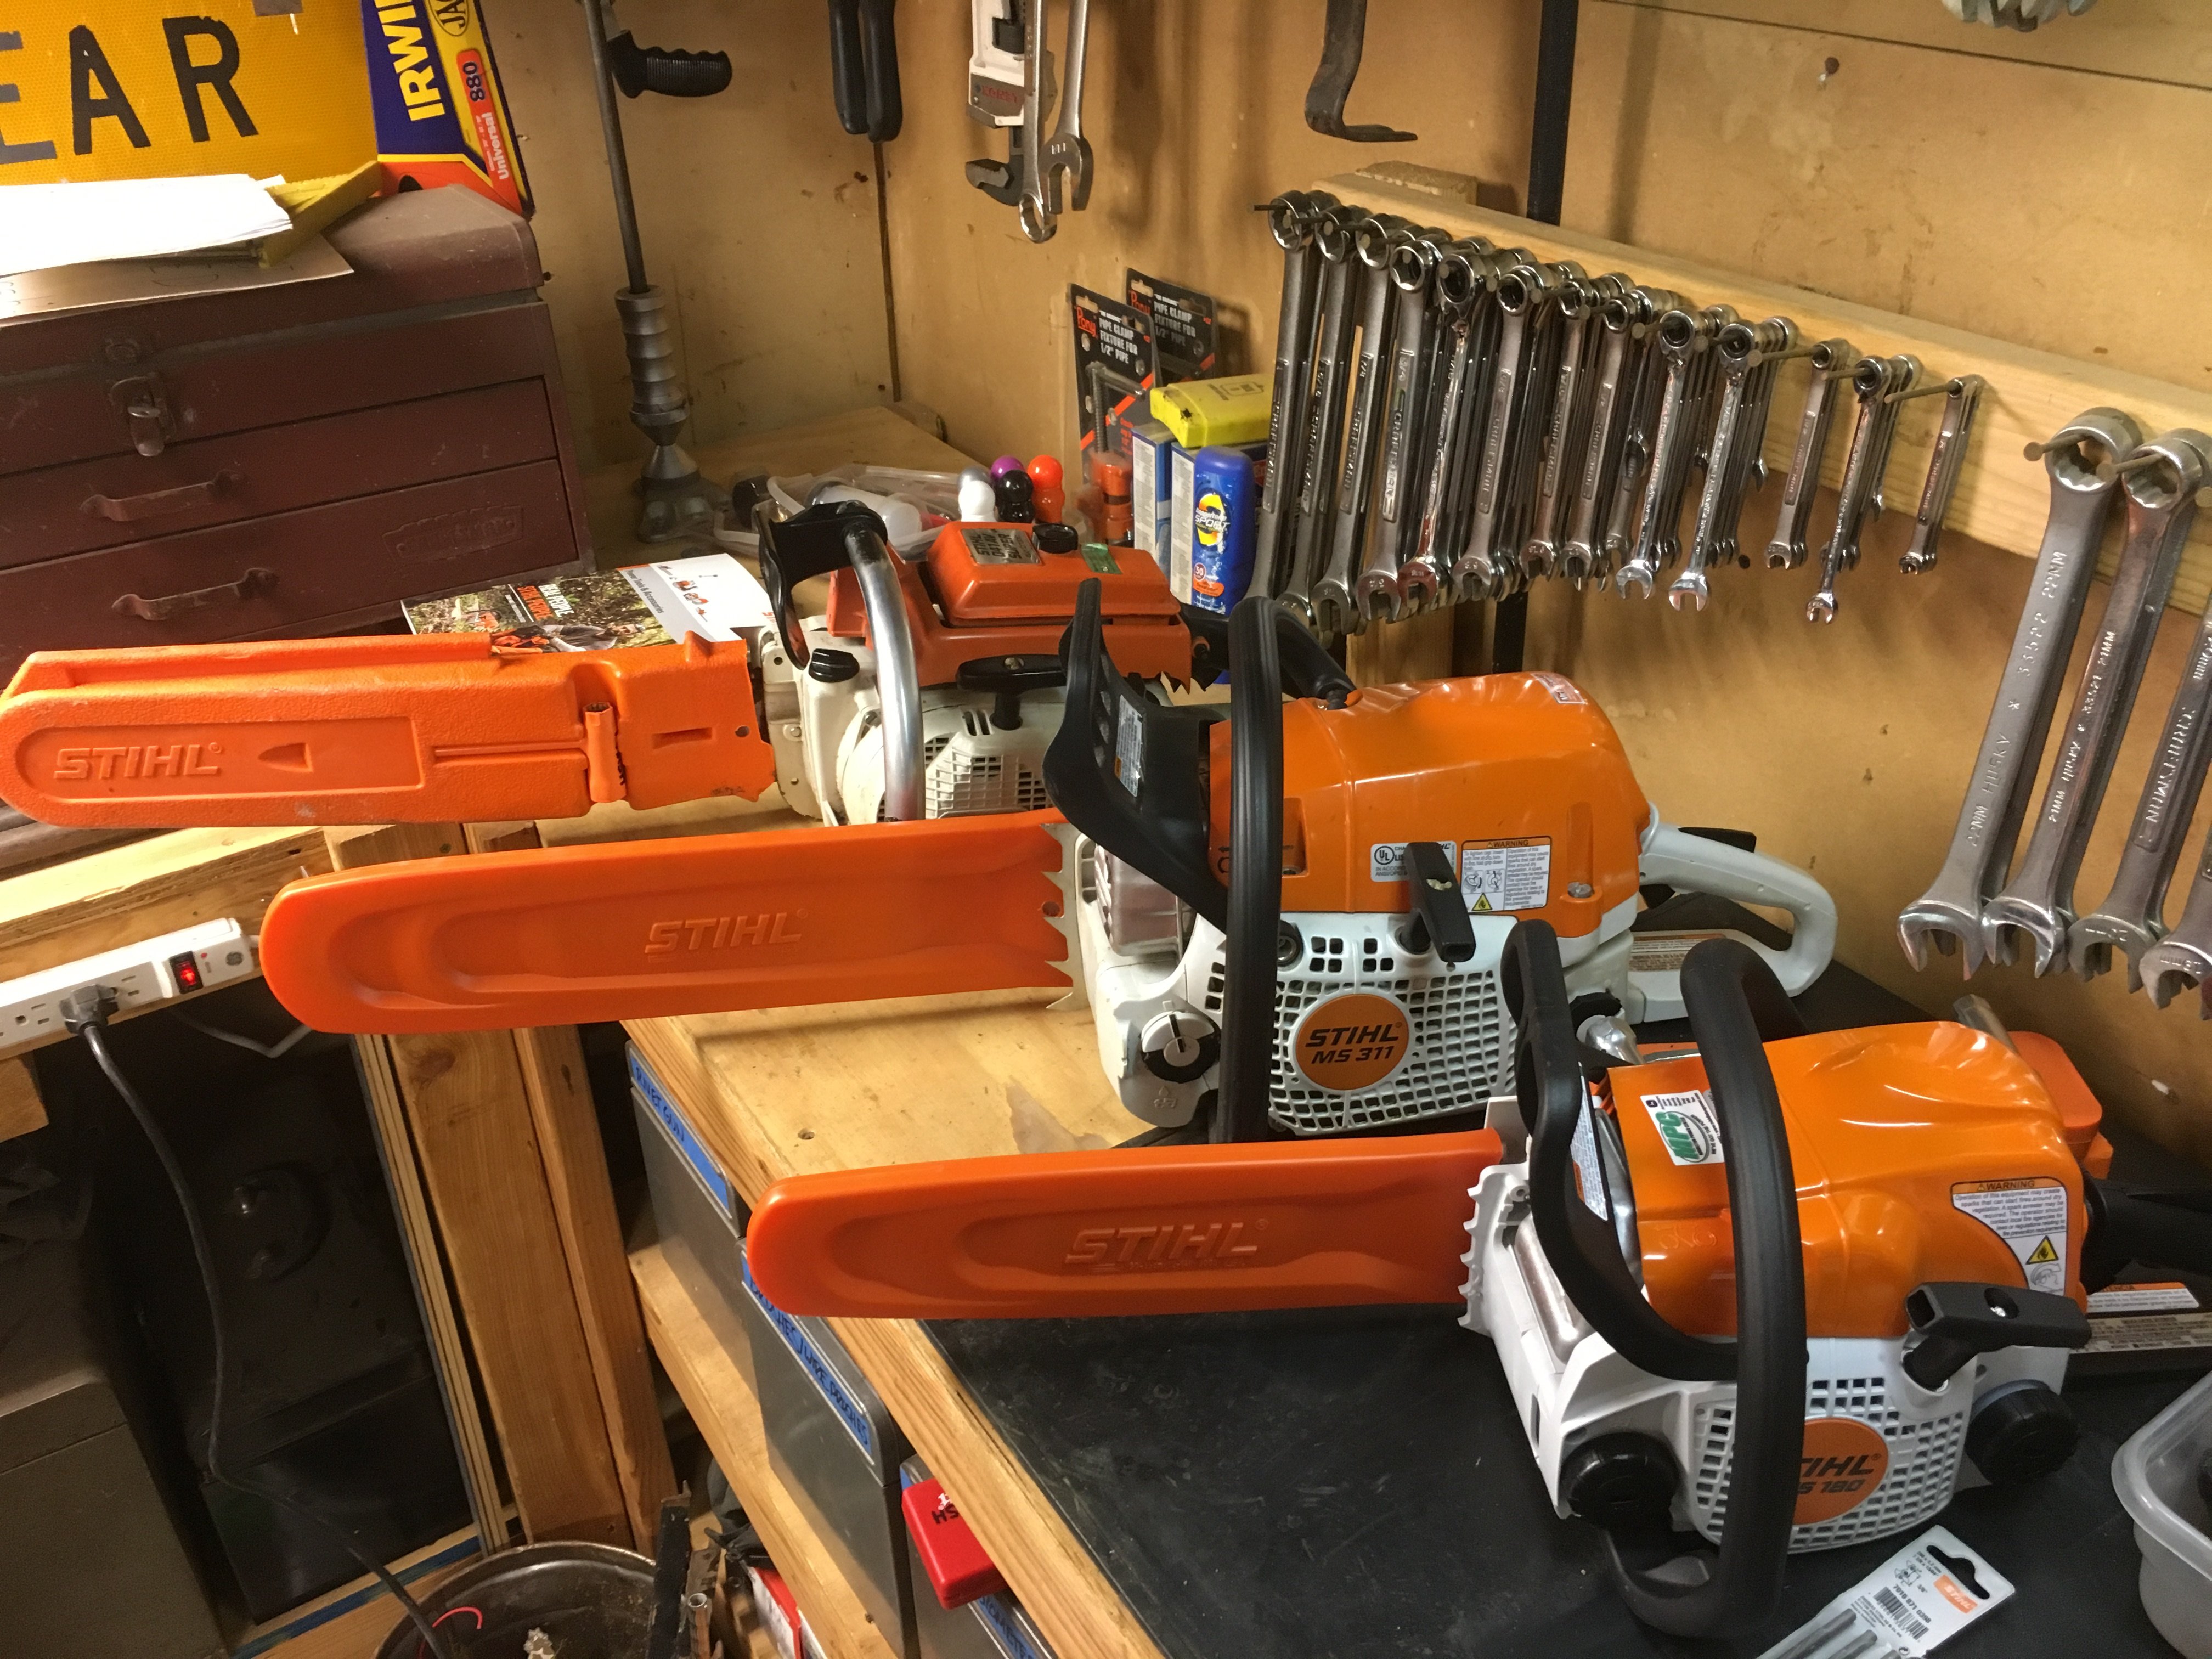
What kind of clamp are you using to hold that axe on? Thanks, Willy That is a grease gun clamp. They have them for sale here at the farm supply stores (Tractor Supply Co, etc.). They usually sell for about $5 each. They work nice but you have to make sure whatever you put in them fits tightly. I started out using pipe insulation like its shown in the pic, but then had to move to wrapping it in a chunk of rubber to make the fit tight. I did the same kinda thing for my shovel...
-
FOAMERS!!!!!!! Yes. But, when you sit down and think about it, YOU and I are Comanche "Foamers"... :peek:
-
Winners gets a pic of their choice in the official CC 2011 calendar. 8) We do this at work with photos that people take of our trains, https://www.wsorrailroad.com/gallery/calendar2009.html
-
Well, I did some digging and came up with these pics from back before paint and bedliner: This is my spare tire mount and tool rack. I've also added some grease gun clamps above the hi-lift so I can mount my full-size shovel above it. The actual mount for the tire is an old 8.25 axle-shaft that was bent and headed for the scrapper. It got cut off and then the inside of a 2" box tube was filed down to accept it snugly before I welded it on. If you use one, cut it off with an angle grinder, sawzall blades aren't hard enough. :brows: One of how everything sits in the bed. I did away with the Gerry can holder. I thought that space could be better used by keeping it open and I was right... I took this right after I drove home from the body shop to get my bedliner sprayed. In this one you can see the mounting pads I made and welded to the bed for my roll-bar to bolt to. Simple pieces of plate with nuts welded on the back and then they got welded to the bed of the truck. They work wonderfully! Out of everything done to the truck so far, I am most pleased with this one. :nuts: Right after paint, you can kinda see how it all bolts in the truck, 16 3/8" bolts... Good shots of the tool and tire rack. Now onto the canoe rack: The whole reason for building this into the roll-bar was to keep it completely independent from the rear hitch. As you can see from this pic, I've got a bike rack I put in there from time to time and I also wanted to be able to haul a trailer while still having the rack on. I kept it pretty simple. It bolts into the bases for the roll bar and bolts into the light mounts on the roll bar. The back of the rack is not welded in one formation. I welded bolts onto the "vertical" pieces and then drilled holes in the top portion for them to go into, nuts go on the bolts and hold it in place. This makes it easier to take in and out and also allows the rack to flex much more than welds would. Shot this one when I was painting it (also have my first attempt at a steering box brace in there). Again pretty basic layout... I hope that helps. :dunno: I've taken all of the stuff out of the truck for the winter now. Its all broken down into its pieces and stood up in the corner of my apartment right now...another thing I'm glad I did in designing the canoe rack especially. It all folds up and lays flat against the wall thanks to the bolts in the rear section. The roll bar comes apart into five pieces and stores nicely, more of a show bar than of any structural use for this reason... If you don't have a welder or a buddy with one, its time to make friends. Welders are pretty much a must if you want to do any serious fabrication work like I did. Good Luck!
-
I'd rather fix dents, rust comes back.
-
:hateputers: :peek: That Sucks Correy, no wonder you have been away for so long, we were wondering where you were... So I had something really really really amazing happen to me today and I gotta share it. I wanted to pull the drivers side rear fender flare off of the '90 so I could paint the lower body up and get everything ready for the upcoming salt season. The truck came from Florida way back when so I thought that there might just be a chance for me to get the flare off without breaking the stud strips. I took the tire off and put my 10 mm wrench on one of them and expecting it to break right off I gave it a gentle turn. It spun. :eek: So did every other one. They had some rust in the threads but after about 2 hours of slowly working them all back and forth in the process of taking them off and dousing them in PB every 5 minutes I got the whole flare off and didn't break a single one of them. A once in a lifetime thing, I stood back and I was literally in awe once I got it done. :wrench: We'll see how the passengers side is sometime this week hopefully. Already sprayed 'em down with PB to soak.
-
87 Comanche 4.0L Compression Test
500 MJ replied to runner6's topic in MJ Tech: Modification and Repairs
To help get sludge out of the engine prior to taking it all apart you can put a mixture of 50% new oil and 50% kerosene in the engine and start it up. ONLY let the engine idle, DO not rev it. Idle it for about 1 minute and shut it down. Drain it immediately while all of the sludge is still warm. Won't hurt anything as long as you idle it and don't touch the gas. My Dad and I did this to a 304 in a CJ-5 we once had and it cleaned it out good. We removed the valve covers and the oil pan and painted them then put them back on with new gaskets. Prior to running the mix, the engine didn't leak. After we ran it, it leaked out of every old seal that there was. We wished we didn't clean the gunk out after that.