

eaglescout526
-
Posts
12138 -
Joined
-
Last visited
-
Days Won
13
Content Type
Profiles
Forums
Gallery
Everything posted by eaglescout526
-
Those vents on the side where the covers used to be are worth snagging.
-
*ZZ TRIM STYLE ZZ - PLASTIC BUCKET SEAT -ZZ BAC 75 AMP ALTERNATOR BCQ Battery - 750 Amp Maintenance Free CGX Head Restraints-Outboard Seating, RR DCK 4SPD MANUAL TRANS - AISIN SEIKI EPD ENGINE - 2.5L I4 TBI GAS GAC ALL WINDOWS - TINTED GLASS GSC MIRROR - RIGHT BLACK HC0 All Vehicles W/O Air Cond HCC HEATER W/UPR LEVEL VENTIL - TYPE II JAY Instrument Cluster w/Tach JFH TACHOMETER - MECH JGB Clock - Digital JJA CIGAR LIGHTER - FRT COMP LMA HALOGEN HEADLAMPS MDA FRT LICENSE PLATE ATTACH REQUIRED NAA ESA W/CATALYST (EXC CALIF SYSTEM) NMB ENGINE COOLING - STANDARD DUTY Build Date:9/4/85 Body Code:JL62
-
Theres plenty of parts there that need to be saved. Like the front grill pieces and that license plate bracket.
-
That’s awesome. This kit is missing it’s air lines but I’m sure those are just any off the shelf air line for air bags and such.
-
Chrysler still has a lot of the front end pieces still around if you want quality.
-
Honestly. I don't know how these would compare to the JK shocks I have. Definitely a neat kit.
-
Neat!

-
Depends on what you need. I recently listed some NOS MoPar front suspension parts that are available still.
-
Ac evaporator plug for ac install???
eaglescout526 replied to Grizzly Adams's topic in MJ Tech: Modification and Repairs
Ok so that thermistor won’t work for you. You can splice it in. Course do you currently have an empty plug on the harness? -
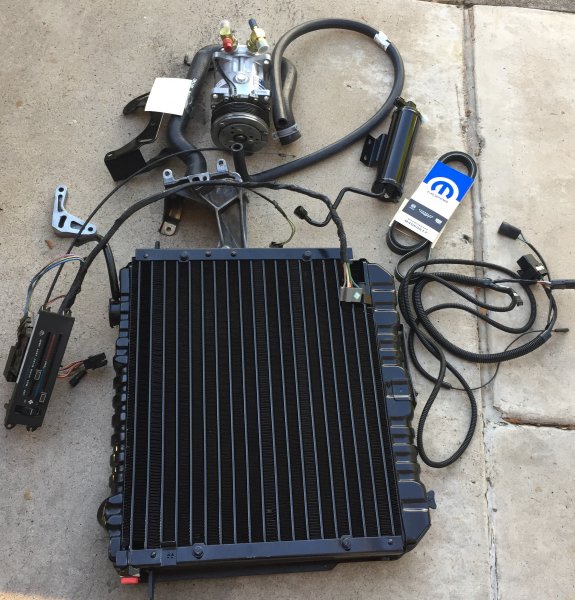
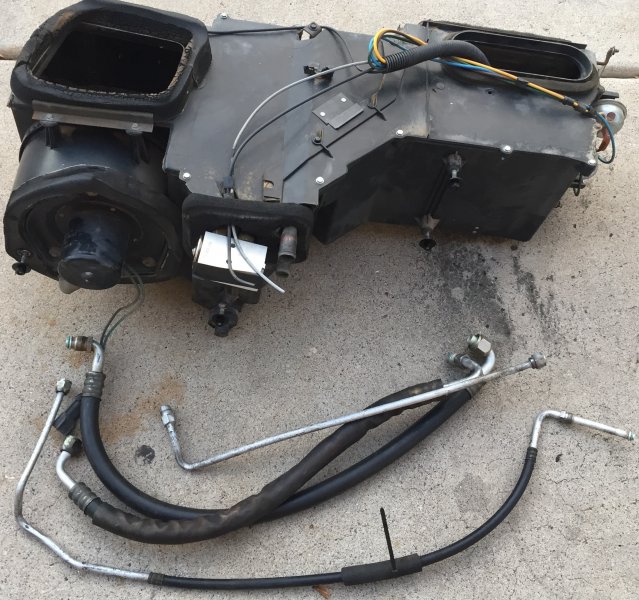
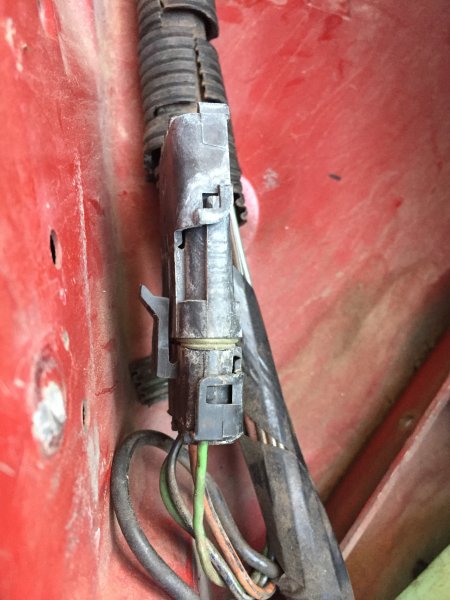
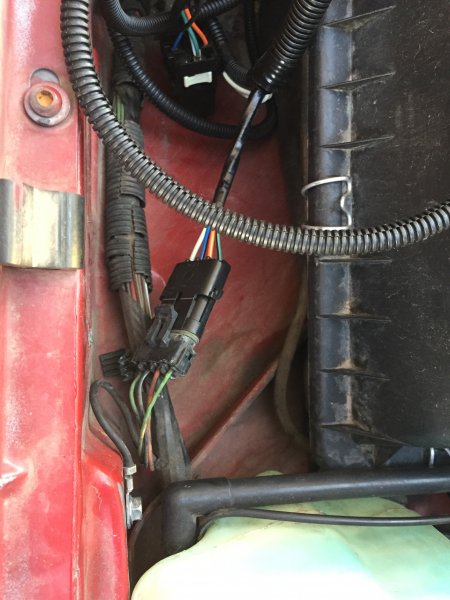
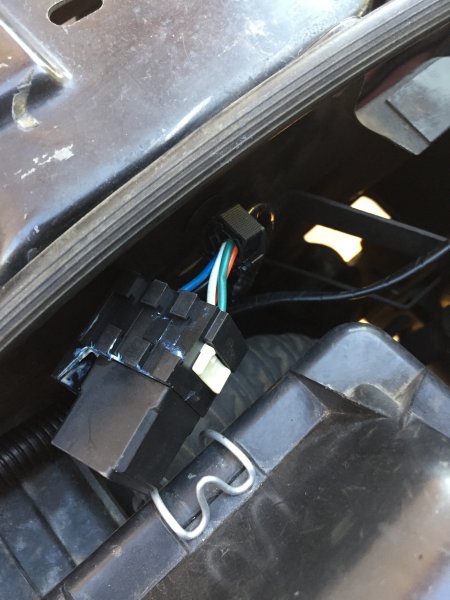
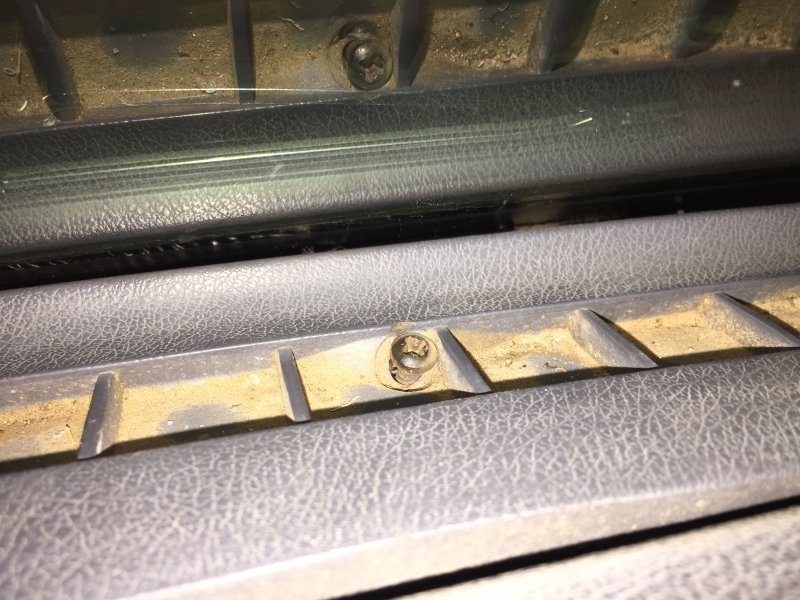
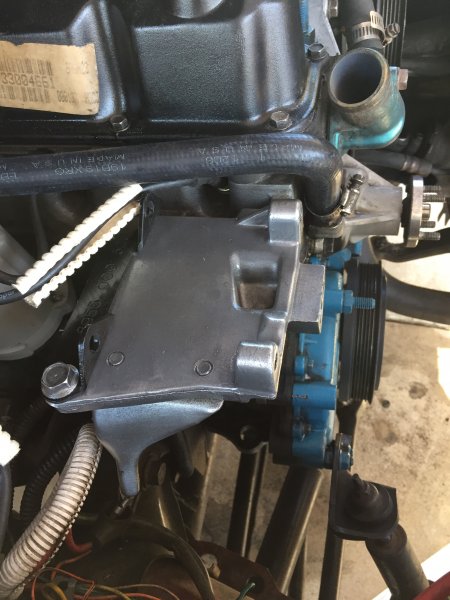
So. You want to add AC to an engine that is a raft in an ocean of 4.0's. Good on you. Found the parts? Lucky you. First you will need these parts: AC control deck w/ wiring harness(84-86 have a different style connector that plugs into the dash harness than the 87-90 harness. Getting the years the same is important here.) and vacuum harness, engine side wiring harness, condenser, compressor(make sure the pulley lines up and the wiring is right!), lines, alt/compressor mounting bracket(four metal pieces), new alt pulley(less that small gap), dryer and low pressure switch, R134A retrofit, serp/drive belt, coolant hoses, air box w/core, expansion valve(R134A kit), O-ring hose kit for R134a, time, patience and money.(This whole addon cost me the same amount as it did to buy the kit in 1988) Optional: Factory radiator and refresh of coolant. Once your pieces have been gathered you are ready! I could go into detail on tearing out your dash, but there is plenty of info on how to remove it. Just be aware of those pesky defrost vent screws(be prepared to spend some time on those). Defrost vent screw:(I did a rant on this) This is important, Renix guys, if you grab a 91+ box, you will need to modify it to accept the old style thermistor switch and will need to route the probe to the core. Feel free to use the old core. Engine side:(unplug the power!!) On the drivers side by the coolant reservoir or washer bottle will be this plug: This plug will be plugged off by a cap. Remove it to gain access to the harness. Your new relay and compressor harness should plug in like so: I mounted my relay by the air box/rad support like so (NOS dealer installed AC harness. These harnesses are too short to go across the engine bay to seat in the relay center, feel free to put it where ever) Brackets. Brackets will mount in old location like so:(You can reuse some bolts but not all. The back needs a long bolt and a washer to space the bracket, at least that's what I had to do. Parts diagram isn't clear on that.)Note; you will have to remove the compressor to check spark plug one, do any thing there first if you need to. Once that is set up you can then proceed to installing the compressor and alt. If you go reman for the compressor, be aware that you may have to splice in the clutch wiring to the harness. I recommend grabbing the old compressor if you can. At some point you will want to have your radiator pulled to attach the condenser to.(do not attach dryer!) You should then hit this point in your install:(pretty) Hopefully you have finished everything on the dash side at this point to have vacuum lines routed and are ready to route some hoses. Make sure you have replaced all the O-rings on your hoses with the R134a O-rings or at the very least replaced 30 year old O-rings(need to be AC approved). Now you can do two things here. One route your small constricting hose like such: Pass side of the rad and condenser is where this hose routes.(at least I found this to be the best work around for lack of stock images) This hose goes up and over to the top of the condenser but under the rad support and connects to the top of the dryer. Then it does down and clear of the belt up to the expansion valve Or you can pull a me and install the rad and condenser to set up all your other hoses like so:(by this point I was complete) Once you get this all set up and ready, this is where you will attach the dryer to the condenser and thread it into its appropriate hose on the condenser itself. Remove your grill and you will have all the free room to work at that level to install the dryer. Make sure you have installed the low pressure switch onto the dryer. Once that is done and your hoses are routed(Condenser to discharge(labeled on the compressor) and expansion valve to suction) and installed like such above, you are ready to wrap this project up! Took me a day to do. You will not be able to test it until the system is charged. With new hose and belt routing, make sure the belt is very tight(if it is loose it will make a pigs squeal seem calming) and that nothing will be in the way for the belt to destroy or itself on. Pass basic engine test with no leaks or hiccups move on to get it charged. Once you are ready to charge it, make sure all your connections are good and tight and have the system vac tested at your local dealer or a TRUSTED, lot of emphasis on trusted, AC shop. Make sure your compressor is filled with the required oil and proper amount and tell who ever does your charge to fill it with 2lbs of R134a.(Currently running such and is doing fine) Side note; if you go to a dealer, ask about Arctic Blast if they have it. It is supposed to help the system run colder. Its like an oil based substance. If I am forgetting something, which I am sure, let me know!
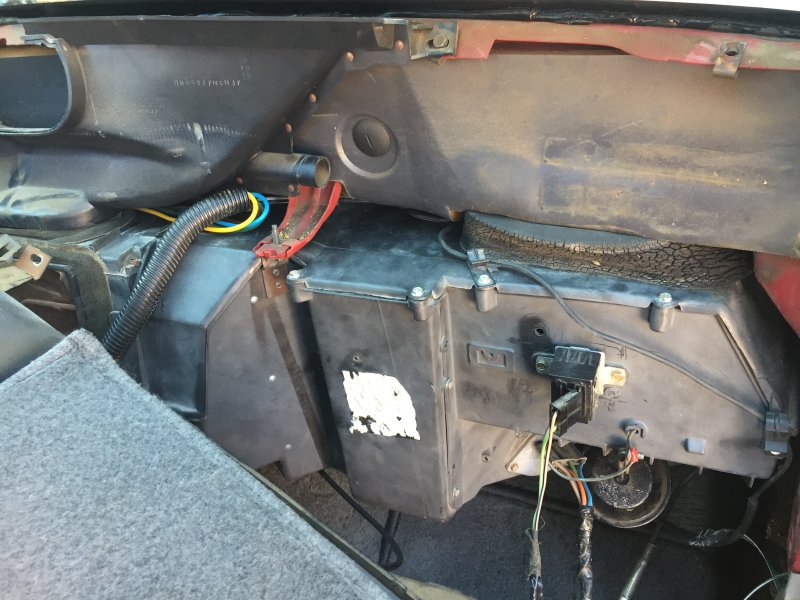
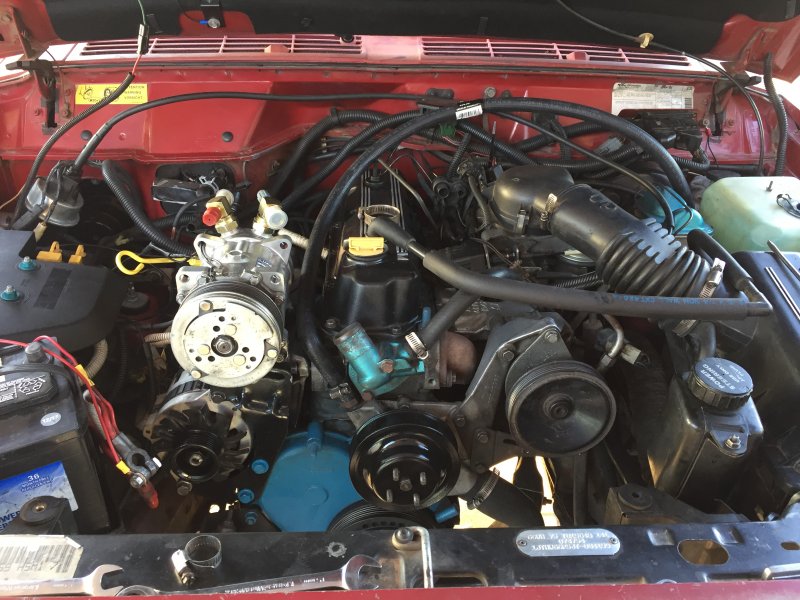
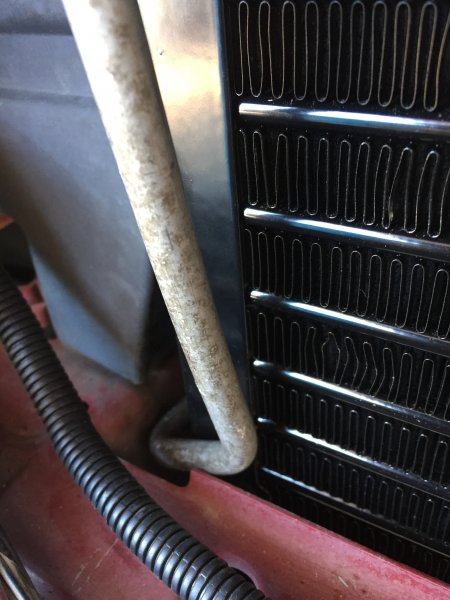
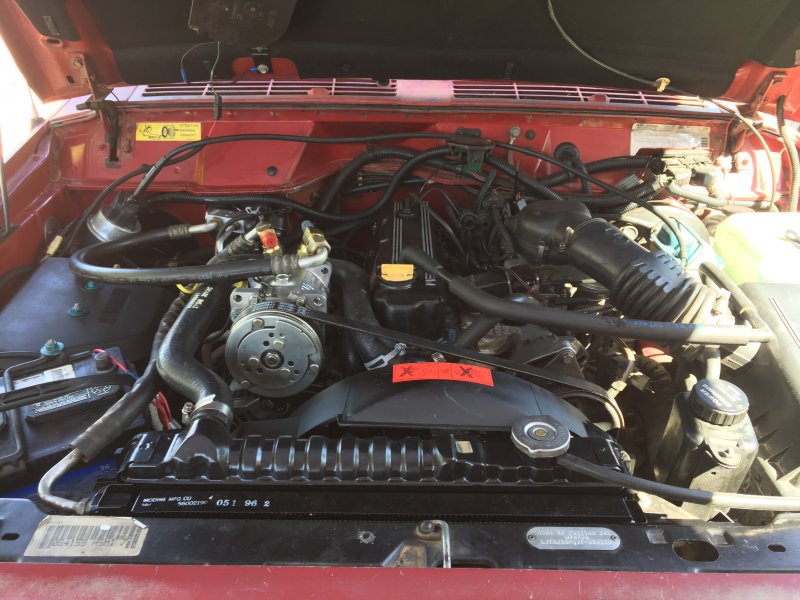
-
Ac evaporator plug for ac install???
eaglescout526 replied to Grizzly Adams's topic in MJ Tech: Modification and Repairs
Ok. I did respond to your post in the DIY thread a while back. Do you happen to know the year that box came from? Do you also have the correct year harness for the AC head and all that? https://www.quadratec.com/p/crown-automotive/thermostat-switch-xj-factory-ac-56002688 I would go check this switch out. It is for the 84-90 model years. If your harness has the same two prong as this, you will need that switch and youll have to modify the box like I did to route the switch's probe through the core. -
Add the fred flintstone floor to your build sheet.
-
Sun roofs are not a factory option for the MJ's. Possible dealer option but no documentation. No problem. But a lot of pre 89 sheets are slightly inaccurate and reuse some newer codes
-
*W7 Cloth Lo-Back Bckt/Red Accent Seats -SA Charcoal 3LX ADA LIGHT PACKAGE ADL PACKAGE - 4X4 PROTECTION AGL Super Sport Group (SS/T) APA MONOTONE PAINT PACKAGE BCQ Battery - 750 Amp Maintenance Free CAC BUCKET SEAT - LO BK CGW Air Bags - Front, Next Generation** CKA CARPETS - CLASS I SHORT PILE 8 - 12 OZ CLE ACCESSORY FLOOR MAT - FRONT &&&&&&&& REAR CUF FULL LENGTH FRONT CONSOLE DDQ Transmission - 5-Speed Manual ERB ENGINE - 4.0L I6 MPI GAS GAC ALL WINDOWS - TINTED GLASS GFD SLIDING RR WINDOW GSC MIRROR - RIGHT BLACK HAA AIR CONDITIONING - FRONT JAY Instrument Cluster w/Tach JGB Clock - Digital JHA WINDSHIELD WIPERS - DELUXE JJA CIGAR LIGHTER - FRT COMP K60 BODY SIDE MOLDINGS - VINYL LAP FUEL ECONOMY SHIFT INDICATOR LIGHT LDA UNDERHOOD COMPT LAMP LMA HALOGEN HEADLAMPS LPE EXTERIOR CARGO LIGHT MBF REAR BUMPER - STEP TYPE (BRIGHT) MDA FRT LICENSE PLATE ATTACH REQUIRED MFD BRIGHT GRILLE - TYPE I NAA ESA W/CATALYST (EXC CALIF SYSTEM) NFA TANK - 20 GAL FUEL NHM AUTO SPEED CONTROL NHQ Transmission Heater PX6 CLASSIC BLACK CLR CT PRIMARY PAINT - FX6 QX6 CLASSIC BLACK C CT SECONDARY PAINT - FX6 RAB Radio - AM/FM SBA POWER STEERING SCE STRG WHL - EURO/SPORT TYPE SUA TILT STEERING COLUMN TBB CONVENTIONAL SPARE TIRE WMC BASE WHEEL DRESS - UP (INCLS TRIM RING) YJP NEW VEHICLE SERVICE - WINDSOR Build Date:7/26/87 Body Code:JP62
-
Lol. Decode coming up!
-
Replaced Crank Position Sensor
eaglescout526 replied to Teapott's topic in MJ Tech: Modification and Repairs
Right here. Take a look at his tips. Chances are your truck probably has not had any of the fixes performed to it yet. -
Replaced Crank Position Sensor
eaglescout526 replied to Teapott's topic in MJ Tech: Modification and Repairs
Cruisers tips. Check those out. It will also help us greatly if you tell us the year and engine you have so the proper folks can help you. Welcome to the addiction. -
*A8 TRIM STYLE A8 - VINYL LOW BACK BUCKET ST -SA CHARCOAL 162 Zone 62-Houston 1AA U.S. Dealer Retail 3V3 Customer Preferred Discount 4EA Sold Vehicle 4HA Special Scheduling Condition I ADA Light Group ADH Heavy Duty Electrical Group ADL Skid Plate Group ALN Body Color Bumper Group APA Monotone Paint ARL 300 Premium Group BAF 130 Amp Alternator BCD 500 Amp Maintenance Free Battery BGA Power Front Disc/Rear Drum Brakes CAC Low Back Bucket Seats CDB Reclining Front Seats CKA Carpets - Floor and Cargo Area CUM Mini Floor Console DGB All 4-Speed Automatic Transmissions DGS 4-Speed Automatic AW4 Transmission DHA Lock-Up Torque Converter DHN Command-Trac Part Time 4WD System DHS Floor Mount Automatic Shift Lever DJH 230MM Front Axle DMD 3.55 Rear Axle Ratio DRJ 175MM Rear Axle ERH 4.0L I6 Power Tech Engine GAC Tinted Glass Windows GBB Tinted Windshield Glass GCB Front Door Tinted Glass GEC Front Left Side Sliding Window GFD Rear Sliding Window GNC Sun Visors w/Illum Vanity Mirrors GRZ Left Remote Mirror GSZ Right Remote Control Mirror GTZ Manual Remote Mirrors HAA Air Conditioning JAY DO NOT USE - See JP, KA classes JCA 85 MPH Primary Speedometer JGB Digital Clock JHA Var Intermittent Windshield Wipers JJA Cigar Lighter K27 Do Not Use K2B STRIPE/BADGE/MOLDING/COLOR K3M STRIPE/BADGE/MOLDING/COLOR KKS STRIPE/BADGE/MOLDING/COLOR KWS STRIPE/BADGE/MOLDING/COLOR LAJ Headlamps On Warning Chimes LBB Courtesy Lamps LBC Glove Box Lamp LBD Ash Tray Lamp LBE IP LED Ambient Light Pipe LDA Underhood Lamp LHD Headlamp Off Time Delay LMA Halogen Headlamps MB1 Black Front Bumper MBJ Black Powder Coated Front Bumper MDA Front License Plate Bracket MFF Black Grille MHA Black Windshield Moldings MMC Rear Door Solid Window Insert MMG Belt Moldings MMK Lower Grille Surround-Painted Silver NAF High Altitude Emissions NBK EVAP Control System NF5 Fuel Tank - 23 Gallon NHM Speed Control PE9 DARK CORDOVAN PEARL COAT PRI PNT - EE9 QE9 DARK CORDOVAN PEARL COAT SEC PNT - EE9 RAA All Radio Equipped Vehicles RAF AM/FM Cassette Radio RCD 4 Speakers SBA Power Rack and Pinion Steering SCE Alcantara Wrap Steering Wheel SFA Standard Duty Shock Absorbers SGA Rear Shock Absorbers TBB Full Size Spare Tire TBM Tire Carrier Winch TRN P225/75R15 OWL Wrangler AT Tires TZA Goodyear Brand Tires WJD 15X7.0 Styled Steel Wheels WLY All Steel Wheels XBS Pickup Box YAA Build To U.S. Mkt. Specifications YGE 5 Additional Gallons of Gas Z01 Rear Spring Group I Z5A GVW/Payload Rating Z67 Left Front Spring Group XVI Build Date:3/24/91 Body Code:JL62
-
As soon as the light comes back can you get a better look at your VIN? Parts catalogue and I say theres something off about you VIN, so I can't decode it
-
your favorite MJ mods: functionality edition
eaglescout526 replied to Pete M's topic in MJ Tech: Modification and Repairs
Can we say JK shocks on this one? Love those shocks. -
Trading my XJ for a MJ...need help
eaglescout526 replied to 717jeepin's topic in MJ Tech: Modification and Repairs
Hmm. I feel the weak thing comes from running larger than 235 tires. We’re you running stock set up at the time it broke? -
Amen to that
-
No problem. Wish we could but just way more 4.0L’s than our 2.5L’s
-
Trading my XJ for a MJ...need help
eaglescout526 replied to 717jeepin's topic in MJ Tech: Modification and Repairs
Why do we keep bad mouthing the D35? If AMC had known it was gonna be a bad axle, they would have never used it on any of their vehicles. The D35 will last anyone a long time as long as you give it care and maintenance and don’t put giant tires on it. If Chrysler knew it was a bad axle they wouldn’t have used it when they acquired AMC. Sure they changed it up after what? Five years or so years when they ran the XJ. If you don’t want to dump money or time into an axle swap that is meant for putting larger than stock tires and rims on it then don’t swap. The D35 will last you a life time until it tells you it wants to be a boat anchor. -
Actually. Pete might be right about that. Might take three Cherokees.