boxyjeep
-
Posts
716 -
Joined
-
Days Won
1
Content Type
Profiles
Forums
Gallery
Everything posted by boxyjeep
-
Anyone attempted creating a set of these? I'm doing a 97+ conversion on my truck and would really like the rear flares to match the front. Obviously, XJ flares won't fit as MJ rear fender opening is much larger. I'm contemplating getting two sets of rear flares and molding them together to fit the MJ rear fender opening. Has anyone else attempted this? I'd like to keep the stock flares if I can. I'm only going to be running 33's, so Notch custom flares are a bit overkill.
-
Added in my build thread and current status.
-
Very nice! I'm definitely a bit partial to those wheels.
-
1988 SoCal Jeep Comanche Build
boxyjeep replied to boxyjeep's topic in Member Projects: Your Comanches
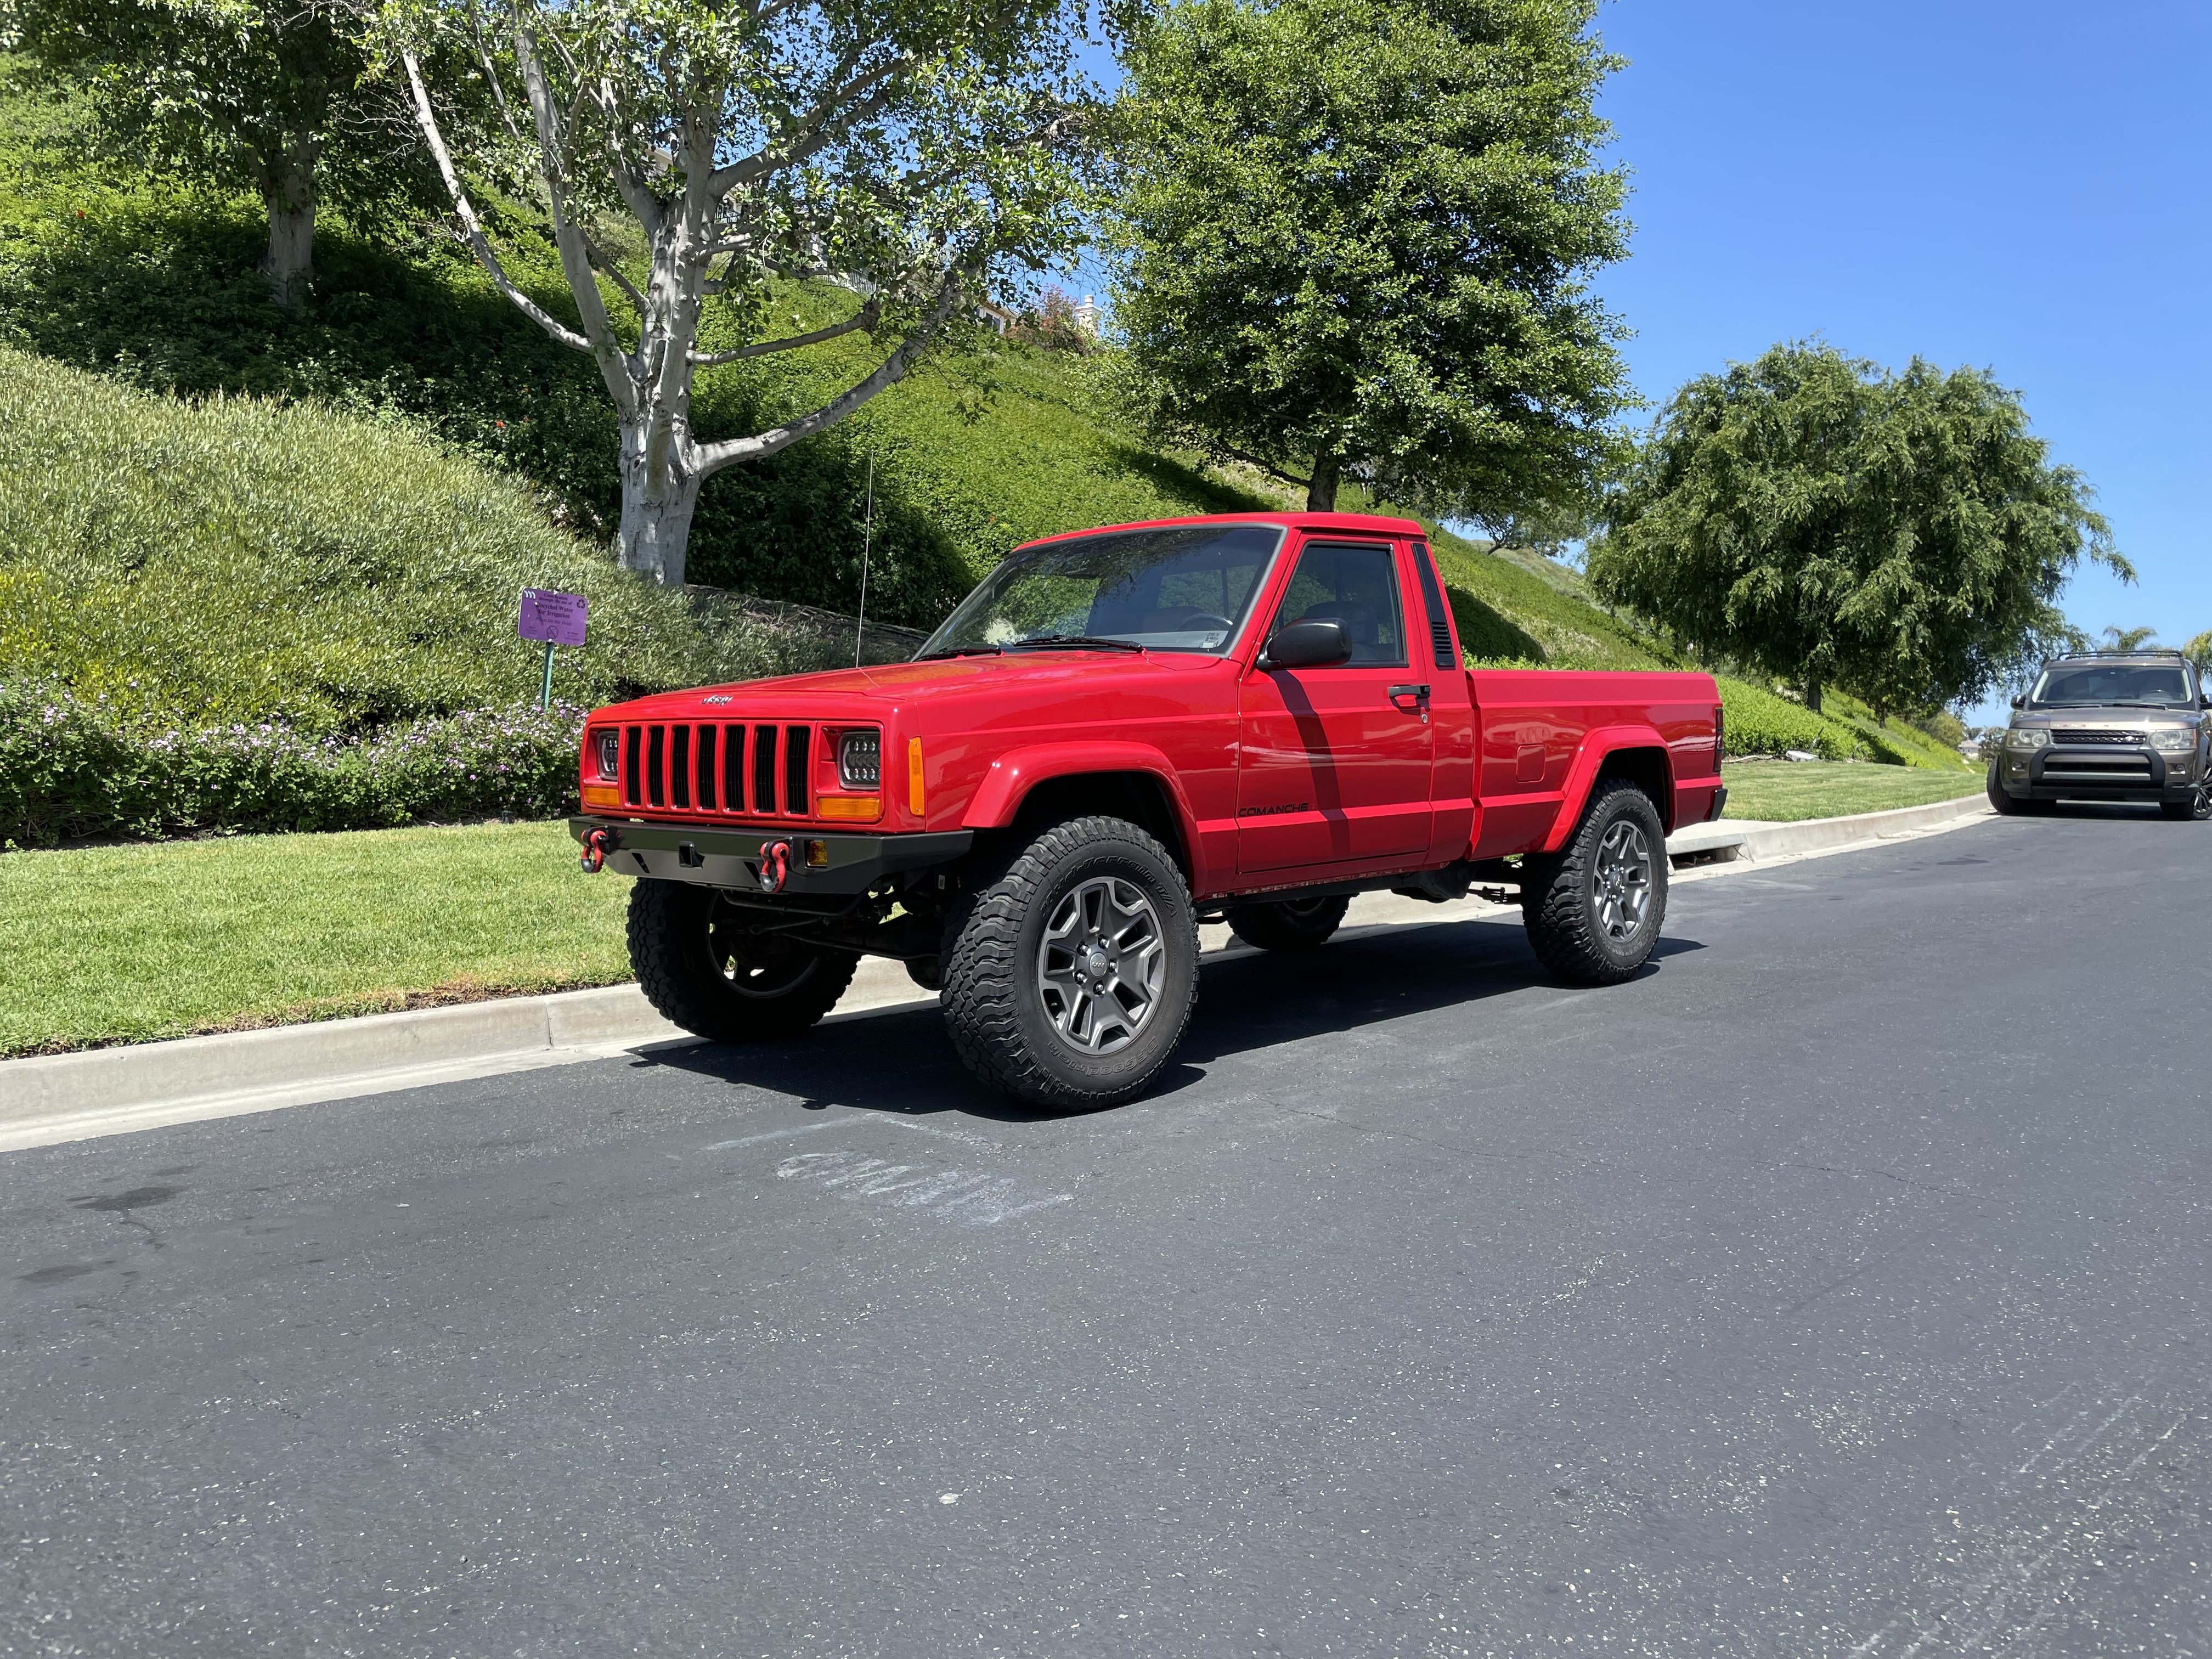
Finally some progress from the body shop. They had me stop by and check everything out. They've made some good headway getting the body primed and patched up. They did a test spray of the color on the header panel. Definitely looks a bit more maroon in the pictures than in person (looks very true to Chrysler Flame Red PR4 in person).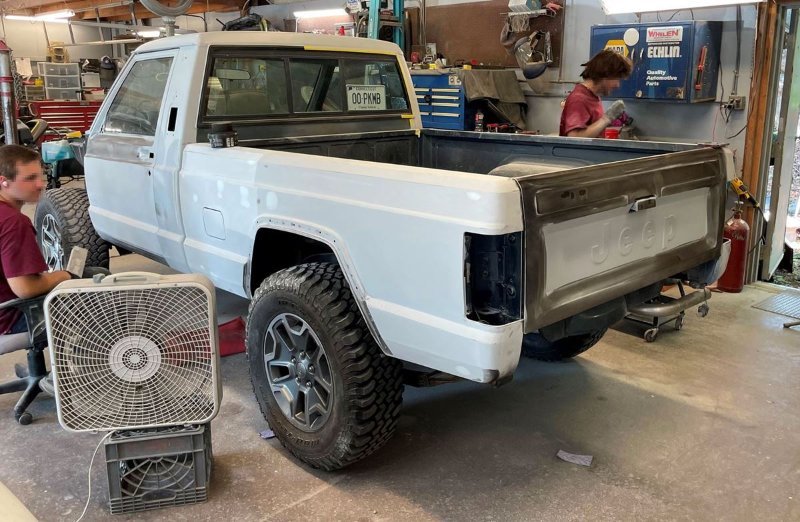
-
I did this before. Pull out the column, remove steering wheel, clean and paint the plastic surfaces and adjust the tilt as you do. Don’t try to disassemble—it isn’t worth it. Sent from my iPhone using Tapatalk
-
I did. Pulled it out and used black plastic paint. Sent from my iPhone using Tapatalk
-
JCR rear bumper not avaliable?
boxyjeep replied to TieDyeJK8's topic in MJ Tech: Modification and Repairs
JCR has gone downhill for sure. I bought a full set of bumpers and sliders in late 2019 and they took forever to ship. Once I got the stuff, there were a bunch of missed welds and other issues. They eventually sent me a set of replacement sliders and a small discount, but it took hounding them forever. Honestly, it's really tough to find good aftermarket MJ parts these days. To add--the JCR sliders do not fit well. They don't line up well with the pinch seam and I decided to not even run them since I would rather not hack up my truck... -
replacement EGR for renix 4.0
boxyjeep replied to 10thta's topic in MJ Tech: Modification and Repairs
Got mine from Rockauto -- part number 4F1413. Looks a lot different but gets the job done. -
1990 Rebirth ('97 Conversion)
boxyjeep replied to Rymanrph's topic in Member Projects: Your Comanches
Definitely was a bigger fan of the green color, and your original build was an inspiration for me to buy a Comanche in the first place. Still looks great though--how often are you driving/wheeling it these days? -
1988 SoCal Jeep Comanche Build
boxyjeep replied to boxyjeep's topic in Member Projects: Your Comanches
Thanks Pete. I'm hopeful that it will be mostly done in the new few months. Once the body is in good shape, I'm planning to throw in ~5" SOA-based lift that I've been hanging onto for awhile. -
That’s a high pinion for sure. Your first pics were deceiving. Sent from my iPhone using Tapatalk
-
Sorry to be the bearer of bad news, but that looks like a low pinion axle, not from a 98 (which was high pinion from the factory). You may want to return or swap it out if you can. LP D30 is one of the worst axles out there.
-
Need everything but the actual antenna mast -- bracket, trim, escutcheon, etc to attach to the fender of 97+. Shipped to 06437.
-
1988 SoCal Jeep Comanche Build
boxyjeep replied to boxyjeep's topic in Member Projects: Your Comanches
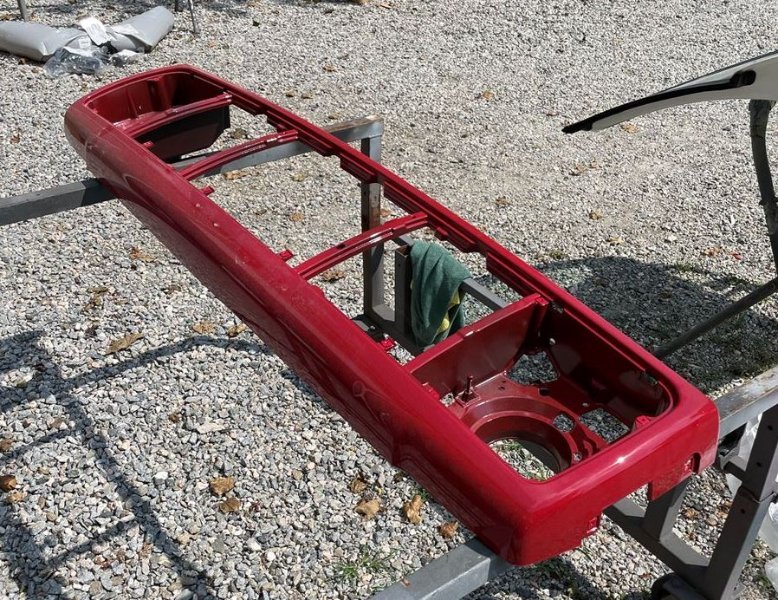
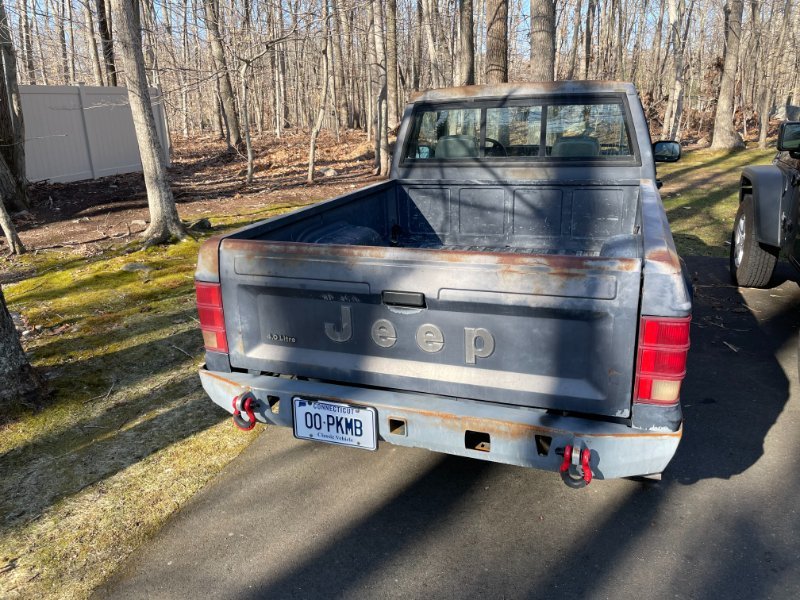
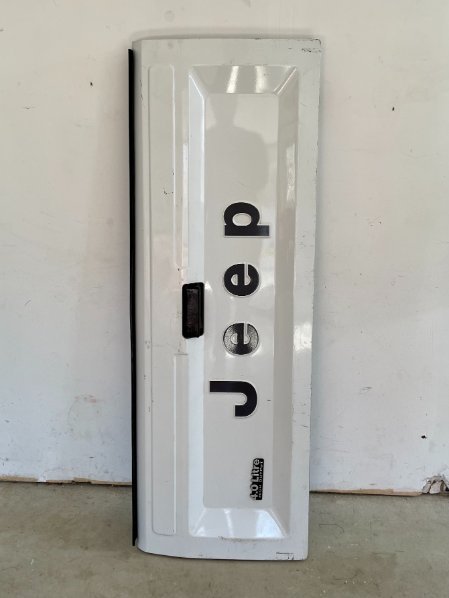
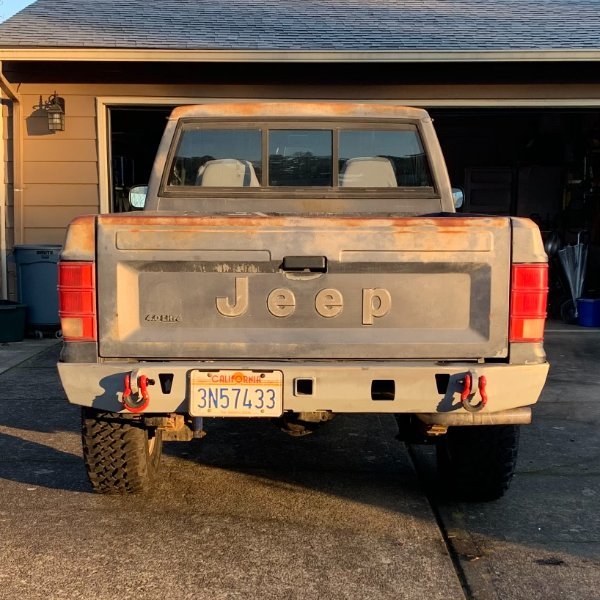
You can probably see a theme by now, but it was again time to move. We had bought a place out on the east coast and had the truck picked up to be shipped in early January 2021. We made our way across the country driving our '20 JL and finally got settled in to our new home. The truck arrived a few weeks later and had no issues getting registered out here in CT (no smog!). That being said, I still didn't want to drive it in the snow/salt, since the frame and undercarriage were in near-mint condition. You can start to see some surface rust on the primed bumpers. I'll be getting those cleaned-up and painted soon. Now that I was out here and settled, I made the decision to get the truck painted. I found someone selling a mint tailgate in Long Island for way too much, but decided I needed it since mine was slightly bent and the handle was tight during operation. This was the last panel that was needed to get the body painted. This was probably the most mint tailgate I've ever seen. It came off a 91 or 92 base on the 4.0L HO badge. It cost me $600 and 4 hours of driving. Next, I found a decent auto body shop nearby and got the truck prepped for paint by pulling off all the plastic, trim, weather stripping, etc. At this point (August 2021), the truck has been in the body shop for ~4 weeks. Hopefully I get it back soon. Will be going with Chrysler Flame Red PR4 (same that could be found on late-model XJ's).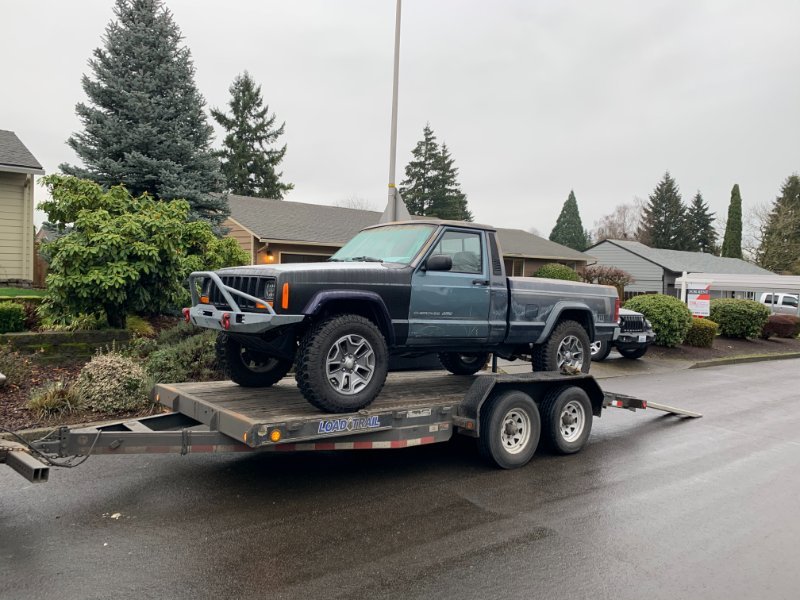

-
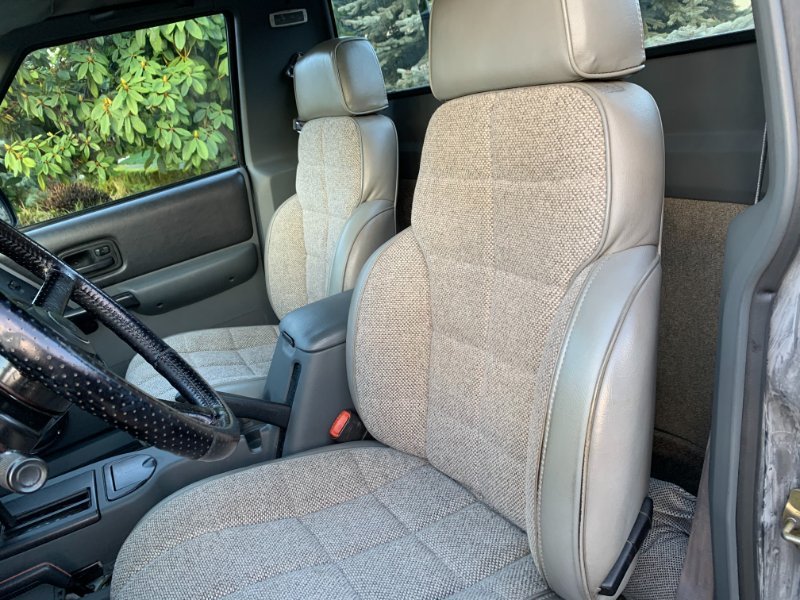
1988 SoCal Jeep Comanche Build
boxyjeep replied to boxyjeep's topic in Member Projects: Your Comanches
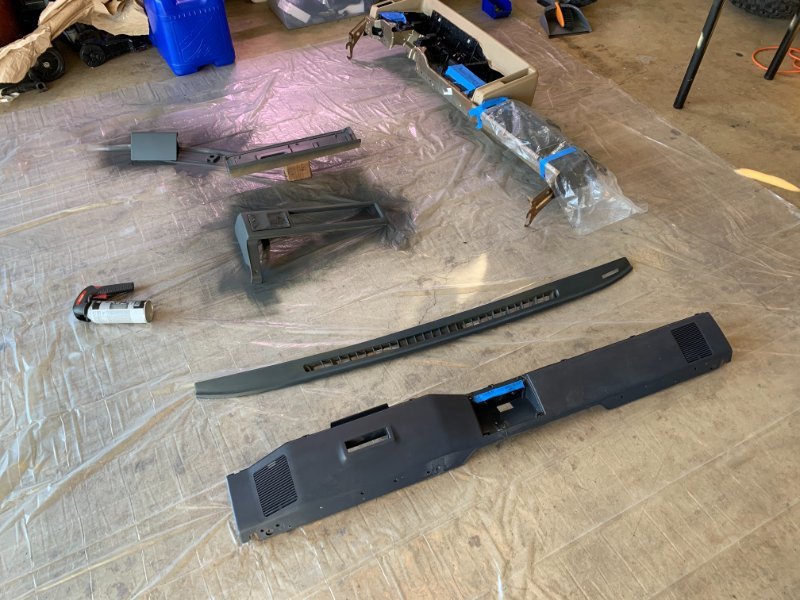
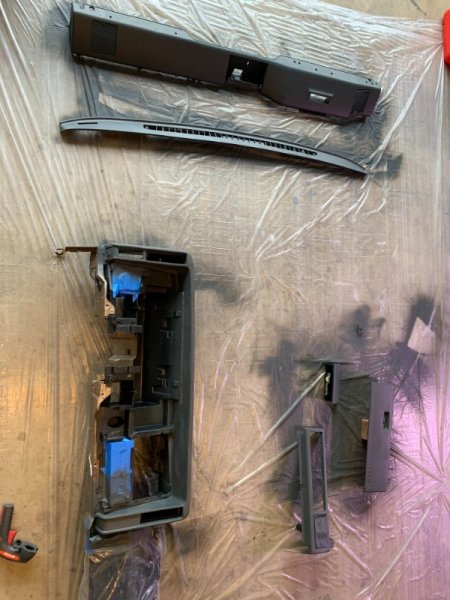
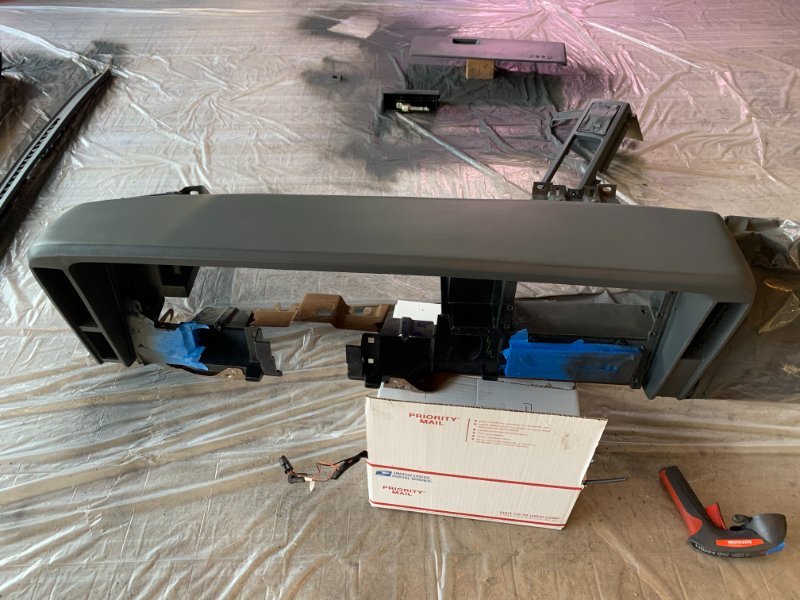
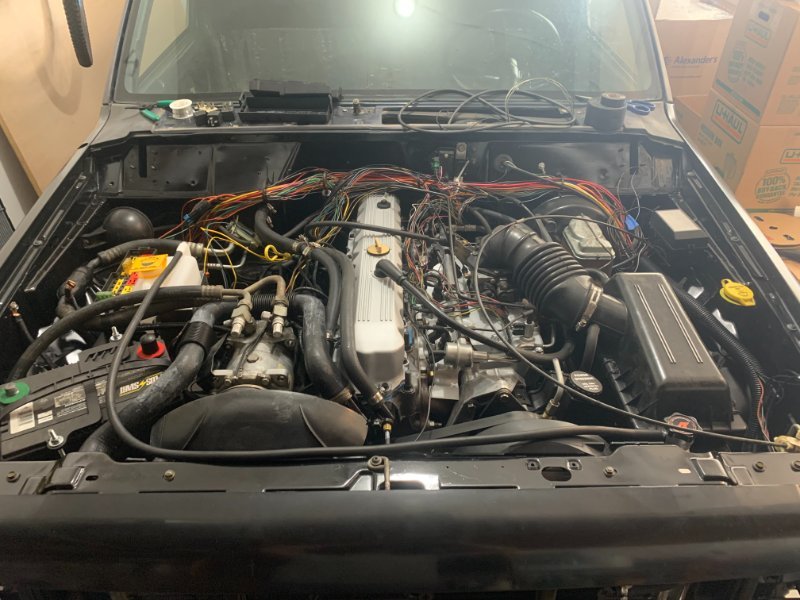
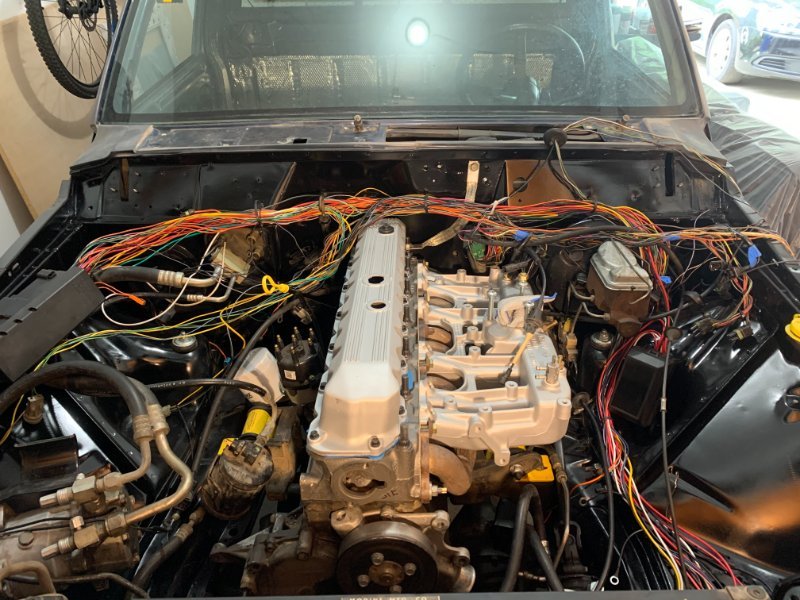
I found a nice dashboard out of a 96 Cherokee at a junkyard. I will say that the best pick-n-pulls along the west coast were definitely in the San Jose area. SoCal and WA state would rarely get XJ's in stock, so I was super lucky to find such a nice dashboard in good condition. Unfortunately, the bad thing was the color. I disassembled the dashboard and got everything painted to match the other panels with the vinyl dye that I've come to love. Overall it came out pretty good. I had to swap over the VIN plate and scratched a few areas of the dash during re-install in the truck, but the interior now looked almost fully complete (minus some wiring and other small bits (like the horn button). I also took the opportunity to install a 97+ e-brake. I also got the wiring loom for the engine cleaned up and looking really clean, with a 97+ injector loom cover and black bolts on the valve cover. At this point, the truck was in decent shape. I had diagnosed an electrical gremlin causing it to periodically stall (the knock sensor wiring had come in contact with the exhaust manifold, causing it to melt and stall intermittently while driving).
-
1988 SoCal Jeep Comanche Build
boxyjeep replied to boxyjeep's topic in Member Projects: Your Comanches
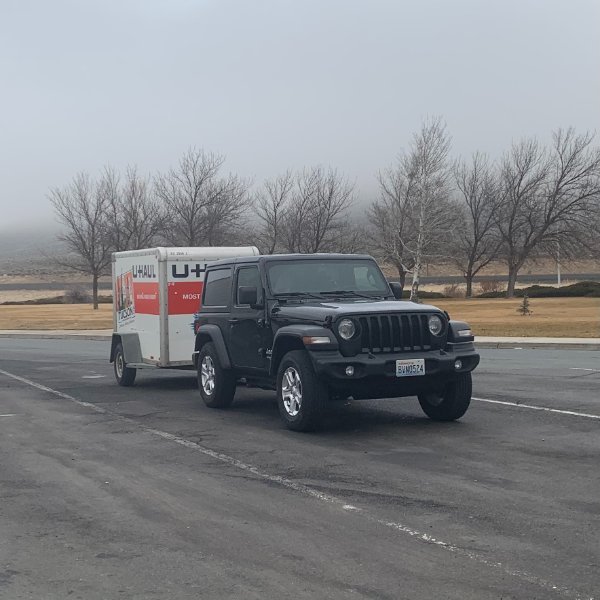
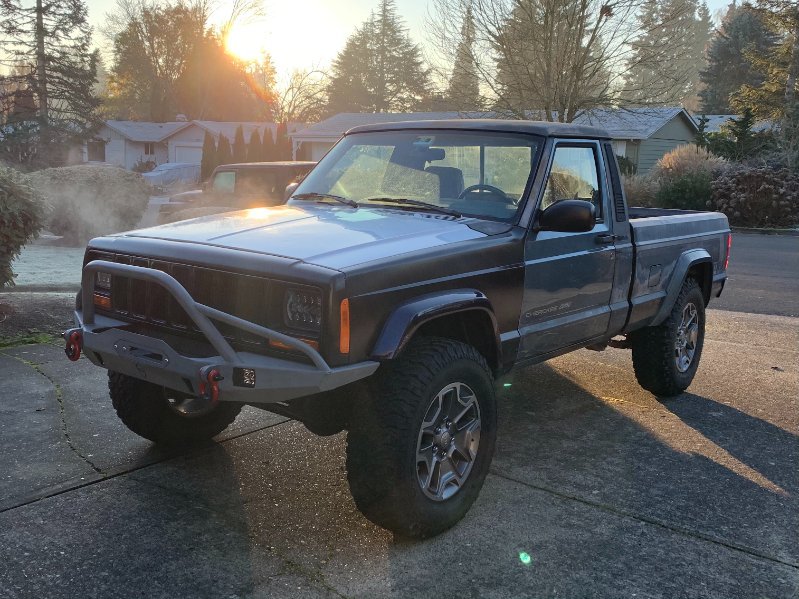
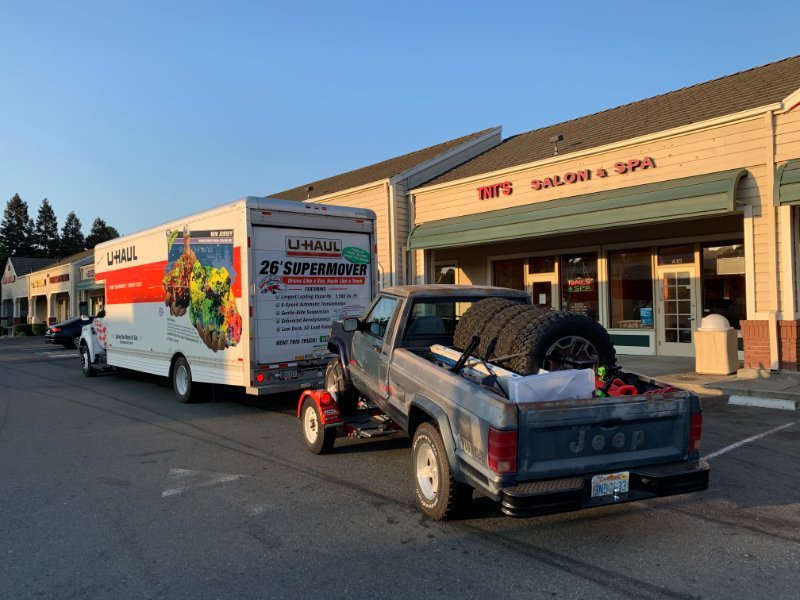
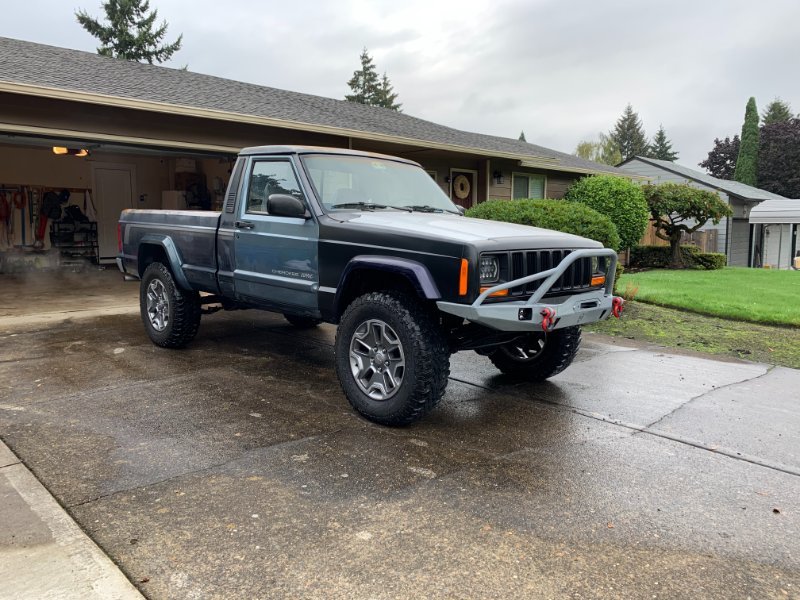
At this point, the truck was running, but the dash was still out and the body was a mix of colors. I replaced the hood with a straight one I got from a junkyard and also got the JCR bumpers installed. Unfortunately, it had been a year since moving up to northern CA and it was time to move again. I loaded the truck up on the back of a U-Haul and we made our way up to the Pacific Northwest (southern WA state): Arrived at our new (rainy) home. I had sold the original bumpers and TJ Ravine wheels and installed a set of JK Rubicon take-off's with adapters. Everything on the exterior was mostly "complete" at this point, but there were a lot of interior items to button up.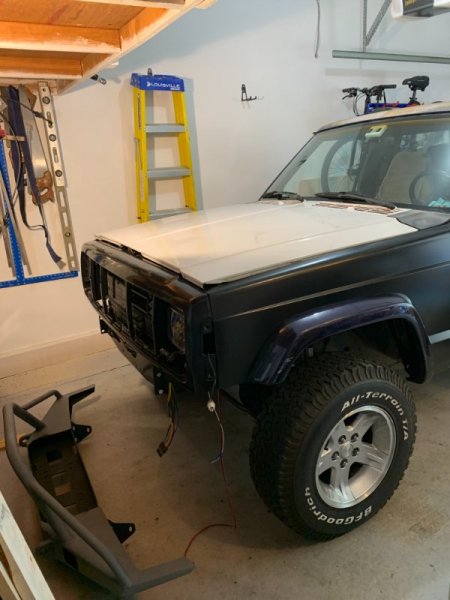
-
1988 SoCal Jeep Comanche Build
boxyjeep replied to boxyjeep's topic in Member Projects: Your Comanches
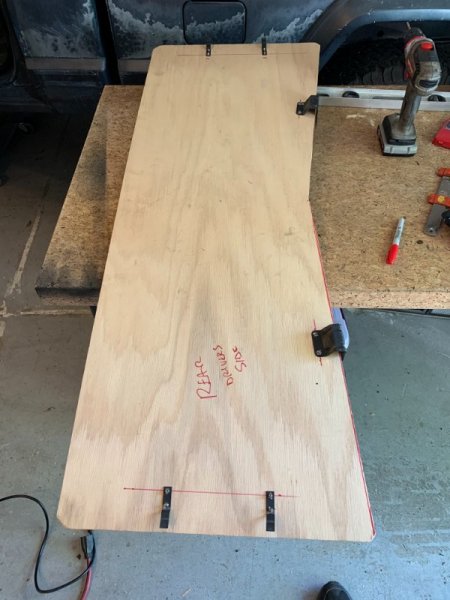
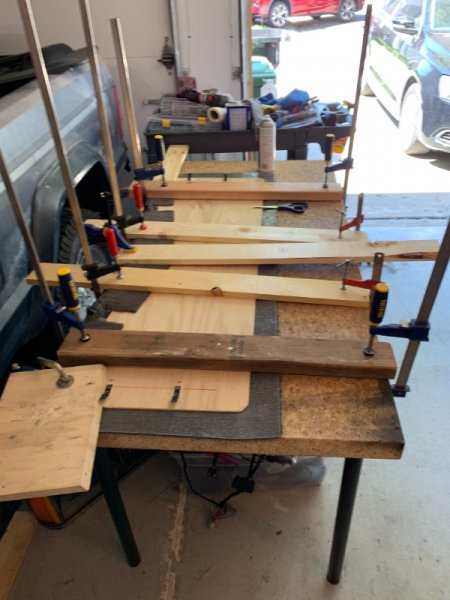
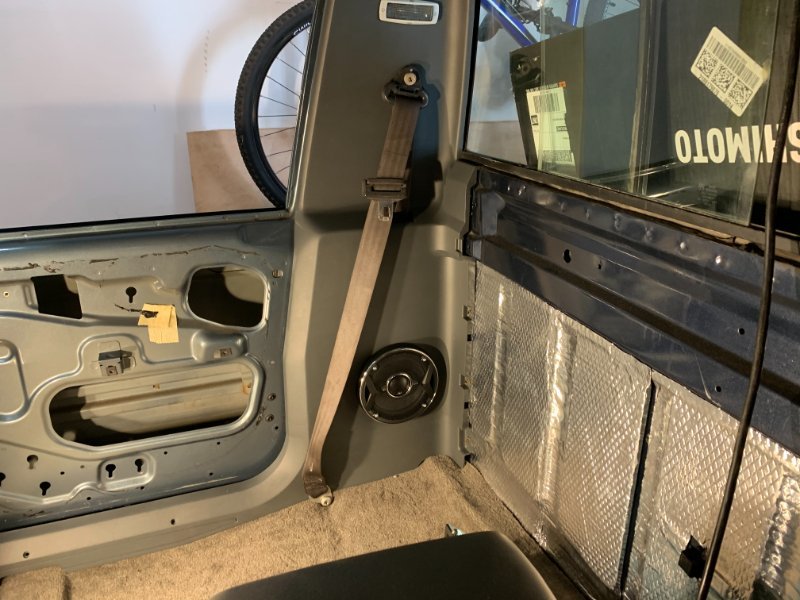
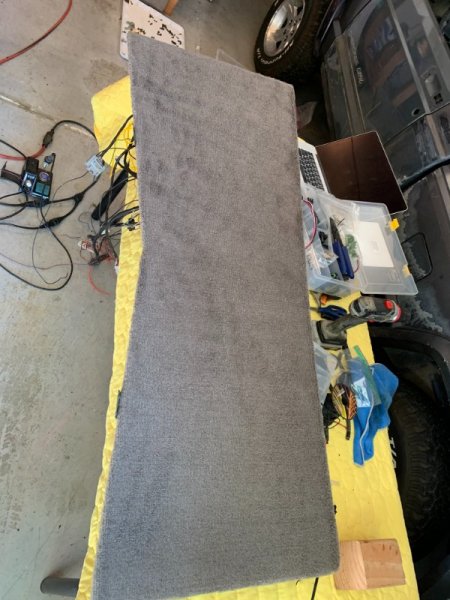
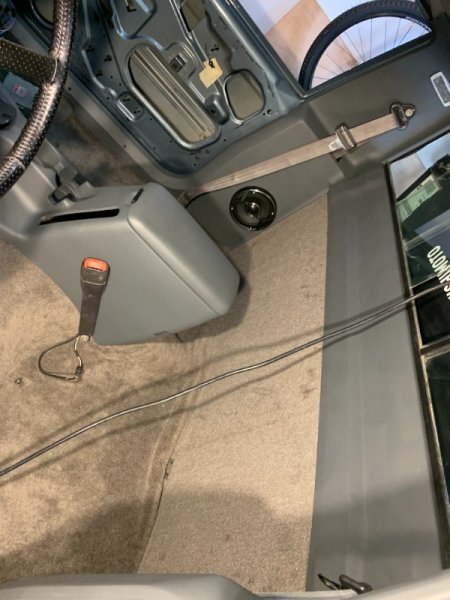
Now it was time to start getting the interior buttoned back up. I had replaced the carpet, headliner, and painted all the interior panels, but still had the old blue rear panel. I decided to make my own panel with some extra matching carpet I ordered and 1/8" luan plywood. Cut to shape: Rear brackets installed: Carpeting glued and clamped: Front side after drying: Before installation. While I had the B-pillar trim out of the truck, I installed some 6.5" JBL speakers. I had installed a cheap set of 4x6 when I first got the truck. Those were garbage and had to go. Installation complete: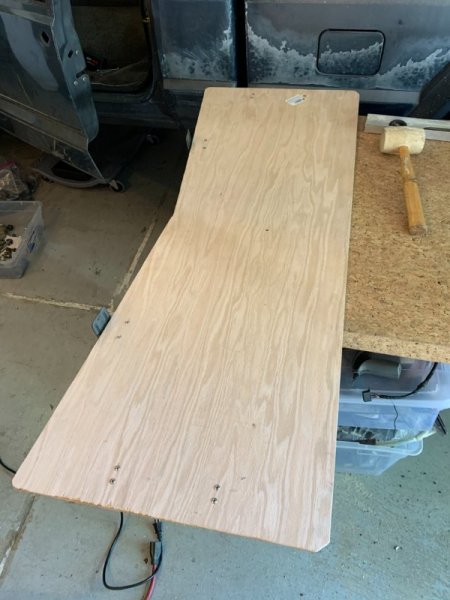
-
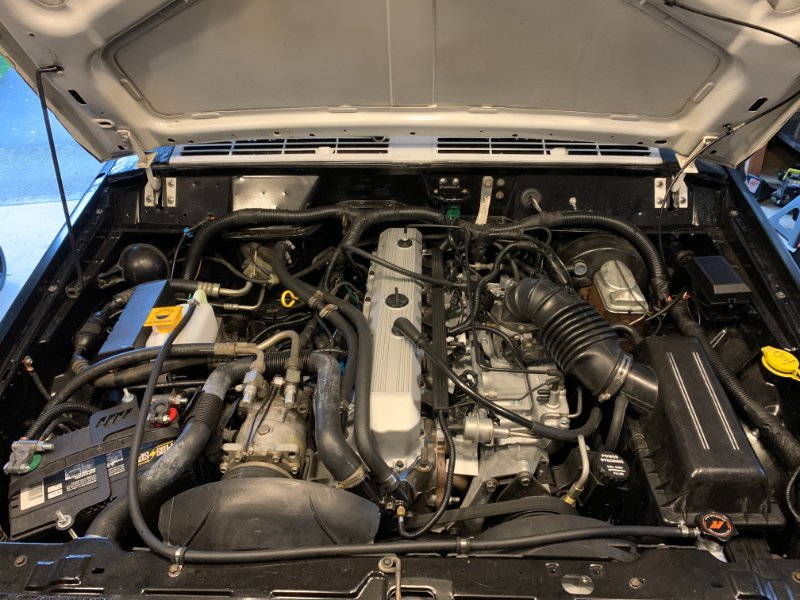
1988 SoCal Jeep Comanche Build
boxyjeep replied to boxyjeep's topic in Member Projects: Your Comanches
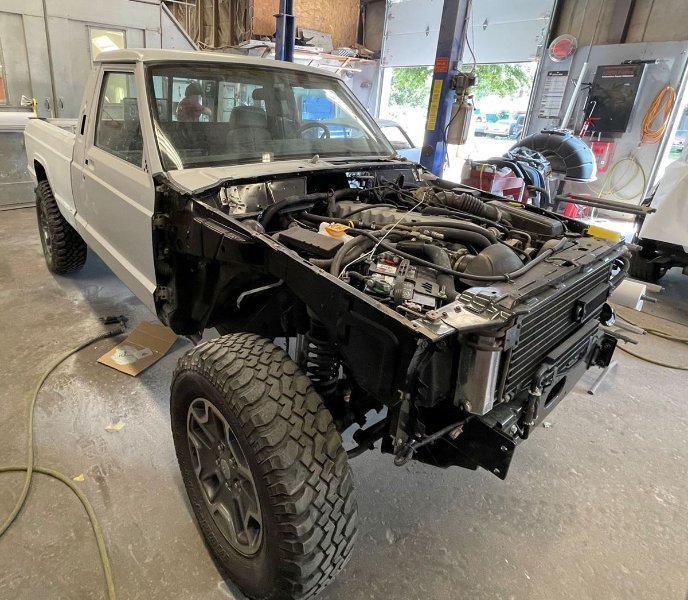
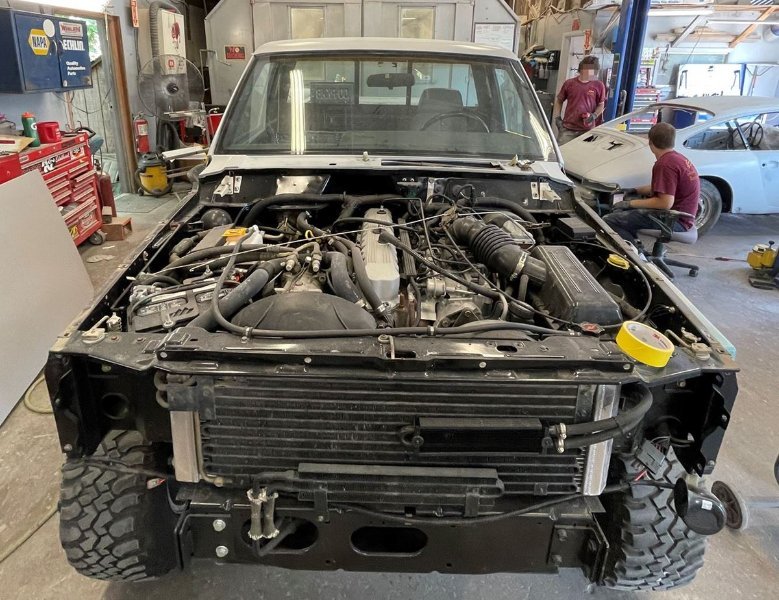
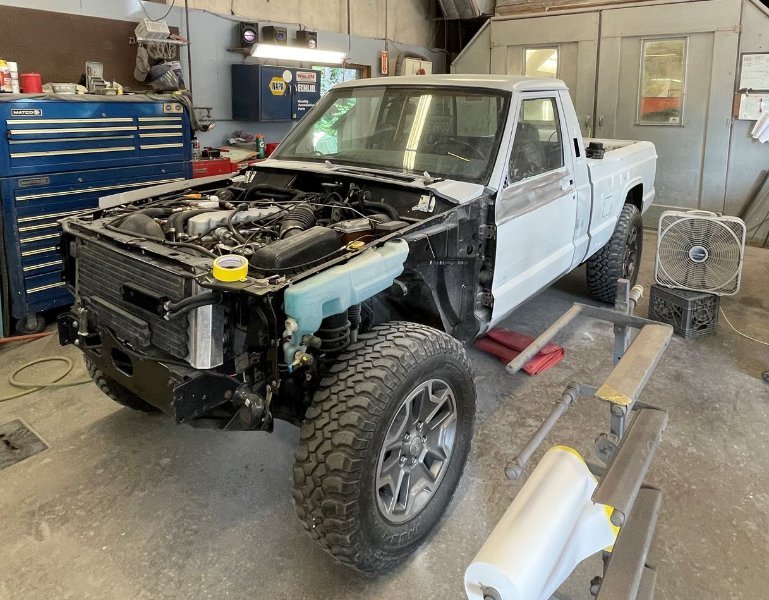
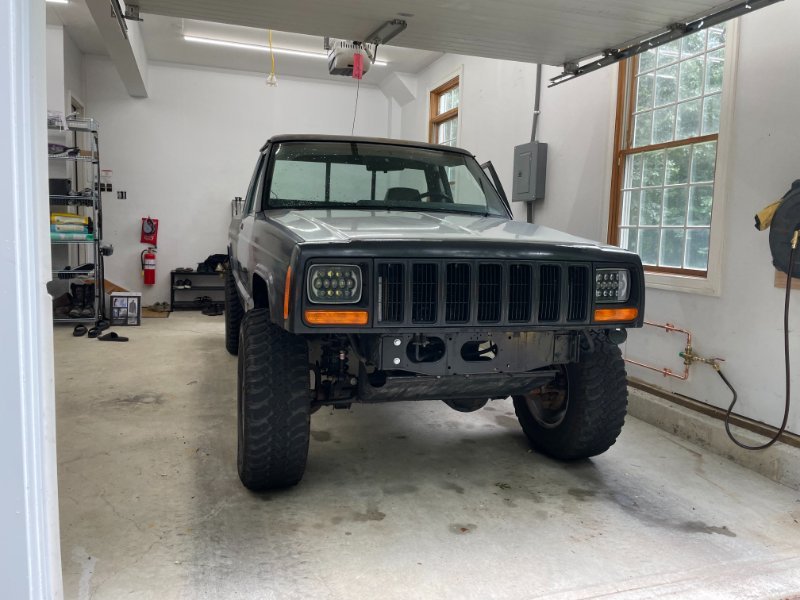
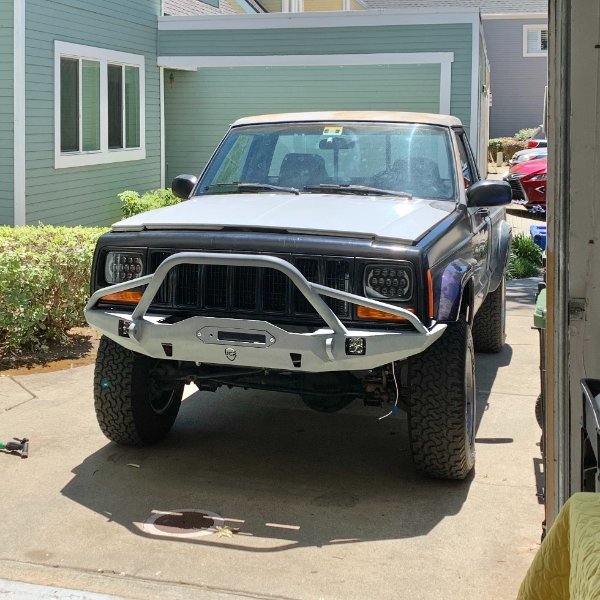
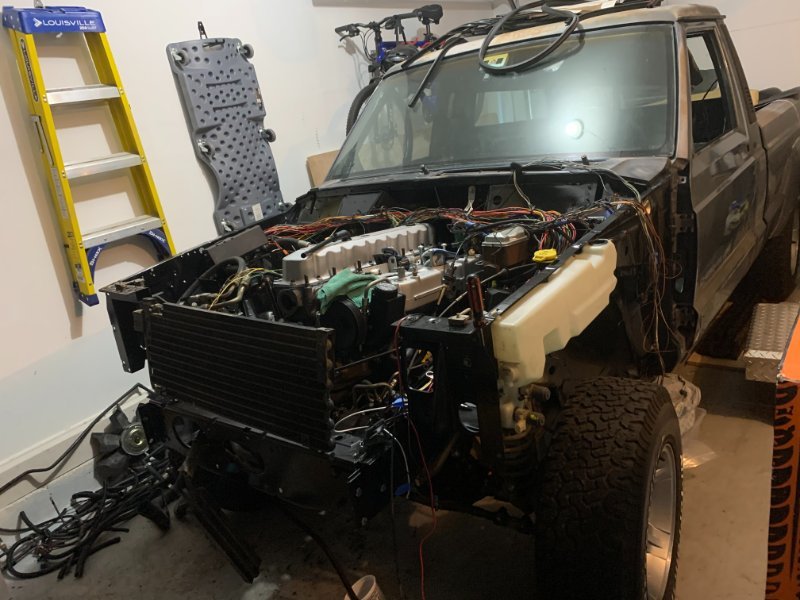
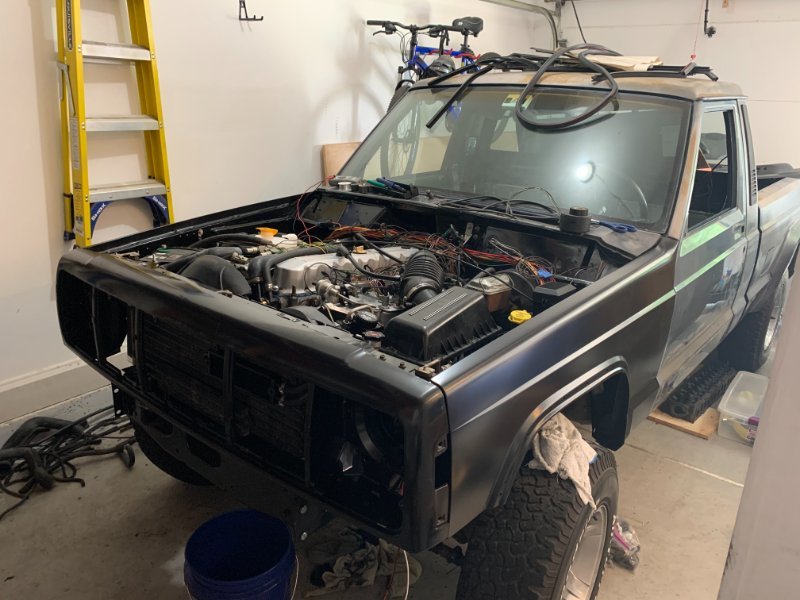
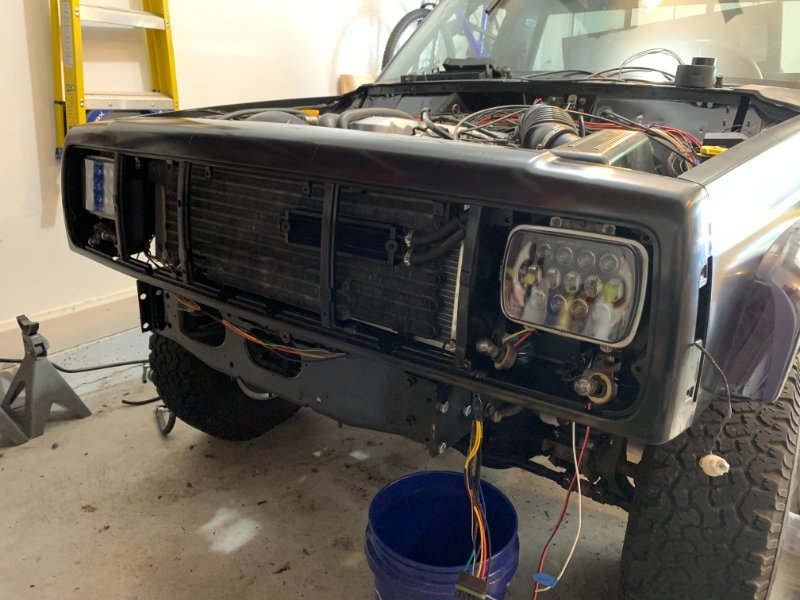
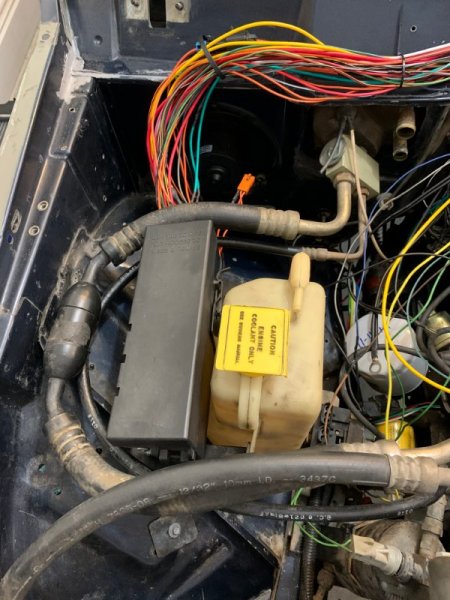
At this point, things were coming along pretty well. I installed a Mishimoto aluminum radiator, 97+ washer fluid reservoir, and aux power steering cooler. You may be asking why I kept the Renix manifolds, EGR, and other parts. Since this truck was in CA, I wanted to pass smog without issue. Washer fluid reservoir installed. Radiator and wiring coming along nicely: Fenders and front clip installed. Starting to look pretty clean. Still need to loom the wiring. You can see the 97+ PDC, overflow bottle/bracket, small vacuum canister, and Renix intake. LED lights installed: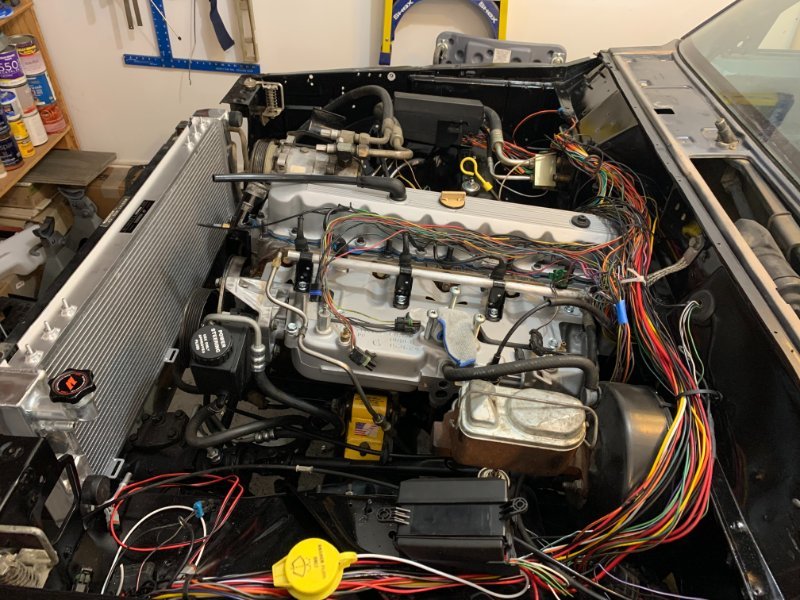
-
1988 SoCal Jeep Comanche Build
boxyjeep replied to boxyjeep's topic in Member Projects: Your Comanches
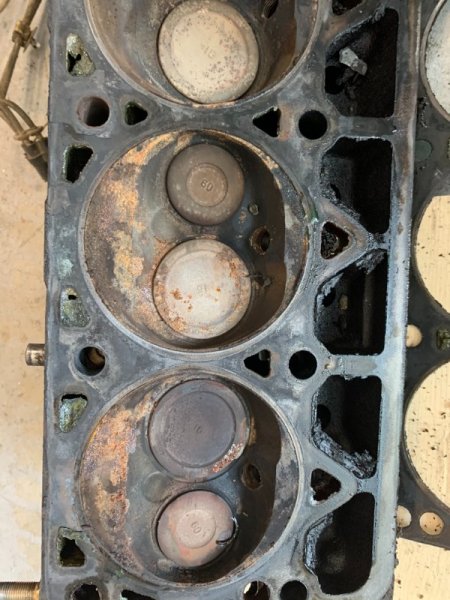
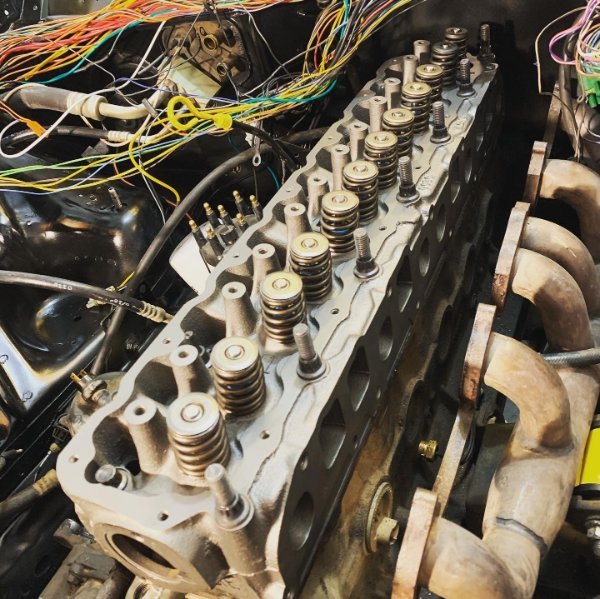
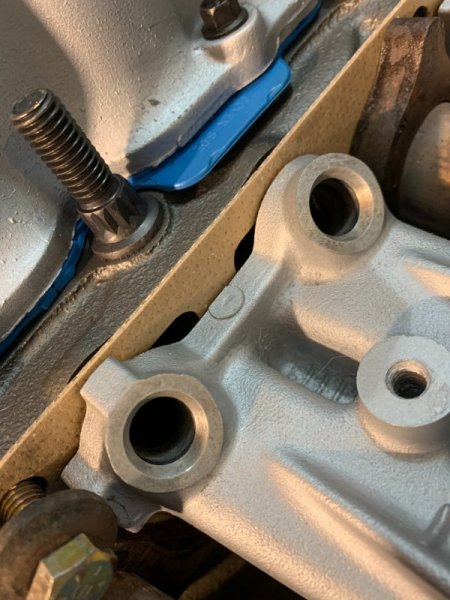
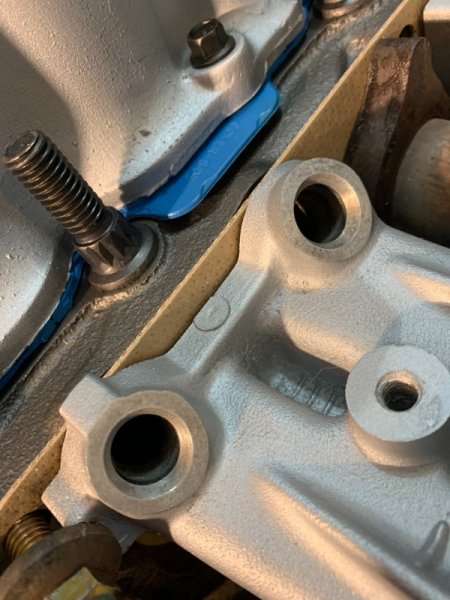
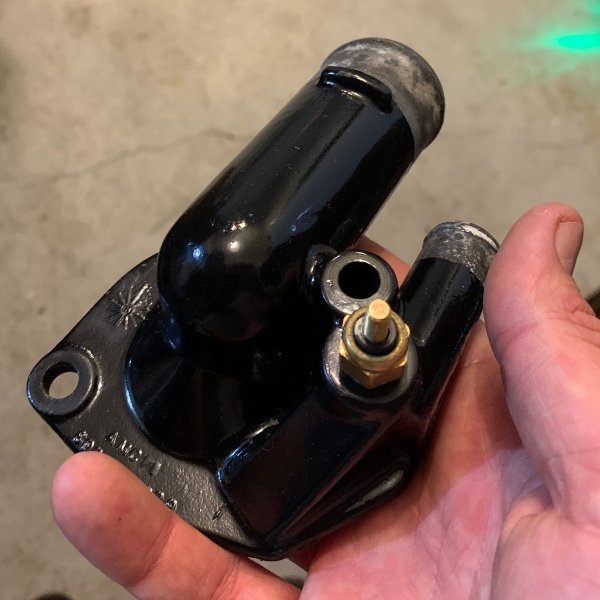
While that was drying, I got a good look at the cylinder head. Nothing too noticeable, but it definitely had a very slight warp to it. I replaced with a new Clearwater HO head. Block and pistons looking okay: Disgusting old cylinder head. It's definitely seen it's fair share of use and abuse in 210K+ miles. New cylinder head installed: Decided to install my temp sensor in the thermostat housing. I cleaned it up, painted, and then tapped the hole: New head with freshly painted valve cover and intake manifold: I ran into some issues with trying to figure out the correct exhaust gasket to use. Since it was a HO head with Renix header and intake, the Renix gasket is the correct one to use. You can see the gaps below if you try to use the HO gasket.

-
Nice! Mine is at the body shop right now to get a similar paint job. What did you end up paying?
-
1988 SoCal Jeep Comanche Build
boxyjeep replied to boxyjeep's topic in Member Projects: Your Comanches
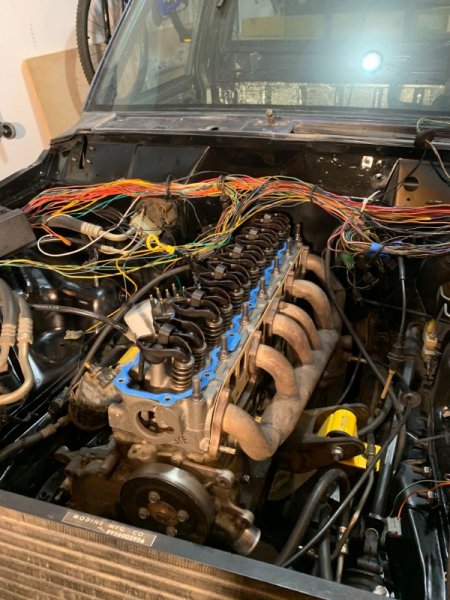
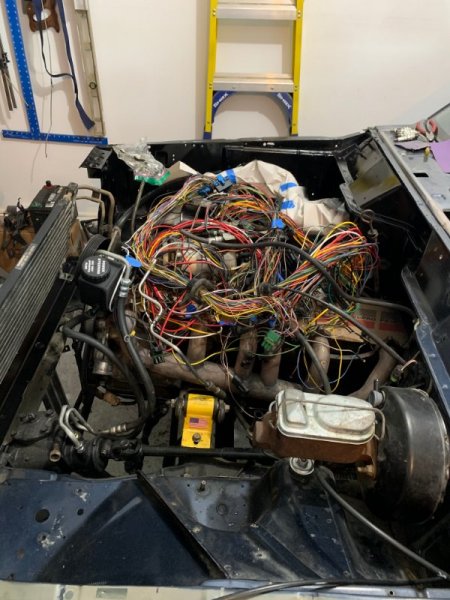
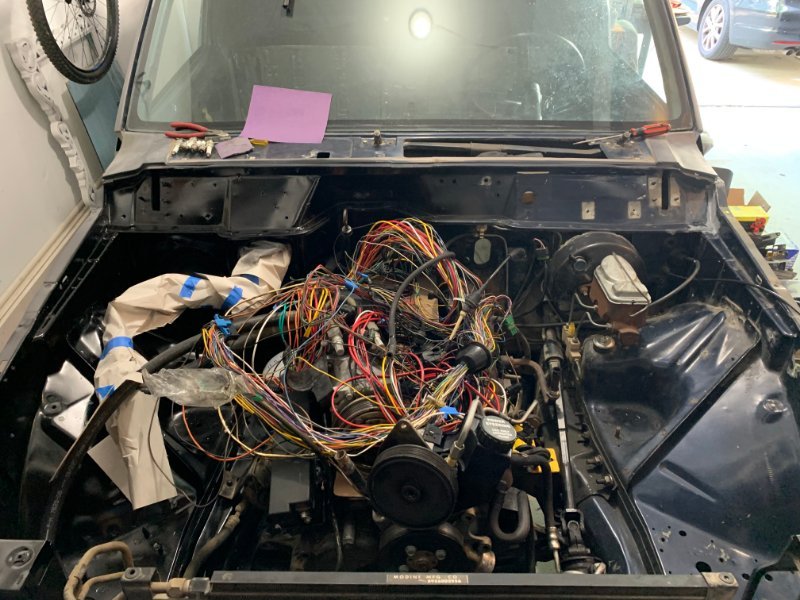
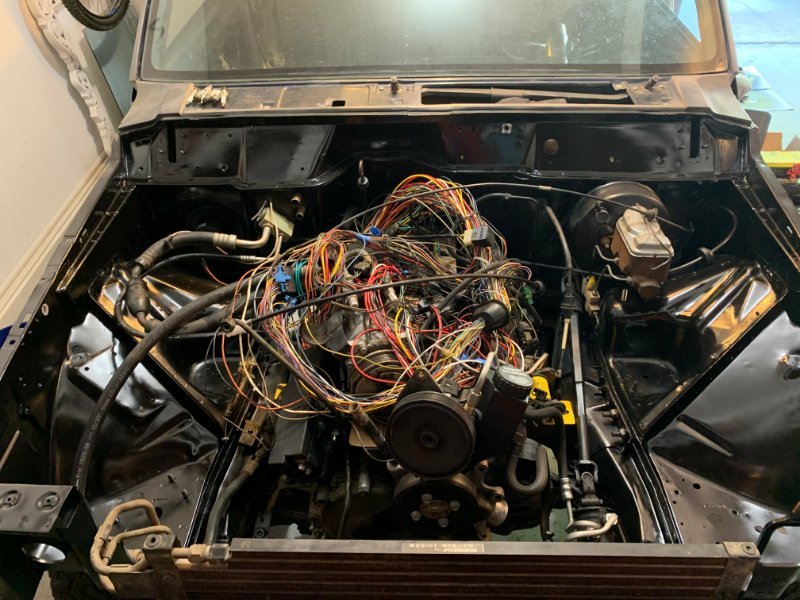
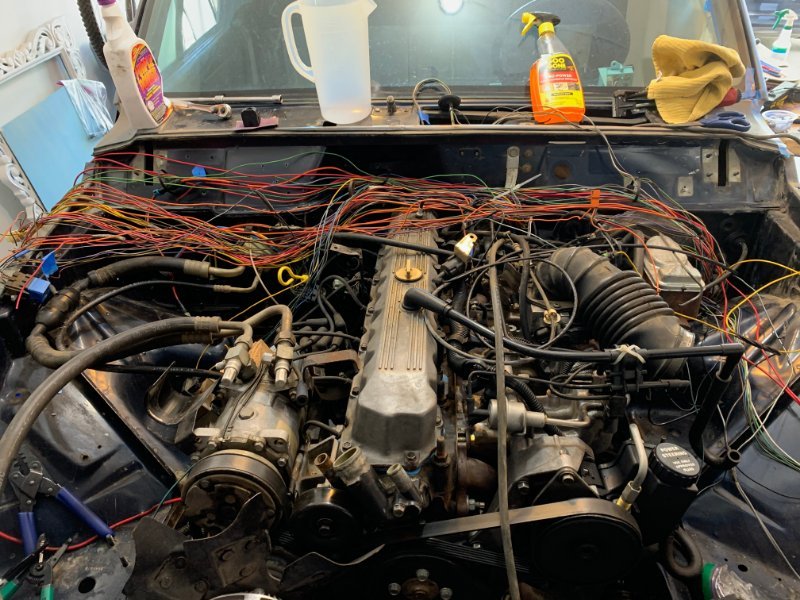
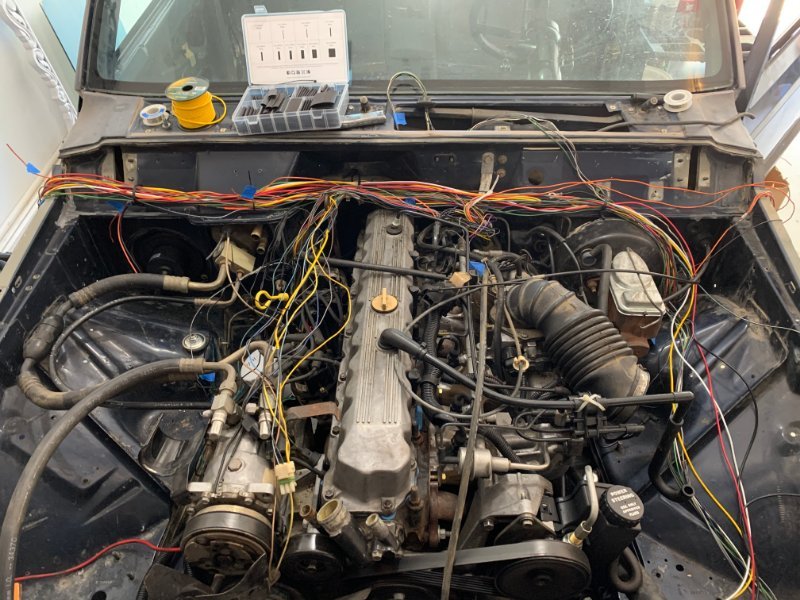
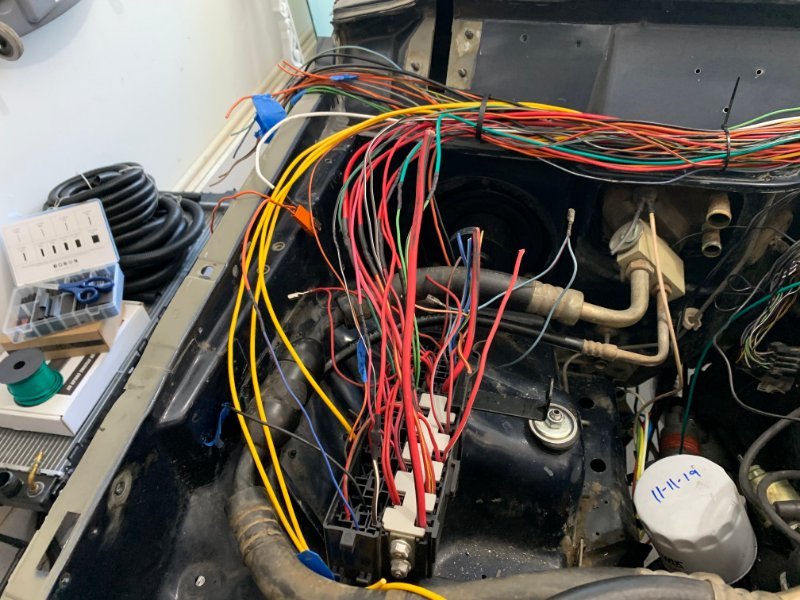
At this point, the engine wiring was simplified and it was time to pull the cylinder head. This was somewhat of an exploratory process. I had spent so much time checking sensors, replacing components, and basically doing everything possible based on best-practices and advice from these forums and elsewhere to get the truck running well. However, nothing worked. I figured that it was likely a warped/cracked cylinder head or some other type of internal engine damage. Time to pull it all out: Wiring rolled up and out of the way: Taped and painted: Done: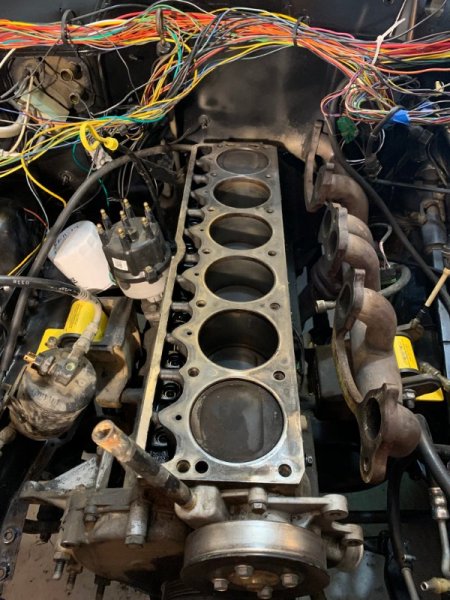
-
1988 SoCal Jeep Comanche Build
boxyjeep replied to boxyjeep's topic in Member Projects: Your Comanches
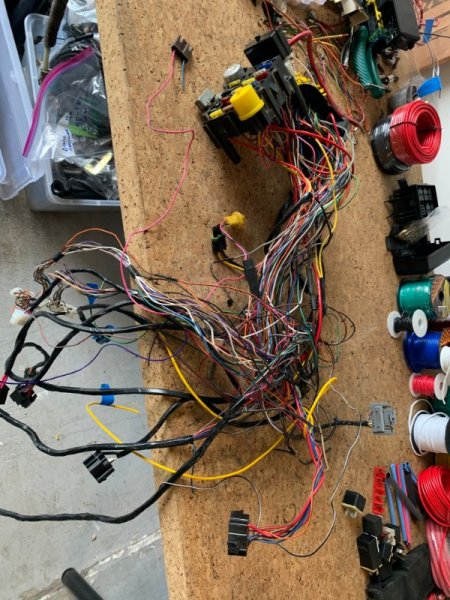
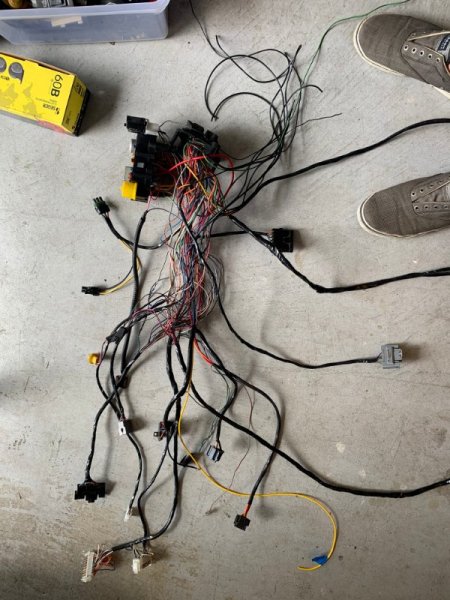
I don't remember how or why, but I also pulled the interior harness out again to simplify it. I shortened or removed any unnecessary wiring and cleaned it up as best possible. On the bench: Wrapped:
-
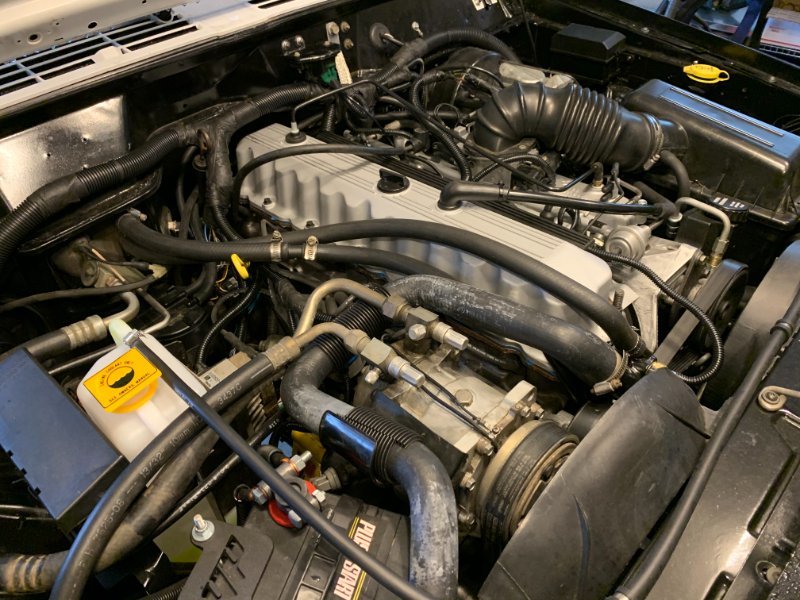
1988 SoCal Jeep Comanche Build
boxyjeep replied to boxyjeep's topic in Member Projects: Your Comanches
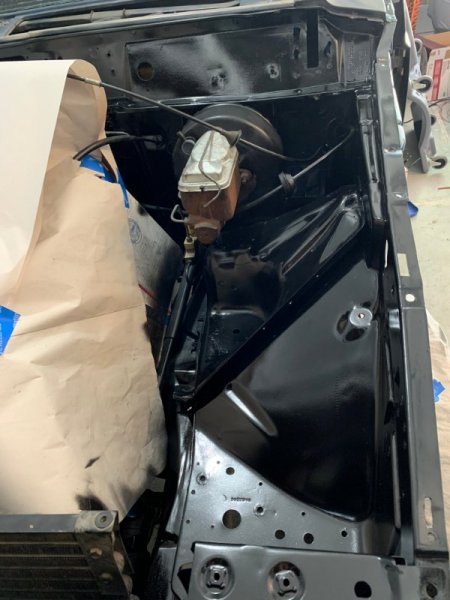
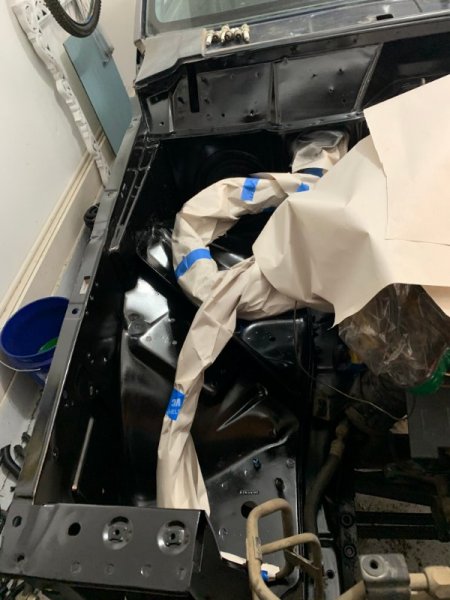
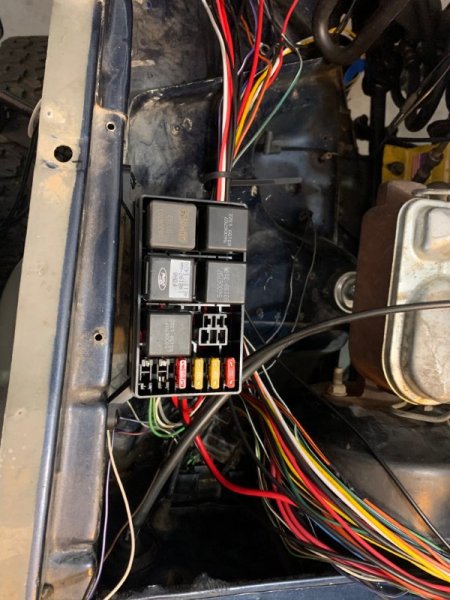
Up next was the engine bay. I wanted to paint it black while I had the head off to be replaced and also clean up the insane amount of wiring that comes with the Renix electrical system. I hated the relay center, fusible links, and how there was wiring routed out and around the radiator instead of along the firewall. There was also a leak coming from somewhere in the cowl/engine bay that was leaking into the passenger floor. Used a bunch of black silicon to seal up where the blower motor mounts. After that, things were off to a good start, but got a little out of control. I ended up installing a relay/fuse box on the driver's side to power the headlights (high & low), fogs, and horn. This allowed me to simplify a lot of the wiring inside the cab as well (and ditch the horn relay). I also made the decision to replace the fusible links with a 97+ PDC. It came out looking pretty clean.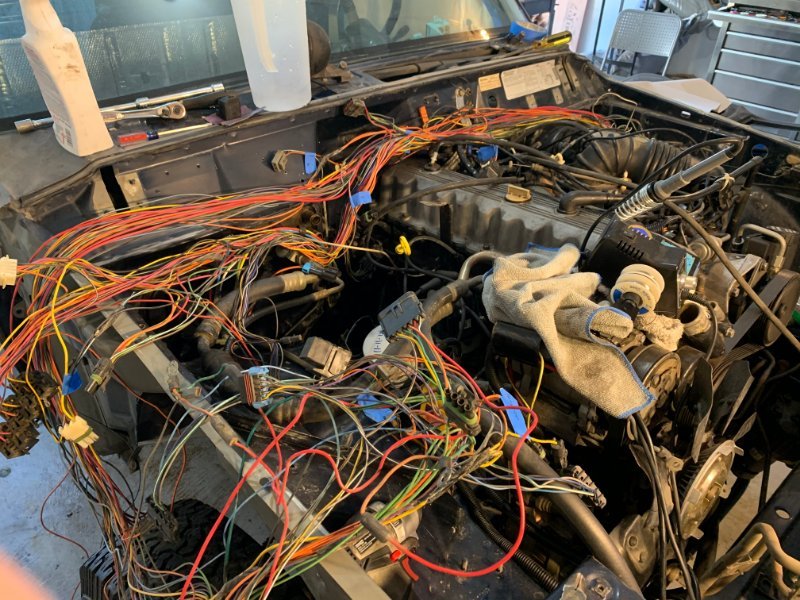
-
1988 SoCal Jeep Comanche Build
boxyjeep replied to boxyjeep's topic in Member Projects: Your Comanches
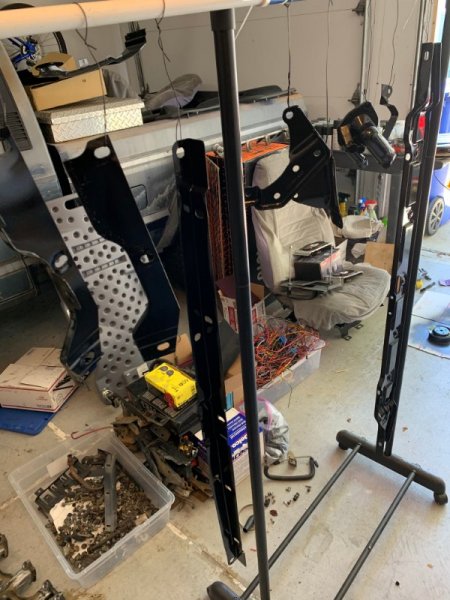
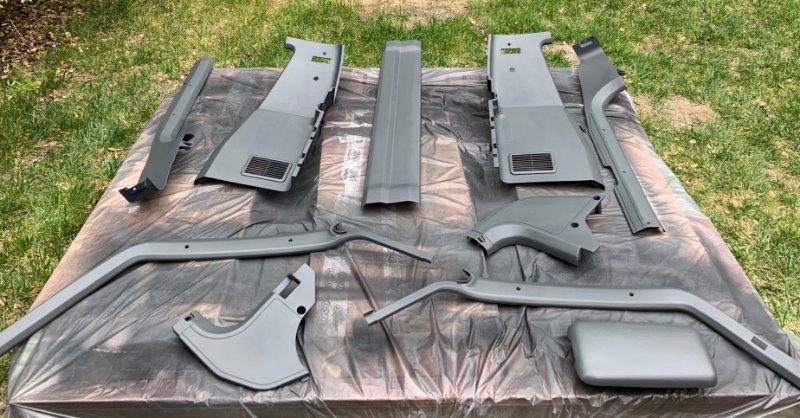
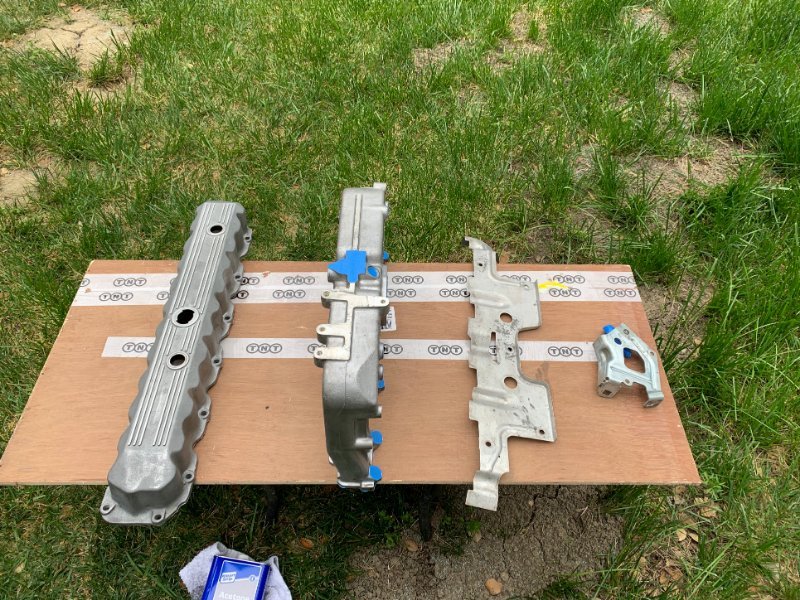
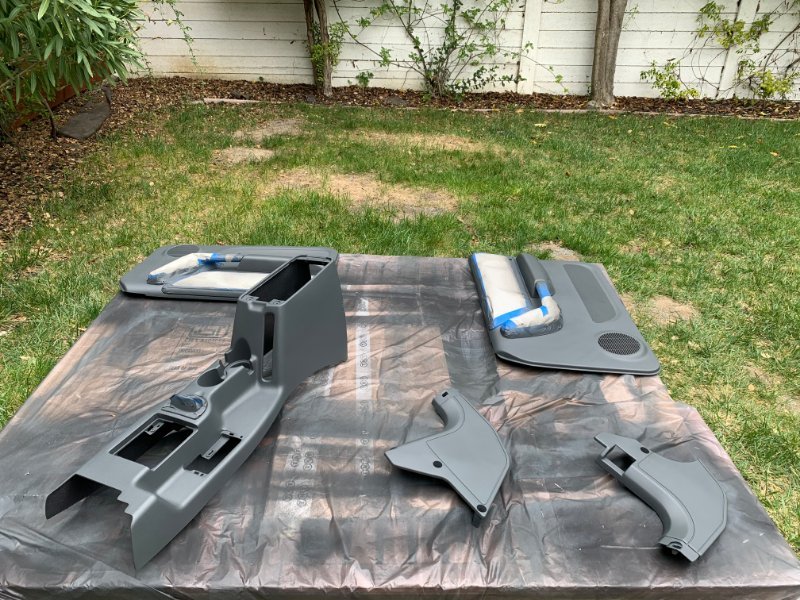
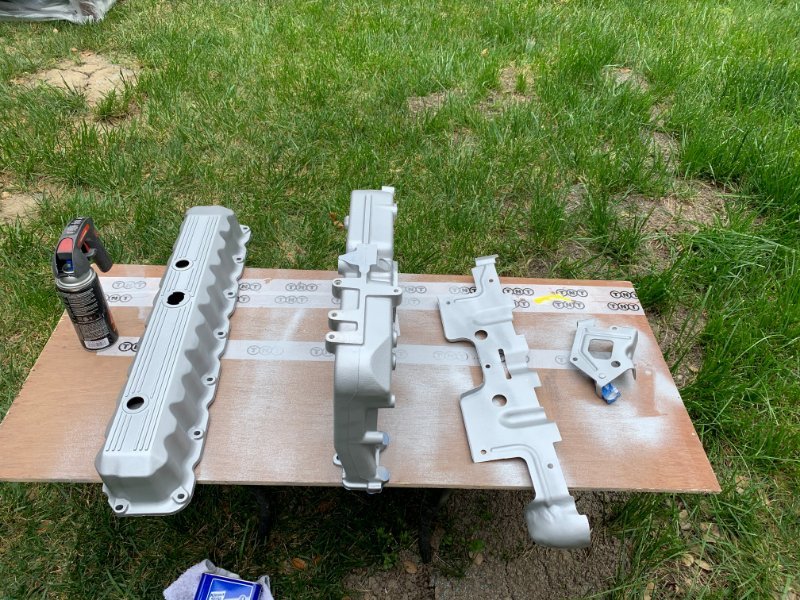
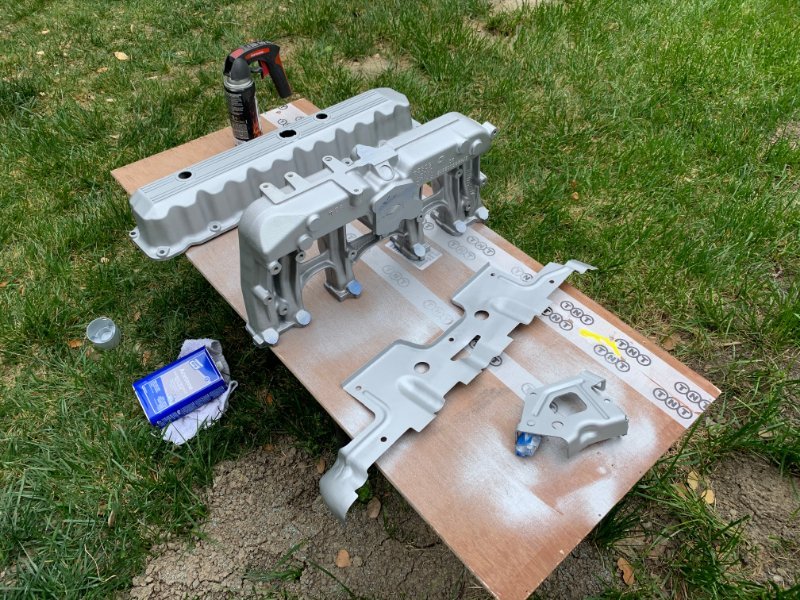
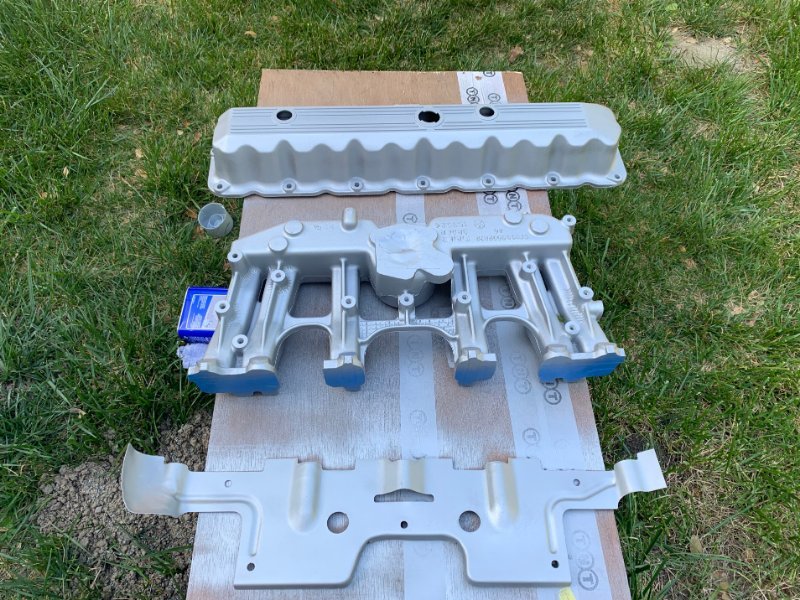
The next to-do was getting all of the interior trim painted to match. I had a hodgepodge of blue, grey, and other colors since I had to source some of the panels from different vehicles. I got everything pulled and sprayed with vinyl dye paint. Overall it came out pretty good. Mixed colors before: After painting: Also took the opportunity to paint a spare valve cover, intake manifold, and some other engine parts with silver high-temp paint: As you can imagine, I was now at the point where I could take some time to focus on the small details.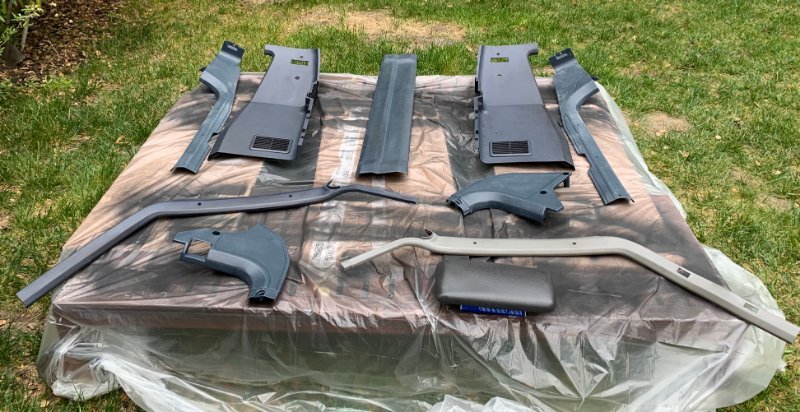

-
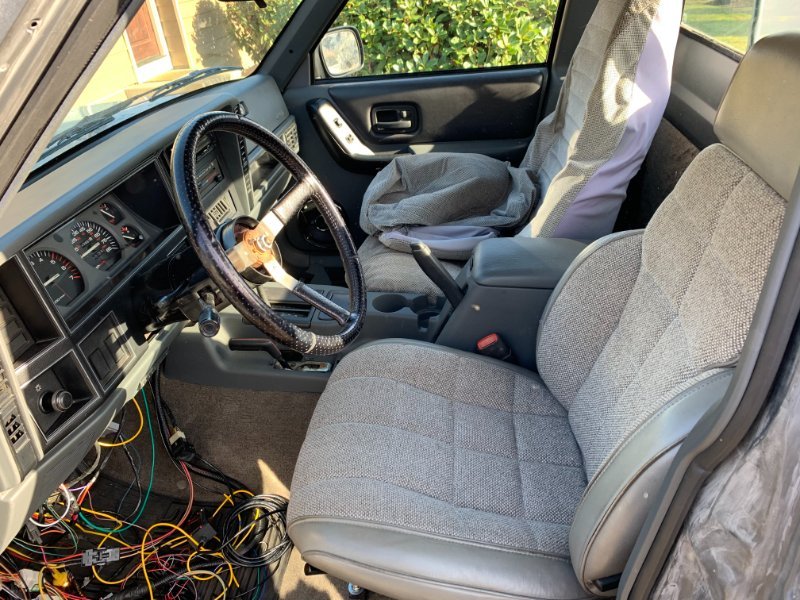
1988 SoCal Jeep Comanche Build
boxyjeep replied to boxyjeep's topic in Member Projects: Your Comanches
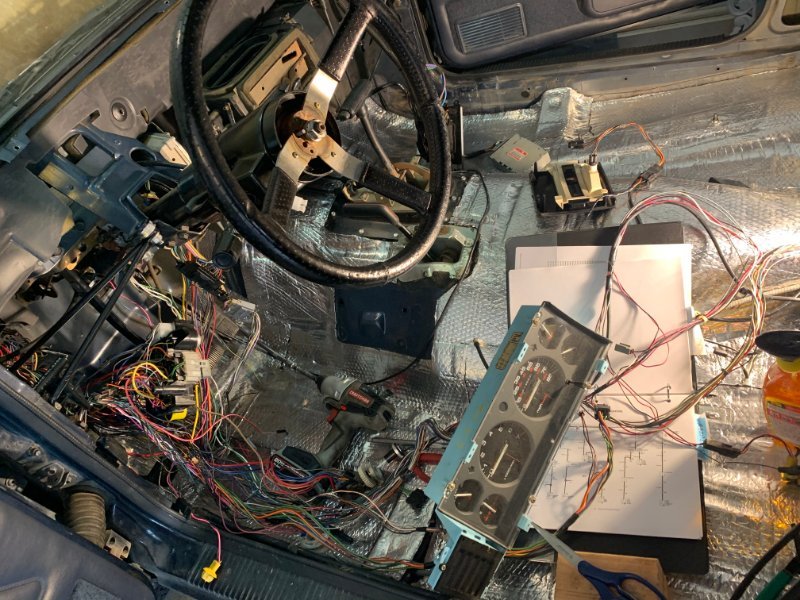
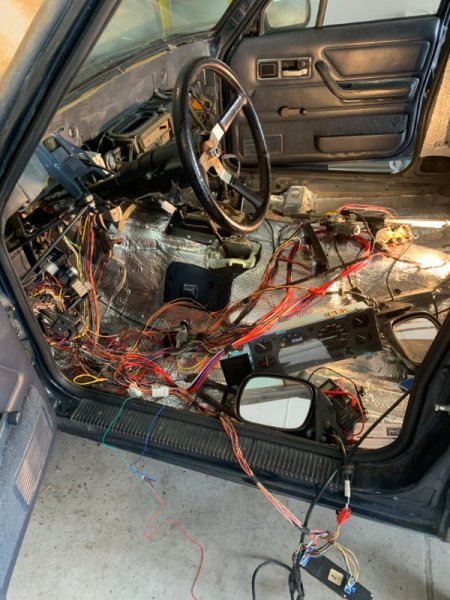
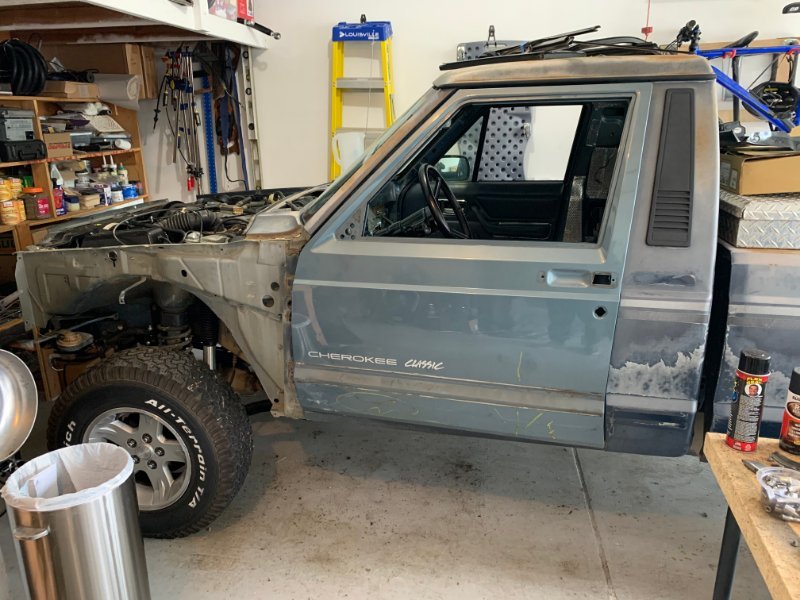
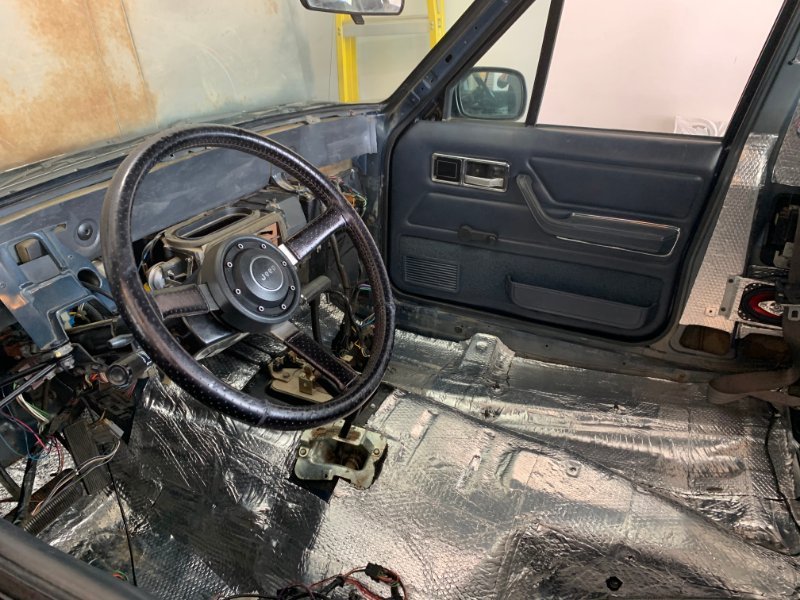
In March 2020, due to Covid my job turned into 100% WFH overnight. I took this opportunity to get the next big phases of the truck done. Primarily replacing the cylinder head, painting the engine bay, cleaning up the wiring, and installing 97+ front clip/doors. This is where things crossed from simple upgrades/fixes to making big changes to the truck. I had gone back and forth for awhile on whether or not I wanted to make the decision to alter the body (as I did get a lot of compliments on the patina), but I originally bought this truck with the though of an eventual 97+ XJ header/clip/dash/door swap. I also converted from column shift to console shift, as well as upgrading to Azzy's NP231 shifter linkage. First thing was pulling out the dash. I was planning on replacing it, since it was super dry and cracked, and also had a ton of ultra-fine dust/dirt particles embedded in the HVAC system. I started cleaning up the wiring and creating a harness for the 97+ doors I had pulled from a local pick-n-pull. This was not fun. My goal was to have full power features (Windows, Locks, Mirrors) using an aftermarket keyless entry/remote start system. I also didn't want to modify the wiring too much, since I planned to eventually upgrade to a 97+ dash and electrical system and wanted it to be plug-and-play. It look awhile and a lot of learning about electrical diagrams, but eventually got there.