boxyjeep
-
Posts
726 -
Joined
-
Days Won
1
Content Type
Profiles
Forums
Gallery
Everything posted by boxyjeep
-
That's not a fun or easy repair. To fix it properly, you likely need to pull the windshield and dash (in addition to the hood and fender). Personally, I would swap in fresh steel from a junkyard XJ.
-
86 2.5l 2wd restoration/work truck
boxyjeep replied to strictlyxjs's topic in Member Projects: Your Comanches
That thing is super clean. Amazing transformation over the years! -
WJ Booster Incompatible with MJ
boxyjeep replied to Salvagedcircuit's topic in MJ Tech: Modification and Repairs
I feel bad after reading this. I was messaging with @commissioneranthony a few weeks ago and he asked about this upgrade/swap and I outlined how I did it in my '88 in a day with no issues (minus the brake light switch). I used the following parts: Booster: CARDONE 5C473163 (RockAuto) MC: RAYBESTOS MC390511 (RockAuto) Adapters you may need: AGS BLAB312, AGS BLAO380 (RockAuto), as well as some 3/16" brake line to flare. Proportioning valve: Wilwood 4444/30 260-11179 (Amazon) Standard Motor Products SLS66 Stoplight Switch (Amazon) I couldn't get the original switch to reliably work (even after filing down the arm), so I installed the SLS66 brake switch in the original cruise control/trans brake switch location (no longer had those) and wired up a relay for the trans brake signal to the TCU. I also removed the load sensing valve in the process. If there is one thing I've learned with these trucks, there will be some frustrations trying to get them reliable. -
To be fair, you could achieve the winter warm up with two of the same keys too... ;-) When I was in the process of rekeying my door locks and glove box, I would accumulate key cylinders when I went to the junkyard. I was then able to pull the tumblers out of them to re-key to match my ignition cylinder (which cannot easily be re-keyed). Same thing can probably be done with 91-96 rear hatch cylinders.
-
1988 SoCal Jeep Comanche Build
boxyjeep replied to boxyjeep's topic in Member Projects: Your Comanches
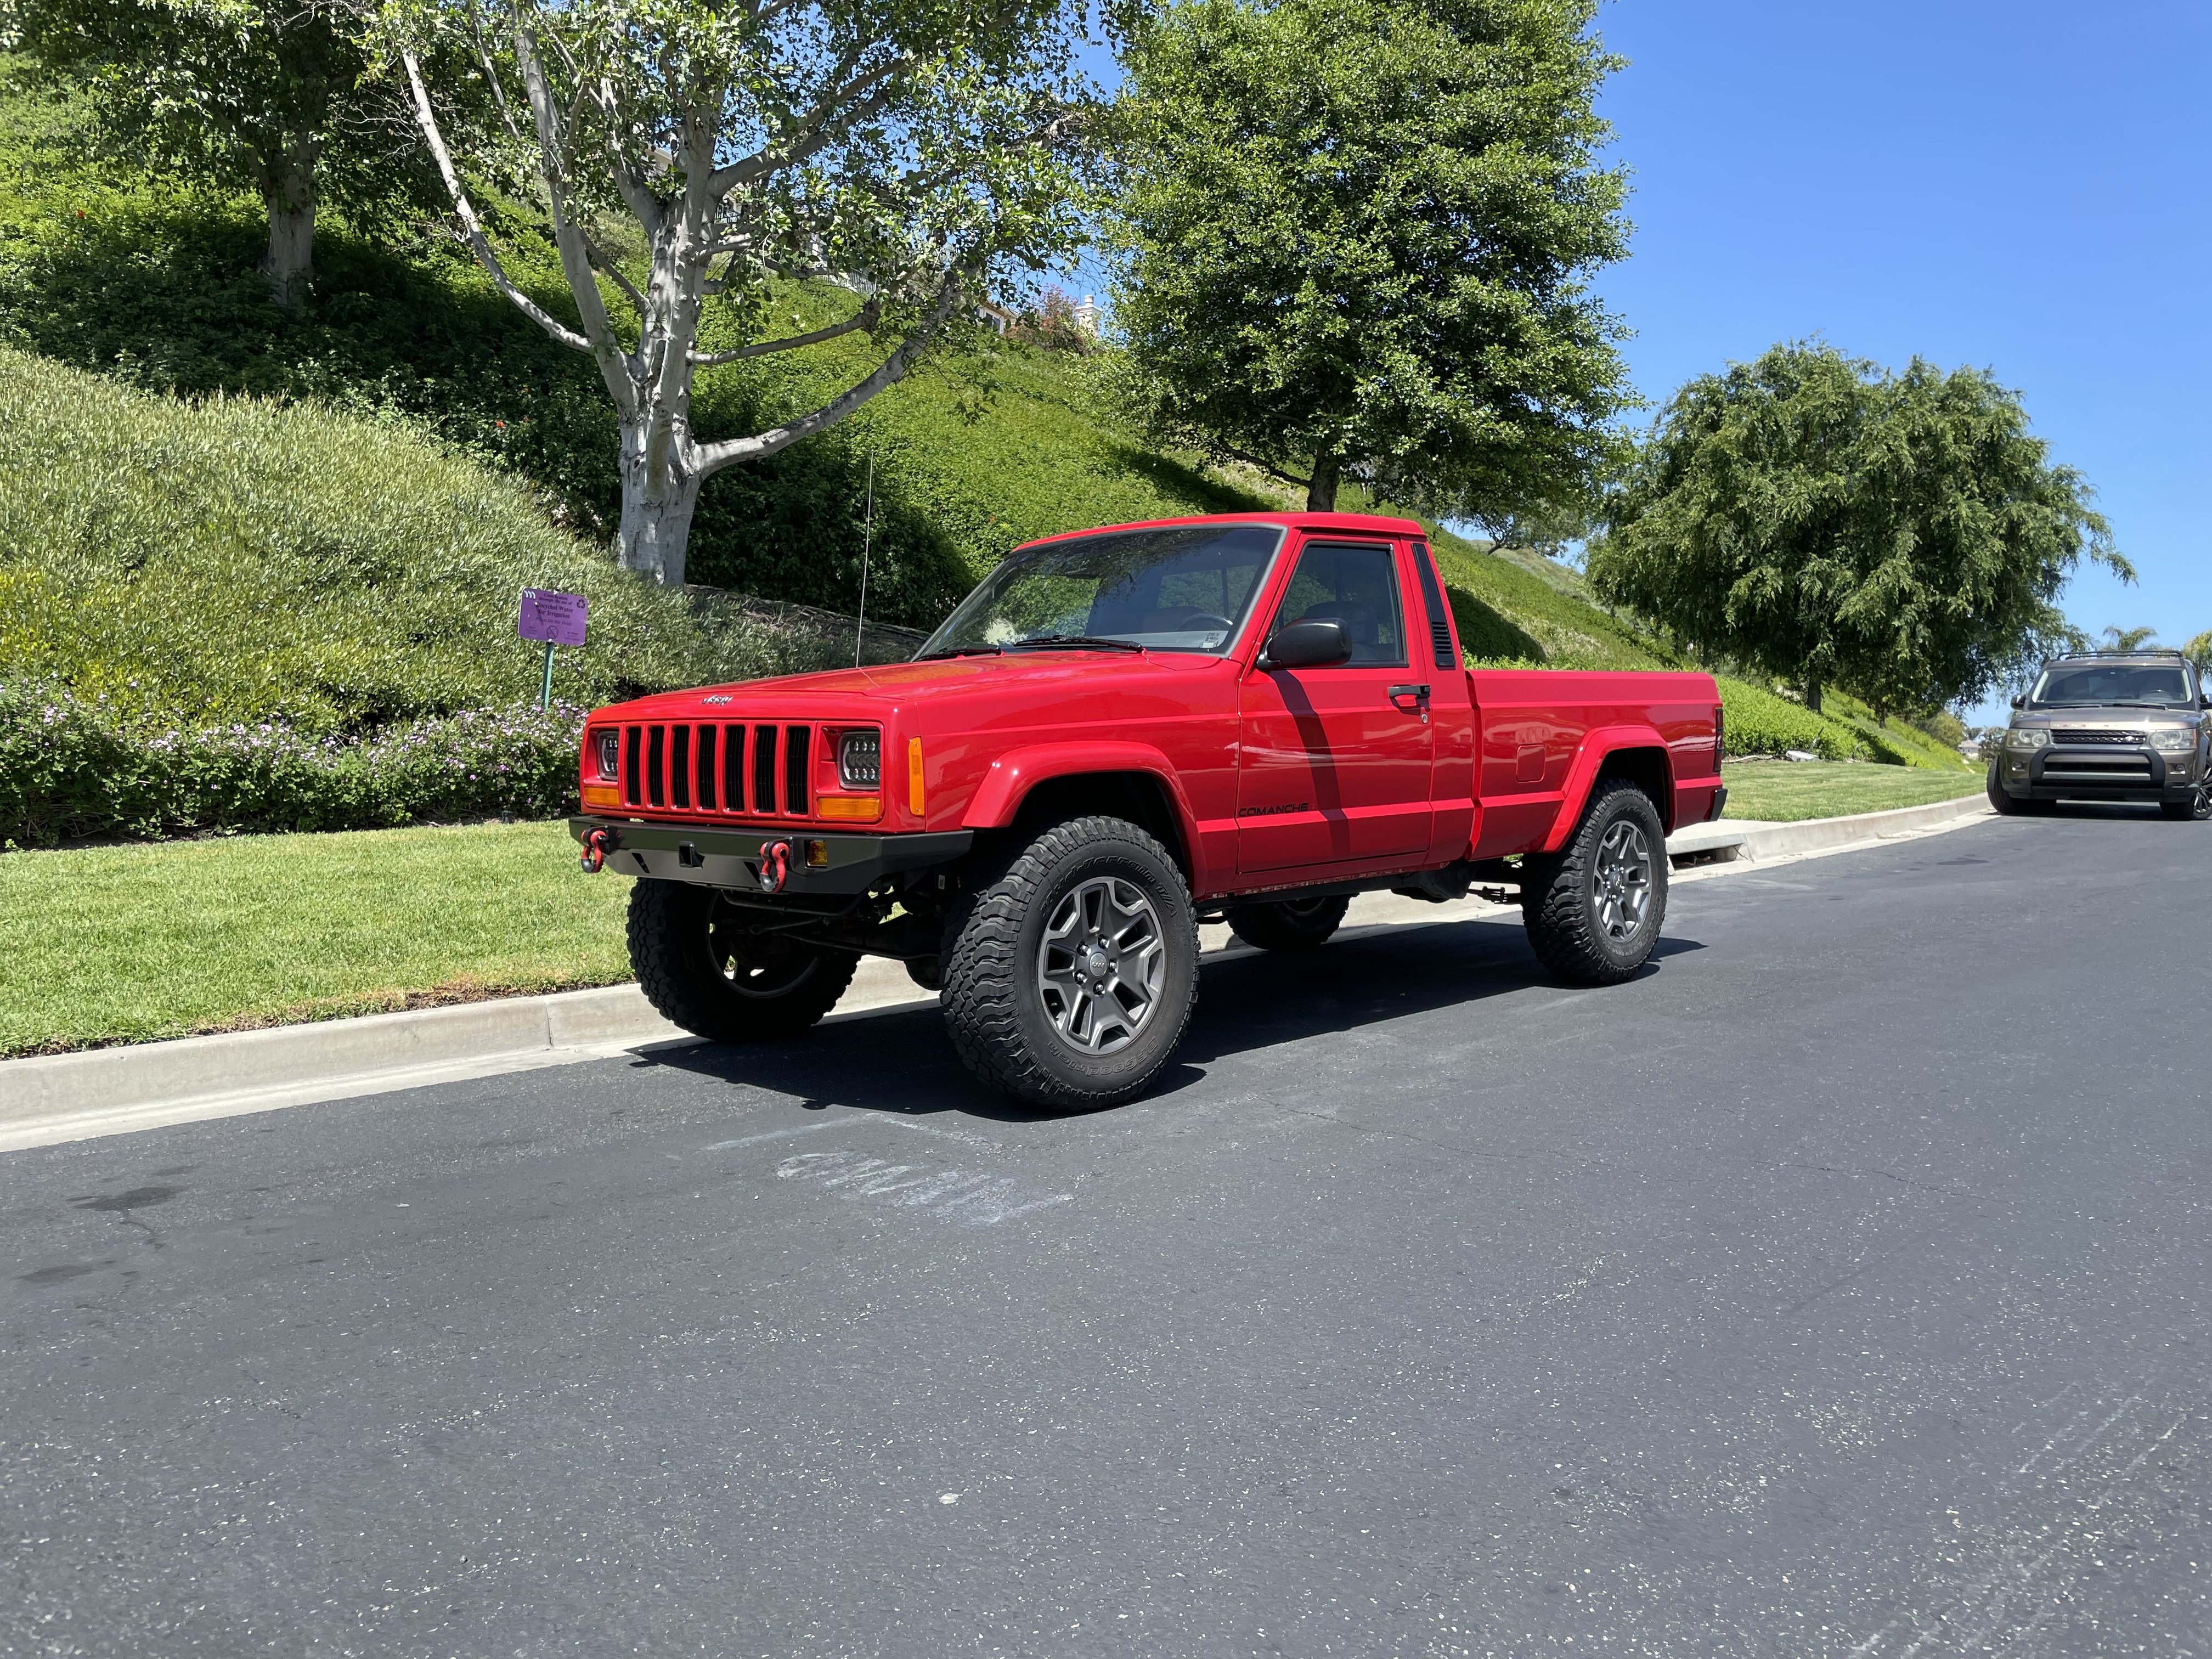
Been making some slow progress on the truck trying to figure out some air/fuel ratio issues. I'm running an ATK 4.6L stroker that I installed in March, however due to needing to pass CA emissions, I am severely limited in any other (noticeable) modifications that may cause me to fail visual inspection. Most notably, I need to have a functioning EGR system which necessitates a RENIX intake manifold, exhaust manifold, intake, cylinder head, etc. I have a bored throttle body and removed the venturi in the stock airbox, but otherwise the truck "appears" original. I tried running the stock 19lb injectors (Bosch P/N 0280155702), but those were slightly too lean and would encounter fuel starvation issues under load @3000k RPM. I took some bad advice from one of the stroker forums suggesting 24lb injectors (Bosch 24.7lb P/N 0280155715), but those were too rich for RENIX engines and "mild" strokers. I thought 23lb (Bosch P/N 0280155703) would be correct, but those were too rich after the truck warmed up (the ECU wouldn't enter closed loop). At this point I stopped playing "swap-a-part" and started looking into how to adjust the fuel pressure at the rail, but it looks like it's only possible with an adjustable fuel pressure regulator. Hesco sells one, but they are currently backordered with no end in sight. After waiting a few weeks and doing a bunch more research on injectors, I determined that 20lb or 21lb would be sufficient and ordered some Bosch 20lb'ers (P/N 0280155909). Still waiting a few more days for those to come in. In the meantime, here's a nice pic I took recently in Dana Point CA overlooking the harbor.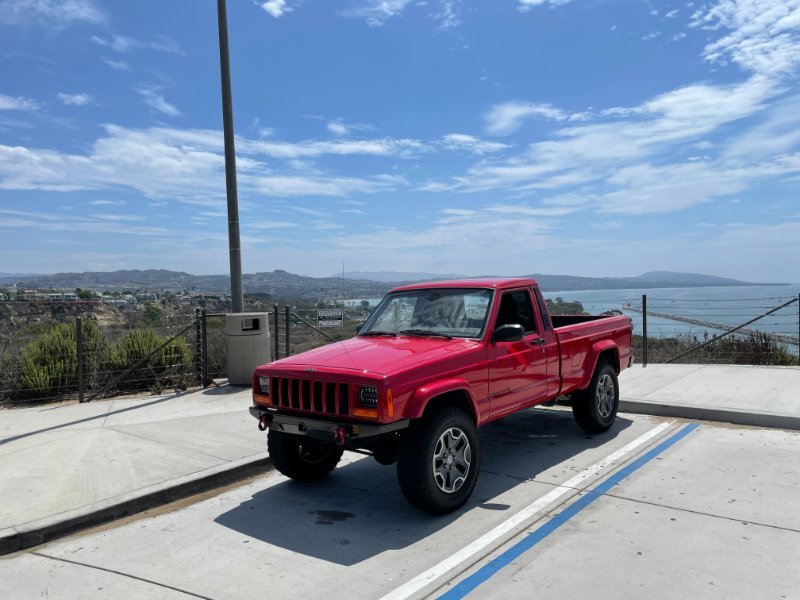
-
I have a 91+ column and 97+ doors. I rekeyed the doors and glove box to match the ignition lock with the newer black plastic "Jeep" key. I'm a big fan of re-keying. Every locked door in my home is a single key and I made sure to do the same with my Jeep. I can't imaging having 2 or more keys for the various locks in my vehicle.
-
WJ Booster Incompatible with MJ
boxyjeep replied to Salvagedcircuit's topic in MJ Tech: Modification and Repairs
I did this swap with those specific parts without issue (beyond having to bend up the firewall seam above the booster). Didn't use a spacer and didn't need to enlarge the hole. Very weird.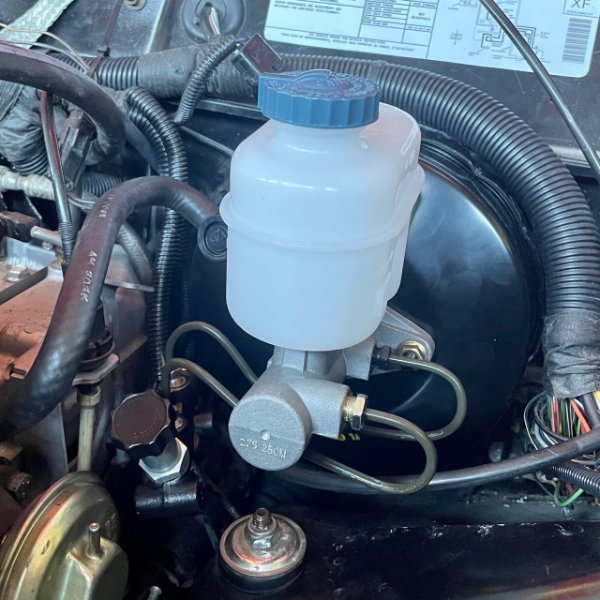
-
Anyone know where to find one of these? I placed an order with Hesco, but they are out of stock for the foreseeable future. Unfortunately, can't find anywhere else that sells these for the Renix fuel rail. I've been playing fuel injector roulette trying to find the optimal AFR in my 4.6L stroker and would like to simply land on fine adjustment of fuel pressure. 19 lb injectors are too small. 23 lb injectors are too large.
-
That is the vacuum switch for your 4WD indicator. There is a valve on the side of the transfer case, which connects back to your front axle vacuum disconnect. When you pull the level into 4WD, this switch is activated by vacuum, this lighting up the "PART-TIME" dash light. Not a great design. I've eliminated the whole vacuum disconnect system on my MJ and switched over to an electric switch on the side of the transfer case (which lights up the dash light).
-
A really clean 89 2WD
boxyjeep replied to pago cruiser's topic in Craigslist/Marketplace/eBay... i.e. Not Your Stuff
Dana 35. Load sensing valve just hanging there. Truck horns... This is one of those trucks that looks good until you start digging into it... -
Part Time Light All Of The Sudden Coming On
boxyjeep replied to JWheeler331's topic in MJ Tech: Modification and Repairs
You might be able to do that. I didn’t have a harness so made my own. -
Part Time Light All Of The Sudden Coming On
boxyjeep replied to JWheeler331's topic in MJ Tech: Modification and Repairs
no, you need to run the wire and tap it in. I did it. Works well. -
I got mine a couple weeks ago. It's amazing.
-
Part Time Light All Of The Sudden Coming On
boxyjeep replied to JWheeler331's topic in MJ Tech: Modification and Repairs
I removed all the CAD vacuum junk and switched over to an electronic indicator switch on the transfer case. Not too hard to do. -
has anyone found a suitable replacement clock?
boxyjeep replied to ruralandalone's topic in MJ Tech: Modification and Repairs
REM clock! -
Jeep Cherokee KL Leather/Heated Seat Swap
boxyjeep replied to boxyjeep's topic in MJ Tech: DIY Projects and Write-Ups
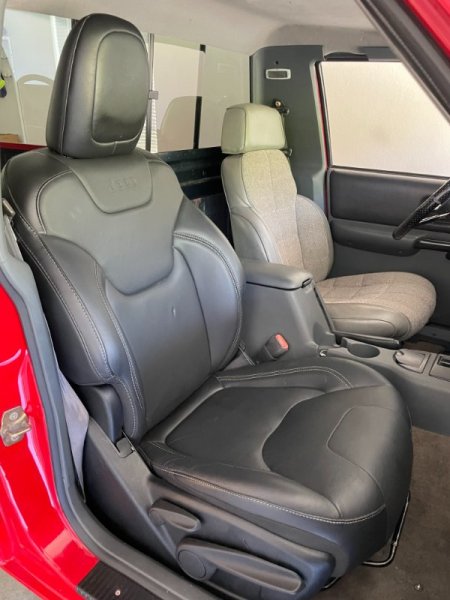
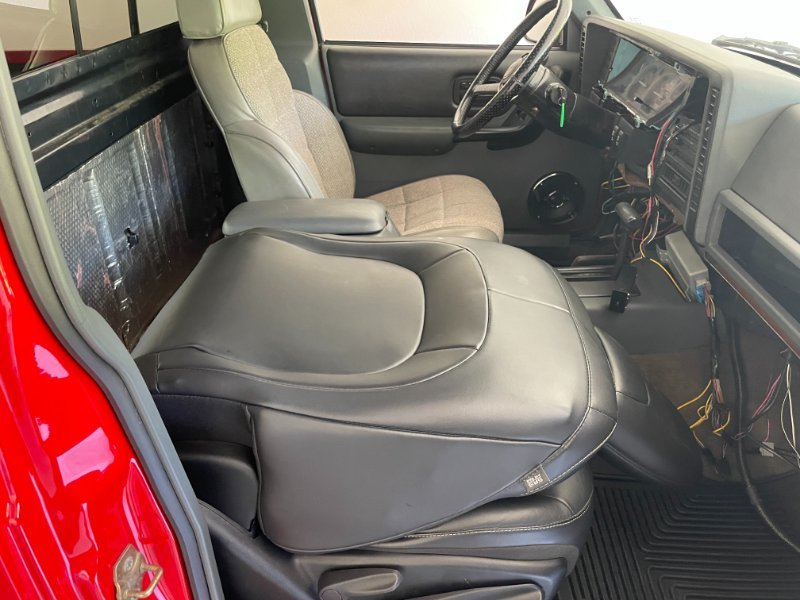
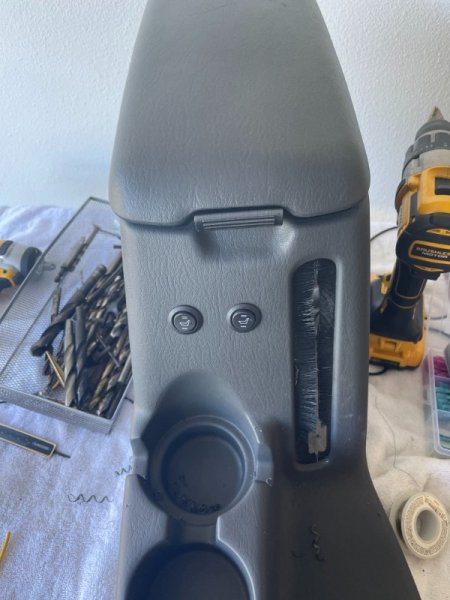
I've got the drivers seat in and mounted up. It sits a little bit high--I'm 5'10" and if I wear a hat, it will slightly touch the headliner. I'm going to drive it for a bit and see if I want to cut the rear mount down a bit. Power adjusters for horizontal adjust (front-back), rear lean, and lumber support all work as expected. I had to remove the vertical adjust as there would be no place to go (up or down) with how tight the transmission tunnel is and how I had to modify the frame. I have the wiring running through the center console and also connected up the heated seats. There was only a single wire going to each "panel" in the base and rear of the seats. The KL uses an electronic heated seat module that receives a digital input from the CAN BUS and likely modulates the temperature with a PWM controller and embedded thermometer in each seat. I'm hoping that a single analog switch will work ok. I'm in southern CA, so I doubt I will use them much. Up next is re-doing the passenger mounts. I'm not 100% happy with where the seat ended up, so I'm going to be cutting them off and slightly moving the seat more inboard to match the alignment of the drivers side. If I were to do this again, I would probably have just bought a set of Corbeau seats and brackets and saved myself a few weekends worth of work.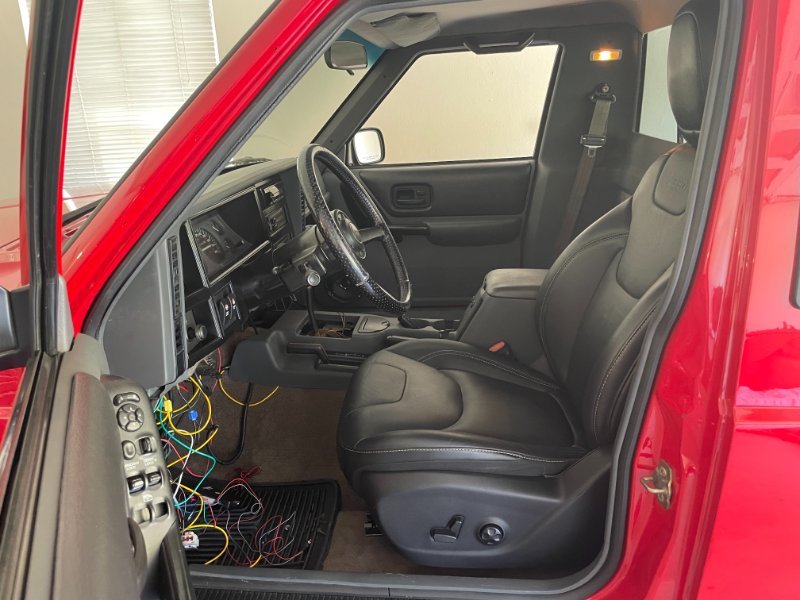
-
Jeep Cherokee KL Leather/Heated Seat Swap
boxyjeep replied to boxyjeep's topic in MJ Tech: DIY Projects and Write-Ups
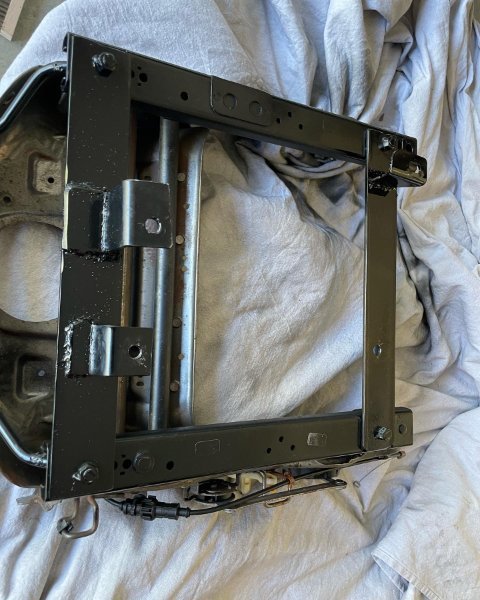
Drivers seat has been a headache to say the least. I can't believe how wide the transmission tunnel is. I've wrapped up fabricating all the brackets and now just waiting for the paint to dry before putting everything back together. Hoping to have this done this week.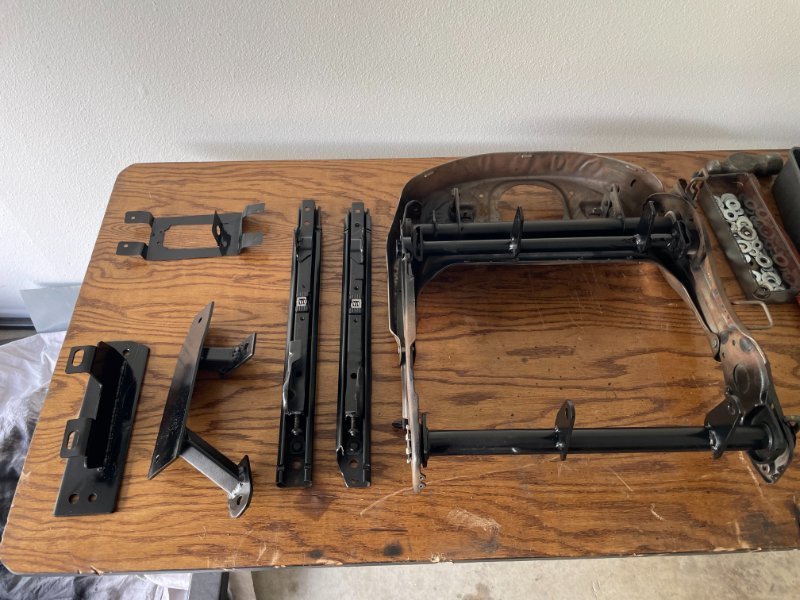
-
Looking good! Thanks
-
@Pete M Thanks!
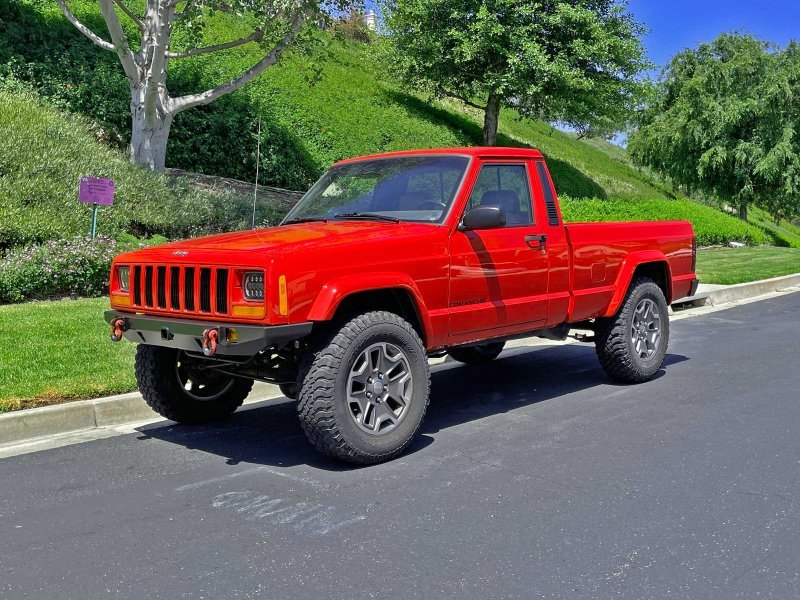
-
86-92 Jeep MJ Reproduction Tail Light Housings
boxyjeep replied to Dzimm's topic in Vendors- members making products for MJs
Have you thought of making any with improved/larger LED lights instead of the standard bulb sockets? -
Can we increase this? It's limited to 0.05MB, which is realllllly small. Very tough trying to scale down a picture to this. Can we possibly bump to even 0.1MB (100KB)?
-
Can you do other size balls?
-
1988 SoCal Jeep Comanche Build
boxyjeep replied to boxyjeep's topic in Member Projects: Your Comanches
Just made a how-to write-up on installing 2014+ Jeep Cherokee KL seats into my truck: -
Jeep Cherokee KL Leather/Heated Seat Swap
boxyjeep replied to boxyjeep's topic in MJ Tech: DIY Projects and Write-Ups
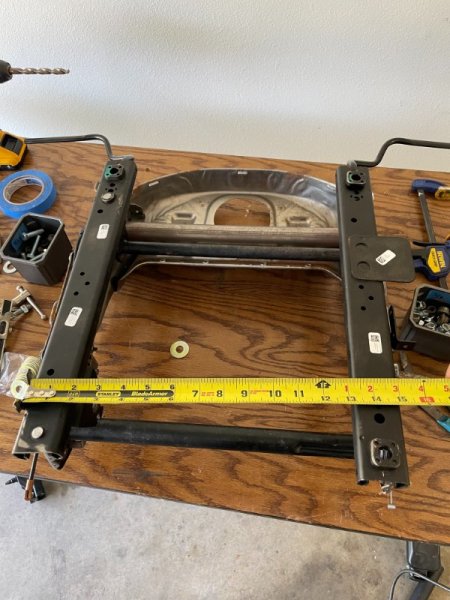
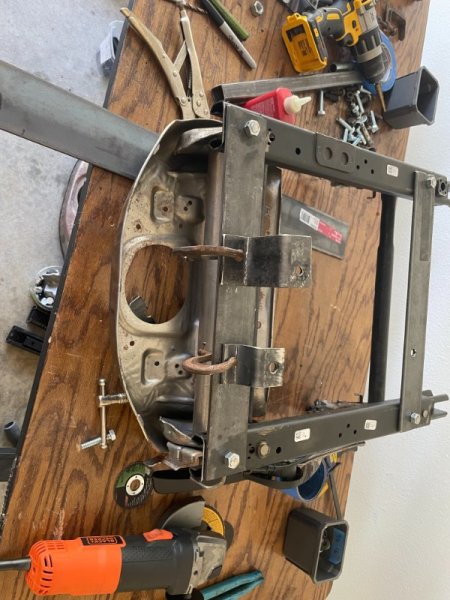
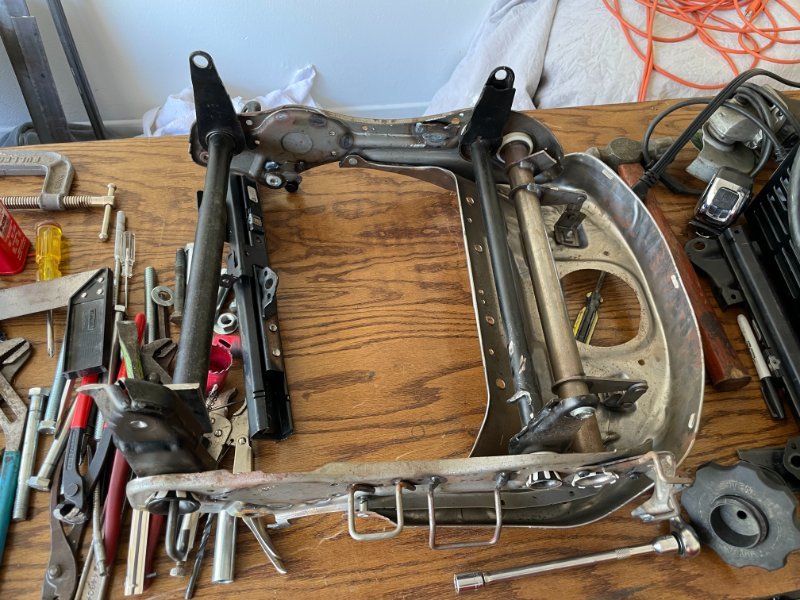
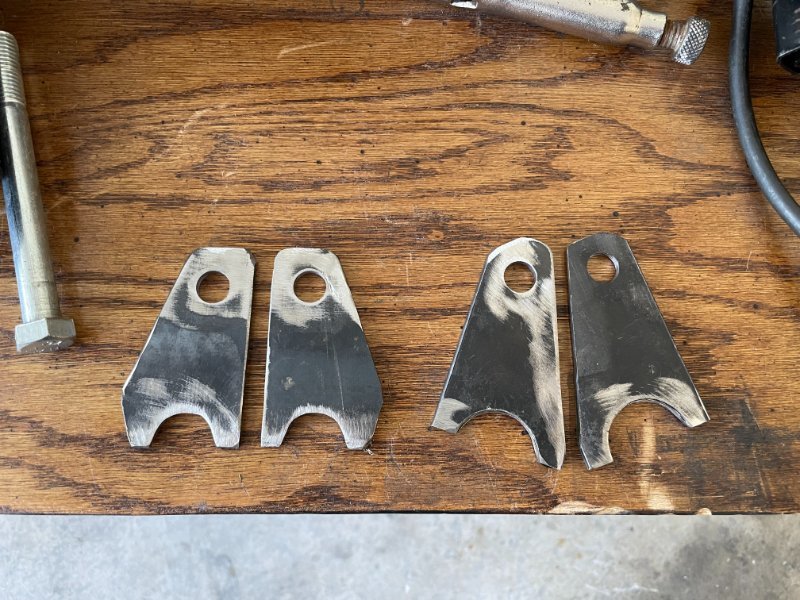
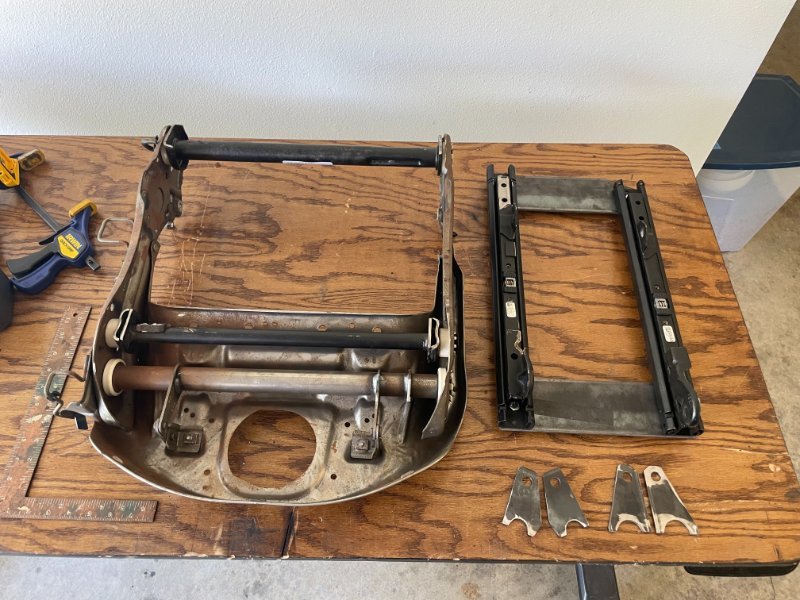
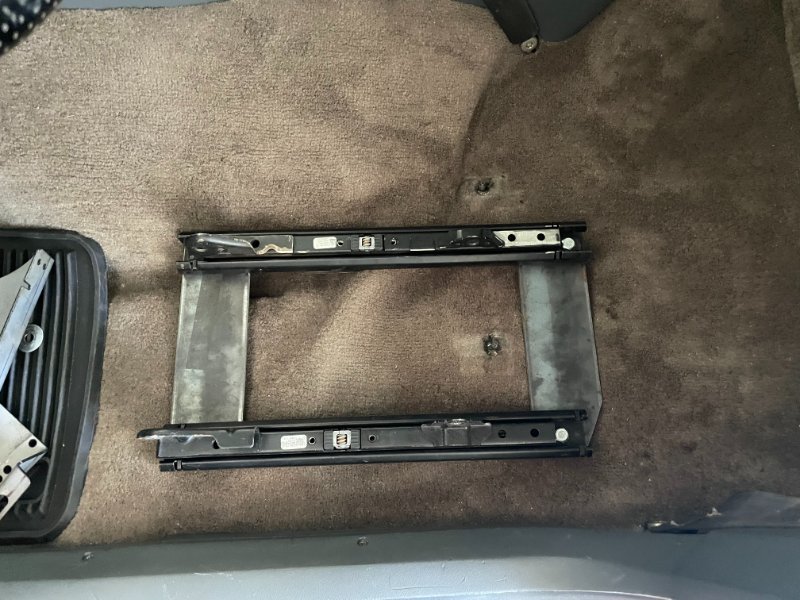
Drivers side is a lot more complicated. It has power adjusters for seat height, front-to-rear slide, and front-of-seat height. Going through a few iterations of seeing what I could remove to still fit the sliders, eventually found that everything needed to be removed: As you can see, the brackets that attach to the sliders are mounted to steel tubes. Unfortunately, due to the reduced floor pan width from the drivers side transmission tunnel, spacers would need to be ~6" long and would likely bend. To solve this, I fabbed some rudimentary replacement brackets and cut off the originals: I then built the cross-brace system for the sliders using 3"x3/16" steel: Situated in the truck--will likely be cutting down the adapter brackets that I have for the front and building something custom for the rear. That's where we stand so far. I need to build those mounts, attach the slider assembly to the base of the seat, and then see what power adjusters I can salvage. It will definitely have front-to-rear power, and hopefully at least one of the vertical adjusters. After that's all done, I'll need to get the power/heat wired in without setting off the airbags :-)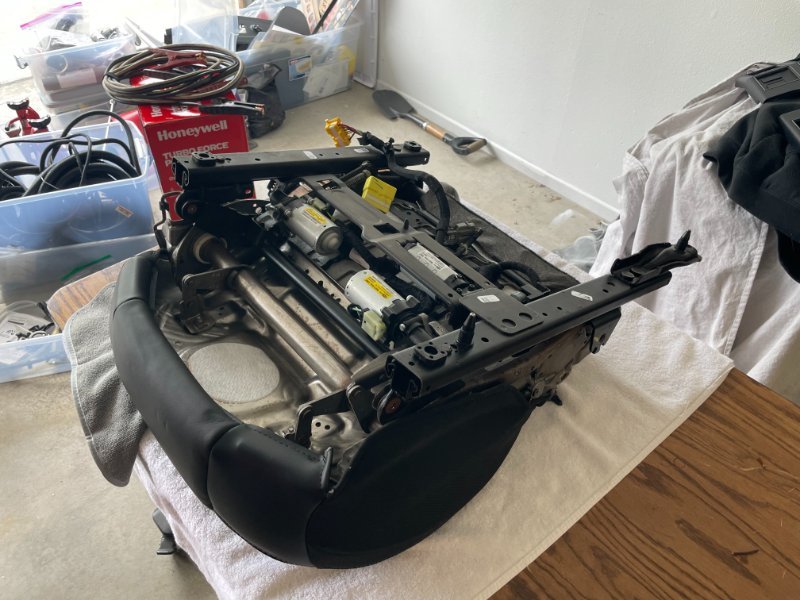
-
Jeep Cherokee KL Leather/Heated Seat Swap
boxyjeep replied to boxyjeep's topic in MJ Tech: DIY Projects and Write-Ups
I was originally going to start on the drivers side, but due to the transmission/transfer case hump, I decided it would be easiest to do the passenger side first. After some measurements, I found that the seat sliders were a bit too wide apart to fit into the Comanche. I disassembled the seat and drilled out the slider rivets and swapped them from left to right with some washers as spacers. This netted about 3-4" less track width which would fit on the floorpan. The only problem with this was that the forward-backward adjuster bar needed to be re-oriented. Despite attempting to get the slider apart, these are not removable. I ended up cutting it off, rotating, and then welding it back together. I had a set of universal seat mounts that one of the vendors sells on here that I was originally going to use, but they placed the seat too high. I ended up creating some very simple brackets and welding them to 2"x3/8" steel that I used for cross-braces. Not my best welds, but should hold up just fine. The rear cross brace has mount that is flat on the floor. After getting the seat back together and installed, it's a very tight fit, but works. The fold-down capability is also very nice: