


ghetdjc320
-
Posts
5079 -
Joined
-
Last visited
-
Days Won
1
Content Type
Profiles
Forums
Gallery
Everything posted by ghetdjc320
-
I’d be up for that! That way members will be active when I post lol. About 4pm my time comanche club goes silent.
-

Upgraded Headlights
ghetdjc320 replied to GrandComanche's topic in MJ Tech: Modification and Repairs
I used to use an eBay harness before swapping to HID’s the male headlight adapter connector always had pins coming loose. The wiring was significantly undersized as well. The amount of insulation on those wires makes them seem 14awg but the actual copper was right at 18awg. The included relays were not meant to handle the constant on duty either and had to be replaced in short order. I’d just build my own harness with some quality sealed motorcycle style relays and quality wire and connectors. I’d also do a 30/40 amp relay setup vs the 30/30 setups they normally come with. -
Jeep comanche trailer wiring harnesses
ghetdjc320 replied to 88mjsally's topic in Vendors- members making products for MJs
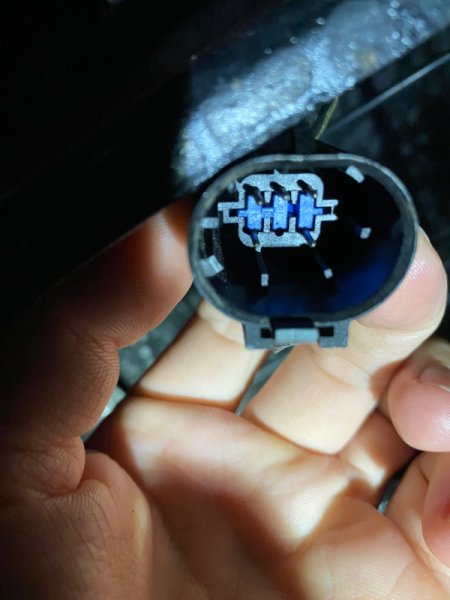
Any ideas on this connector for my tail lights on my 91? Doesn’t seem to be what I’ve seen on here.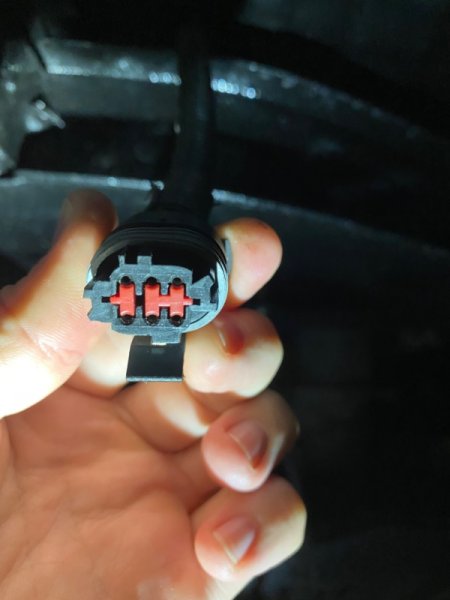
-
Jeep comanche trailer wiring harnesses
ghetdjc320 replied to 88mjsally's topic in Vendors- members making products for MJs
-
91 HO Shut Off While Driving
ghetdjc320 replied to kryptronic's topic in MJ Tech: Modification and Repairs
If either of those the relays are failing intermittently that could cause the issue. Other issue could be the ecu connector. You can try removing it, cleaning it all out and reinstalling. The ASD circuit basically feeds power to the injectors and coil so the ecu can control the ground side pulse. -
91 HO Shut Off While Driving
ghetdjc320 replied to kryptronic's topic in MJ Tech: Modification and Repairs
Have you tried replacing the ASD relay in the power distribution center. Or fuel pump relay also? -
HVAC Control Panels, Finally!
ghetdjc320 replied to ghetdjc320's topic in Vendors- members making products for MJs
Sounds good. Just shoot me a PM before you send anything so I can make sure you have minimal down time -
HVAC Control Panels, Finally!
ghetdjc320 replied to ghetdjc320's topic in Vendors- members making products for MJs
First batch of two completed.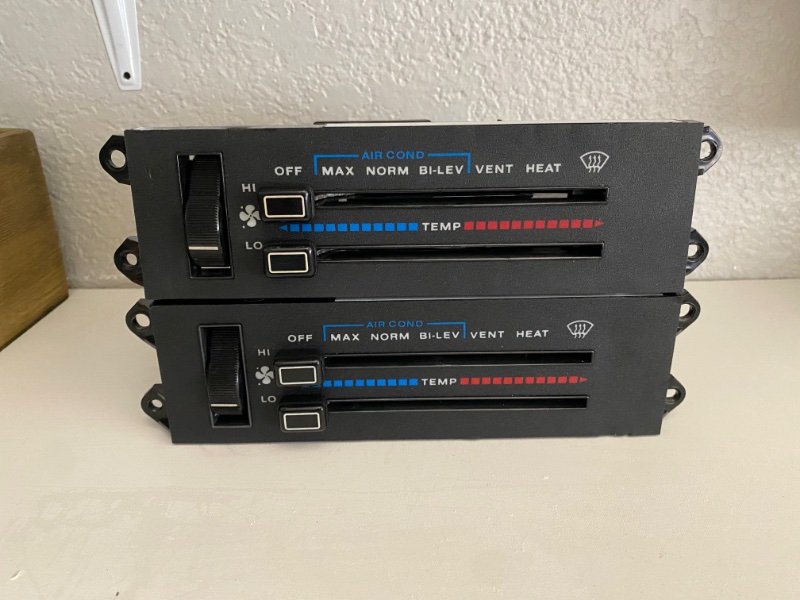
-
HVAC Control Panels, Finally!
ghetdjc320 replied to ghetdjc320's topic in Vendors- members making products for MJs
I would need an original to do that with but yes it’s possible. -
HVAC Control Panels, Finally!
ghetdjc320 replied to ghetdjc320's topic in Vendors- members making products for MJs
Anytime! -
HVAC Control Panels, Finally!
ghetdjc320 replied to ghetdjc320's topic in Vendors- members making products for MJs
One of these units coupled with a restored oem radio from @Minuit a fan plug from @schardein and maybe some new switch bezels and your factory dash will be factory new and optioned out. -
HVAC Control Panels, Finally!
ghetdjc320 replied to ghetdjc320's topic in Vendors- members making products for MJs
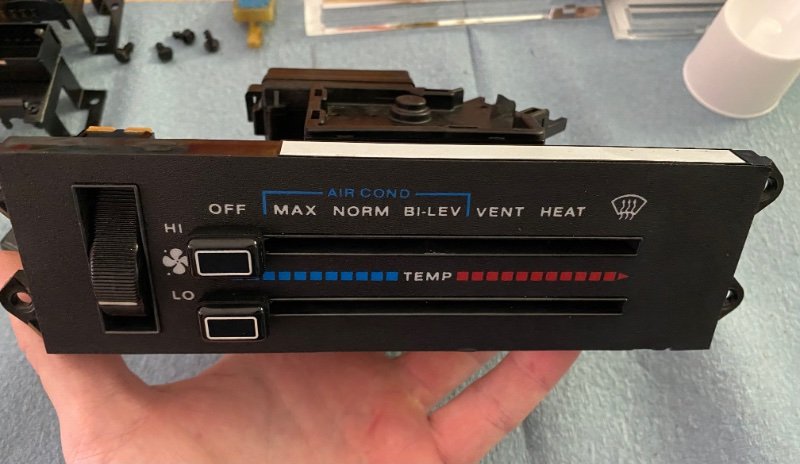
Here is the first completed panel: @Rubikahn and @GrandComanche You guys have first dibs I’m going to set aside a couple for myself at some point as well. Controls are smooth as butter. The illumination back panel reflectors are hand polished. I tested these with both LED and incandescent “74” style bulbs. Both work very well but I would recommend an LED with a slightly orange glow. That way you get the correct color match to your other accessories but more brightness.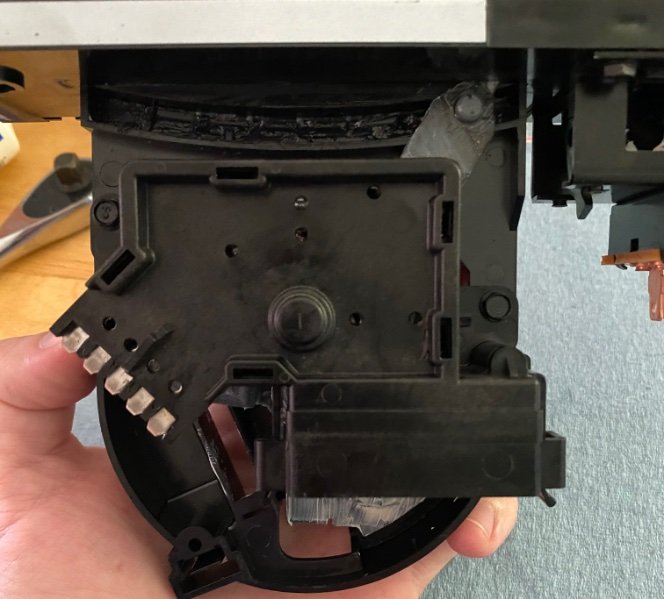
-
HVAC Control Panels, Finally!
ghetdjc320 replied to ghetdjc320's topic in Vendors- members making products for MJs
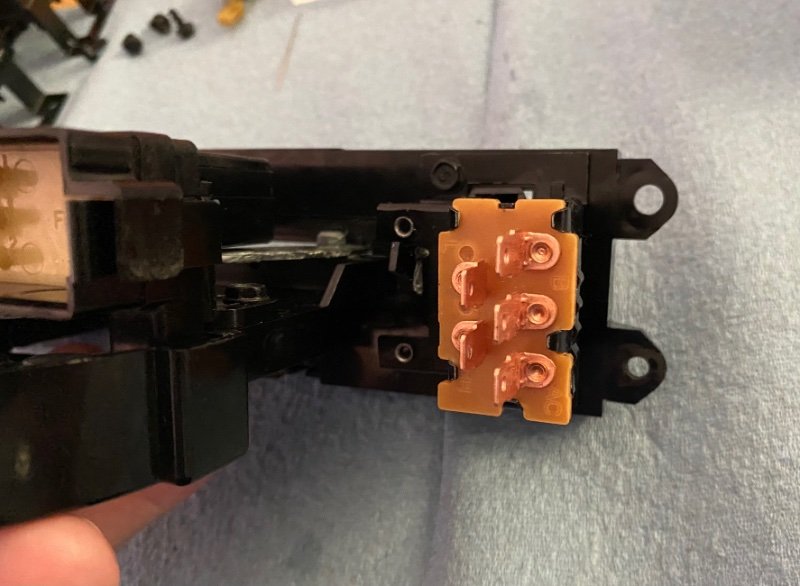
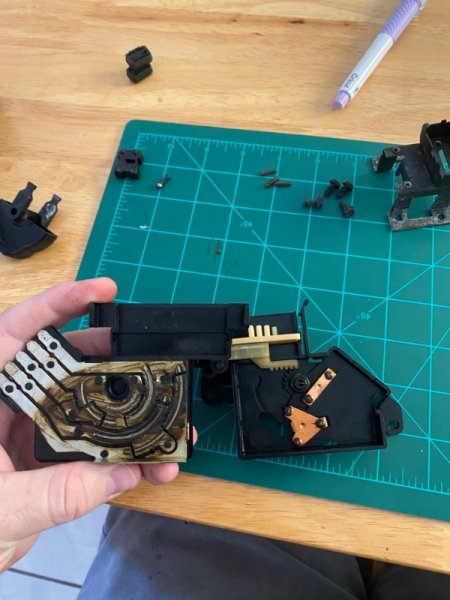
Electronics all disassembled and degreased. Housings were acid stripped to bare metal. All contacts will get a nice polish for the best conductivity before reassembly.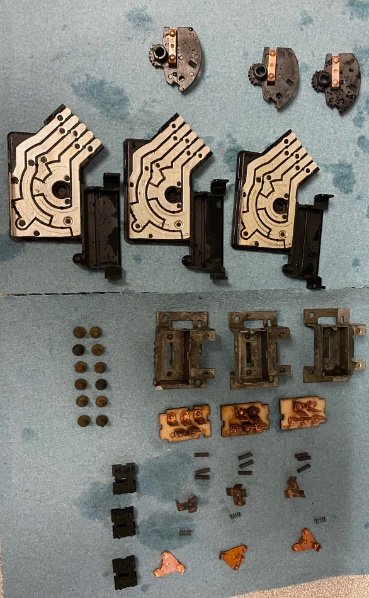
-
HVAC Control Panels, Finally!
ghetdjc320 replied to ghetdjc320's topic in Vendors- members making products for MJs
They are fully illuminated yes. I’ll some pictures of the nighttime illumination in the next day or two. -
HVAC Control Panels, Finally!
ghetdjc320 replied to ghetdjc320's topic in Vendors- members making products for MJs
PM coming your way -
HVAC Control Panels, Finally!
ghetdjc320 replied to ghetdjc320's topic in Vendors- members making products for MJs
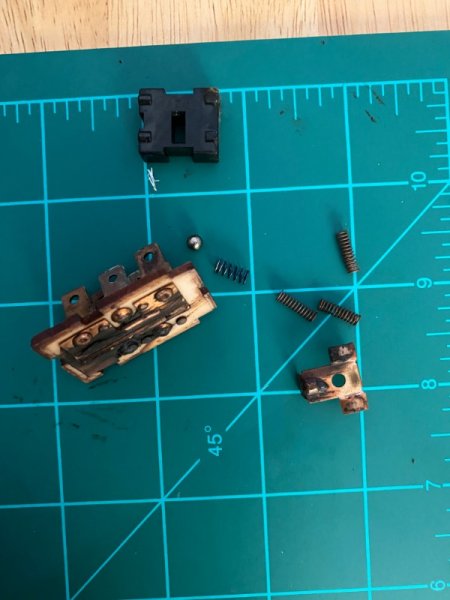
The factory Indak fan motor switches are being meticulously restored. All previous grease and oxidation is removed, the contact rivets are tightened, pcb boards cleaned, housings stripped and refinished. They are absolutely awesome! Here are some restored panel bezels as well. These have 3 additional coats of the matte factory style finish for extra protection. Buttons are being restored as well including the white striping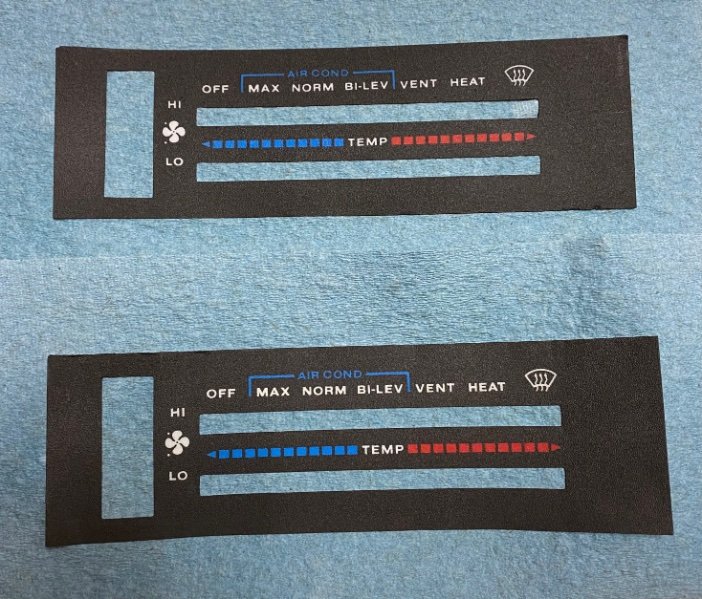
-
HVAC Control Panels, Finally!
ghetdjc320 replied to ghetdjc320's topic in Vendors- members making products for MJs
By the way, while changing the panel, be sure to inspect and/or swap your fan blower plug. @schardein carries some new plugs and pigtails -
HVAC Control Panels, Finally!
ghetdjc320 replied to ghetdjc320's topic in Vendors- members making products for MJs
-
HVAC Control Panels, Finally!
ghetdjc320 replied to ghetdjc320's topic in Vendors- members making products for MJs
Alright, progress has been made at last! I have several panels all stripped down as well as a supply of restored parts and pieces. I have also collected a supply of new fan switches when the original Indak switch is no longer rebuildable. These panels function as new and are completely restored using as many if not all original parts. I will have a couple available by the end of the week but have several more in the works. A complete restored panel is $150 which includes a $25 refundable core charge. If you would like to have your original model restored that service is $125. I take a painstaking amount of time trying to save all the original pieces for these units but on occasion I will use a few small replacement parts such as springs, e clips, screws, contacts etc. Will post some pics of restored units in a few days. -
1991 Eliminator Resto-Mod
ghetdjc320 replied to ghetdjc320's topic in Member Projects: Your Comanches
I cut an polished the roof the other day. That paint had been curing for about 3 months now so it ready to go. Went in order starting with 800, 1000, 1200, 1500, 2000, 3000 grit paper all wet sanded. Finished with 3m trizact single step polish. Ideally I’d cut it to 5000 grit but I have a pretty potent DA that was able to make quick work of the 3000 grit with that polish. Came out great. Next l coated it with Migliore ceramic coating. I used the “Acqua” coating which is made for boats since I had plenty left over from my jet ski. The level of salt spray and rain makes this actually a very good fit for this truck. Stuck the truck under the canopy to let it all cure for 24hrs. Also did the windshield and door windows with rainx after a dawn soap and razor blade treatment. Turned out great. I had forgotten how much better the windshield and wipers perform in the rain with rainx (and similar products). -
Those are some nice parts there! Was the 44 out of the chief?
-
Agreed, that should have been a recall for every MJ parking brake they made. My YJ one was equally terrible. I have had good success modifying the stock units though. Does require a good bit of fab work but holds exceptionally well now.
-
D30 Carrier Break and Locker
ghetdjc320 replied to 89 MJ's topic in MJ Tech: Modification and Repairs
Keep in mind that there is no difference between an HP and LP D30 carrier. The difference is in the gearset -
D30 Carrier Break and Locker
ghetdjc320 replied to 89 MJ's topic in MJ Tech: Modification and Repairs
First off, apologies to the OP for this side topic lol. @Eagle Both Auburn units use clutches and even require limited slip additive. This includes both the open/locked and the lsd/locked models. On the original select a loc (formerly known as the infamous Ected), there is no actual “locking” gear mechanism like you would find on a full case selectable aftermarket locker such as an ARB. The actual “locking” friction comes from the clutch plates. The electromagnet in the original Auburn select a trac is a way of applying extra pressure to the clutch packs on-demand. Here is an explanation directly from Auburn: The center block also applies force to the opposite side gear (6) to compress the clutch pack (7) and provides the vehicle with a solid axle assembly that transfers 100% of the torque to both wheels, Taken from this source: https://auburngeardiffs.com/select-a-loc-ltd-slip-to-lock/ And here is a picture. Notice the large clutch pack (figure 7) that rides just under the spider gear. I have not dug into the Gov-Loc to see exactly how their clutch packs are used but I wonder if it’s not similar in the sense that they increase the pressure on the clutch packs in order to “lock” the diff. Obviously the method of activation is different. Furthermore, the gov-loc isn’t actually a locker in the sense that it requires slip to activate. It’s more like a “very limited slip”. The torque bias after engagement seems to be pretty good though.
-
D30 Carrier Break and Locker
ghetdjc320 replied to 89 MJ's topic in MJ Tech: Modification and Repairs
It may be a LP D30 but the actual carriers are the same. Only the ring and pinions are different.