


cruiser54
-
Posts
9413 -
Joined
-
Last visited
-
Days Won
14
Content Type
Profiles
Forums
Gallery
Everything posted by cruiser54
-
This would be a good mod to do: CRUISER'S MOSTLY RENIX TIPS IMPROVING BLOWER MOTOR PERFORMANCE NOVEMBER 28, 2015 CRUISER54 28 COMMENTS On 1984 to 1990 MJs and XJs, the blower motor’s factory grounding point is on the driver side inner fender under the sheet metal screw. This ground is shared with windshield wipers, front windshield washers, rear windshield washers, AC clutch relay, fan control relay, fog lamps, fan motor, headlamps, front turn signals, front side markers, and park lamps. So your blower motor has its ground point 10 feet away from where it is located!! What we’re going to do is leave that ground intact and also ground the blower motor on the passenger side inner fender much closer to the blower motor itself. This will also benefit the other components on the factory ground circuit. Take this opportunity to refresh the factory ground as a matter of course. Remove the screw, scrape the surface to bare metal and reinstall the screw securely. Here’s what I do to get the ground much closer to the blower motor and add another ground point to this overloaded ground circuit. Find the blower motor connector on the passenger side. Red and Black two wire connector. Find a location where the black wire can be made to reach the passenger side inner fender, and cut the wire. You may have to do some rerouting of the harness to achieve this. Take both cut pieces of wire and put them together into a yellow eyelet and crimp. Fasten the eyelet to a place on the passenger side inner fender with a sheet metal screw after applying OxGard to the contact surfaces. Be sure to scrape the attaching point on the fender to bare metal first. Your blower motor will now turn faster and last longer, and the other electrical components on the circuit will benefit from a better ground path.
-
You guys need to keep grabbing those ECUs whenever you can and keep your old one as a spare. Smokeyyank's experience is typical. The trick to replacing them is pulling the ECU toward you on its bracket and removing the 3 nuts to get it off.
-

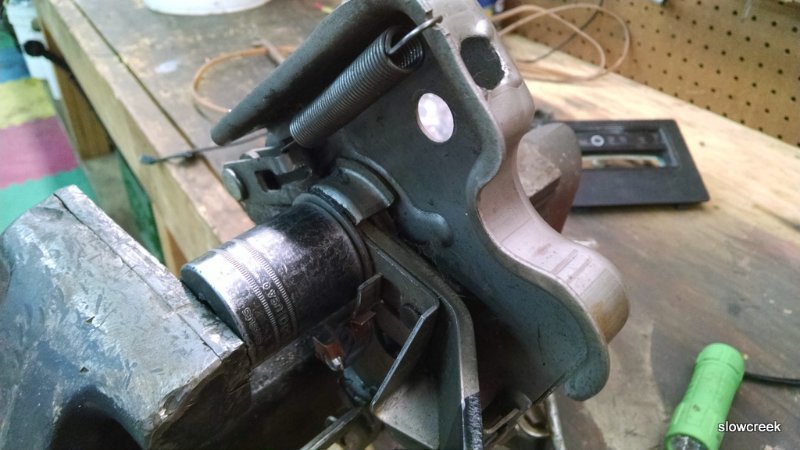
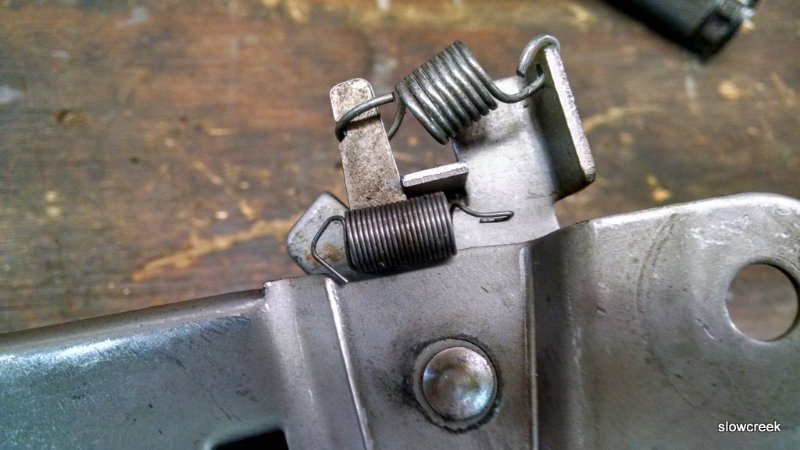
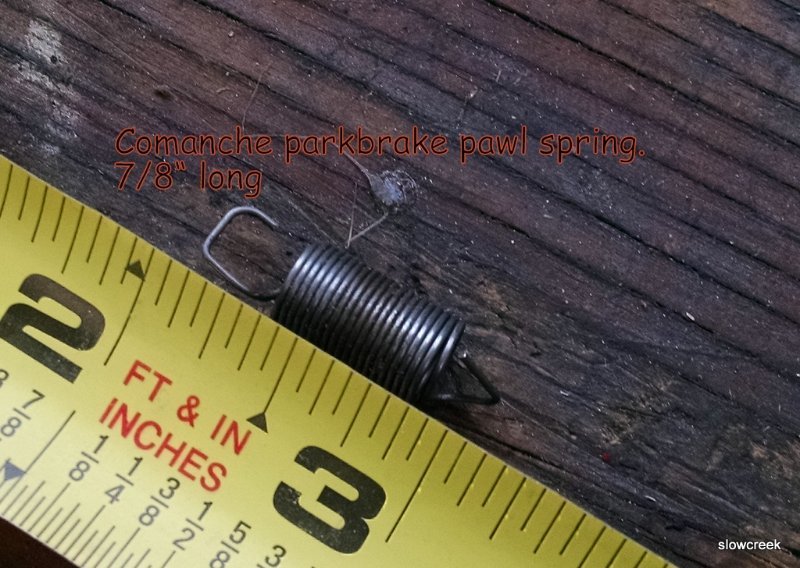
Parking brake pedal issue
cruiser54 replied to Cali Steve's topic in MJ Tech: Modification and Repairs
There was a recall on those mechanisms. I fixed mine with a stronger spring.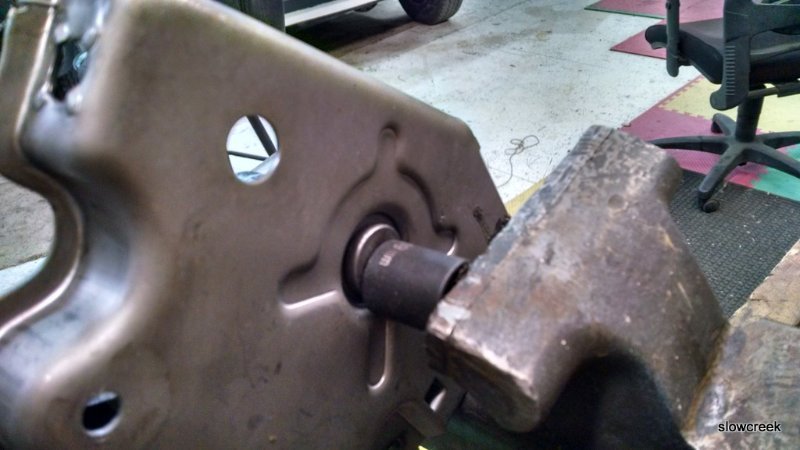
.jpg.59f8b94a958ec120741c471fc90b03ef.jpg)
-
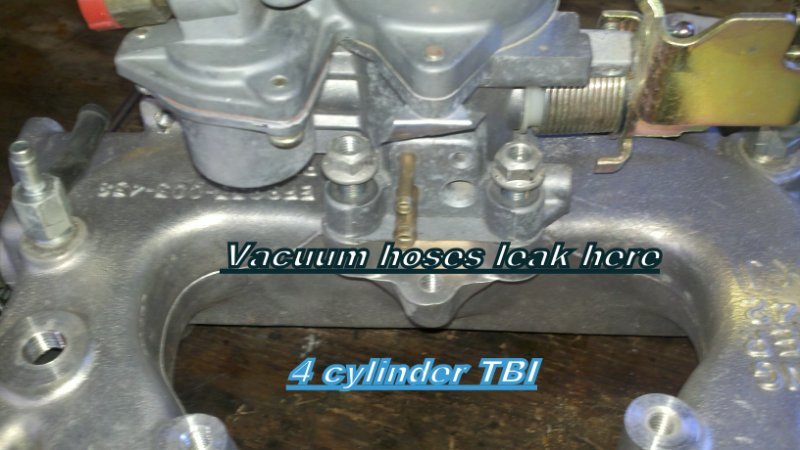
You MUST check that the intake and exhaust manifold fasteners have not loosened up. Also, the hoses pictured below.
-
Intake manifold leak?
-
That's all good.
-
Way to hang in there.
-
Have you completed Tips 1 through 5 at www.cruiser54.com? Also check this:
-
Shifting into 4 wheel drive while not moving
cruiser54 replied to Piilgrim82's topic in MJ Tech: Modification and Repairs
What are you trying to save by NOT using the 4WD? You're stepping over dollars to pick up pennies if it's wear you're worried about. I would do the CAD elimination just because they're known for failure when you need 4WD the most. -
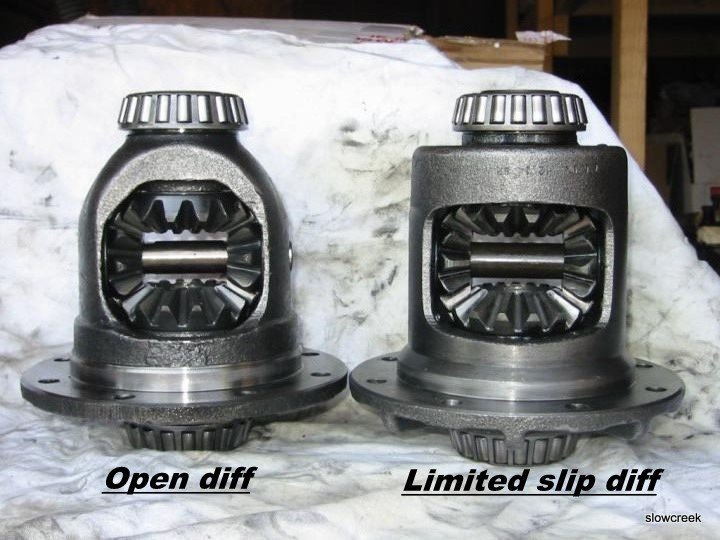
Dana 44 ID - Open or LS and other questions
cruiser54 replied to Dammerung's topic in MJ Tech: Modification and Repairs
-
Dana 44 ID - Open or LS and other questions
cruiser54 replied to Dammerung's topic in MJ Tech: Modification and Repairs
Mine is 4WD -
excellent plan. You could test the CTS also.
-
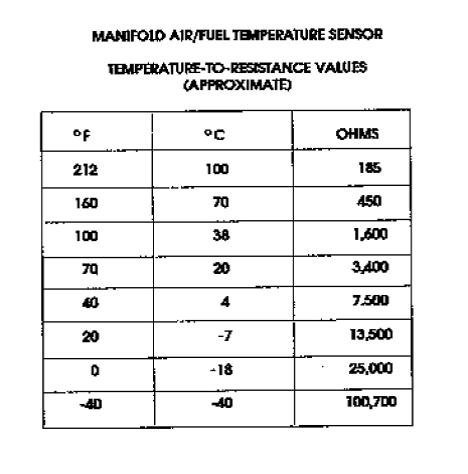
test the IAT with an ohmmeter when cold.
-
Done tip 3?
-
Sure is.
-
That ground circuit terminates at the dipstick tube stud.
-
We're shooting for .5 ohms.
-
Heater control valve. Eliminate it and cap off the line.
-
92 Comanche making a weird noise from transmission
cruiser54 replied to HaysMJ's topic in MJ Tech: Modification and Repairs
It's an AX-15. When's the last time you checked the fluid level and condition? -
Only filter.
-
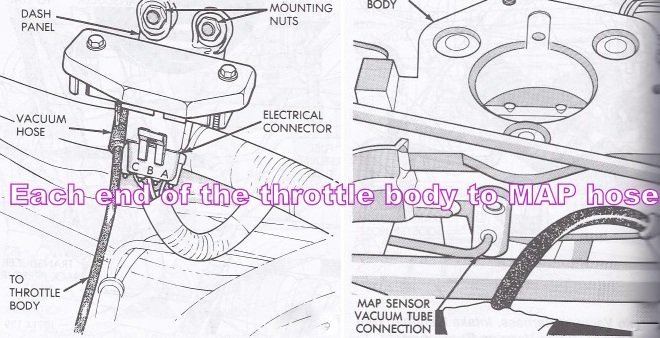
I'm with you. also, carefully inspect the hose/tubing from throttle body to MAP. A small crack will cause the MAP to think you have the gas pedal on the floor and make it run very rich.
-
The AW4' backup light switch is part of the Neutral Safety Switch. That appears to be the harness for the transfer case light in the dash.
-
CRUISER'S MOSTLY RENIX TIPS THROTTLE BODY TO MAP SENSOR HOSE FIX JANUARY 23, 2016 CRUISER54 45 COMMENTS The Renix throttle bodies have a strange and failure prone connector on the side where the MAP supply originates and then runs up to the MAP sensor located on the firewall. This hose/pipe assembly is no longer available for purchase. The real kicker here is how critical this line is in supplying the correct vacuum signal to the MAP, the most relied upon sensor for the ECU to read regarding air/fuel ratio. Any cracks, melted spots, or loose rubber connectors can cause major starting and driveability issues. There’s a simple fix though. All that’s required is a 1/8” NPT tap, a new throttle body gasket ( Napa FPG 60742 ), a vacuum fitting (Napa 05703-B102), two vacuum elbows (Napa CRB2670), and a length of new plastic piping (Napa CRB2672). Remove the throttle body and take it to the workbench. Using an oiled tap along with a driver, carefully thread the lower of the 2 holes of the throttle body where the old fitting was plugged in. Don’t go too deep. These are pipe threads. Flush the hole with carb cleaner and inspect for any left over cuttings. This is an excellent time to do a complete throttle body and IAC cleaning. See Tip 11. Take the vacuum fitting (05703-B102 ) and apply a LITTLE bit of thread sealer on the threads only. I prefer Permatex #2 but almost anything is fine. . Carefully screw the fitting in until snug. Install one of the vacuum elbows on the MAP sensor so it points toward the throttle body, and the other vacuum elbow on your new throttle body fitting so it points up to the MAP sensor. Cut a length of the new plastic tubing (approximately 13 inches) to fit between the vacuum elbows and install it making sure there is enough slack for some engine movement. Route it according to the photo. We don’t want any rubbing or chafing with engine movement. Not a bad idea to use some contact cement or Gasga-Cinch sparingly on the tubing to elbow connectors.
-
starting a 4.0 on an engine run stand
cruiser54 replied to jeff351's topic in MJ Tech: Modification and Repairs
If it doesn't start right up, who cares? You're building oil pressure. Same as on a stand....... -
starting a 4.0 on an engine run stand
cruiser54 replied to jeff351's topic in MJ Tech: Modification and Repairs
why? Can't you just install it and do the same?