DigitalBman Posted May 20, 2017 Author Posted May 20, 2017 And this is for comparisons sake. The last pattern where we agreed more depth and the new one where I added ten thou depth today. New on left, old on right
DigitalBman Posted May 22, 2017 Author Posted May 22, 2017 So I finally got the front done yesterday! Locker and gears are final installed and I just have to mount and wire the actuator for the cable. And hopefully will get the rear done this week!
WyoCherokee Posted May 22, 2017 Posted May 22, 2017 So a little update! Cleaned the extremely dirty floor, welded up and patched up holes that were left in the floor, cleaned up some cancer, painted the patches and the floor with some bedliner. The cab now has no holes allowing air to flow through and create the draft it had. Then laid some dynamat style material. Literally covered every square inch of the floor and back wall, even inside the B-Pillars. This stuff seriously looks and feels exactly like dynamat. There is nearly 80 square feet of dynamat and dynamat style deafening material between the floor and the roof. And began installing the new carpet. Still have trimming to do and some fitting to do. Also sanded and painted the E-Brake mechanism. So you bedlined the floor, Dynamatted over the top of the bedliner, and threw down frost king, and then carpet? Any issues with the dynamat sticking to the bedliner?
DigitalBman Posted May 23, 2017 Author Posted May 23, 2017 So a little update! Cleaned the extremely dirty floor, welded up and patched up holes that were left in the floor, cleaned up some cancer, painted the patches and the floor with some bedliner. The cab now has no holes allowing air to flow through and create the draft it had. Then laid some dynamat style material. Literally covered every square inch of the floor and back wall, even inside the B-Pillars. This stuff seriously looks and feels exactly like dynamat. There is nearly 80 square feet of dynamat and dynamat style deafening material between the floor and the roof. And began installing the new carpet. Still have trimming to do and some fitting to do. Also sanded and painted the E-Brake mechanism. So you bedlined the floor, Dynamatted over the top of the bedliner, and threw down frost king, and then carpet? Any issues with the dynamat sticking to the bedliner? No sir, this stuff really sticks. Just make sure it is rolled and pressed hard enough to get rid of the diamond pattern in the material. This stuff made such a drastic difference inside the cab it's not even funny. And I still don't have my headliner installed. But frost king? I don't believe I mentioned frost king, what is that?
DirtyComanche Posted May 24, 2017 Posted May 24, 2017 I think the gear pattern you settled on looks fine. :thumbsup:
DigitalBman Posted May 28, 2017 Author Posted May 28, 2017 So turns out... My C8.25 was a 27 spline.. Not really sure where the confusion happened. Previous owner and the Ad when I bought it said 29 spline... Needless to say, it wasent worth keeping the 27 splines. That.. And I have a 29 spline OX locker. So that problem was remedied today! Got some 29 spline axles from the junkyard! The Size difference is pretty significant! Definitely a lot sturdier axle! When I do my disk brake conversion I'll get some chromoly axles and keep these as spares... Also got the pattern set on the rear axle! Tomorrow is final assembly!
DigitalBman Posted May 29, 2017 Author Posted May 29, 2017 So, did final assembly today and ran into a couple of snags. Primarily installing the C-Clips. In order to install the C-Clips you have to remove a snap ring, conical thrust washer, spider gear, and center pin inside the OX locker. ... Not really sure if OX just didn't design their C8.25 locker for 4.88 gears or what. My guess is they designed it for 4.55 at Max. So any numerically higher gear (wich is thicker) won't work.. Due to the pin not being able to come out, it hits the ring gear. So with a little bit of creativity and persuasion I got the C-Clips installed. Will be a huge pain to do a trail repair if I ever break an axle shaft though... That's the downside. This is what was happening when trying to remove the center pin. But after getting that figured out I got it final installed and took it for a test drive! Final Specs: Pinion Preload - 12 inch pounds Pinion Nut Torque - 255 Foot Pounds I didn't write down my final shim thicknesses. Was able to torque the pinion nut to 255 Foot Pounds exactly because I used a crush washer eliminator kit, wich used a spacer and shims to set the Preload. Similar to the D30 up front.. Man!!! Such a drastic difference!! I have so much low end torque now it's not even funny!! My interstate driving is pretty much shot with these 33's though. But, the best upgrade has to be in how this jeep handles with an open differential compared to the Spartan lockers. No more popping in turns or it pulling to one side or the other. My front locker was completely trashed, the rear one looks practically brand new though! So with these 4.88 gears, at 50 miles an hour I'm at 2k RPM with my AX-15. But I'm cool with that, I plan on 35's or 36's later on. Wich will correct it to some degree.. My speedometer is very off now it said I was doing about 72mph when my GPS said 50mph! Lol so I need to address that... I put it it 4WD Low and with the Chevy HD planitary that's in the transfer I COULD NOT stall it!! I pressed the brakes to the floor and pulled the E-Brake and it barely slowed down the truck when I was in 1st gear just idling. No throttle input at all and I just couldn't get it to stall. This has been a hell of an experience learning how to do a gear install and a locker on top of that. But I'm very happy I did it myself. I feel like iv grown quite a bit as a mechanic. Wouldn't have been possible if it wasent for all of the knowledge on all of these forums! Next step is to mount and wire the electric actuators for the lockers.
DigitalBman Posted June 6, 2017 Author Posted June 6, 2017 Just a little update, got the speedo gear installed this weekend, actually, my wife installed it for me! I just showed her what needed done and she did it! So now when I'm doing 50MPH the speedo actually says 50MPH and not 80 or so.. Lol
DigitalBman Posted June 6, 2017 Author Posted June 6, 2017 Also took my dog for his first ride in the back of the Jeep this weekend after we got the new speedo gear in! He did extremely well!! He's about a 7 month old, miniature Australian Shepherd. His name is Scout! He loved riding back there!
DigitalBman Posted June 8, 2017 Author Posted June 8, 2017 So I got my fuse box from a member over at cherokeeforum It is great!!! Super high quality and very impressed with how complete the kit is!
kansashogan Posted June 9, 2017 Posted June 9, 2017 Nice. Hey, my nephew is also there at McConnel. Tyler N is his name. My son says he parks by you all the time. Bryan T is his name. They are both Tech Sergeants.
DirtyComanche Posted June 9, 2017 Posted June 9, 2017 That's a nice fuse panel. What all are you planning on using it for?
DigitalBman Posted June 9, 2017 Author Posted June 9, 2017 That's a nice fuse panel. What all are you planning on using it for?Front LED lights, rear LED lights, on board air, auxiliary cooling fans, and some other stuff. It gives me a really good platform to build off of long term. 5 relay circuits and 5 fused circuits
DigitalBman Posted June 9, 2017 Author Posted June 9, 2017 That's a nice fuse panel. What all are you planning on using it for? I looked up your son's name and I don't know him or your nephew! But your son does appear to work on the flightline. So we do work in the same vicinity.
DigitalBman Posted June 11, 2017 Author Posted June 11, 2017 So I started this today! Got the second battery mounted. Freed up quite a bit of room to mount the actuator for the front locker and to mount the auxiliary fuse box I posted about previously. Was very easy to mount... Just used a battery tray from a junkyard jeep.
DigitalBman Posted June 18, 2017 Author Posted June 18, 2017 Was able to get the front and rear actuators for the lockers adjusted and mounted today! The front one is mounted next to the second battery on the passenger side.
DigitalBman Posted July 21, 2017 Author Posted July 21, 2017 So it has been quite a while since I have posted. Been busy with life and all. Actually the day before I left to visit my family for a few weeks is when I found out about being MJOTM! Pretty cool stuff But here is a little update. Iv been working my butt off trying to get ready for the event at Kansas Rocks I am going to Saturday. Seems like ome thing after the other has been slowing me down. But here is a run down: - wired in my auxiliary fuse box to my second battery - wired up my battery isolator, charges the second battery when I am driving and I can engage the isolator as needed to jump start my start battery if need be - I finally have my OX Electric lockers wired up, through my auxiliary fuse box. I modified an XJ rear wiper switch to be a two stage switch. First click engages the rear locker, dim indicator light comes on, second click engages the front locker, bright indicator light comes on - also have an inline circuit breaker for my auxiliary fuse box so that all of my extra stuff is safe - I acquired a police package NOS 4 switch panel with the EXT IDLE switch, will be wired up soon. - I also acquired a mint condition full black MJ interior that even has the original spare tire mount stickers on the back carpeted piece. Expect some more updates soon. But for now here are a few pictures! My 4 position switch panel. The fog light switch has been modified to be a dual stage switch as well. First click front LED lights. Second click the rear reverse lights. Then the diff locker switch, 1st click engages the rear locker and then the locker engaged indicator light is lit. The light is an LED diode with 3 inline resistors for the rear locker indication. The front locker indication is the same LED light but with only one resistor inline from the locker engaged indication wire. The LED inside the locker switch The resistors inline with the LED. Just another picture showing the resistors on their circuits. Red wire for the rear locker, black for the front. The ground was ran separate. I ended up JB welding the resistors to the side of the switch and and the ground wire for the LED. I don't have a picture. I'll grab one when I take the switch panel off next time. Here is the switch lit with the rear locker simulated engaged. Here it is with the front locker simulated engaged. Each locker is wired through a fused circuit on this fuse box. Circuit 1 is a relay and a fuse, C2 is just a fuse (rear locker) C3 relay and a fuse, C4 just a fuse (front locker). And so on and so forth. It's 10 circuits total. 5 relay and fuse 5 fused. It is ground to the battery and the battery is also grounded to an engine mount just like the start battery is. That way everything on the jeep can be grounded anywhere if need be no matter what battery it draws power from. This is my 80 amp circuit breaker for the auxiliary fuse box and the 500 amp solenoid operated battery isolator. Both are mounted in an out of the way place and honestly, I probably would have never put anything else in their place.. Leaves room available for future things on the driver side. Anyways, that's primarily what iv been up to recently!! I have a lot more to do in the coming weeks and months with just the parts I have laying around currently... Will post a video of the locker switch soon!
DigitalBman Posted July 21, 2017 Author Posted July 21, 2017 Here is a video of the locker switch and battery isolator switch.
cody4359 Posted July 21, 2017 Posted July 21, 2017 I don't understand how you modified your switches, but that extremely clean and badass! what the point of the extended idle? i could Google it.. Sent from my SM-G900V using Tapatalk
DigitalBman Posted July 21, 2017 Author Posted July 21, 2017 I don't understand how you modified your switches, but that extremely clean and badass! what the point of the extended idle? i could Google it.. Sent from my SM-G900V using Tapatalk EXT IDLE is the option that came on police package equipped XJ'S. It takes the idle RPM from around 800 to around 1200rpm so thst the alternator is putting out the amperage required to maintain a good charge on the battery due to all of the extra things drawing power from it. For the switch, I took an XJ rear window wiper switch. On the rear window wiper switch there is a first click, turns on the wiper, second click wich is momentary engages the rear window washer fluid sprayer. I took apart the switch, removed the spring and plastic pin pieces that made the second click momentary so that it is now simply a two stage switch. On the rear window wiper switch there is no indicator light. So I installed the LED. The OX locker electric actuators have a light that indicates when the locker is fully engaged. Well instead of two switches, one for each locker..I did what I did. For the indication of two lockers being fully engaged on one LED I ran resistors inline with the indication wire from each locker to the power side of the LED. So that the rear is dimmer when it fully engages and the front is bright when it fully engages. And the change is very noticeable in person. Does that make sense?
cody4359 Posted July 21, 2017 Posted July 21, 2017 great explanation, thanks Sent from my SM-G900V using Tapatalk
DigitalBman Posted July 22, 2017 Author Posted July 22, 2017 My wife and I are Ready for kansas rocks tomorrow!! Installed military style battery terminals today and created new wires for the power to the fuse box, starter, and the chassis ground today after work.
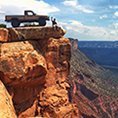
DigitalBman Posted July 23, 2017 Author Posted July 23, 2017 So.... Today at Kansas rocks was great! Had a lot of fun! And a good day of wheeling. ..... Until the very end of the trip... I went for one last little hoorah at the entrance of the trials. Got on top of the area where they had some culverts laid out... Got out to take a picture. Was standing in front of my jeep, I was underneath the bumper but looking eye level with the differential. Stood there looking at the underside of my jeep for a minute, turned around to walk down and take the picture... I heard a noise, my buddy yelled, I looked back just in time to process I needed to get the hell outta dodge. The E- Brake failed and the jeep rolled forward.. These rocks stopped it and the jeep had boulders under each axle.. All four wheels were off of the ground. Just a reminder to always be vigilant and be safe. After a full say of wheeling and not a thing going wrong this one little thing happened and it could have ended badly. On the upside my OX lockers were freakin awesome!!!! With the 4.88 gears and the built transfer case I was creepy crawling over every single obstacle and had a great day!! I would approach each trail and while on the trail engage the lockers if needed. Then disengage them at the end of the trail or in tight turning areas.. On the other hand, does anybody have any suggestions for a tie rod upgrade??? Pretty sure my tie rod saved my axle from being bent... It was that hard of a impact.. Opinions on going over the knuckle??
DigitalBman Posted July 30, 2017 Author Posted July 30, 2017 Finally got the cowl intake done today after I gave up on the high idle switch wiring... Underneath where it is attached to the the cowl is some pre filter material. Going through spectra performance tubing and the inline cone filter. I love it! And the noise is hardly noticeable inside the cab. Only ran it where it is parked due to the tie rod still being mutilated. So I will give some more feedback on how it drives. I went with the inline filter so that minimal modification to the firewall / cowl area had to be done. One 3 inch hole and that was it. Plus removal of the filter is easy and less susceptible to things getting in the cowl, especially with the pre filter material at the entrance of the intake.

Recommended Posts
Create an account or sign in to comment
You need to be a member in order to leave a comment
Create an account
Sign up for a new account in our community. It's easy!
Register a new accountSign in
Already have an account? Sign in here.
Sign In Now