

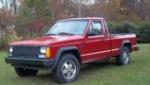
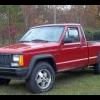
1987Comanche
-
Posts
1073 -
Joined
-
Last visited
Content Type
Profiles
Forums
Gallery
Everything posted by 1987Comanche
-
As the title says I scanned the MJ section of the 1990 full line brochure and it's very interesting reading (option packages, axle ratios, etc). I thought others would be interested but it's an 11MB file. How do I post the .pdf?
-
I bought an OBD Link SX USB to OBD II adapter and it came with some basic OBD WIZ software. I can see the basic parameters everyone mentioned, active & pending codes, and I/M flag status. They have specific software packages for GM, Ford, etc but I haven't taken the plunge. It's not as good as the Snap On Solus or OTC/SPX scan tools but it was around $40 (as opposed to $4,000+).
-
 Try using a dremel to grind 2 or more flats on the outside of the bolt. You can then use vice grips or perhaps hammer a socket on it for removal.
 -
New Floors/dropping fuel line?
1987Comanche replied to lexluthier72's topic in MJ Tech: Modification and Repairs
The fuel line is fairly close to the floor on the driver's side. I purchase a "Velvet shield" welding blanket that's rated to protect nearly anything and it did a good job when I put floors in the '87. I use it to wrap fuel tanks when welding exhaust systems anywhere in the vicinity of one. Granted I try to keep the welder as far away from fuel containing objects as possible but, in certain circumstances (the last weld when the exhaust system is in place) there is little choice. -
Hockey stick door handles
1987Comanche replied to Keyav8r's topic in MJ Tech: Modification and Repairs
I took my tin snips to the jy and cut out the chunk of inner door containing the clips. It's 18 gauge and cuts easily. Once you make 2 or 3 cuts the clips pop out with no damage :). -
Check for a PM
-
Crappy Little Buzzer
1987Comanche replied to Zenobian_84's topic in MJ Tech: Modification and Repairs
The blue buzzer adds the headlight on warning and key in ignition. I believe black's only function is seatbelt warning. -
AX 15 Internal External Slaves
1987Comanche replied to skidoo_j's topic in MJ Tech: Modification and Repairs
There are spring clips on both sides? The donor had one on the ball stud side but not one for the slave cyl side. What's the P/N for the spring clip? Also how do you set the ball stud height to make sure it is correct? -
AX 15 Internal External Slaves
1987Comanche replied to skidoo_j's topic in MJ Tech: Modification and Repairs
I've been collecting parts for my external slave conversion, slated for when the engine comes out. What am I missing>? -
Heat soak on the injectors. It's a well documented problem on the 00-01XJ's. The Mopar TSB "fix" is to zip tie insulation on the injectors (I think #3 or #4 is most common). I might have the TSB floating around if you want to PM me.
-
Vibrating after pulling drive shaft
1987Comanche replied to HOrnbrod's topic in MJ Tech: Modification and Repairs
I'd vote for worn U-joints. I had a random banging that I traced to a nearly new shock that functioned fine off the truck. Removal and reinstallation in the exact same orientation caused the issue. Sometimes stuff is worn in such that any disturbance upsets the delicate balance. -
im sick of the closed system!!!!!
1987Comanche replied to SW86's topic in MJ Tech: Modification and Repairs
I used a 1st gen S-10/ Blazer overflow bottle and it fits great. You can modify the stock Renix overflow bottle bracket to fit it. And it was $5 at the jy :clapping: -
I was thinking the AX-5 slave may not have enough (or perhaps too much) stroke when compared to the AX-15 slave. Also I wondered if either slave will fit the AX-15 bellhousing. Does anyone have specs on either ( or both)? Here's the AX-5 slave http://www.autozone.com/autozone/parts/Duralast-Clutch-Slave-Cylinder/1986-Jeep-Comanche-2WD/_/N-iixsuZ6o2ja?itemIdentifier=735902_0_0_ AX-15 slave http://www.autozone.com/autozone/parts/Duralast-Clutch-Slave-Cylinder/1995-Jeep-Cherokee-2WD/_/N-j1scmZ6o2ja?itemIdentifier=577903_114091_0_
-
Last week I scored an external slave AX-15 at the jy from a '94 XJ. I'm planning on transferring the bellhousing to my AX-15 and converting it to an external slave system. Unfortunately the plastic hydraulic line from the master to slave had been cut, so I only have the slave cylinder and about 15" of plastic line. The research I did suggests that a successful conversion requires the master, slave, and line as a pre-assembled, pre-bled unit. My '87 had an external slave AX-5 that didn't have the plastic line or roll pin. It had actual fittings. That got me wondering if I could use an AX-5 slave on the Ax-15. If I did that I wouldn't have to change the master cylinder and could just extend/modify the existing line to fit. Also I found conflicting info on the external slave MC. Some sources say it's a direct bolt-on, others say it requires firewall mods. Thoughts? Guidance?
-
Can you leave the transfer case attached and get everything out in one shot? I'm slowly working towards an engine rebuild on my '90 and figured I'd pull the front clip to get it out. 4.0, AX-15, NP231
-
Clutch not releasing
1987Comanche replied to nitroxsteve's topic in MJ Tech: Modification and Repairs
So which internal slaves have a good track record? LUK and Mopar? -
Went back to LKQ today and wrote the VIN down while I was there. I have some digits wrong as it didn't come up as valid. Anyone know what's wrong with this? 1Jtmu64566j115329
-
Dirty Under Valve Cover
1987Comanche replied to xjrev10's topic in MJ Tech: Modification and Repairs
You may want to consider pulling the oil pan and cleaning the oil pump pickup and timing cover out. I pulled about 3.5 Coke cans worth of carbon like that out of my 4.0. Timing cover was so packed the only free space was where the chain moved. To clean the head I pulled the pushrods, plugged the holes with paper towels, and scraped it with a screwdriver/gasket scraper. -
Bad ballast Resistor.
-
I have my backup set in the basement. PM me and I'll send you some pics. We might be able to work something out.
-
There is another possibility. You might need the revised ECU. I was lucky enough to score one at the jy and it works great!! See Text file below for TSB Models 1987-1990 MJ & XJ Bodies With 4.0 Liter Engine Subject Start and Stall and Driveway DieOut Index DRIVEABILITY Date December 29, 1989 No. 18-54-89 REVISION A P-0005 (C18-24-9) BODY CODE LEGEND MJ - COMANCHE XJ - CHEROKEE NOTE: THIS TECHNICAL SERVICE BULLETIN SUPERCEDES TSB 18-54-89 WHICH SHOULD BE REMOVED FROM YOUR FILES. SYMPTOM/CONDITION Driveway die-outs with a cold engine, particularly in warm ambient temperatures. DIAGNOSIS Verify that TSB 18-51-88 or TSB 18-57-89 (crank position sensor and patch harness) has been properly performed on the vehicles to which they apply. Make sure the fuel management system is operating correctly by using the DRB II in the state display and systems test. Any electronic engine control problems detected by the DRB II must be corrected before performing this TSB. PARTS REQUIRED 1 ECU (Automatic Transmission) PN 53007842 1 ECU (Manual Transmission) PN 53007843 1 Mopar Choke and Linkage Cleaner PN 4549619 This repair procedure involves replacing the ECU and cleaning the throttle body. 1. Install the new service replacement ECU. 2. With the engine off, remove the clean air tube from the throttle body. 3. Open the throttle and spray the bottom edge of the throttle plate and the throttle body bore with Mopar Choke and Linkage Cleaner, PN 4549619, (use cleaner sparingly). NOTE: USE ONLY THE RECOMMENDED CLEANER TO PREVENT DAMAGE TO THE THROTTLE SHAFT SEALS. 4. Using a soft bristle brush such as a tooth brush, work the cleaner into the stubborn deposits on the throttle blade and the throttle body bore where the throttle blade is positioned at idle. Allow the cleaner to soak for three (3) minutes. 5. Start the engine and let idle. Spray the cleaner sparingly at the throttle plate edge and throttle bore contact area. 6. Operate the engine at 1500 RPM for one minute to clear the intake manifold of cleaner. Allow the engine to idle until it reaches normal operating temperature. Then shut the engine off. 7. With the engine off, connect the DRB II to the vehicle. 8. Disconnect the idle speed stepper motor wire harness connector at the stepper motor. 9. Connect the stepper motor exerciser tool 7558 (Ele. CT01) to the stepper motor. See Figure 1. 10. Set the parking brake, place the transmission in park or neutral and start the engine. 11. While observing the RPM on the DRB II, put the exerciser tool control switch in the low position until minimum idle speed is obtained. 12. With all accessories off, adjust the base engine idle speed to 575 rpm in neutral. This should be accomplished by first adjusting the throttle body air by-pass screw and then, if necessary, by adjusting the throttle stop screw. 13. Adjust the throttle position sensor so that the "state display" on the DRB II displays the throttle position sensor as 12-14%. If the TPS percentage is above or below this number, refer to the TPS adjustment procedures as displayed on the DRB II or as outlined in the appropriate Jeep Service Manual. 14. Shut the engine off. Install the clean air tube, remove the stepper motor exerciser control tool, connect the idle speed stepper motor wire connector. Spray the exposed threads of the throttle stop screw with cleaner and blow dry with shop compressed air. Apply Loctite 209 or equivalent to the exposed threads. See Figure 2. POLICY: Reimbursable within the provisions of the warranty. TIME ALLOWANCE: Labor Operation No. 08-15-62-93 . . . . . . . . . . . . . . . . . 1.0 Hrs. FAILURE CODE: 04 - Cold Stall
-
I put a '96 VC on mine and had the same problem. My fix was to pop the cap off, fill the threaded portion stuck in the VC with JB Weld, pop the cap back on and wait for it to cure. I then used a Craftsman rubber strap wrench (like an oil filter wrench) on it and got it out. The aftermarket ones don't get stuck like that as they're 1 piece.
-
A little help from the community please!
1987Comanche replied to 1wingnutt's topic in MJ Tech: Modification and Repairs
Somewhere around $1500. -
There's also a pull-a-part in Columbia, SC. If you swing over to Greenville, SC you can hit 2 pull-a-parts. One in Greenville, one in Greer.
-
The floors in my '90 took forever to dry. They were tacky within a day. I waited all weekend and they were still sort of tacky. Finally had no choice but to drive the truck. One day of being in a hot, sunny parking lot with no carpet finished drying it.