

skidoo_j
-
Posts
988 -
Joined
-
Last visited
Content Type
Profiles
Forums
Gallery
Everything posted by skidoo_j
-
I used the harbor freight press kit to push out the bushing, however I did have to enlarge one of the cups so it would fit over the bushing and seat on the axle. Used a lathe, but a sanding drum on a drill would have worked. What ended up happening with mine were the rubbers pressed out then i beat, cut, swore, smashed, and drove the sleeve out. Installing the new was easy. The bushings are cheap, I got some crown or omix brand ones from 4wd.com for $5 a each.
-
Renix To Ho Tps Adapter
skidoo_j replied to ftpiercecracker1's topic in MJ Tech: DIY Projects and Write-Ups
More air flow with a much larger butterfly. Also way easier and cheaper for intakes as it doesn't have some freak connection. -
I'd stick with name brand bearings, Not to long ago i found (posted link on CC.com too) a youtube video showing how brand new bearings that were store brand were so far out of tolerances they would be considered shot vs timkens. found the old post:
-
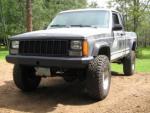
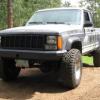
I currently run xj shackles in the rear with SOA. It did lower the rear about 3/4" IIRC. I've had people tell me that because they're so small that they could invert, but have not had any issues like that. Some suggested limit straps if doing any extreme wheeling to prevent the invert and save shocks too. The biggest side effect I think I experience is increased axle wrap. It's hard to quantify if the xj shackles are the cause or the SOA, I used 8" spring perches and extra large plates on the conversion to reduce risk, but never ran the mj shackes after the SOA and Metric ton springs swap.
-
From Control Arm Bushing Replacement Advice
skidoo_j replied to big66440's topic in MJ Tech: Modification and Repairs
No just if you pulled the arms off and used a shop press to get out old bushings it will go way way faster (time wise) then if you sit there with a ball joint press and a ratchet or impact gun. Although a shop press would have the disadvantage that it could cause much greater damage due to added force, so just make sure it's supported well. If i had a shop press when I did mine I would have jumped all over it. -
From Control Arm Bushing Replacement Advice
skidoo_j replied to big66440's topic in MJ Tech: Modification and Repairs
When I did mine I just used the ball joint press with the 4x4 cup kit from harbor freight. I used alot of PB-blaster and a couple wacks with a bfh. The rubber pulled through on one of the upper axle first and then i beat the cup in then folded it out. I read where people have burned them out, seem way to messy and noxious for me. And read where some people just use a bfh. If you removed the arms and used a shop press the arms would go really fast. The upper axles would be your biggest pain then. Definitely harder doing it on the truck depending your available tools. If you have to use a ball joint press with a thread pusher i'd keep it attached to the truck. -
Catalytic Converter / Exhaust Systems
skidoo_j replied to starkizer's topic in MJ Tech: Modification and Repairs
I'm running the black jack headers, straight pipe to a flowmaster delta 40. It is very quite in the cab compared to my brother's xj running a flowmaster 40 also straight pipe. Sounds plenty deep. at about 4k-5k it can get a little race-carish, but when I've got it up that high it's understandable. The delta 40 is supposed to have the same performance curve as a regular 40, but less dB, and deeper. I have heard the gibson and do enjoy it's sound, however it was not on an inline 6 so ???? The guy at the muffler shop said my delta 40 made the I6 sound like a v8. I don't know about that. -
WJ Booster and Master Cylinder Upgrade
skidoo_j replied to Comanche County's topic in MJ Tech: DIY Projects and Write-Ups
Yes if you have a '91 the 95/6 dual from a cherokee is pretty much a direct swap. The lines will have to be bent to get to the new mc, so I'd replace them. And people have blown out their load sensing valve with stock pressure, so it really depends on if you think and trust a 22 year old valve that you can't rebuild or replace. Several have replaced it with a manually adjustable valve. Willwood, sbc etc. -
http://www.ebay.com/itm/JEEP-COMANCHE-M-R-MR-27-WORKSHOP-REPAIR-MANUAL-MECHANICAL-JULY-1985-/261126352035?pt=Motors_Manuals_Literature&hash=item3ccc57eca3&vxp=mtr
-
Bucket Seat Brackets Found On Ebay
skidoo_j posted a topic in Craigslist/eBay... i.e. Not Your Stuff
http://www.ebay.com/itm/Jeep-Comanche-MJ-Bucket-Seat-Brackets-Used-but-VERY-GOOD-/160921575524?pt=Motors_Car_Truck_Parts_Accessories&fits=Make%3AJeep%7CModel%3AComanche&hash=item2577ac6064&vxp=mtr -
Well you have 4 lines that run from the engine bay to the back of the transfer case then run along the passenger side to the front axle. There are t's, check valves, a vacuum switch at the transfer case, a vacuum res in front bumper on passenger side. All of these could be at fault or a contributor. Then there's the diaphragm at the cad. With all the hoses and connections each could crack or the rubber grommets can brittle and nolonger making good seals. checking all the fittings and hoses I think would take about as long as doing the clip and flip lock method. Let alone the time trying to ensure all the hoses are connected correctly, as the colored hoses go to steel lines so you have to follow out each steel line trying to make sure you don't get crossed up too. Total cost to flip this over and lock it is just your time and can easily be reversed once you find the time to fix/repair the vacuum system if you desired.
-
No way around the 1 Year limit? The only way we can find posts older then a year is to search for them and pray?
-
found another way, but again limited to 1 year. clicking content then on left side selecting topics i started and 1 year.
-
Okay so I'm trying to find topics or posts that I had either created or posted in the past. I went to my content, but it is limited to 1 year of history. In the old format it listed page after page back to my very first post or topic. Is there away to change the limits? I then tried using the search function. I knew I started the topic so I put my user id in the author field, changed the date fields, but I got results that I was not the author too, I did find my topic, but it took several date changes and i had to type in a subject to search as it seemed doing an author and date search results were limited to about a year and showed posts where i was not the author. I used to go though my content in the old forum for reference all the time, it enabled me to be able to more rapidly respond to similarly asked questions and refer them to prior info. Now I myself spend 20-30 minutes trying to find an old topic where something was previously covered. In the new format it's almost easier to re ask a ? then to search for answers, even when I was the one who asked the question previously.
-
Thought maybe adding parts numbers for e-brake lines and brake hoses that are common would be helpful as it seems to be a very often asked ?? For front brake hoses that are 4" longer, rubber but longer at $13 each new. Left side: napa part 38182 according to cross reference it fits 1/2 ton and 3/4 ton chevy vans. Right side: napa part 38183 cross reference to: 86-94 gmc 1/2 ton and 3/4 ton chevy van For e-brake cables that are 10" longer for both housing and cable: Dorman Part c93113 shows it fits a Jeep cj5 81-83, cj7 81-86, scrambler 81-85 http://comancheclub....g-brake-cables/
-
Questions About Lifting The Rear Of My Truck
skidoo_j replied to Des88MJ's topic in MJ Tech: Modification and Repairs
-
Questions About Lifting The Rear Of My Truck
skidoo_j replied to Des88MJ's topic in MJ Tech: Modification and Repairs
http://comancheclub.com/topic/30777-10-longer-parking-brake-cables/ -
that's horrible.... I've never understood why they make wearable parts so damn hard to replace. It's even worse on new vehicles. spent almost 8 hours on my buddies 95 ranger replacing the heater core, had to pull the whole dash. the 93 ranger was a 30 minute replacement.
-
I'm about to tackle this same issue, but was wondering if the entire dash is required to be removed or if the FSM is correct and I just have to remove the lower dash panel and the center console?
-
The fronts are the same. The rears are quite different. The two door model's flares are sold to fit the MJ. The 4 door model half of the flare attaches to the door. I guess as long as you were okay with the split you could always make ethem work. vs 2 door:
-
4X4 Question - Cad Delete
skidoo_j replied to ParadiseMJ's topic in MJ Tech: Modification and Repairs
IIRC don't you have to pull the carrier if you do this and change the axle seal at the pumpkin as the seal with the cad axle set is after the CAD. -
you could do a normally closed switch that is held open when in 2x4, then when you shifted up it would close and turn on the light, but it would show 4x4 when the transfer was in Neutral that way. You could wire two normally open switches parallel mounting one at 4h and one at 4l some how. still think locating the switch at back of transfer would be less headache.
-
It may be possible to run a vacuum line from the current switch directly to the light switch, trial and error i guess. the switch activates under vacuum so i'm sure it could be done. IIRc there is a schematic of the actuation in the diy pics forum. I'm sure you'll need to plug some of the ports on the back of the transfer, or maybe just use some tees etc. I'd assume an electric switch would be easier to swap and wire then to figure out the cluster of vacuum hoses.
-
Correct, it's a Normally open switch to ground. When under vacuum it closes completing the circuit. With a welded cad if you're wanting the light you need to find an electric switch that attaches at the vacuum port on the transfer and replaces with with an electric switch.
-
Damn your local dealer puts the screws to you. Unless they didnt have it in stock and charged you for shipping. Looking it up by part number through my local dealers parts site lists them at $0.70 each. Sorry, but hey it will save you alot of headache vs trying to drive around to various other stores to find one.