

Salvagedcircuit
-
Posts
1381 -
Joined
-
Last visited
Content Type
Profiles
Forums
Gallery
Everything posted by Salvagedcircuit
-
 You sir are a gentleman and a legend. Searching mcmastercarr now. Thanks a ton!
 -
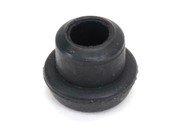
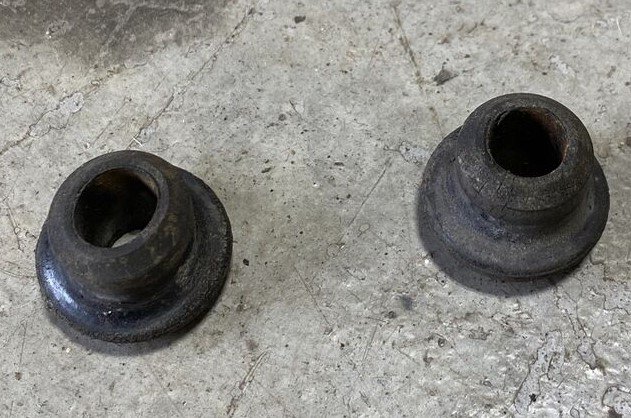
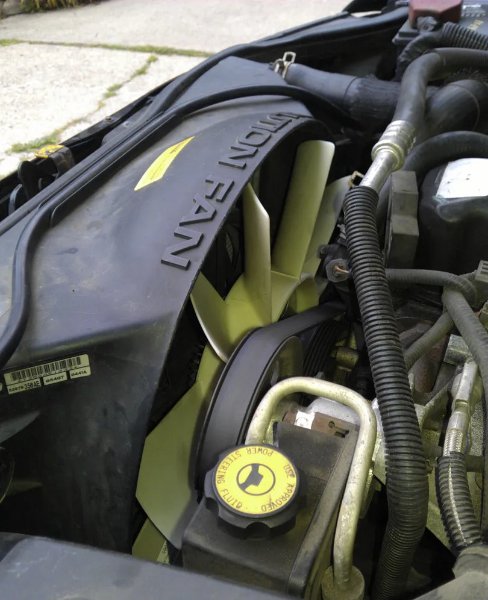
I'm looking for the dimensions of the bottom radiator guide pin bushings for the 4.0L engine. They look like the attached photos. This bushing is installed between the bottom guide pins of the radiator and the front cross member / bottom radiator mount. Mopar part number: J0687550. It is called a "radiator grommet" There are not many left in stock and they are $22-25 each, which seems excessive for a small bushing. I was hoping to find something close on mcmastercarr. The previous owner folded over rubber strap and shoved it below the bottom of my radiator. If anyone can take dimensions, or even just dimensions of the bottom radiator guide pins, I'd greatly appreciate it. I will gladly CAD up the bushing and make it available for anyone to clone using whatever 3d printable elastomer available today. This would be very valuable information for future comanche restorations, as there are no 3rd party clones of the bottom radiator bushings yet. Also, does anyone who has replaced a radiator know if a new radiator comes with the bottom bushings? By gut feeling says no. Thanks a ton!

-
'88 Sport Truck
Salvagedcircuit replied to Buddy Brantley's topic in Member Projects: Your Comanches
What lights did you go with for the sport bar? Thanks. -
Lower control arm brackets
Salvagedcircuit replied to DirtPoor's topic in MJ Tech: Modification and Repairs
If I were you, do what I just did: replace upper control arms, lower control arms and axle bushings. My upper control arms were original to my vehicle. 34 years old. My lowers were more recently replaced. Both were toast. More importantly, replace the bushings on your front axle. It is likely the original ~30 year old bushings are shot that connect to the upper control arms. They are pressed into the cast iron bumps in the top of the front axle. The original bushings, the Moog K3128 used used a strange internally dimpled design. Don't buy those. Buy the better designed bushings from the WJ: the MOOG K3166. They fit 100%. It is mentioned on many posts on naxja and here. The K3166 is better. I purchased the K3128 bushings not knowing this and drilled out the internal dimples to the next drill bit size. I will attach some photos when I get to my camera next. The dimples are really a silly design. Removing these bushings is a a real pain, but it's worth it. You will need to rent a ball joint press tool from the local parts store. You will need the large one, since the comanche is a truck. The smaller kit is designed for people movers. Another thing to mention: some folks like upgrading to the fully boxed WJ upper control arms. They are more sturdy than the comanche upper control arms, and have a larger oval shaped bushing on the end of the upper control arm that mounts to the frame. This bushing allows for more dampening against NVH (noise vibration, harshness) but your frame will need some modification to make them fit. By fully boxed I mean that the control arm is a contiguous square metal tube, not a C-channel shape like the original comanche control arms. I opted to just use the original MJ upper control arms because I did not want to modify a bunch of things and I needed to get the comanche back up and running asap. Warning: removing and installing the bushings will take a few hours. It took me 3-4 frustrating and uncomfortable hours on my back. That's with my brother as a helper. My method: I used a 1/2in ratchet, some swivel joints and soaked the old bushings in PB beforehand. If I were to do it again, I'd use a larger ratchet (3/4 or 1in drive) or a battery impact on low setting to help. There is very little space on a stock height vehicle on jack stands to do the job. I did not use a car lift, but I can imagine it would have been easier. Ways to speed up the process but still be safe: Wire wheeling the outside of the new bushing helps with the installation. You don't lose much material and it just makes the first 10 minutes of the install go easier. Wire wheel the inside of the bushing mount in the axle with a drill and rotary wire wheel. The cleaner the surface, the smoother the install. The 89-90 axles had cast bushing mounts. I believe they went to a stamped steel mount in later years of the front axle. Your old bushings may be easier or harder than mine to remove. If rust has built up between the two stamped steel vertical flanges, you will have fun removing your bushings. Freezing the new bushings will make them shrink by a few thousandths of an inch on the OD I did not use an impact to do the job primarily because I did not want to break a tool that I did not own and I did not want to push the tool too fast, have something slip and go to the hospital. Some people use a torch and hammer the old bushing out. I did not do that. You will need a good quality ratchet. My <1yr old 1/2 drive dewalt ratchet bit the bullet. Use a 3/4 drive or a 1in drive. Good luck! -
Mechanical fan upgrade
Salvagedcircuit replied to DirtyComanche's topic in MJ Tech: Modification and Repairs
Stop giving me good ideas Pete! -
Mechanical fan upgrade
Salvagedcircuit replied to DirtyComanche's topic in MJ Tech: Modification and Repairs
That is a good question. I'm not sure at the moment. However, I am genuinely curious what the inner dimension of the nissan clutch is. It lists the fan Mount Dia (to engine) as 4.72in, but is the 4.72in measured from the inner edge of each neighboring slot? I wonder if that slot geometry is generous enough to adapt to the 4.0L engine side. I think I may grab a used one from ebay and find out.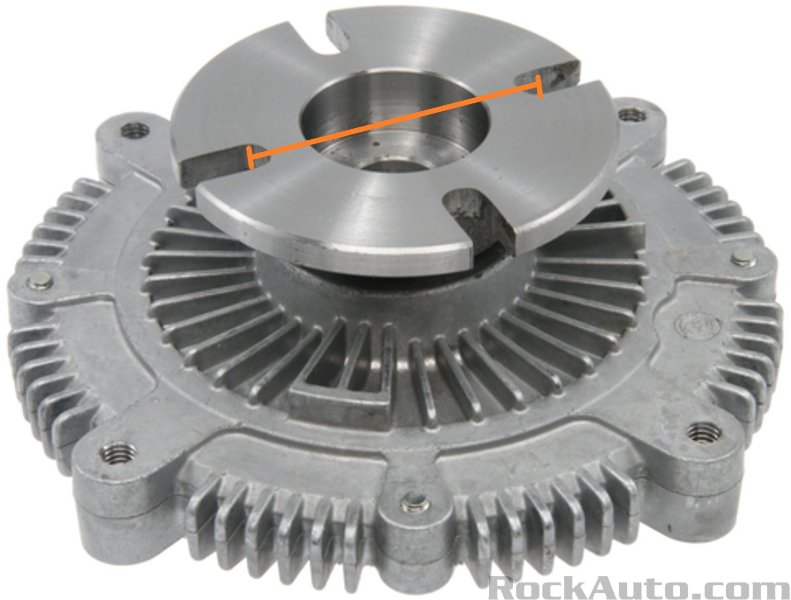
-
Are these Turbines worth it?
Salvagedcircuit replied to robfg67's topic in MJ Tech: Modification and Repairs
This is not a good deal, because ebay sellers like this exist. $169 each. I'm sure you can message him and lowball him even further. That's a professionally refinished rim. There are nearly a dozen ebay sellers who do the same thing, a lot list at ~$200/rim. You can lowball them and probably get a newly refinished set for $500 or less. Refinishing the turbine rims is a process. There are multiple threads on here about it, but it takes a lot of time or money to do. The general order of operations is this: Power wash the dirt / grime off. If there is little to no corrosion and it polishes up with auto store wax, just use them. If they are tarnished and corroded, they'll need to be bead blasted or sanded Bead blasting and sanding removes the luster/shine on the 10 spoke rims You will need to either re-machine the surface of the 10 spoke rims on a lathe or slowly step sand the spokes from 400 grit to like 3000 grit, then polish Polishing compound must be removed with acetone or alcohol In between the spokes is an off-gray color. This means the rim will need to be powder coated in off-gray, then powder coated entirely in clear. Some people skip the two color powder coating and just clear powder coat. Spray paint clear coat will likely not hold up to road debris, which is why powder coating is your best bet. Bead blasting, polishing and powder coating cost money. If you have a commercial grade bead blast cabinet and a powder coat booth, sure go to town. But otherwise, your best bet is to hunt around for a set in good shape or lowball some ebay sellers. Ebay will always cover you if you get a set in bad shape. -
Are these Turbines worth it?
Salvagedcircuit replied to robfg67's topic in MJ Tech: Modification and Repairs
Nope, nope nope. I picked up (4) in MA for $120 with very bald rims. They were not in great shape, but way better than that photo. -
I hear you. I am one of those ebay sellers that disables outside of the usa 48 shipping. I will consider shipping overseas on a case by case basis if a buyer asks. The reason being is the way ebay places such scrutiny on tracking numbers. If I send something to the UK for example, the tracking number ends at the border and a new one is granted once it arrives at the other shore. If a buyer in the UK claims the item was never received, ebay sees the tracking number only made it to the usa coast and no more, and then provides the buyer a refund. The seller than loses out on the item and the purchase price. It's a pain. I have not used their global shipping option yet, but this alone has burned many ebay sellers. Maybe I'll reconsider it in the future. Granted, I do ship overseas using pirateship. I've done it with comanche parts. It works great. There's no middleman and no ebay pulling the money from my account.
-
I don't think that guy understands the rarity of that combo. A working comanche in ukraine. With a longbed sportbar. Quick, someone throw it in a car capsule. It'll save it
-
86 2.5l 2wd restoration/work truck
Salvagedcircuit replied to strictlyxjs's topic in Member Projects: Your Comanches
That's looking mighty fine right there. Good luck with the repair. -
Mechanical fan upgrade
Salvagedcircuit replied to DirtyComanche's topic in MJ Tech: Modification and Repairs
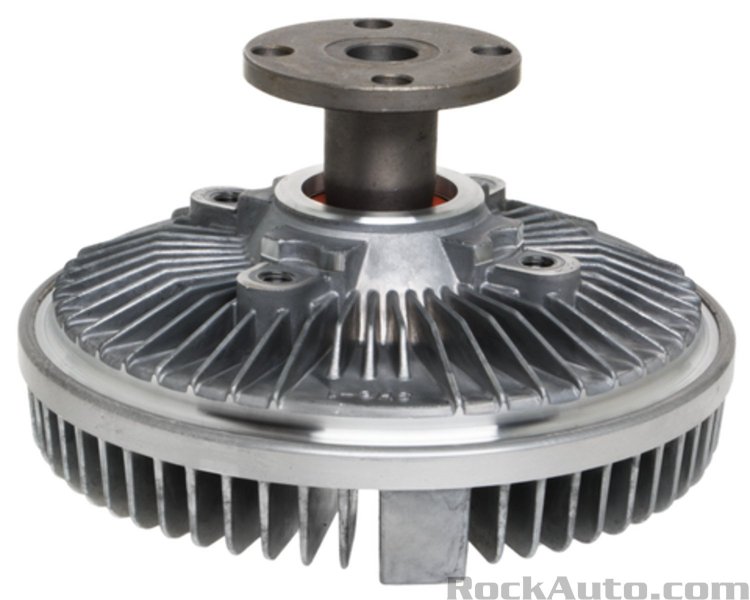
After some late night hunting, It seems like (2) fans might fit into the XJ fan shroud: 2001-2006 BMW 325i / 330i / 525i / 530i fan. Dorman # 621-584. Center bolt ID: 5.9in. OD: 16.535" 1990-2008 nissan xterra / frontier. Nissan NP300 09-2015. 8 blade. Continental FA70560. 7 Blade version: Continental FA72096 / Dorman 620-450. Center bolt ID: 5.25in. OD: 16.06" for 7 blade, 15" for 8 blade. Both have large center openings to allow for an adapting plate. Both have an OD of 16in and less. From my searches, it seems the XJ/MJ fan is 16in diameter. Jeep XJ / MJ fan clutch: Clutch OD: 5.99" Fan Bolt Circle: 3.25" Fan Mount Dia (to engine): 2.62" Jeep ZJ fan clutch: Clutch OD: 6.45" Fan Bolt Circle: 3.25" Fan Mount Dia (to engine): 2.62" Nissan fan clutch: Clutch OD: 5.85" Fan Bolt Circle: 5.27" Fan Mount Dia (to engine): 4.72" I don't have any of these parts on hand to verify. Either should work with a simple aluminum adapter. I'm going to CAD something up and get an estimated weight of the adapter to see if this is all worthwhile. Think of all the efficiency gains!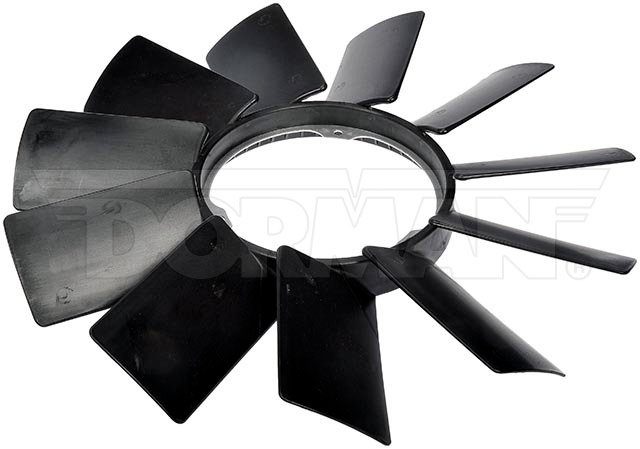

-
I go into further details here:
-
Mechanical fan upgrade
Salvagedcircuit replied to DirtyComanche's topic in MJ Tech: Modification and Repairs
This is definitely a challenge. I'm hoping the growing number of hybrid vehicles with peculiar packaged components may lead to a suitable fan. Fingers crossed. The hunt begins -
Gladiator Rear Bumper on a Comanche
Salvagedcircuit replied to JackD's topic in MJ Tech: DIY Projects and Write-Ups
Definitely get the pins @EdJarHead mentioned. For some reason, molex did not include the mating part numbers for the connector pins -
Mechanical fan upgrade
Salvagedcircuit replied to DirtyComanche's topic in MJ Tech: Modification and Repairs
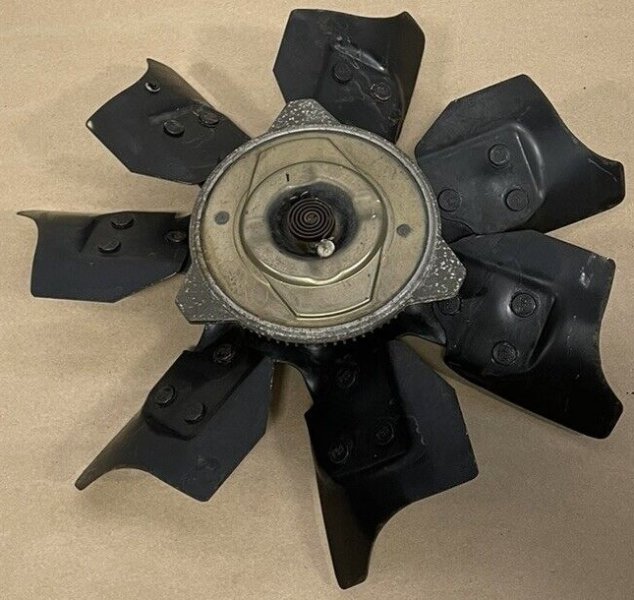
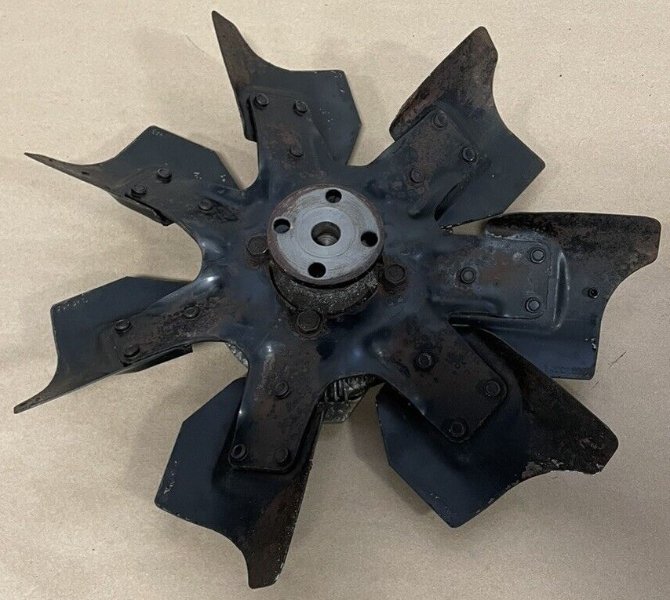
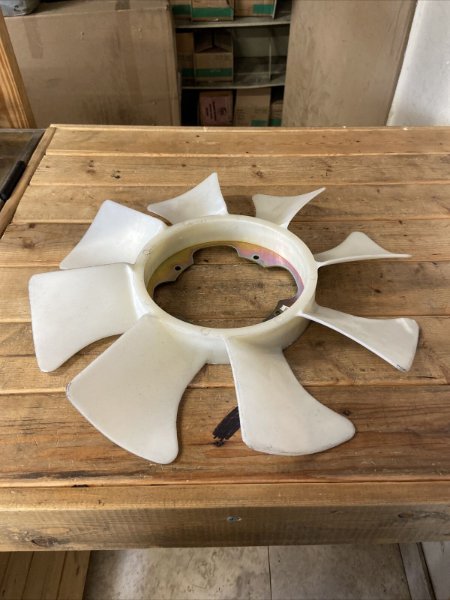
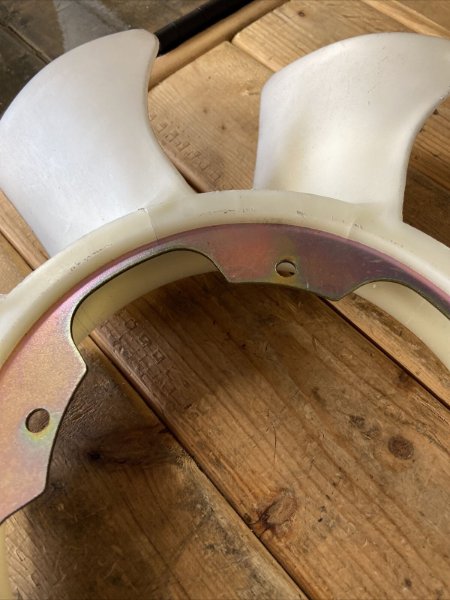
Yay thread reboot! Did anyone ever discover a potential plastic fan replacement for the mechanical fan? I'm not looking to change the fan clutch, just finding a better geometry fan to improve the mechanical fan performance. I'm not having an overheating problem, just looking for ways to improve. I'm eyeing the dual OEM 10 blade tyc fan upgrade maybe in the future but that's going to require a new alternator, all new wiring etc.. I'm debating doing some research and purchasing a few fans to try and find a suitable replacement to the very simple metal mechanical fan. Would be neat to find a suitable solution. (the attached images are from a ford taurus and a WJ)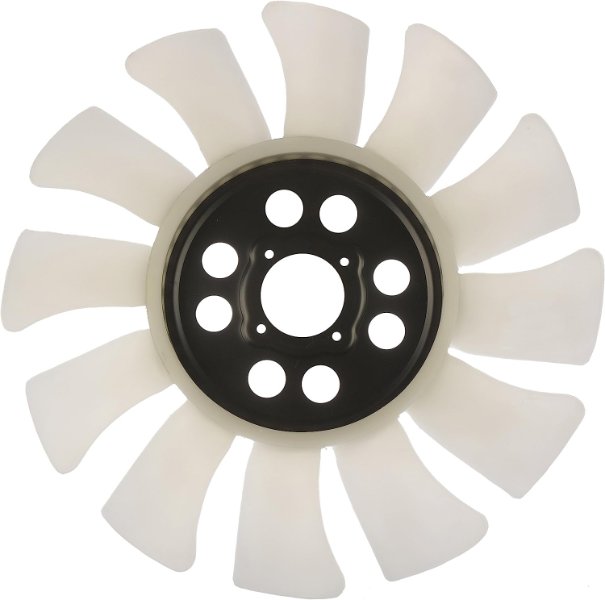
-
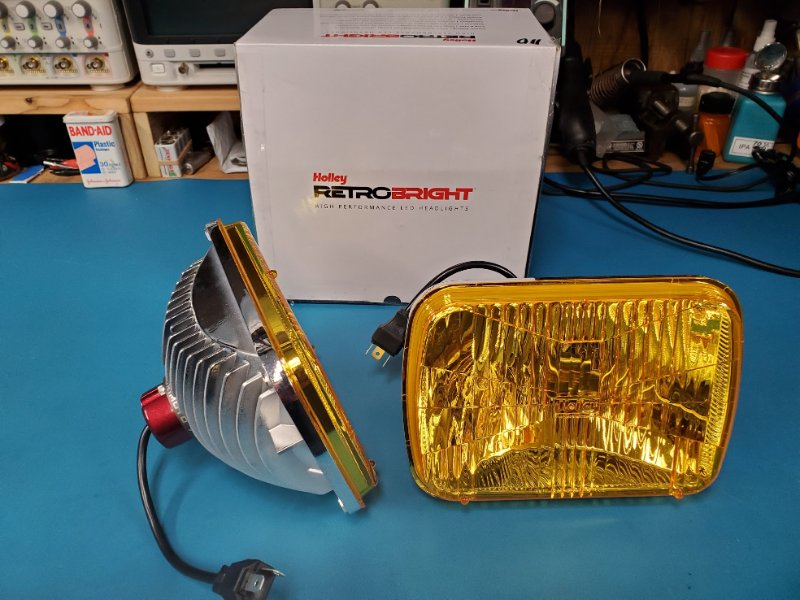
Got these yellow bois in the mail today. $45ea, not too shabby. Not too yeller myself, but the bulbs are worth at least double what I paid. Should be good as spare bulbs.
-
My 1992 Comanche Pioneer Rejuvination
Salvagedcircuit replied to Jlindsey86's topic in Member Projects: Your Comanches
That radio is looking sharp. So period correct -
That's what matters right there! Nice work. As someone from Long Island, I feel your pain. The rust is real. Luckily, my Mj spent most of it's life in North Carolina, but it still has some rust that needs attention.
-
It looks like St. Louis Spring updated their website. They do indeed make the springs in house in the USA. Website: https://saintlouisspring.com/ Video: I'm glad I gave them my money and not some shady importer. I paid for the springs out of my own pocket. If I were to do this all again, I'd definitely give them the leaf spring Spring Research Engineering spec sheet and they would probably make it to spec.
-
Teaching an old dog new tricks...
-
Gladiator Rear Bumper on a Comanche
Salvagedcircuit replied to JackD's topic in MJ Tech: DIY Projects and Write-Ups
Part details: molex part# 34900-2120. https://www.molex.com/en-us/products/part-detail/349002120 Legitimate suppliers: https://www.newark.com/molex/34900-2120/automotive-conn-housing-rcpt-2pos/dp/58Y4039?ost=34900-2120 https://www.digikey.com/en/products/detail/molex/0349002120/5700299?s=N4IgTCBcDaIMwBYCcAGFBaMBGMKQF0BfIA https://www.mouser.com/ProductDetail/Molex/34900-2120?qs=c8NFF48pVsB2DUTqyWKSjA%3D%3D Parts compatible according to molex: https://www.molex.com/en-us/products/part-detail/349961501 Cavity Plug compatible according to molex (I'm guessing the pin?): https://www.molex.com/en-us/products/part-detail/349961501 https://www.digikey.com/en/products/detail/molex/0349961501/15713841 rubber wire seals compatible according to molex: https://www.molex.com/en-us/products/part-detail/349961902 https://www.digikey.com/en/products/detail/molex/0349961902/13978793 -
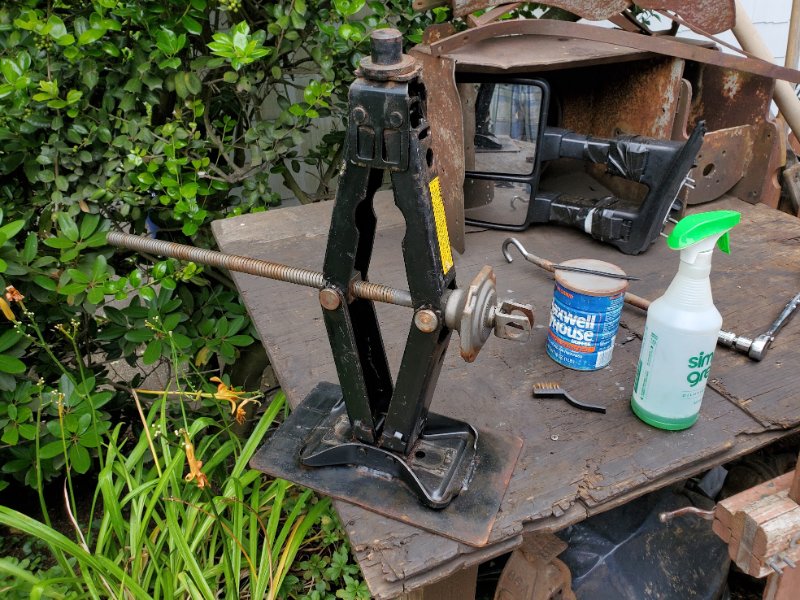
Nice. It has a pretty decent lift range. Minimum is 6.75in. Maximum is 19.75in. I just lifted the back of my '97 astro and let it sit for a few hours. It seems to be pretty decent so far. I'm going to paint some parts of mine once the weather stops being 90% humidity
-
Transfer Case Skid Plate
Salvagedcircuit replied to Drahcir495's topic in MJ Tech: Modification and Repairs
I think there's supposed to be welded nuts in the frame where it mounts. I'm not 100% sure if every truck came with the nuts though. -
Drahcir495's Build-up
Salvagedcircuit replied to Drahcir495's topic in Member Projects: Your Comanches
Holy moly that came out incredible!