
White_Comanche
-
Posts
280 -
Joined
-
Last visited
Content Type
Profiles
Forums
Gallery
Everything posted by White_Comanche
-
96 LT4 Corvette
White_Comanche replied to Car Enthusiast's topic in Member Projects: Other Cool Stuff

-
2.5L Throttle Body Removal & Cleaning
White_Comanche replied to White_Comanche's topic in MJ Tech: DIY Projects and Write-Ups
Thanks Eagle. Yes, I used the Standard #1605 TBI kit. -
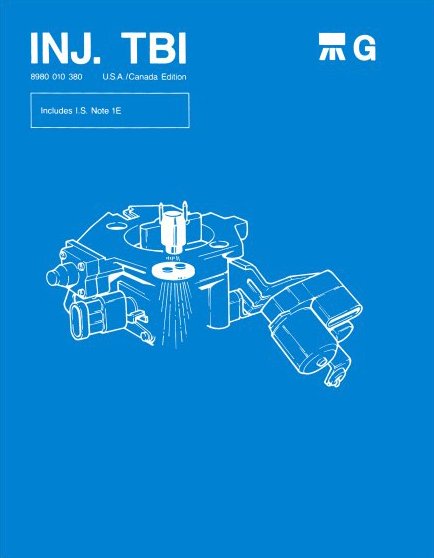
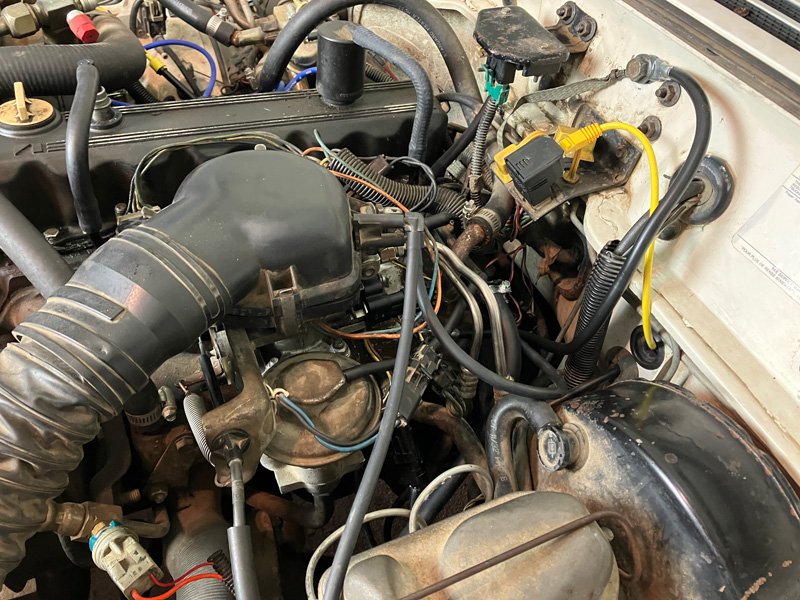
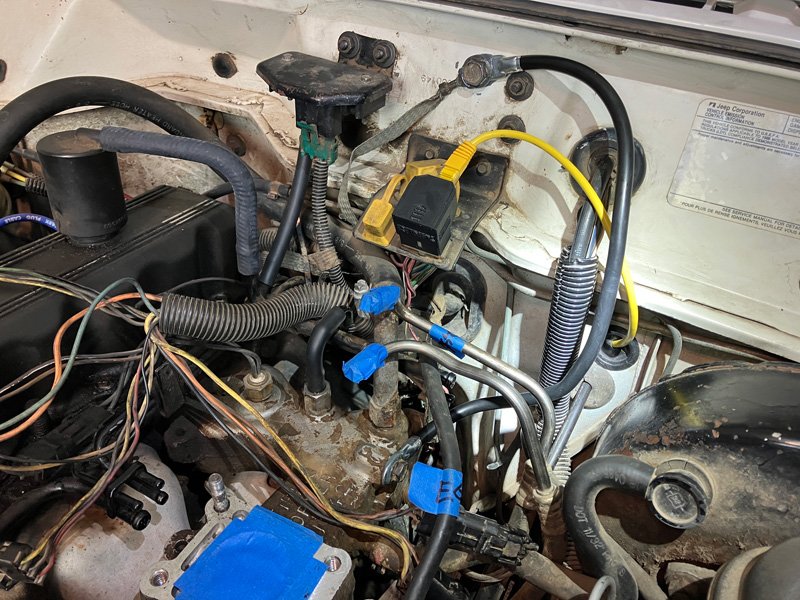
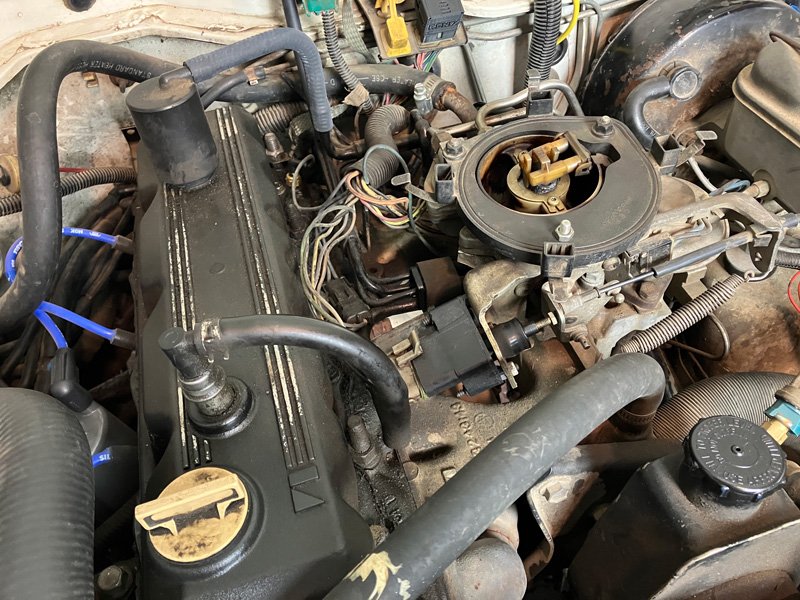
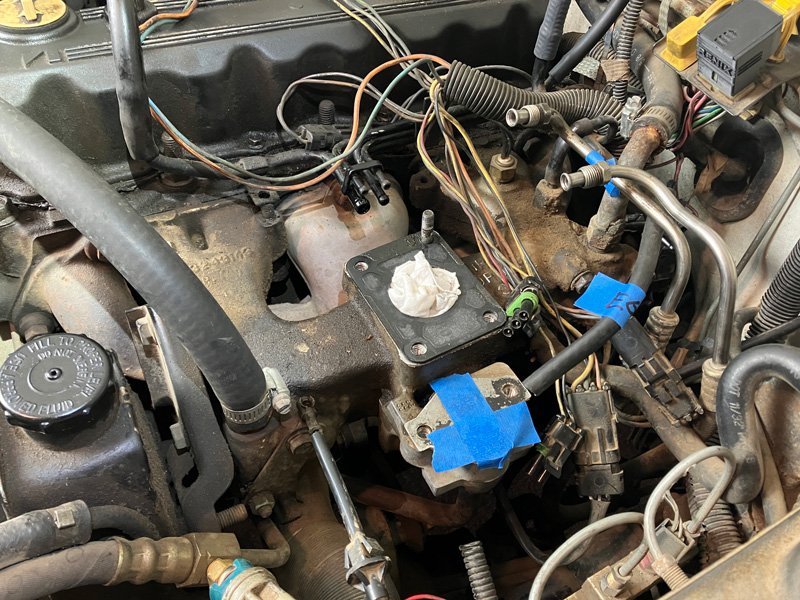
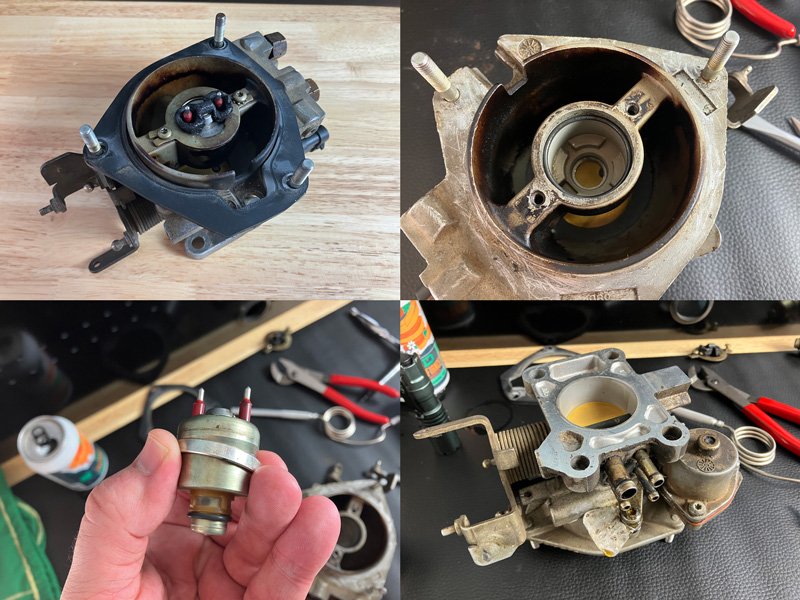
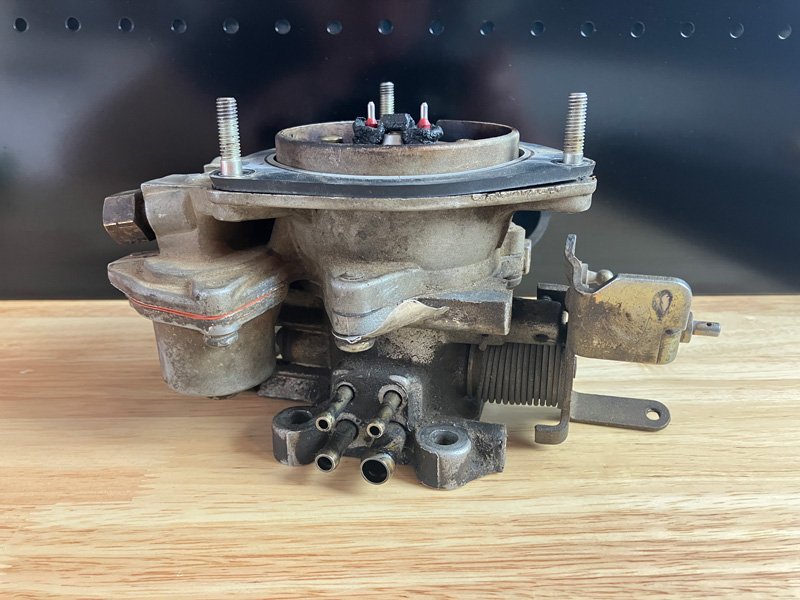
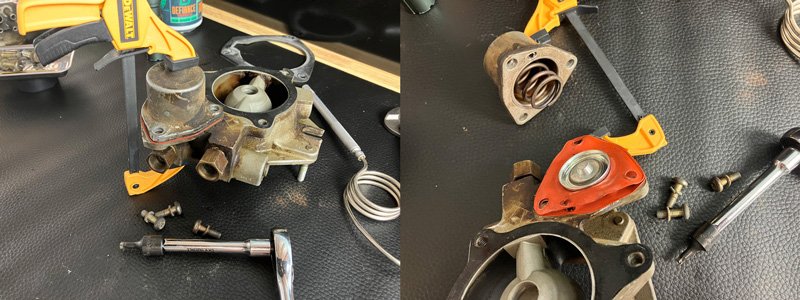
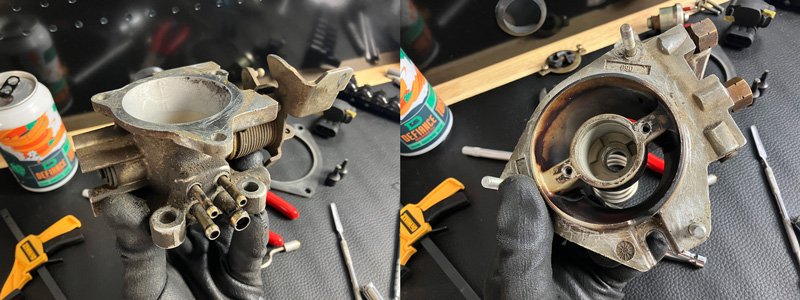
Cleaning and rebuilding my throttle body was a project that seemed daunting while leading up to it. However, this project was FAR LESS of a big deal than anticipated. This guide is a helping hand for those 2.5L guys that haven’t done this before. Since the throttle body is going to be out anyway, I’d recommend doing all the things Cruiser54 suggests. Removing the TB opens up so much room to get at the things that might be bugging you. This whole project took 27hrs that stretched out in 3 weekends. Besides the TLC I gave to the throttle body, I also did this stuff: • Tighten all Manifold Bolts to spec... I had one of these bolts missing! • Clean all Wire Harness Connections • Firewall to Intake Ground • Clean PCV Valve • Clean EGR Valve • Clean Intake Air Temp Sensor • TB 4-Hose Vacuum Connection • Replace Any Vacuum Hoses • Adjust TPS What You’ll Need: Standard Motor Products #1605 Throttle Body Rebuild Kit. The key is to take your time and be methodical. Read up on manuals, label stuff, and take reference pictures as you disassemble. Since I have an 86 MJ I bought this manual for assistance: 1983 - 1987 Jeep Throttle Body Fuel Injection Component Service Manual Published by Detroit Iron and can be purchased through Rock Auto General Order of Operations: • Disconnect Battery & Unscrew Gas Cap • Disconnect Air Bonnet Assembly, with Vacuum Hoses • Disconnect Fuel Lines • Disconnect TPS, WOT, ISA & Fuel Injector Connectors • Remove EGR Valve • Disconnect Throttle Linkage Spring & Cable • Remove Throttle Plate Assembly (keep the ISA motor attached) • Remove Throttle Body Assembly Once the air bonnet assembly and hoses are off, there’s a plastic part on the very top of the TB that needs to be taken off. Once its off, the TB removal process becomes much clearer to recognize and understand. Just go about it logically. Lots more room available after TB is removed! Use tape for identification and to keep out grime — Note: firewall to intake ground improvement Dirty Throttle Body The throttle body itself is pretty straight forward to dismantle. A few Torx sockets will get it apart. I used a plier with deep teeth to lift the fuel injector out. Use a twisting motion as you lift to remove it. Others use a slotted screwdriver to pry it out, but I think the plier method is best. I used a mini bar clamp to help take apart the fuel injection pressure regulator. Inside is a strong spring, and this little clamp helped out tremendously. To clean the throttle body I’d recommend using a few Scoth-Brite pads. They’re flexible and won’t do any damage. I used a full can of throttle body cleaner during the cleaning process. A nylon brush comes in useful for the exterior, and a few pipe cleaners did wonders for inside the tubes. Throttle Body After Cleaning Re-assembly was easy. Only a few things will be used from that #1605 kit. Just match up the old with the new. The mini bar clamp came in handy again when bolting together the fuel injection pressure regulator. A few pieces of low tack tape will help hold that orange diaphragm in place as you close it up. Clean & Assembled Throttle Body Clean those Electrical Connections! Throttle Body Bare Vac Connection New TB Vacuum Hose Connection A word of advise... this picture above was taken before I successfully connected my clean throttle body to the new hoses. I failed at the first try. I ended up pulling all four hoses out, and barely reattached them to the vacuum hard lines. Why? Because you'll need all the available hose length to successfully attach the TB. Have a heat gun ready. 1) Lube every metal tube with silicone spray... including the TB brass tubes 2) Warm hoses with a heat gun 3) Slowly, but quickly get that clean TB onto the hoses 4) Continue to warm with heat gun if needed. Also, be sure to place your intake gasket BEFORE mating the TB to the 4 hoses. Clean & Fresh 2.5L Throttle Body with New 4-Hose Vacuum Connection All Buttoned Up!
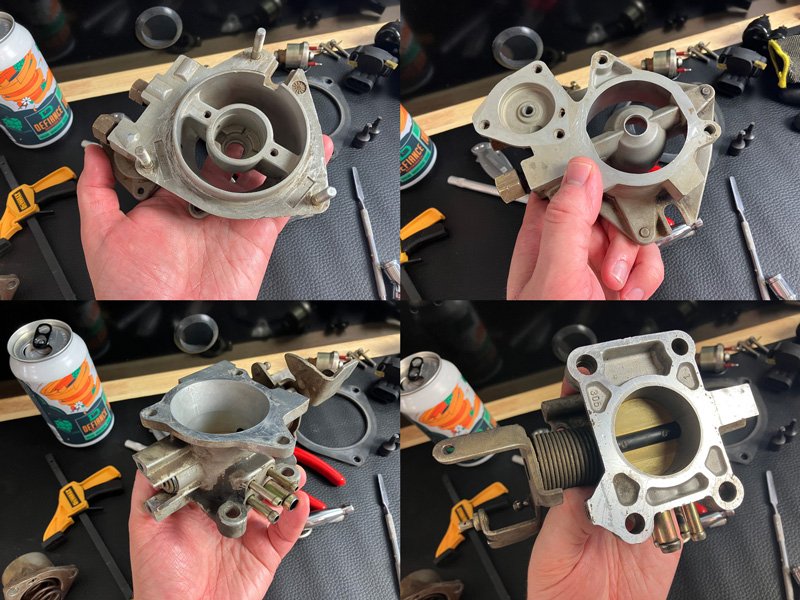
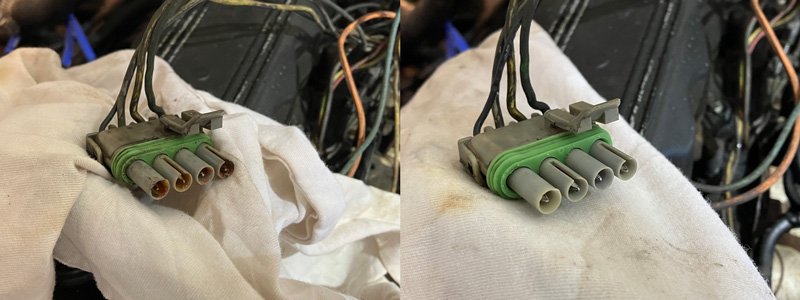
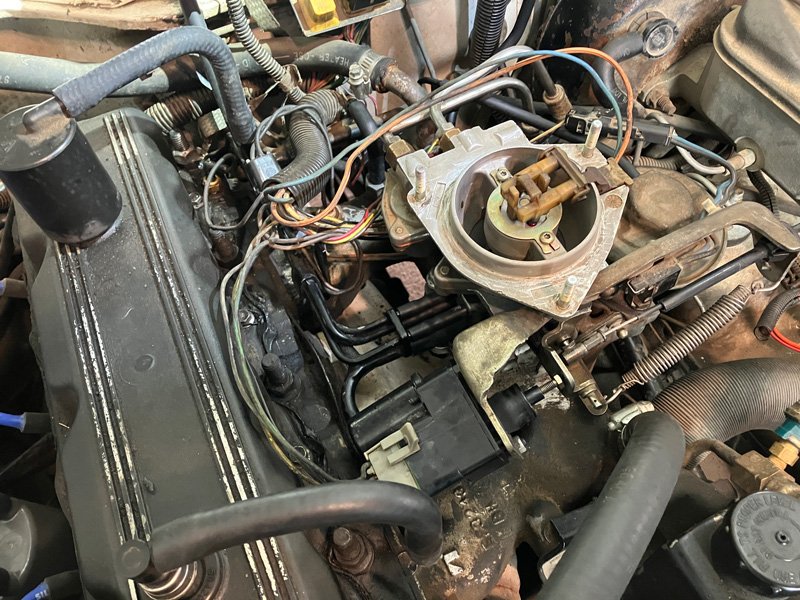
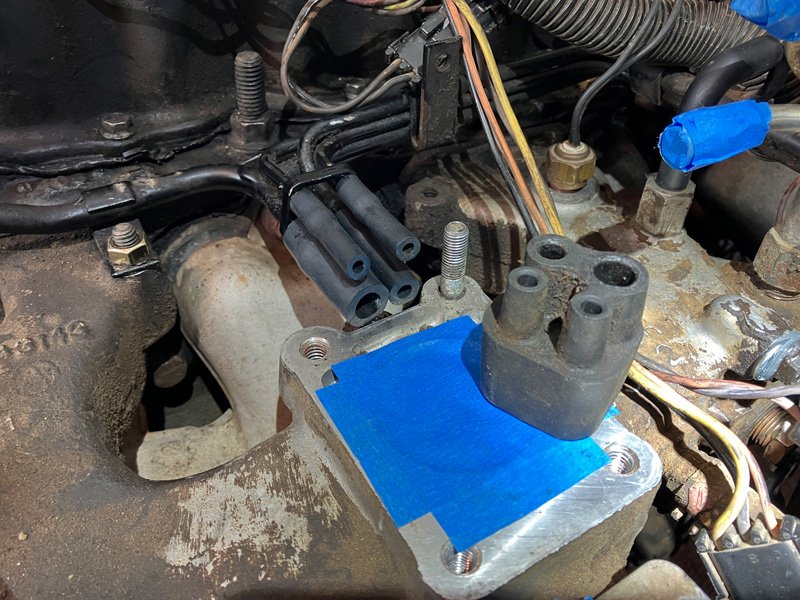
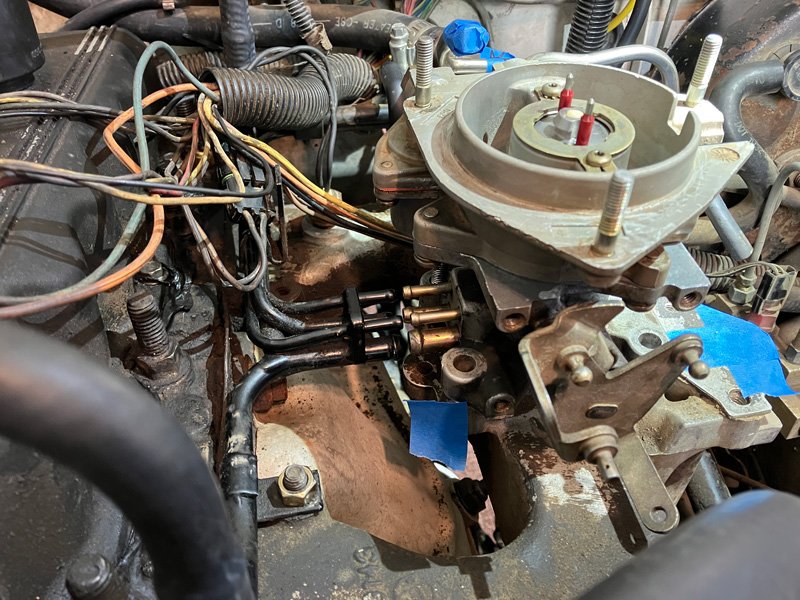
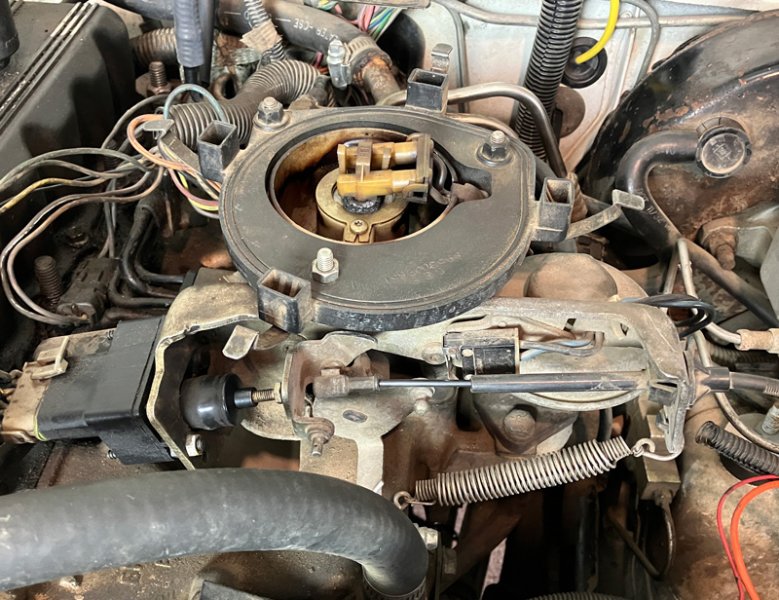
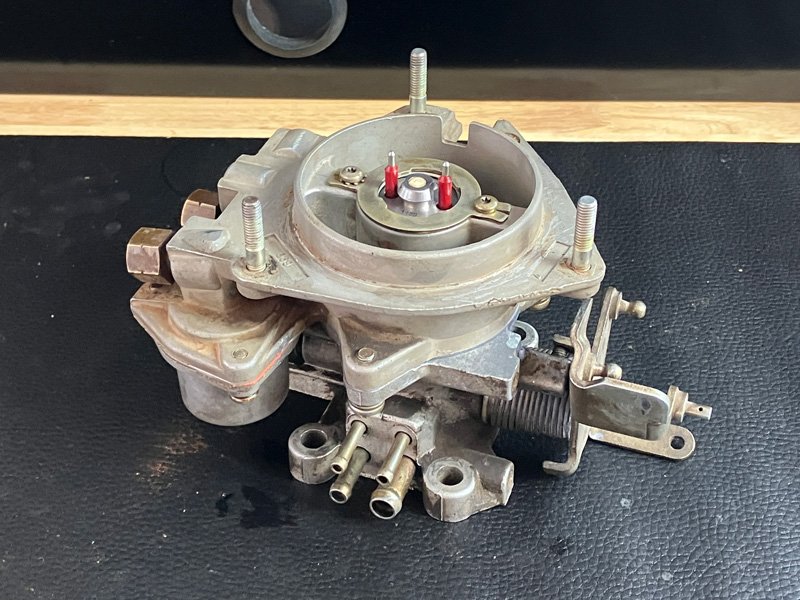
-
...and the tailgate.
-
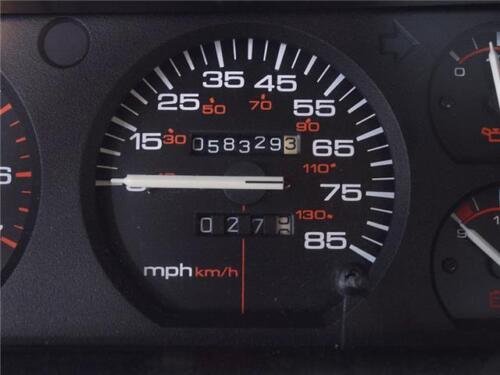
oh jeez, ha ha! Yes, see now that I have somehow misread the mileage.
-
That looks like its fun to drive, and also use. Pretty cool piece of antique machinery.
-
Interesting, I had a difference perspective when I was reviewing the listing photos. For 583k that truck looks to be in superb shape. Photos lie I know... but figured it would look far more lived-in by now. Guessing the real mileage would be roughly half of what the odo says.
-
hey, something seems fishy here...
-
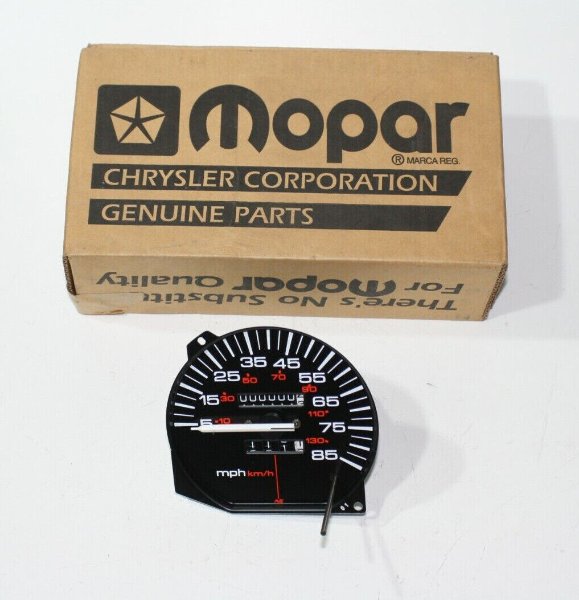
This speedometer is listed wrong as a Tach on eBay. It has a Make Offer button, so price can be low-balled. https://www.ebay.com/itm/402251037593?hash=item5da807bb99:g:fgEAAOSwg-tjM0Bg&amdata=enc%3AAQAIAAAA4HyidtcoS3xjooxA8a0vNp36aXD8ocQWLiszDicg8%2FU%2FJHy%2BIUkHzKqn6WtBRPqhYZ5p%2FZMdzGTXr6r6cM5xYDtqBzX5NYumHxqVlZ9qTFsjJoBsLzJfW3PL0R9cUfdcCPMMliWy9SBo4CB7lGw3aaPVqhid33giZCvrIzcP5cM4%2FNl4x5tTzueW9dS161FJ09oVf9lcs%2B8OeKi6Ulg87N8ci4dwAENKdtbKKXO2tRQpsucez%2FPRyq5mHZdlK3F%2F0r30dg18RD9hxeobSgIYWHjUlLB3STGz0pXmnpkh%2BFVM|tkp%3ABk9SR5bfobqTYg#shpCntId
-
This is a great idea and well executed. Pictures are excellent. I'd like to see something like this for us 2.5L guys.
-
Odometer stopped working
White_Comanche replied to Rubikahn's topic in MJ Tech: Modification and Repairs
This is great to know. One thing I'll add is be sure that all the odometer numbers L-I-N-E-U-P. I made the mistake of closing up my dash after a cluster swap while my numbers looked like this. While driving the first mile wheel turned in a screwy way. Ended up pulling the gauge out again to align all the numbers. Now the odometer works as it should. For Kable-Ease I'd recommend sealing the tube in a small plastic bag after use. My toolbox was a mess after it leaked. The lubricant is not easy to clean up either. The tube has one of those screw caps where it needs to be 110% tight for it to not leak.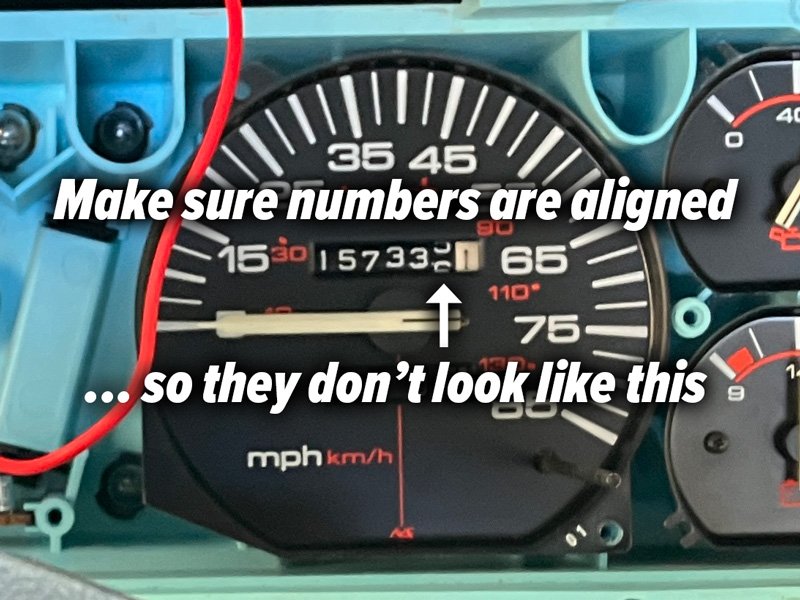
-
Odometer stopped working
White_Comanche replied to Rubikahn's topic in MJ Tech: Modification and Repairs
Do you still have your old cluster? You might be able to swap out just the speedo/odo gauge. That assumes it has the same gauge face style and speedo connection type. If you don't, remove that gauge and see if it's binding somehow. Tip: you can "power" the speedometer gauge by using a cordless drill... find something suitable that fits into that back square hole and chuck it into a drill (I whittled down a short length of square plastic rod). You can listen for any clicks to pinpoint where the issue is. On the back of the gauge there's a tiny C-Clip holding the mile number drum together. Once that's removed all the numbers can be separated and adjusted. I'd say greasing your speedo cable will largely fix the needle bounce... maybe fiddle with the cable underneath to see if you can minimize any harsh curves. I recently used a product called Kable-Ease by AGS. It worked great, and is specifically designed for this application. Note: I used this on a brand new cable during my own cluster swap... and didn't just squeeze it down the hole. 1) I straightened the new cable out on clean hard flooring, 2) drew out the long metal line, 3) applied an even coat while wearing latex gloves. -
NOS Speedometer (ebay)
White_Comanche replied to russel730's topic in Craigslist/Marketplace/eBay... i.e. Not Your Stuff
Sweet. It would be awesome if one shows up sometime in the next several months! I currently have all the gauges with the old style look... including a tach. I believe it has a bad resistor. It's bloated and cracked open. It was nice to buy this NOS speedometer because the one that came in the cluster I purchased was in really bad shape—very gummed up and off-balance. If nothing shows up I'll make this into a late-year MJ project and try to find a suitable replacement resistor. -
NOS Speedometer (ebay)
White_Comanche replied to russel730's topic in Craigslist/Marketplace/eBay... i.e. Not Your Stuff
I ended up purchasing this NOS Odometer this weekend. Thanks for posting the listing on CC a few weeks ago. Otherwise it would've flew under my radar. I'm slowly piecing together a working full set of gauges with the old style face plate design. If a NOS Adjustable Tach gets listed on eBay I'll be tickled. -
REM from Nick-In-Time
White_Comanche replied to Drahcir495's topic in MJ Tech: Modification and Repairs
Might be able to help you out on this manual. The 2.5L quick-reference guide I made turned out well. I do catalog design work, and layout + typography. -
REM from Nick-In-Time
White_Comanche replied to Drahcir495's topic in MJ Tech: Modification and Repairs
I too, have a Clock REM. The first project it helped me out with was calibrating the tach in a 1990 cluster I installed. I've been monitoring the manifold pressure and coolant temp with it mostly. Seeing results in real-time while driving is cool. All the functions are a bit overwhelming at first, but piece by piece I'm able to grasp them in an entry level sort of way. One thing I'd recommend is going to his website and copy and paste all the REM functions pertaining to your 2.5 or 4.0. The folded pamphlet that came in my box (late 2022) was old, not updated, and organized poorly. His website has all updated copy. All the readings that these REMs display always cycles in order. What I did was write down each one in order... then I created my own cheat sheet from what was saved from his website. This process also helped me learn.
-
Looks like your 86 is in pretty decent shape. Think we'd all like to see more pictures!
-
Wiper Arms Park in Up Position
White_Comanche replied to White_Comanche's topic in MJ Tech: Modification and Repairs
Thanks a lot guys. I failed initially by trying to be smart and save time. Found out that only turning the motor shaft doesn't work! the entire assembly needs to be removed. Ended up doing exactly what pizzaman mentioned. Unbolted the crank and oriented everything back to park position. I used q-tips with bluetac to see how the wiper studs were arcing when the motor was turned on. Discovered I also needed to disconnect the bottom-drivers pivot bushing to get the passenger side to wipe in the correct way. Moral of the story: take note of the linkage orientation before diving to do a complete wiper motor overhaul.
-
I'm perplexed as to why my wiper arms park in this up position. I cannot adjust the arms in a horizontal way... if I do, they'll crash into the cowl. The swing of the arms have no issues. They go up and down making a proper arc. During the past month I spent lots of effort refurbishing my wiper motor, gear housing, bushings, etc. Also installed a working intermittent governor that Eaglescout sent me. Lo/Hi and intermittent speeds work great. But when switched to park (off) this is where they rest:

-
Since owning my MJ, I've been noticing how darn cool older trucks are. Lots of care went into beautifying this Chevy LUV. The owner found some knobby tires that really make the truck look rad.

-
Sold! Thanks Eagle for the wiper module.
-
Great thanks Eagle. If a newer ZJ wiper module can be used on an 86 Comanche I'll take it. Hopefully it checks out during testing.
-
I'd like to find an Intermittent Wiper Module in good overall shape that is known to work properly. Asking CC members first before getting one on ebay. Don't know what these things go for, but the few on ebay seem overpriced. Pretty sure mine is not operating right. When tapping on it with a finger, or physically rotating 180° it makes my wiper motor stutter and can sometimes move the wipers. Also low speed is not reliable.

-
Wipers won’t turn off need help
White_Comanche replied to Manche90's topic in MJ Tech: Modification and Repairs
You are describing much of the same wiper issues I've been working to resolve. These links below have guided me on which direction to go. What I'm doing is replacing the bushings, and also generally restoring the motor and gear housing. Fresh Yamaha Molyb grease will lube the gears. I found severe corrosion and very worn out bushings. Those two things can prevent the arms from parking. Soon I'll find out the results. Have not reinstalled it yet. When disconnecting the Intermittent Governor, and plugging both side connectors together, I'd say it's a good sign if only low/park work. https://comancheclub.com/topic/16246-wipers-won't-turn-off-wth/ https://comancheclub.com/topic/41809-no-windshield-wipers/ https://comancheclub.com/topic/61787-no-wipers/ https://comancheclub.com/topic/57353-comprehensive-wiper-modification-upgrade-maintenance/ -
Using a HEAT GUN on various MJ projects has helped me out tremendously. Anything from disconnecting electrical connectors to softening up vacuum hoses before going over a nipple. Especially connectors. Nothing pisses me off more than breaking a plastic tab! A recent project that got extensive use was removing my wiper motor for refreshing. I used the heat gun to warm up the posts the wiper arms connect to. They popped right off with little fuss. Also used heat again to soften up and remove hardened grease in the motor gear housing. Another job that was made much easier was targeting the plastic wiper arm bushings. With heat, the old bushing came off easier, and the new ones installed in a snap.