

White_Comanche
-
Posts
263 -
Joined
-
Last visited
Content Type
Profiles
Forums
Gallery
Everything posted by White_Comanche
-
TBI ISA Adjustment procedure
White_Comanche replied to eaglescout526's topic in MJ Tech: DIY Projects and Write-Ups
Great write-up Eagle. Thanks for explaining things in granular detail when it was needed. This step-by-step will come in handy for anyone trying to figure this out. Wearing hearing protection during this procedure is really smart. I would include eye protection as well. -
Idle Stepper motor issues
White_Comanche replied to trailturd's topic in MJ Tech: Modification and Repairs
-
Idle Stepper motor issues
White_Comanche replied to trailturd's topic in MJ Tech: Modification and Repairs
I think this would be awesome, and would pretty much eliminate any confusion on the whole process. Well over a year ago we exchanged a few emails regarding you rebuilding my ISA. Never did follow through because I eventually found out that my motor was quite new around the same time I did extensive work in and around my throttle body. The few times my ISA got stuck it was during cold winter starts from it not being driven for a long while. I read pretty much all literature in various FSMs on the whole procedure. When parsing out the steps from their word usage, it really gets confusing. A Comanche Club post using modern language and photos to fall back on will be a great help! -
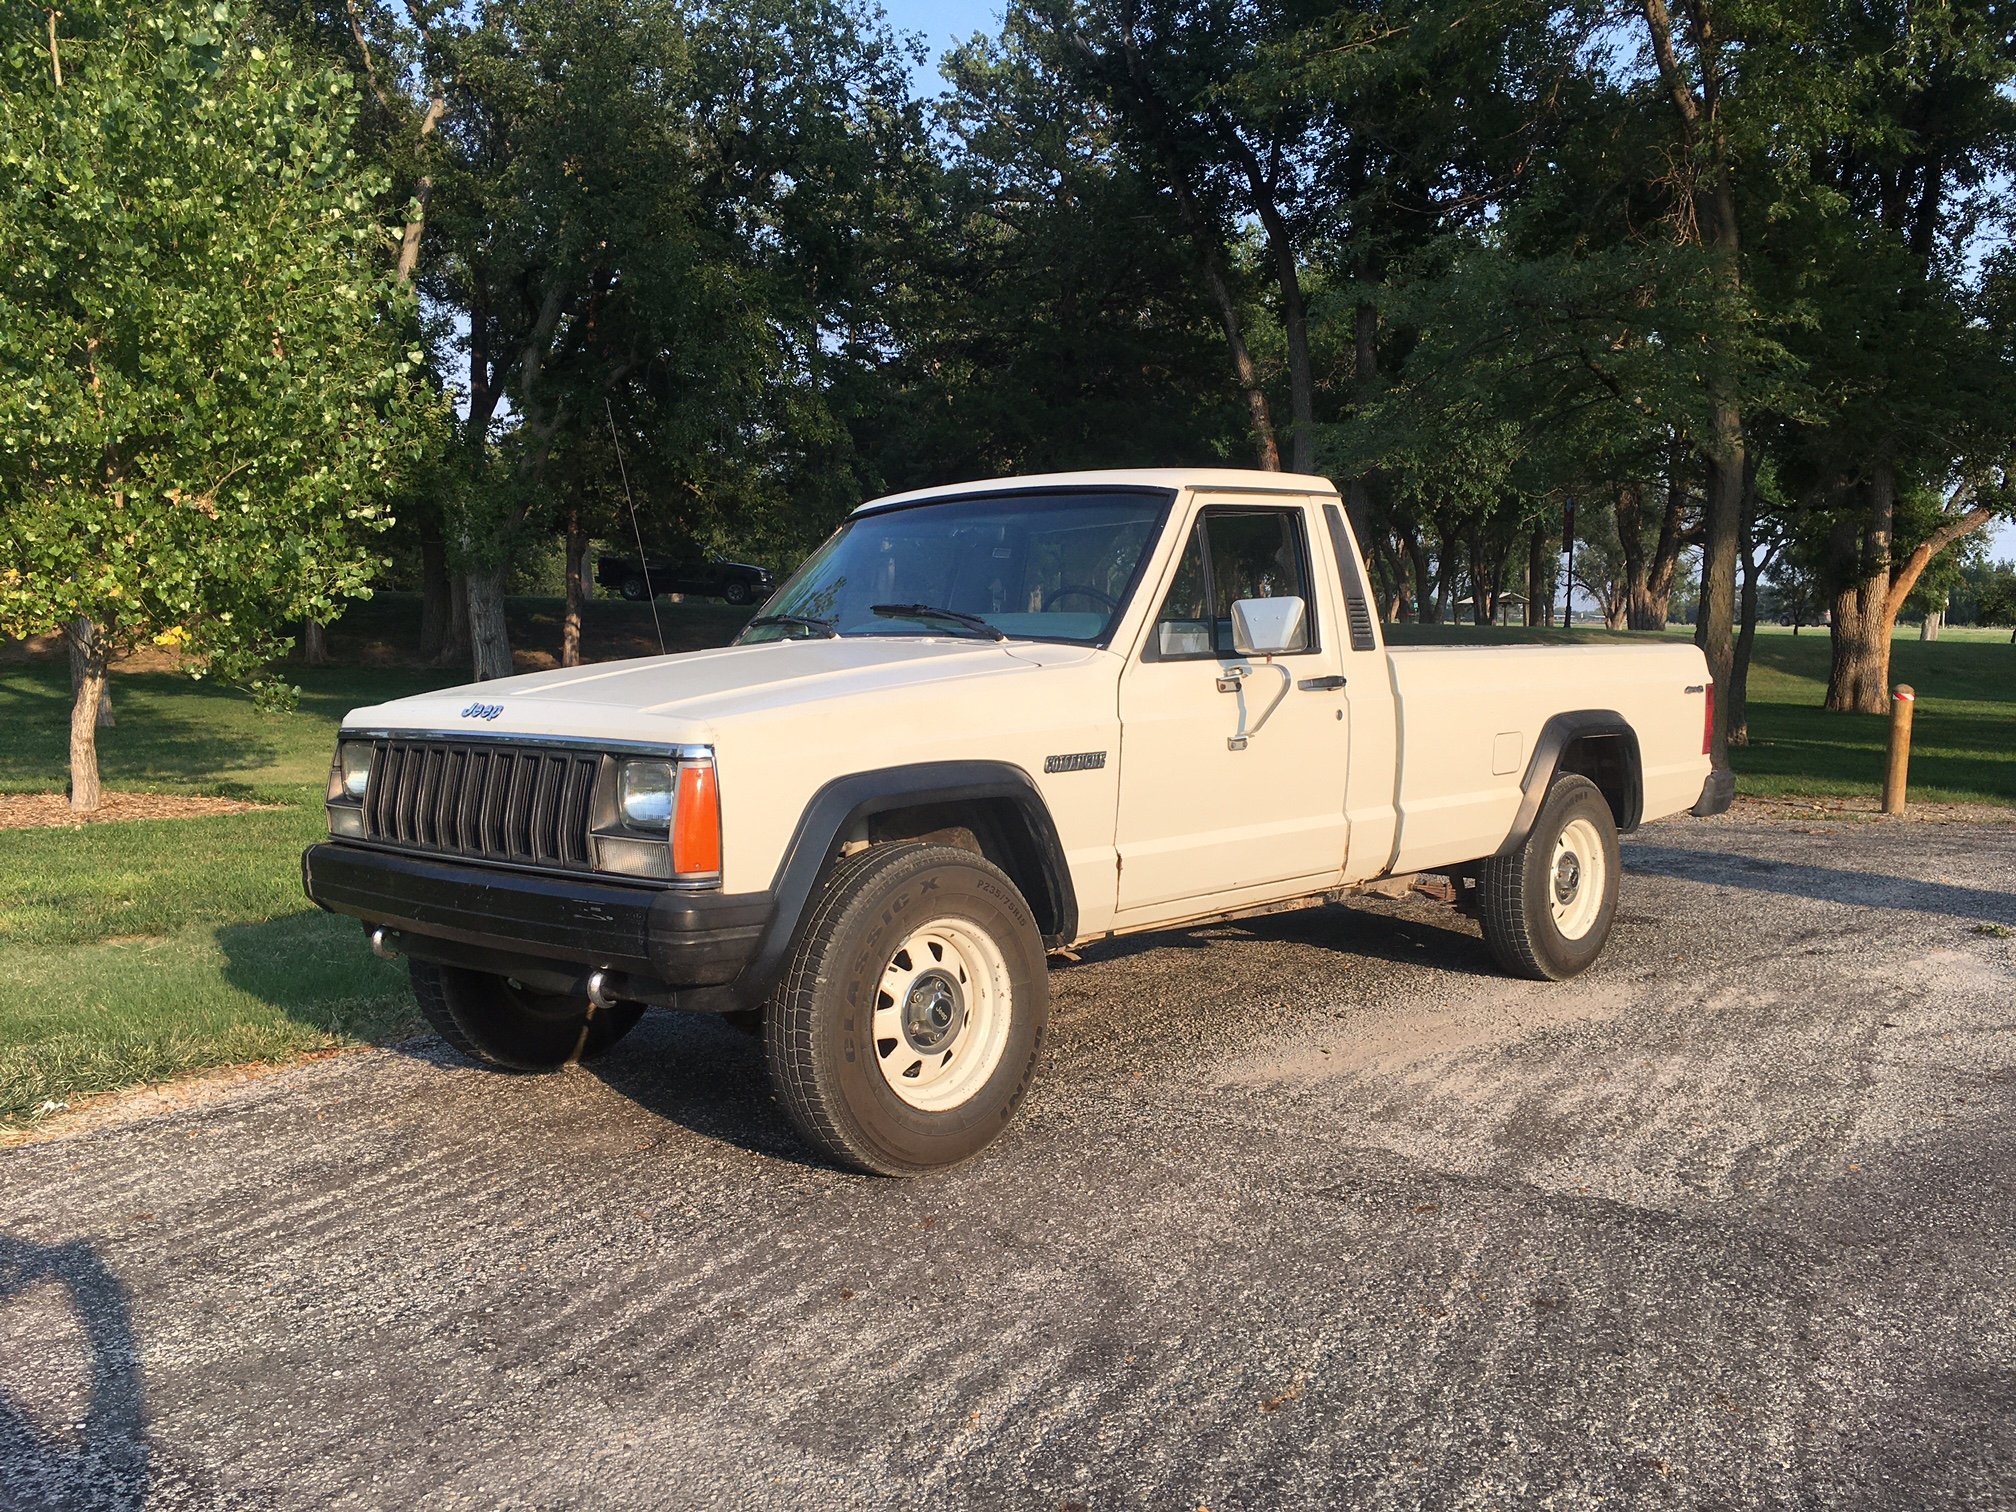
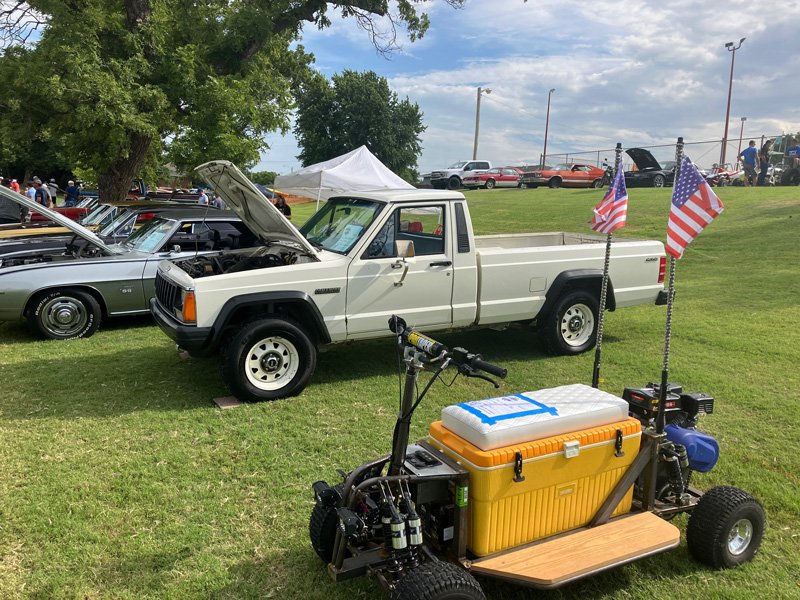
Took my MJ to its first car show this past weekend. The show brought in 80 vehicles in total. That custom cooler kart in the foreground got the 'show favorite' award.
-
2.5L Backup ECU Hunt ~ 1986
White_Comanche replied to White_Comanche's topic in MJ Tech: Modification and Repairs
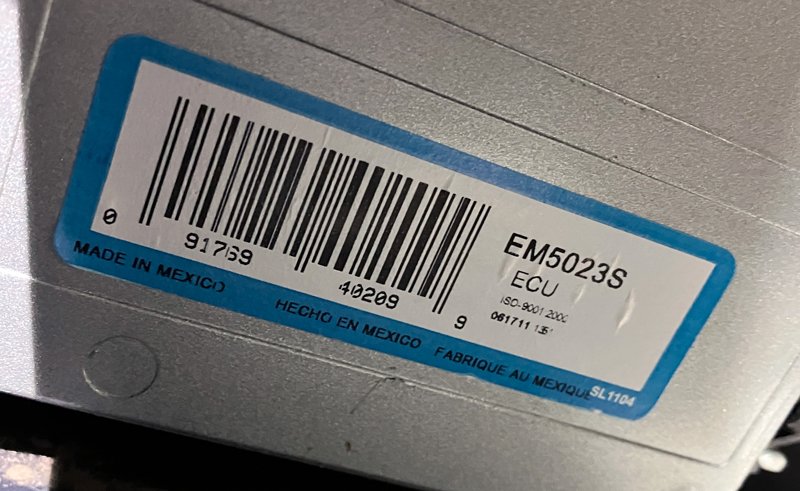
Hey Eagle, do I search for ECUs like this? I've been seeing a little more than anticipated. Just curious... why am I not seeing any real continuity between the numbers on these labels vs the others that look in this style? Or are these a looping range of part numbers?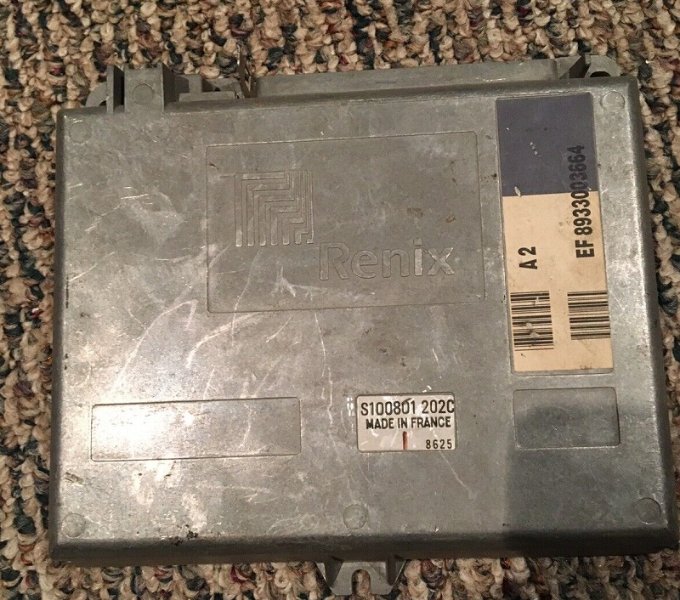
-
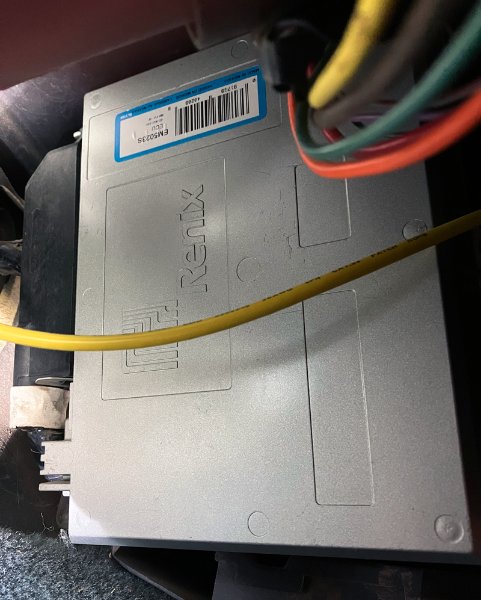
I'm inspired to get a backup ECU ever since @Pete posted that recent PSA about this critical piece. 'Cause no working brain box equals no vroom-vroom. My ECU is original, and judging by how it looks it could last my lifetime, but ya never know. Below are pictures of it, and a closeup of the label. I'd like to know: • What year(s) of MJ & XJ ECUs work in my 1986 2.5L Manual Transmission? • What Part Number(s) should I be looking out for? • Will computers from donors that have automatic transmissions work as well? Also, are any of the 2.5L compatible years better than others? I've read that 4.0s can get a small performance bump when installing the right one. Thought I'd ask to see if there's been any new insight discovered. Appreciate all the help guys. I see a lot of these on eBay, but very few that look exactly like my ECU.
-
Thanks for posting what you have available on eBay. Eaglescout got in touch earlier and is sending me a blue buzzer. It's been a busy week and I see this thread is quite busy. I have intention of reading everything in detail when the day starts to close. Thanks guys for all the help!
-
Sweet, will pm tomorrow. Thanks eagle.
-
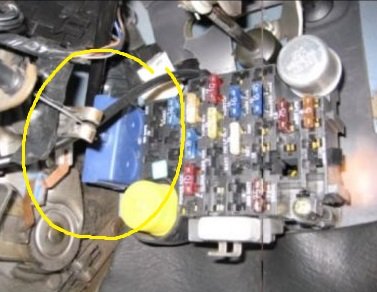
After doing some research on CC I believe I should be after a Blue Chime Module. I'm getting tired of forgetting that my headlights are on. This image is not from me, I borrowed it from our forums. The Chime Module in my 86 has never worked. It was a black one. I pulled it today and checked for voltage at pin 1... nothing. Unless my procedure for checking voltage was wrong... The fuses associated with it are all ok. The female chime connector looks clean too. Guess I'll try a different module if I can find one.
-
Comanche Club swag (stickers, posters, magnets :)
White_Comanche replied to Pete M's topic in The Pub
Pete, I’ll send you an email sometime soon. I’d like to see if there are any straight-cut vinyl window stickers available. -
2.5L Throttle Body Removal & Cleaning
White_Comanche replied to White_Comanche's topic in MJ Tech: DIY Projects and Write-Ups
Include some shots you might take. More 2.5L TB project images will surely help others out. -
96 LT4 Corvette
White_Comanche replied to Car Enthusiast's topic in Member Projects: Other Cool Stuff

-
2.5L Throttle Body Removal & Cleaning
White_Comanche replied to White_Comanche's topic in MJ Tech: DIY Projects and Write-Ups
Thanks Eagle. Yes, I used the Standard #1605 TBI kit. -
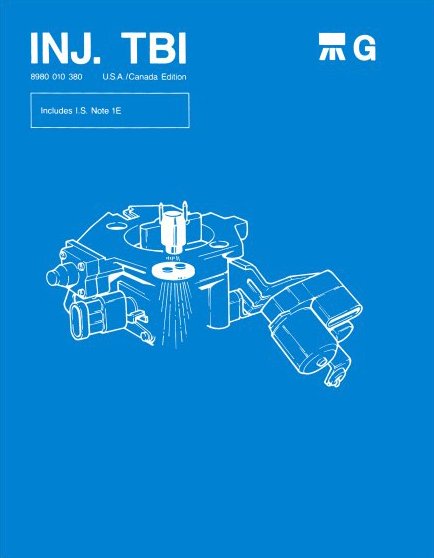
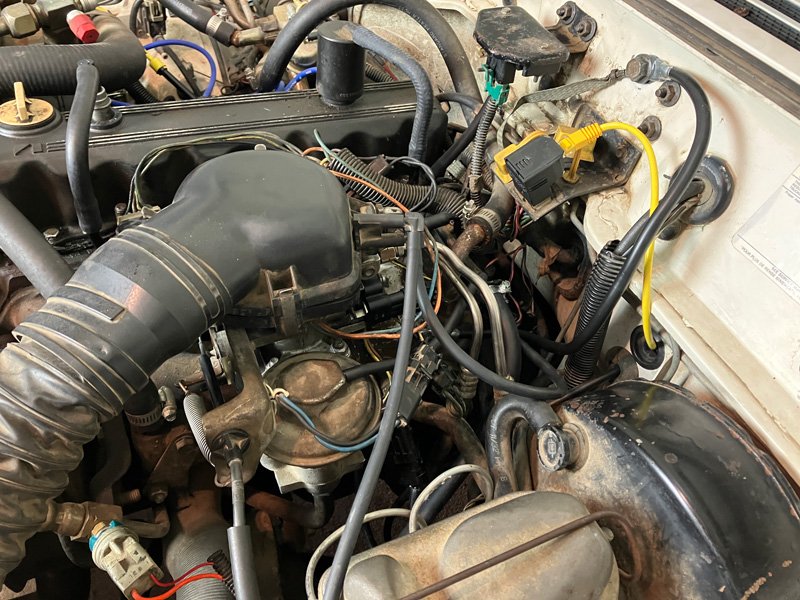
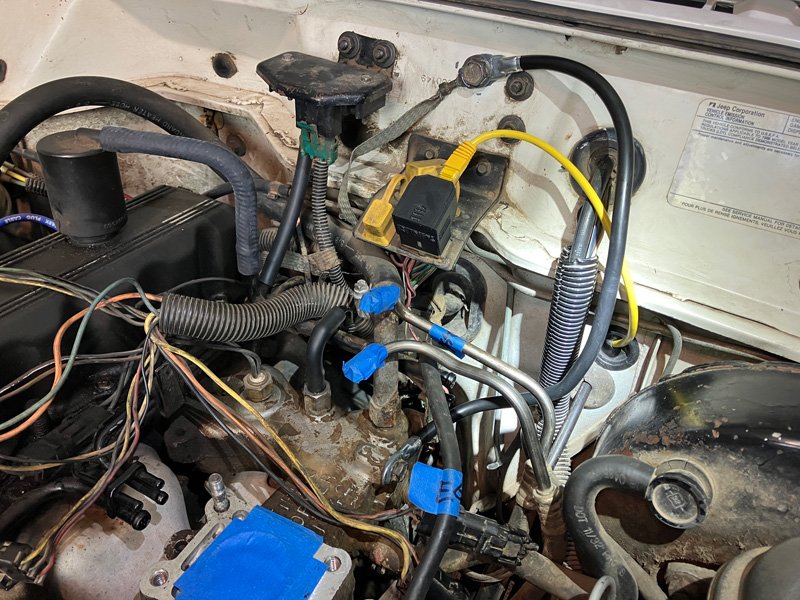
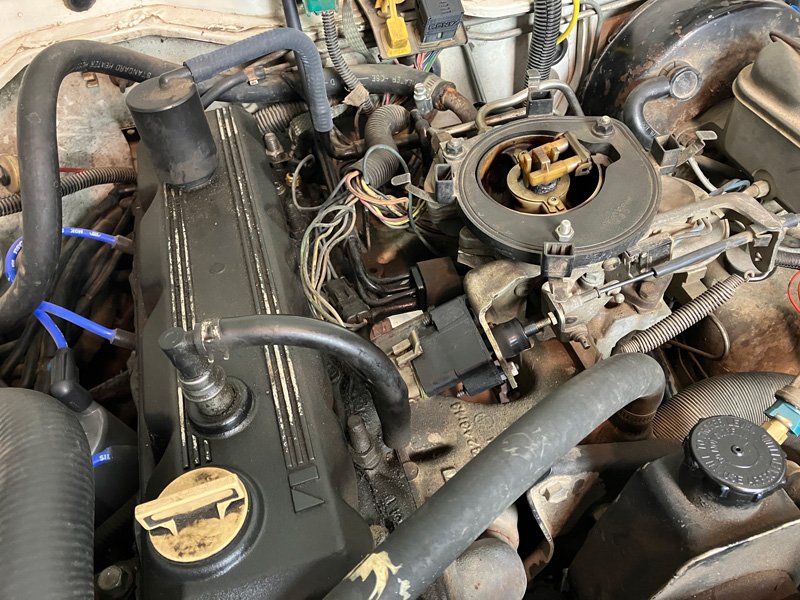
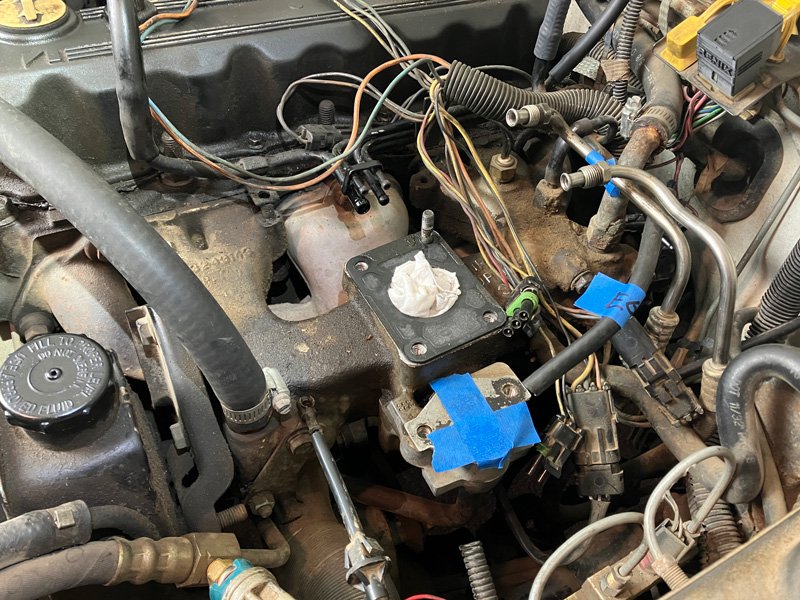
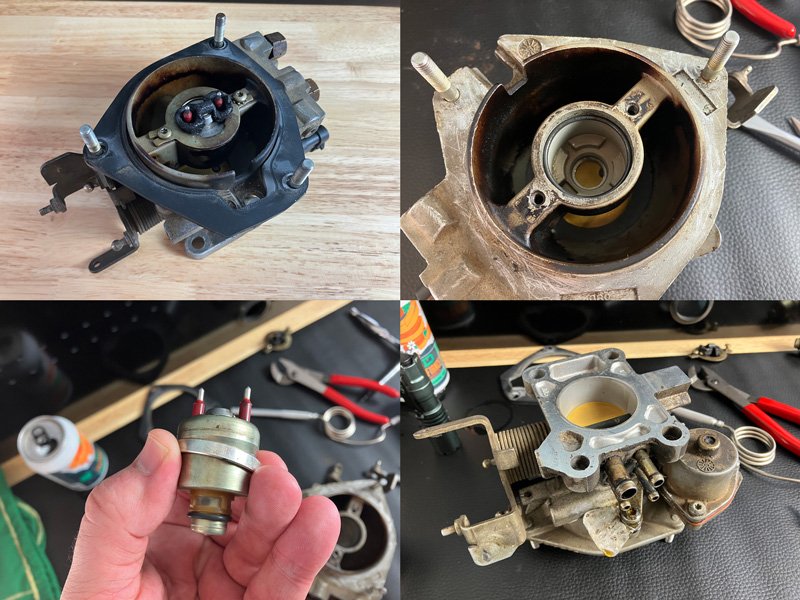
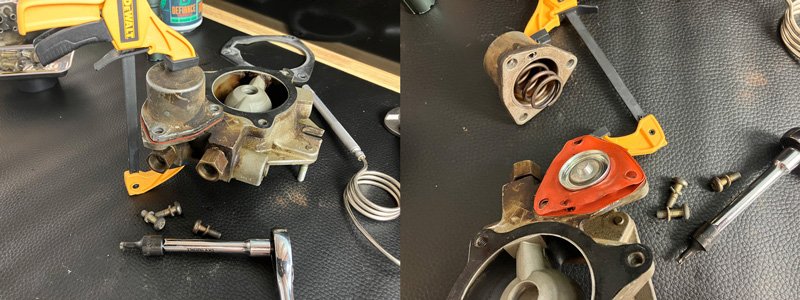
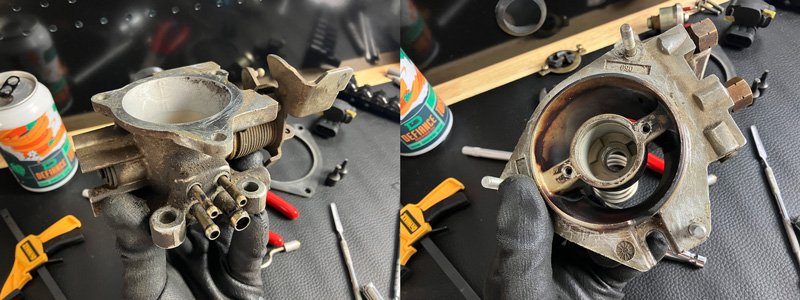
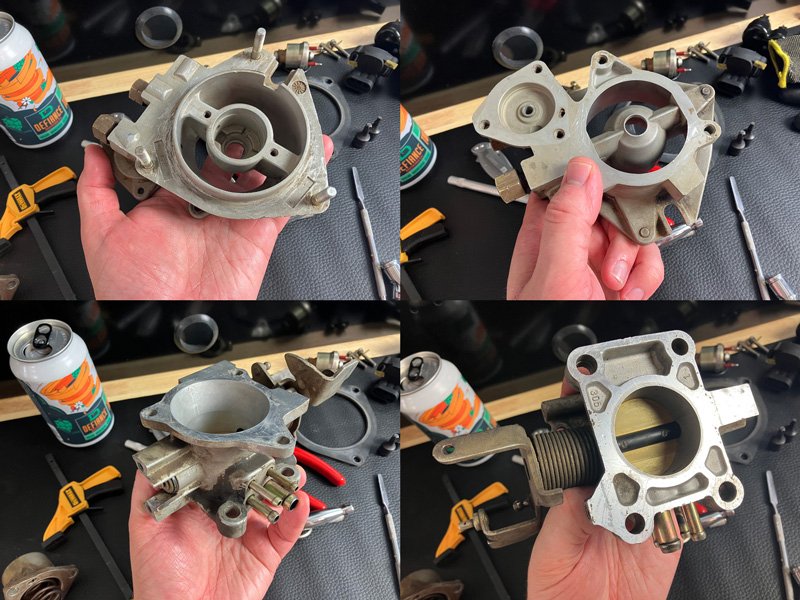
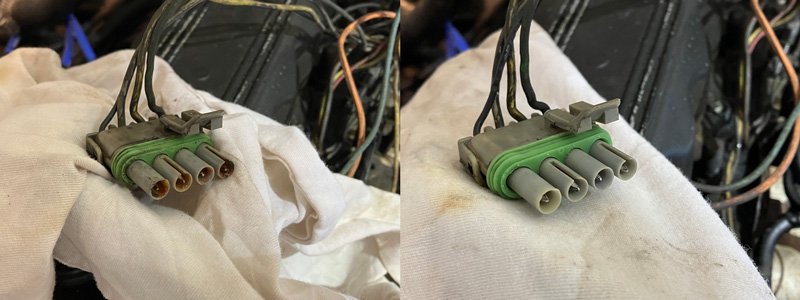
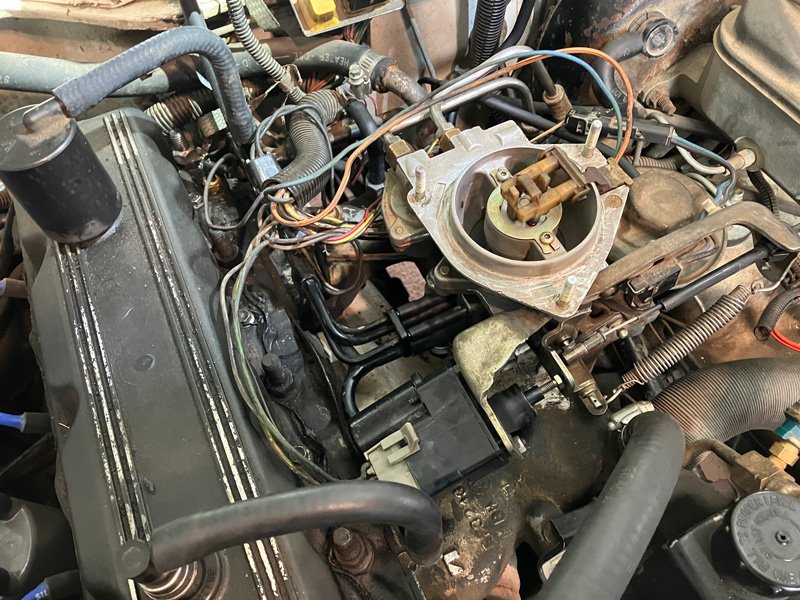
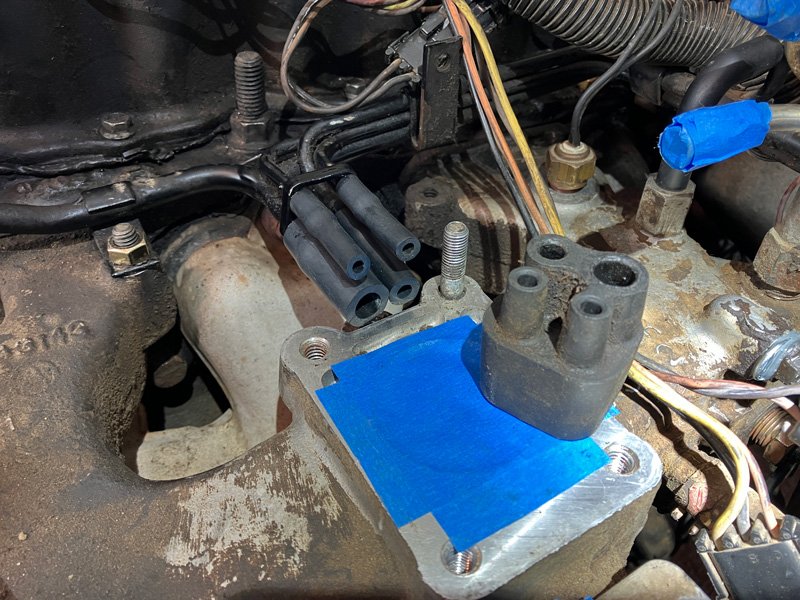
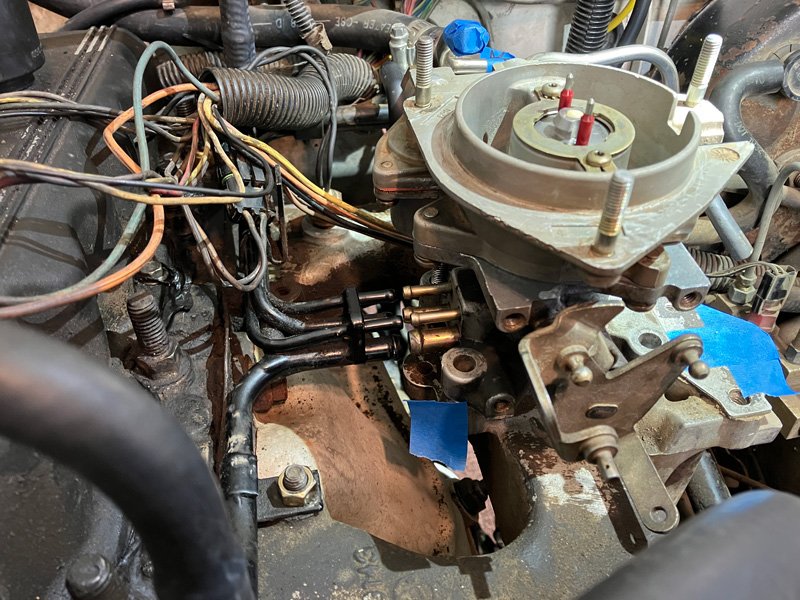
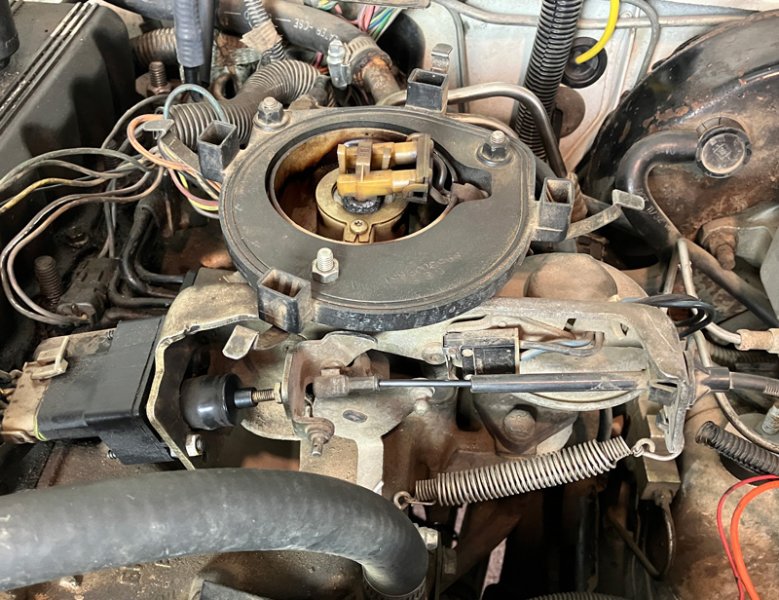
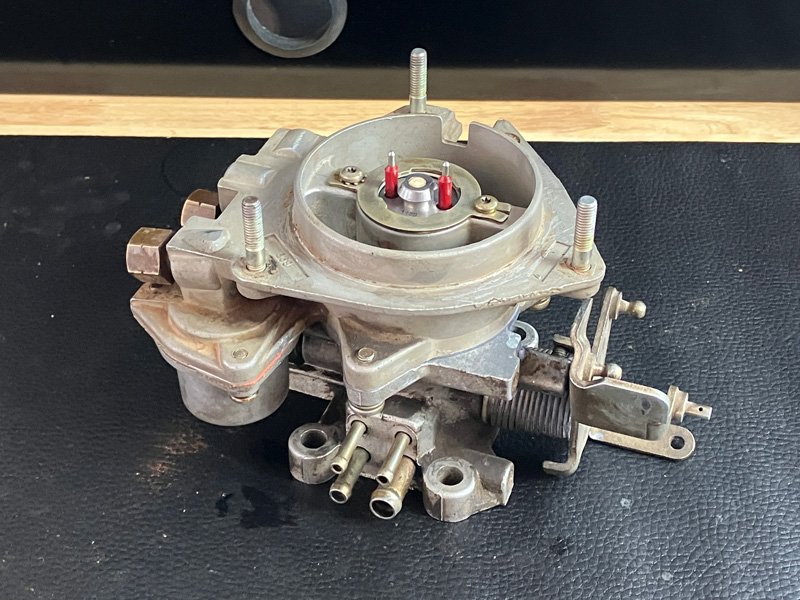
Cleaning and rebuilding my throttle body was a project that seemed daunting while leading up to it. However, this project was FAR LESS of a big deal than anticipated. This guide is a helping hand for those 2.5L guys that haven’t done this before. Since the throttle body is going to be out anyway, I’d recommend doing all the things Cruiser54 suggests. Removing the TB opens up so much room to get at the things that might be bugging you. This whole project took 27hrs that stretched out in 3 weekends. Besides the TLC I gave to the throttle body, I also did this stuff: • Tighten all Manifold Bolts to spec... I had one of these bolts missing! • Clean all Wire Harness Connections • Firewall to Intake Ground • Clean PCV Valve • Clean EGR Valve • Clean Intake Air Temp Sensor • TB 4-Hose Vacuum Connection • Replace Any Vacuum Hoses • Adjust TPS What You’ll Need: Standard Motor Products #1605 Throttle Body Rebuild Kit. The key is to take your time and be methodical. Read up on manuals, label stuff, and take reference pictures as you disassemble. Since I have an 86 MJ I bought this manual for assistance: 1983 - 1987 Jeep Throttle Body Fuel Injection Component Service Manual Published by Detroit Iron and can be purchased through Rock Auto General Order of Operations: • Disconnect Battery & Unscrew Gas Cap • Disconnect Air Bonnet Assembly, with Vacuum Hoses • Disconnect Fuel Lines • Disconnect TPS, WOT, ISA & Fuel Injector Connectors • Remove EGR Valve • Disconnect Throttle Linkage Spring & Cable • Remove Throttle Plate Assembly (keep the ISA motor attached) • Remove Throttle Body Assembly Once the air bonnet assembly and hoses are off, there’s a plastic part on the very top of the TB that needs to be taken off. Once its off, the TB removal process becomes much clearer to recognize and understand. Just go about it logically. Lots more room available after TB is removed! Use tape for identification and to keep out grime — Note: firewall to intake ground improvement Dirty Throttle Body The throttle body itself is pretty straight forward to dismantle. A few Torx sockets will get it apart. I used a plier with deep teeth to lift the fuel injector out. Use a twisting motion as you lift to remove it. Others use a slotted screwdriver to pry it out, but I think the plier method is best. I used a mini bar clamp to help take apart the fuel injection pressure regulator. Inside is a strong spring, and this little clamp helped out tremendously. To clean the throttle body I’d recommend using a few Scoth-Brite pads. They’re flexible and won’t do any damage. I used a full can of throttle body cleaner during the cleaning process. A nylon brush comes in useful for the exterior, and a few pipe cleaners did wonders for inside the tubes. Throttle Body After Cleaning Re-assembly was easy. Only a few things will be used from that #1605 kit. Just match up the old with the new. The mini bar clamp came in handy again when bolting together the fuel injection pressure regulator. A few pieces of low tack tape will help hold that orange diaphragm in place as you close it up. Clean & Assembled Throttle Body Clean those Electrical Connections! Throttle Body Bare Vac Connection New TB Vacuum Hose Connection A word of advise... this picture above was taken before I successfully connected my clean throttle body to the new hoses. I failed at the first try. I ended up pulling all four hoses out, and barely reattached them to the vacuum hard lines. Why? Because you'll need all the available hose length to successfully attach the TB. Have a heat gun ready. 1) Lube every metal tube with silicone spray... including the TB brass tubes 2) Warm hoses with a heat gun 3) Slowly, but quickly get that clean TB onto the hoses 4) Continue to warm with heat gun if needed. Also, be sure to place your intake gasket BEFORE mating the TB to the 4 hoses. Clean & Fresh 2.5L Throttle Body with New 4-Hose Vacuum Connection All Buttoned Up!

-
...and the tailgate.
-
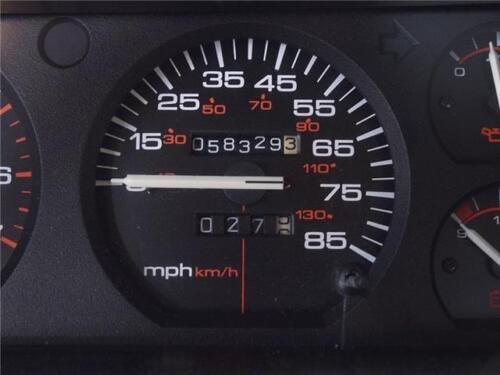
oh jeez, ha ha! Yes, see now that I have somehow misread the mileage.
-
That looks like its fun to drive, and also use. Pretty cool piece of antique machinery.
-
Interesting, I had a difference perspective when I was reviewing the listing photos. For 583k that truck looks to be in superb shape. Photos lie I know... but figured it would look far more lived-in by now. Guessing the real mileage would be roughly half of what the odo says.
-
hey, something seems fishy here...
-
This speedometer is listed wrong as a Tach on eBay. It has a Make Offer button, so price can be low-balled. https://www.ebay.com/itm/402251037593?hash=item5da807bb99:g:fgEAAOSwg-tjM0Bg&amdata=enc%3AAQAIAAAA4HyidtcoS3xjooxA8a0vNp36aXD8ocQWLiszDicg8%2FU%2FJHy%2BIUkHzKqn6WtBRPqhYZ5p%2FZMdzGTXr6r6cM5xYDtqBzX5NYumHxqVlZ9qTFsjJoBsLzJfW3PL0R9cUfdcCPMMliWy9SBo4CB7lGw3aaPVqhid33giZCvrIzcP5cM4%2FNl4x5tTzueW9dS161FJ09oVf9lcs%2B8OeKi6Ulg87N8ci4dwAENKdtbKKXO2tRQpsucez%2FPRyq5mHZdlK3F%2F0r30dg18RD9hxeobSgIYWHjUlLB3STGz0pXmnpkh%2BFVM|tkp%3ABk9SR5bfobqTYg#shpCntId
-
This is a great idea and well executed. Pictures are excellent. I'd like to see something like this for us 2.5L guys.
-
Odometer stopped working
White_Comanche replied to Rubikahn's topic in MJ Tech: Modification and Repairs
This is great to know. One thing I'll add is be sure that all the odometer numbers L-I-N-E-U-P. I made the mistake of closing up my dash after a cluster swap while my numbers looked like this. While driving the first mile wheel turned in a screwy way. Ended up pulling the gauge out again to align all the numbers. Now the odometer works as it should. For Kable-Ease I'd recommend sealing the tube in a small plastic bag after use. My toolbox was a mess after it leaked. The lubricant is not easy to clean up either. The tube has one of those screw caps where it needs to be 110% tight for it to not leak.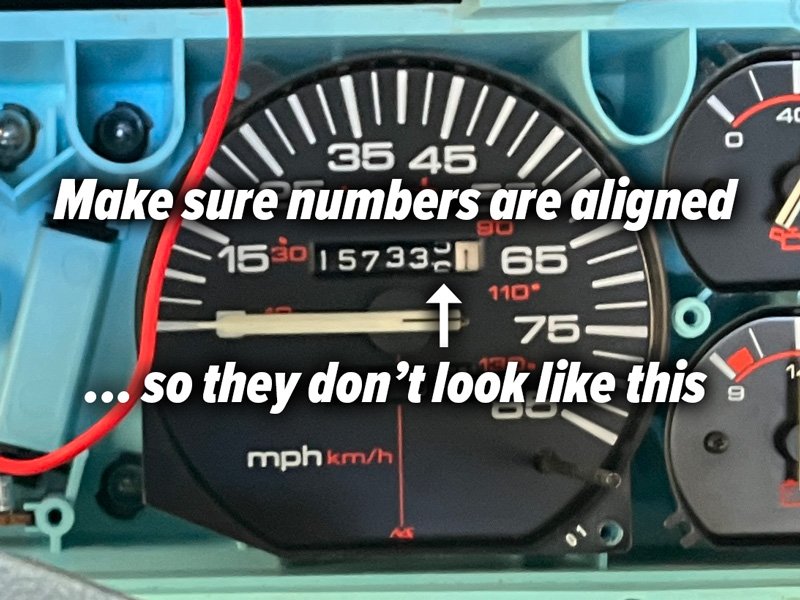
-
Odometer stopped working
White_Comanche replied to Rubikahn's topic in MJ Tech: Modification and Repairs
Do you still have your old cluster? You might be able to swap out just the speedo/odo gauge. That assumes it has the same gauge face style and speedo connection type. If you don't, remove that gauge and see if it's binding somehow. Tip: you can "power" the speedometer gauge by using a cordless drill... find something suitable that fits into that back square hole and chuck it into a drill (I whittled down a short length of square plastic rod). You can listen for any clicks to pinpoint where the issue is. On the back of the gauge there's a tiny C-Clip holding the mile number drum together. Once that's removed all the numbers can be separated and adjusted. I'd say greasing your speedo cable will largely fix the needle bounce... maybe fiddle with the cable underneath to see if you can minimize any harsh curves. I recently used a product called Kable-Ease by AGS. It worked great, and is specifically designed for this application. Note: I used this on a brand new cable during my own cluster swap... and didn't just squeeze it down the hole. 1) I straightened the new cable out on clean hard flooring, 2) drew out the long metal line, 3) applied an even coat while wearing latex gloves. -
NOS Speedometer (ebay)
White_Comanche replied to russel730's topic in Craigslist/eBay... i.e. Not Your Stuff
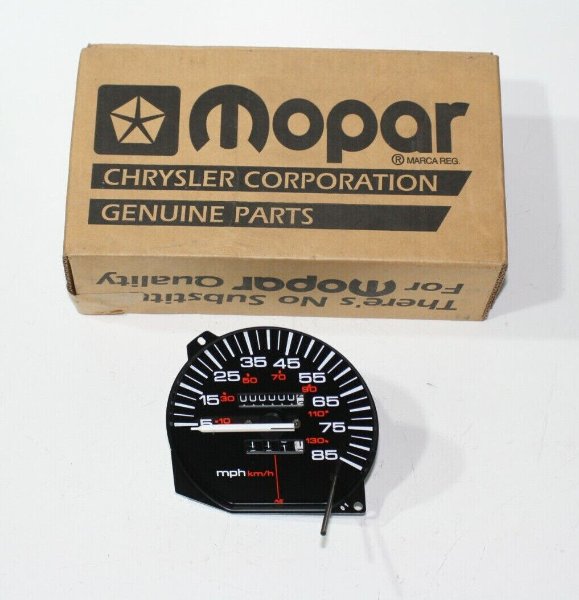
Sweet. It would be awesome if one shows up sometime in the next several months! I currently have all the gauges with the old style look... including a tach. I believe it has a bad resistor. It's bloated and cracked open. It was nice to buy this NOS speedometer because the one that came in the cluster I purchased was in really bad shape—very gummed up and off-balance. If nothing shows up I'll make this into a late-year MJ project and try to find a suitable replacement resistor. -
NOS Speedometer (ebay)
White_Comanche replied to russel730's topic in Craigslist/eBay... i.e. Not Your Stuff
I ended up purchasing this NOS Odometer this weekend. Thanks for posting the listing on CC a few weeks ago. Otherwise it would've flew under my radar. I'm slowly piecing together a working full set of gauges with the old style face plate design. If a NOS Adjustable Tach gets listed on eBay I'll be tickled.