OldSch88L
-
Posts
360 -
Joined
-
Last visited
-
Days Won
1
Content Type
Profiles
Forums
Gallery
Everything posted by OldSch88L
-
Well, my ECU just fried this afternoon. The question is, are Renix ECUs interchangeable between models? For example, I've got a '88 2.5L manual Comanche, so can I put in the ECU from a manual 2.5L Renix YJ? I opened mine and it seems beyond repair, and anything older and all the XJs at the junkyard are always 4.0L however I do see some 4-cylinder YJs sometimes.
-
 Yes it works, thank you!!!!
 -
Link is dead
-
It works, I've put a '96 full cluster in my '88 Renix 2.5. I got the connector with it when I snatched it at the JY. Almost all the wires are there, just different colors. I used diagrams and pinouts for 1988 and 1996 and cross-referenced them to figure out the connector swap. I had a poverty-spec cluster stock with dummy lights so I had to get different oil pressure and coolant temps sensors. I also had to go from cable to electronic speedo. Got the electric speedo sensor and made my own 3-wire harness. Pretty sure the new cluster came from a 4.0, and my truck is a 4-banger, and everybody said that the tach wouldn't read right, and those year clusters don't have an adjustment for it, but mine strangely reads bang-on, so big mistery there. Also note that your gas gauge will read backwards, unless you get a 1991 sending unit I think? Can someone confirm this?
-
non-jeep junkyard treasures to hunt for
OldSch88L replied to omega_rugal's topic in MJ Tech: Modification and Repairs
For cheapskates like me who want to spend the smallest possible amount to replace blown MJ speakers: Chevy Aveo for 4X6s Suzuki SX-4 for 5.25" If you stumble upon a Ford Ranger FX4 Level II, the Alcoa wheels are an easy sell on the Ranger forums. Same pattern as the MJ, but I tried 'em but the MJ has a bigger hub, so no-go, unless maybe with spacers? I've got some, they're forged aluminum and really light. Still with the Level II it has a 8.8 axle with LSD, but instead of the common Trac-Lok clutch type, it has a Torsen. It also has a stick-shift t-case instead of the electronic knob; again, the Ranger guys will go nuts for one of those. And finally, GMC k2500 4x4 rear shocks, something like a 1990, I'll have to check. According to my research, same mounting type/hardware, and are longer which would make them perfect for a lifted MJ. Only worth it at the JY if they seem in perfect shape, because even brand new, they are CHEAP!!! IIRC, the cheapest ones on RockAuto were Gabriels for like 25$CAD each! I will try it in the next months when I'll have some money; so unconfirmed for now, but research with shock manufacturers spec charts says it should work. Is that what causes that ugly tuck in the rear? So, the truck is like wedge shape, wider in the rear than the front? My Ranger 2WD's specs says the track width is narrower in the back than the front which causes the same effect, so I thought that was the case on a Comanche! -
Transfer case output leak- Your opinions?
OldSch88L replied to OldSch88L's topic in MJ Tech: Modification and Repairs
No it doesn't seem to at first glance -
I think you should change your avatar to "Admin and MJ savior", I think you're way past the MJ addict mark...
-
Transfer case output leak- Your opinions?
OldSch88L replied to OldSch88L's topic in MJ Tech: Modification and Repairs
Crap, I didn't think about that, and my shims are already on order I hope the measurement don't change too much; IIRC, I think I read somewhere that you kinda can get away with up to 2 degrees discrepancy... Well yeah, you're right, but it's just that I never thought something as simple as a seal could become such a complication. It's still weird having to go to all those lenghts, especially if it fixes it... -
Axle seal replacement (questions)
OldSch88L replied to NHMJXJ's topic in MJ Tech: Modification and Repairs
The worst one is the outside seal when you have a Dana 30 CAD, espescially if you don't have the special tool... In that case, the best option is to switch to a 1-piece axle IMO... -
I'm about at my wit's end with my transfer case's output shaft seal always leaking; I think I'm at #3 or 4, somewhat lost track. It's a 242 with external slip yoke. The original and second ones blew until I found out that the breather was plugged; you could see the seal's lips folded onto themselves and ripped. So fixed that, still leaks. Changed it again, #4, still leaks. Took a closer look, the lips and seal itself seem intact, doesn't seem to be a groove in the shaft either. Recently I noticed a vibration above 80 Km/H, so I decided to measure driveline angle, and my diff is off by 6 degrees compared to the transfer case, so I got pinion angle shims on order. While under there, I also found out that the transmission mount is shot; it's pretty easy to move the drivetrain around. Do you think that the combination of vibration and bad mount caused the output shaft to wobble a bit, causing fluid to get past the seal? After the I get the shims, I'll also order a new mount and seal, but after that, if it still leaks, I'm seriously considering buying another t-case P.S. the breather tube flows freely, and the output shaft doesn't seem to have play in it.
-
I think the front end looks good, otherwise it looks like a school bus with a jeep grille. And why the Wagoneer name? There's no styling cues inspinred by the old one, and doesn't look that much capable offroad. They might as well have called it the new Commander, since at least they have the 7-passenger thing in common... I also hate the kinda melted cheese look that seems to slowly creep into the Jeep brand since Fiat layed their dirty hands on Chrysler!!!
-
After looking closely, those beds looked familiar... Pretty sure those are Chevy stepside beds (77-ish) with Dakota wheel arches grafted on the Chevy fenders. Good news is, I'm pretty sure you can get a brand new stepside bed from LMC Truck. Personnally, the way I would do it is start with a Ford Ranger Splash bed. I've got a '98 as my main vehicle. the inside bed is narrower than a standard bed, and the sides are bolted-on fiberglass fenders, that I would remove. Then find used Comanche bed sides for cheap, like some with rusted out wheel openings. For the stepside fenders, I'd go with '81-ish Ford F-150 flareside fenders, which are more angular than the Chevy's and may go better with the Comanche's lines, then modifiy the wheel arches to go with Comanche rear flares. So, all easy parts to find except for the Comanche ones. First pic is an '81 F-150 Flareside, and the second is a Ranger Splash with its bedside unbolted to give you an idea...

-
Jeep Comanche "wing window" Seal Replacements
OldSch88L replied to Wodex's topic in MJ Tech: Modification and Repairs
I'm in the same spot as you; I searched a lot, but they don't seem to make new stock for these. -
Just saw this thread, what happened to you really sucks But glad to see you're in good hands and getting better!
-
I've got varying preferences, depending on how I feel. When nostagic about my teen years, I'll go with a 90's top songs medley, when I feel 80's I like ThePrimeThanatos' playlists on youtube (he's like a youtube DJ that specialize in synth and retro-style and cyberpunk-style music), I also like bluegrass sometimes, especially The Dead South, sometimes some original Linkin Park, classic rap and hip-hop from the 90's-00's, I also like Bob Seger a lot, and sometimes movies original soundtracks, espescially Hans Zimmer's; that guy's a genius!!!
-
I'll give you some pointers, since I used to work in a body shop. First of all, don't lose sleep on the panel adjustment; it's an '80s designed american vehicle, there's only so much you can do. That being said, you always start adjusting panels from the back forward, since the last panel (rear quarter in a car, cab in your case) is fixed and non adjustable. So align the door with the cab, loosening the hinge screws on the door and pulling the front edge of the door outwards might help you get the back edge inwards a litlle. Then, if the front edge of the door sticks out a little bit, you compensate by adjusting the rear edge of the fender. But like I said, don't go too crazy with this; personnally I think the gaps look surprisingly good, as for the depth, I've seen worse...
-
Well, I'll be dipped!!! (As Derek from Vise Grip Garage would say) Hahaha! You sir, have one heck of a sharp vision!!!!
-
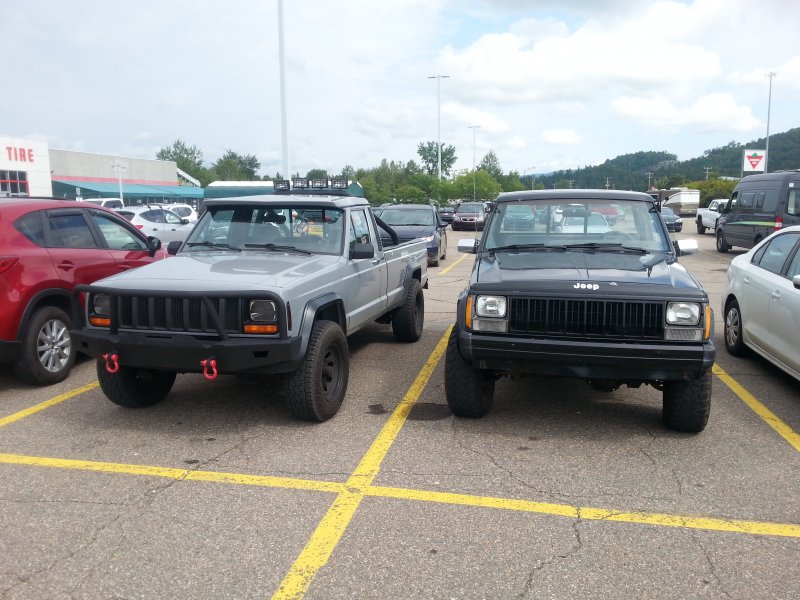
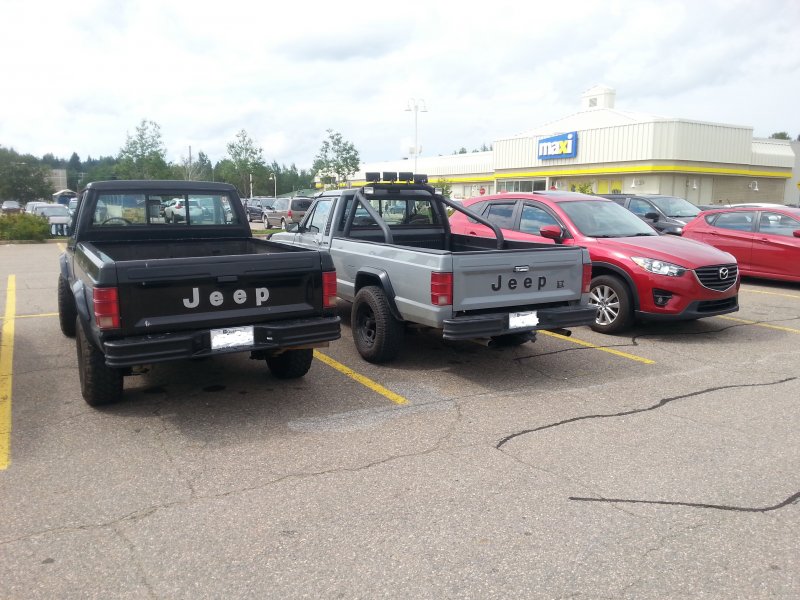
No, I don't have club cards, neither did I have a pen or paper However, I did ask around on Club Jeep Quebec (the province's biggest Jeep group on facebook) and some guy replied with a photo of the truck in a driveway, nothing else. I asked him if it was his, and I got no reply yet. Here's his photo:
-
What Minuit knows about stock Jeep radios
OldSch88L replied to Minuit's topic in MJ Tech: DIY Projects and Write-Ups
Ah well, I guess I'll live with it! Can't get too picky, I'm already really happy with the sound and just having a functionnal radio! Thanks a lot!!! -
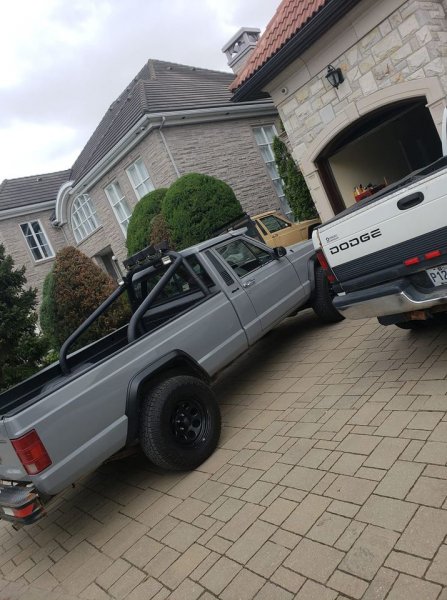
First of all, I live in a small ski-resort town with barely over 9500 people in it, in Quebec, Canada. I'm pretty much the only one living there with what you could call an old Jeep. There's a ton of Jeeps here, but mostly JKs, JLs, Patriots, Compass, new Cherokees and Grand Cherokees. So sunday I was running errands at my local Canadian Tire, and when I turned around to reverse the truck, I spot the end of the bed and tail light of this thing and thought "Hey, I know that shape"!!! A grey longbed 4x4 with a '97+ front swap! Sorry that I don't have more pics; people were checking me out like I belonged in the looney bin when I was taking these shots so I made it fast! I don't think this guy is on here, am I wrong?
-
What Minuit knows about stock Jeep radios
OldSch88L replied to Minuit's topic in MJ Tech: DIY Projects and Write-Ups
Hello Minuit, a few quick updates followed by yet another question. I finished installing an Infinity amp and speakers from a 2001 Cherokee Limited. You were right about my truck having only front speakers stock, and they were original, and were completely blown! The cardboard cones were all wavy and were unglued from the frames. I also did a once-over on the radio like you suggested, to check connections so I unplugged all the wires and put a little dielectric grease. Good news is everything works beautifully now. But the fader doesn't seem to do anything now. Do you think it's amp-related? It worked before when I only had 2 speakers, the new rears work but the fader won't let me fine-tune it seems And BTW, a big thank you for all your tips and tricks!!! -
Crankshaft position sensor is M7X1.0, but good luck finding that somewhere other than the dealer since it's an uncommon size, and half of the shank is an unthreaded shoulder, to precisely center the sensor. If you lose 'em, I found out that big conical head Phillips screws of the right size work perfectly to self-center the sensor. Found them in my bucket-O'-bolts from when I worked at a body shop, and IIRC, they're for a door jamb striker, can't remember what car though!!!
-
A lot of my favorites have been said already, but I've got some that I'm really surprised that no one said yet. Vice Grip Garage, Junkyard Digs, D&E in the Garage, TFL (all their channels), WatchJRGo, Deboss Garage, RegularCars Reviews. A bit less known but also good are: Junkyard Dave (presently custom-building an AWD, Hellcat powered Charger wagon made from Magnum, Challenger and TrackHawk parts, amongst other projects), TheSketchMonkey (redesigning past and present cars), D.I.Y AUTO SCHOOL (warning to sensitive ears, this guy's LOUD and swears a lot but he is a master of his craft for auto body and repair), Wrench Every Day (really more into it now that Jared is the host), and of course, those crazy Brits from Bad Obsession Motorsport!!
-
What Minuit knows about stock Jeep radios
OldSch88L replied to Minuit's topic in MJ Tech: DIY Projects and Write-Ups
Quick question, I scored an Infinity amp and speakers from a 2001 Cherokee Limited 60th anniversary at the junkyard. I was cross-referencing wiring diagrams between the MJ's AR-7750 and the amp, so my question is: can I use the radio's power antenna wire (terminal 3) as a remote signal for the amp? -
What Minuit knows about stock Jeep radios
OldSch88L replied to Minuit's topic in MJ Tech: DIY Projects and Write-Ups
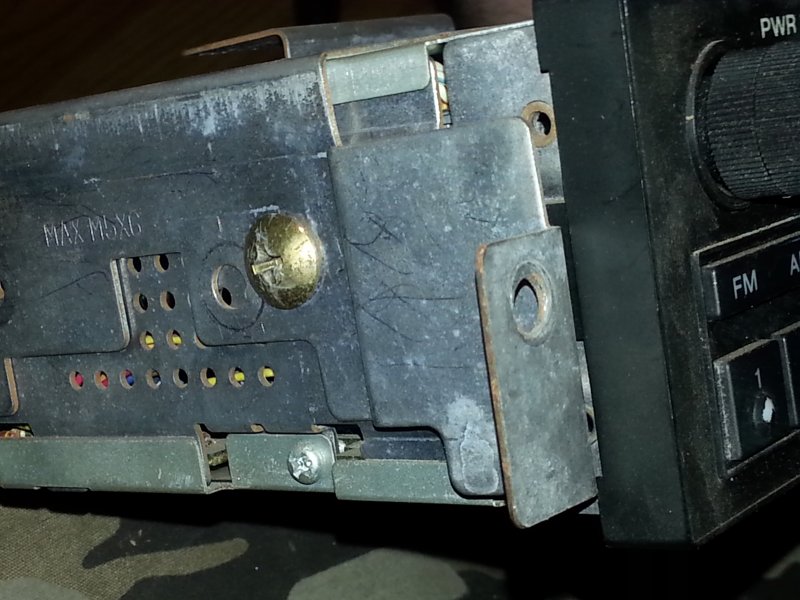
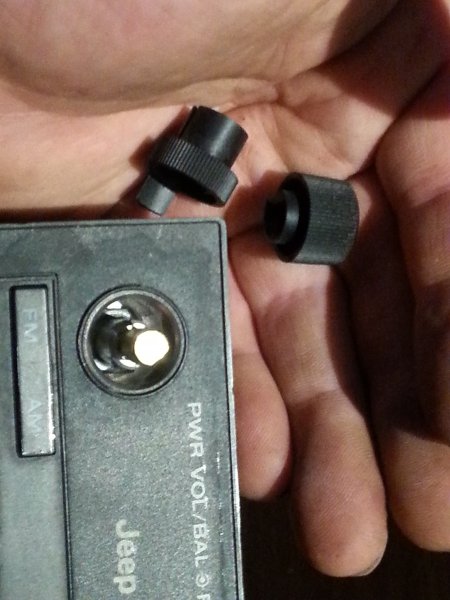
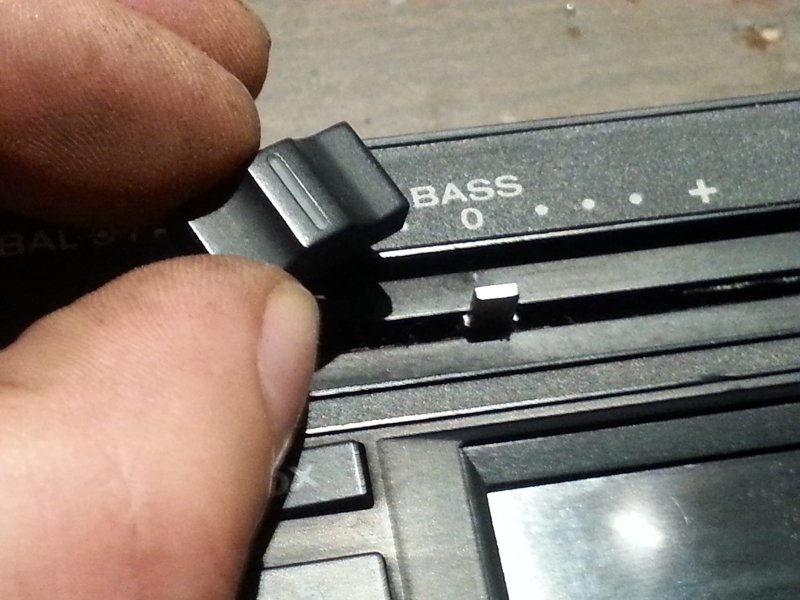
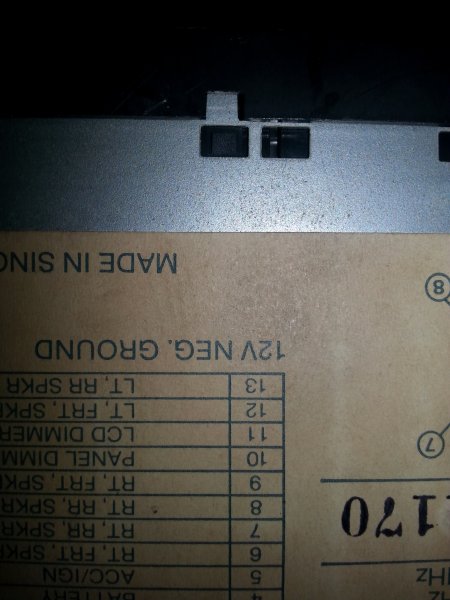
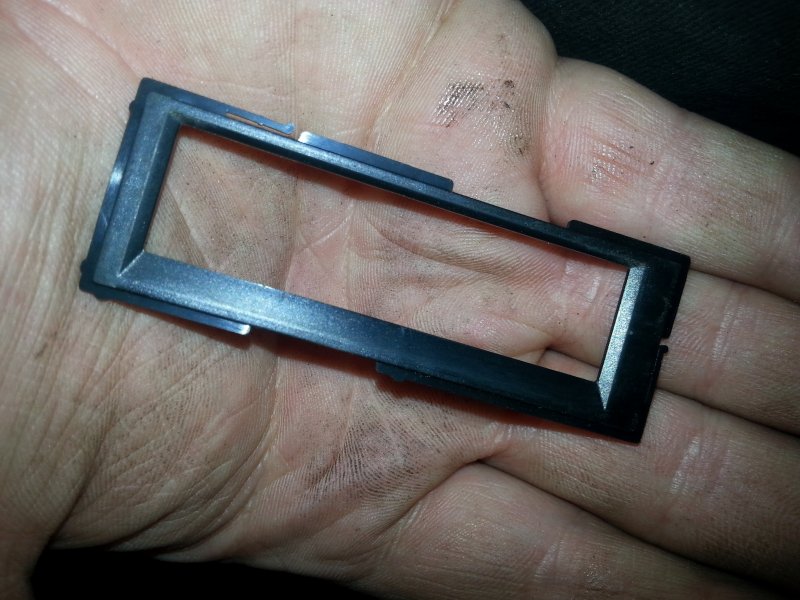
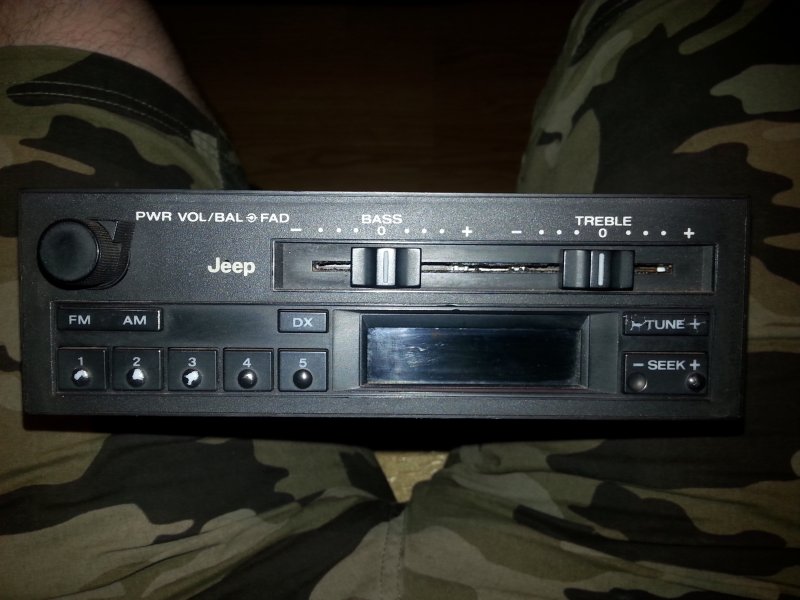
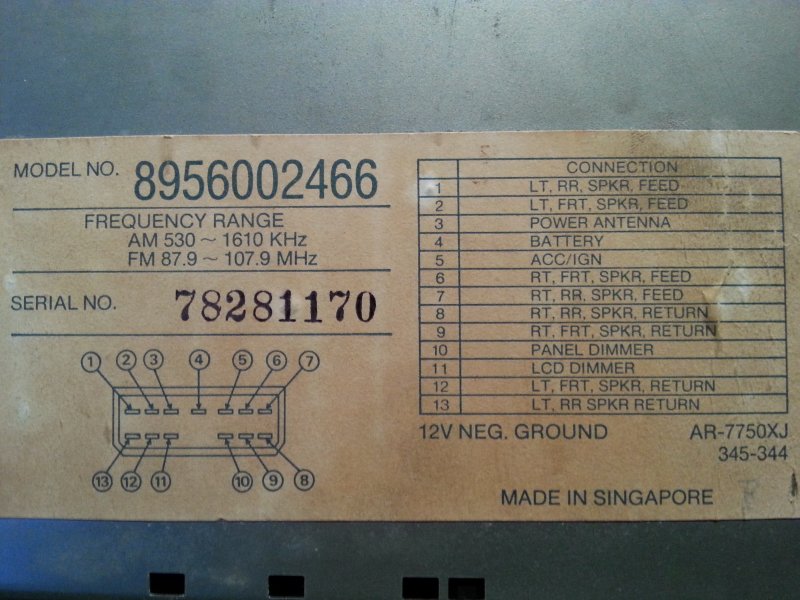
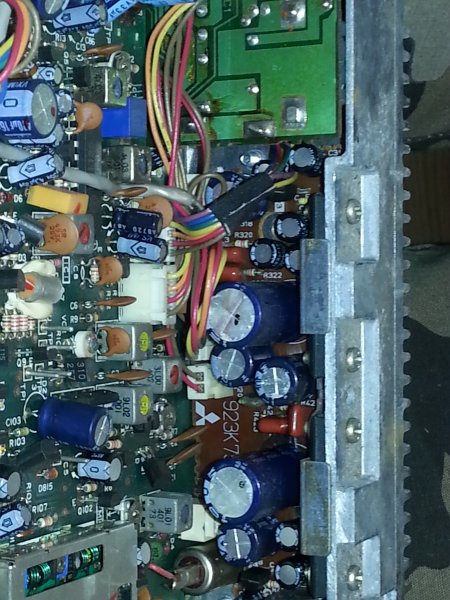
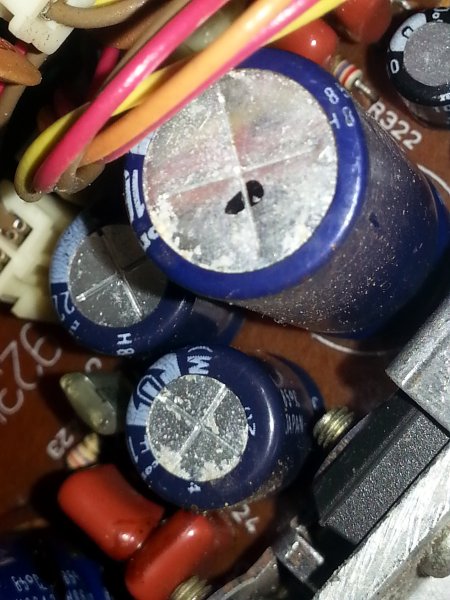
Hey there Minuit, I was taking my radio appart to tighten the volume knob like you suggested and figured I'd do a mini write-up for others wanting to do the same. Also included in the pics is the serial number tag with pinouts, which I found interesting, shame that not every manufacturer does that! And finally, about the issue of sound cutting off after a few seconds, everything was extremely clean inside except for those two capacitors that have a little bit of stuff on them... They both have flat tops still; they're not swollen. What do you think? I once had an Xbox that would shut off after a few seconds due to 3 capacitors that bursted and leaked, and it reminds me of that... Ok! So step one for fixing that annoying loose volume knob! Remove those golden guys, mine had only two, yours might have four, then remove the bracket. Step two, take out the volume and fader knobs as well as the bass and treble sliders; everything is just pressed in. Here, you can see the offending nut at the bottom of the volume hole. If you have a really thin wall 11mm socket and can reach the nut, more power to you, this would end right here. Step 3, remove these two guys, one on each side. Step four CAREFULY remove the face, noting that you have these little tabs to press out both on the top and bottom of the face. Step five tighten the nut with a deep 11mm socket, and don't lose or forget this guy before reassembly (LCD window insert) Photos for Minuit: The two suspect capacitors: