

AZJeff
-
Posts
1295 -
Joined
-
Last visited
-
Days Won
1
Content Type
Profiles
Forums
Gallery
Everything posted by AZJeff
-
Does the photo you supplied show this "other hole", because I don't see anything that looks very large and needing to be plugged.
-
It started with a Harmonic Balancer....
AZJeff replied to Mr.H_H's topic in MJ Tech: Modification and Repairs
Agreed with the suggestion to clean the gunk off. The oil on the rubber bushings for the shock will cause it to deteriorate. Time to get some foamy engine cleaner and the hose, and go to work on the engine compartment. -
Do you want OEM equivalent to attempt to restore your MJ to factory appearance, or just good seat belts? I used these guys, and their belts are perfectly acceptable, but they are not a perfect match to OEM. However, I went with the type of female buckles that are attached to a stiff cable, rather than the fabric type, as they are easier to find with a bucket seat and a console.
-
Rubber Windshield Molding
AZJeff replied to WahooSteeler's topic in MJ Tech: Modification and Repairs
No need to take the metal studs off that are welded to the frame around the windshield, but I WOULD remove the little clips, especially if they are the steel kind. They have a tendency to cause rust, even when they are not holding anything down. I am assuming you are having a auto glass shop put the new gasket (molding) in at the same time as installing the windshield itself, because the rubber fits over the edge of the glass prior to being adhesively bonded to the window opening. -
I haven't seen anyone talk about this here, but based on my experience with XJ's and my MJ, the cooling system for the engine is the Achille's Heel of the vehicle. Not taking care of your cooling system can result in getting stranded somewhere (which is annoying) or, worse yet, an overheated engine with head cracks and/or head gasket issues, (which is expensive). Take care of your cooling system: keep the coolant clean, and use distilled water when mixing the antifreeze keep the radiator in good shape. One that has corrosion in the tubes cannot transfer heat. Keep dirt/bugs our of the fins by washing it with a hose nozzle once in a while watch your hoses for soft spots or bulges use a good working pressure cap on your cooling system. The ones in the "closed" systems are especially prone to failure, as is the plastic pressure tank. A cooling system that won't hold pressure will overheat sooner. keep the factory shroud for your mechanical fan installed as from the factory. It helps the fan pull air through. this has been mentioned before, but DO NOT change your thermostat to something with a lower rating than the 195* original level. A lower temp. thermostat WILL NOT make your engine run cooler.
-
Stripped rear drum brakes
AZJeff replied to conrad_the_mj's topic in MJ Tech: Modification and Repairs
If that is a standard MJ cylinder, they are universal for both sides. It's been so long since I looked at an MJ/XJ wheel cylinder, I became confused and gave the wrong answer in my above post. In thinking more, I answered that there were different for each side based I what I remember about FORD wheel cylinders, which, of course, doesn't help much for an Jeep owner. Sorry for my bad information above. -
Stripped rear drum brakes
AZJeff replied to conrad_the_mj's topic in MJ Tech: Modification and Repairs
Usually, the right and left wheel cylinders have the bleeder location and inlet tube location inverted from one side the the other, and thus are side-specific. -
Tru dat. But most former owners probably did not follow that rule. Proof of that is the “custom” wiring we see on older MJ and XJ vehicles, using twisted wires and electrical tape, or wire nuts. An owner that would do that wouldn’t worry about distilled water in the cooling system😢
-
Flushing radiators can be hit or miss, as it all depends on what sort of residue is clogging the radiator to begin with. For example, out here in AZ, our water is VERY alkaline, and radiators that are filled with that water WILL develop lime residue in the tubes that will eventually clog them. The only thing that removes lime residue are acid flushing agents, and acids can and will attack the metal of the radiator as well as the lime inside the tubes. That means the flushing process might result in a radiator with holes in it, or worse yet, one that does not leak, but one that has weakened walls that will burst once it's put under pressure and temperature. Bottom line---flushing may or may not improve radiator performance.
-
That snaps into the hole in the firewall. On the older MJ's, I think the firewall will need to have the existing hole expanded to accept this new bushing/boot.
-
April 2020's Quarantine Comanche-AZJeff's 89
AZJeff replied to 89 MJ's topic in Comanche of the Month (MJOTM)
The console in my MJ came with it, along with a very sad looking headliner, when I bought the vehicle. It wasn't hooked up correctly at all, but from what I can determine, it came from a later XJ. It's not the same overhead console that was in my 2000XJ "Classic", which was long and contained rear maps lights, so I don't know exactly what year it may have been donated from. The console has a central courtesy dome light, and two map lights, all of which work now. It is fastened to an XJ headliner board that I cut down and recovered with new headliner material. The back of the headliner does not curve down to connect to the rear of the cab like a MJ would, so I added in an aluminum channel (covered in black cloth) that is attached to the inside of the cab with structural adhesive. The blunt end of the back of the cut-off XJ headliner slides above this aluminum channel to be retained in the rear of the cab.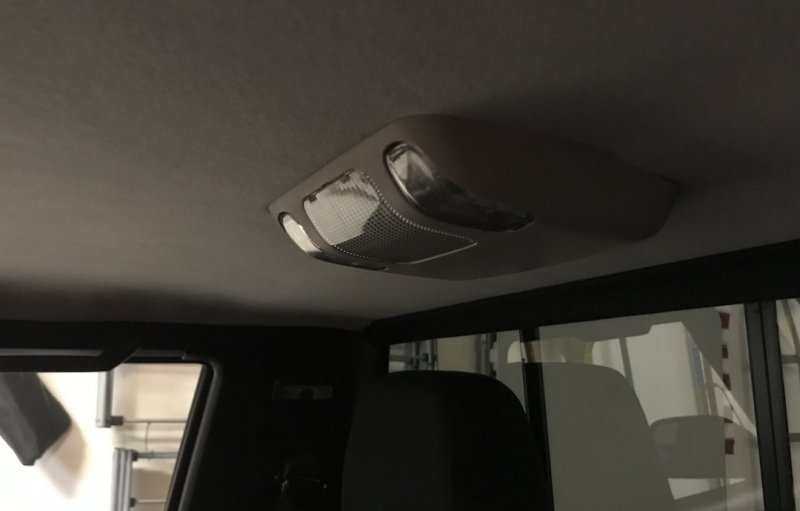
-
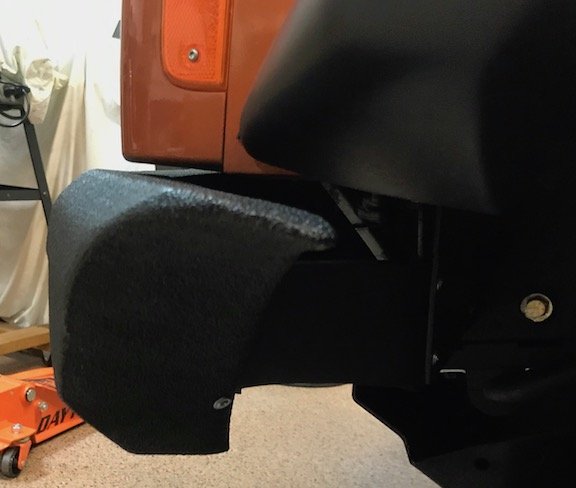
April 2020's Quarantine Comanche-AZJeff's 89
AZJeff replied to 89 MJ's topic in Comanche of the Month (MJOTM)
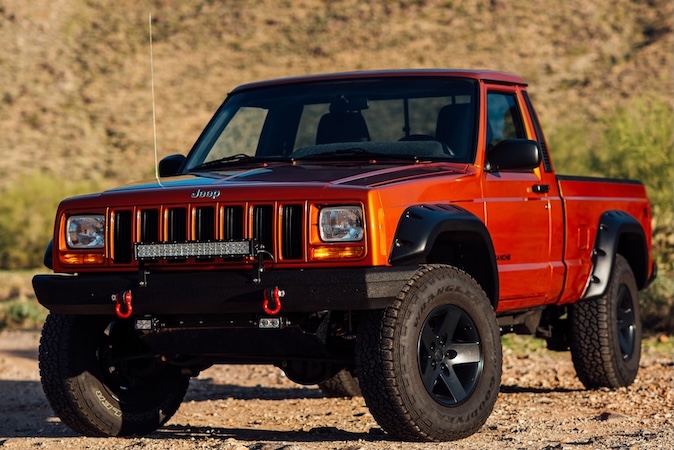
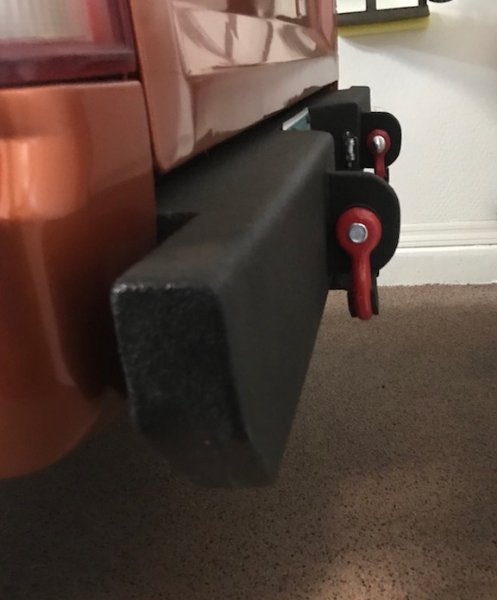
The rear bumper is a complete, from scratch, fabrication using rectangular tubing. After welding/grinding, the entire thing is coated in bed liner. The rear receiver hitch is relatively light duty, but the clevis lugs are serious, and pass through both side of the tubing and are welded on both sides, making them pretty substantial. They are also located very close to where the bumper mounts to the "frame" of the MJ. Here are a couple of pictures.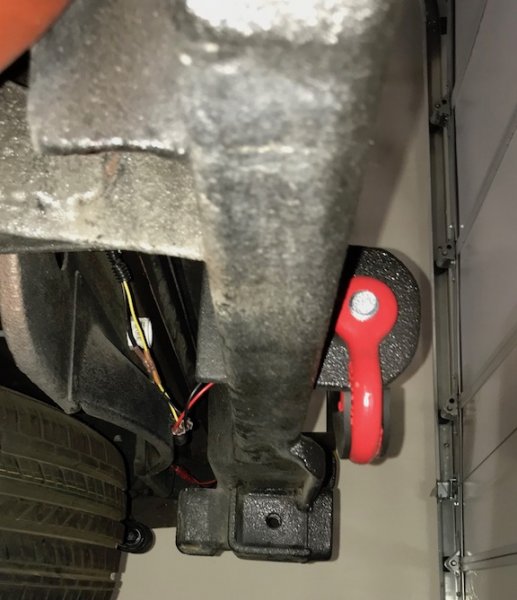
-
April 2020's Quarantine Comanche-AZJeff's 89
AZJeff replied to 89 MJ's topic in Comanche of the Month (MJOTM)
The front bumper is actually a fabrication using several MJ/XJ front bumpers as pieces. Notice that the contour of the front bumper is segmented, showing that various pieces were cut and then butt-welded together to create the angles needed to match the curve of the front grille. The end caps (which I am not really happy with) were further butt welds with some flat sheet stock to finish the end proper. The entire bumper is covered in bed-liner, so the welds/grinding are concealed under the final coat. Because the bumper is made from factory pieces, the attachment method is factory. BTW, I wouldn't actually use the front clevis' for serious towing/pulling, they are mostly for looks.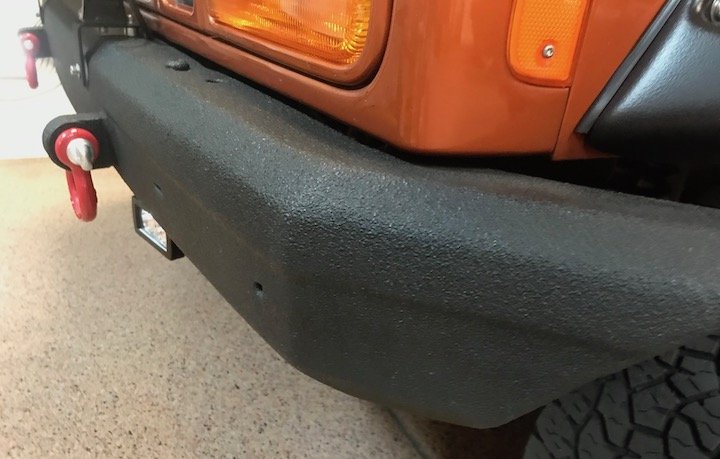
-
Jeep Comanche Bench Seat, Belt/Buckle replacement
AZJeff replied to Tonynguy's topic in MJ Tech: Modification and Repairs
I have them in my MJ. Their products are good to go. -
If you've thought about moving your airbox...
AZJeff replied to Big Dan's topic in MJ Tech: Modification and Repairs
Ah...I have never seen a nickle copper line before. Now I know. -
If you've thought about moving your airbox...
AZJeff replied to Big Dan's topic in MJ Tech: Modification and Repairs
I notice one thing that nobody has mentioned: in your picture where the master cylinder was shown, the brake lines seem to be made from copper. Are they? If they ARE made from copper, that is NOT a good choice for hydraulic brake lines. They should be made from a steel alloy. -
Glamour shots and final resting place of my MJ
AZJeff replied to ghetdjc320's topic in MJ Tech: Modification and Repairs
That's a beautiful MJ. I wonder what the cost to ship it back to the US would be? It's a shame you have to give that up, as it looks like the work was a labor of love. I assume you are going to be in Micronesia long enough that taking it with you is not cost-effective. -
Remove stuck driveshaft bolts?
AZJeff replied to KatahGii's topic in MJ Tech: Modification and Repairs
I use socket head cap screws in place of the normal OEM hex head Bolts. They are normally built to ASTM std. 574, which is better than grade 8 SAE. -
I have put CSF rads in both my MJ and my previous XJ's, and found them to be the best, most durable solution. The plastic tanked rads don't seen to survive here in the Arizona heat very long, even if you are religious about keeping the coolant clean and fresh, as I am.
-
Good suggestions in the entire write-up, but I have a proposed BETTER solution than just the self-adhesive foam around the cable track: wrap the foam ENTIRELY around the track, and add a small "tie-wrap" (wire tie) to keep the foam secure to the track. Here in AZ, the heat causes the foam to come loose of the track and then fall off in the door. The tie wrap is added security.
-
It would not surprise me if the center of that PCB (printed circuit board) is attached with something like double stick foam tape (or an industrial equivalent.) A PCB that is only supported/attached at the edges/corners can flex up and down like an old oil can in the middle, leading to solder fatigue cracks. When I worked for Motorola, they made PCM's for Ford, and they were worried about PCB flexure as I described. To deal with this, Ford insisted that the early PCM's be "potted," which essentially encapsulated the PCB in epoxy. Needless to say, a potted PCB is unrepairable, and Ford quickly changed to supporting the PCB more evenly. I agree that looking for a problem with the PCM is the LAST thing to consider. Those devices are surprising reliable. If you become absolutely convinced the PCM is misbehaving, there are places that can test/repair them, but I don't know if they can deal with a Renix PCM.
-
Thermostat housing, mounting "mod"?
AZJeff replied to MLT Lulu's topic in MJ Tech: Modification and Repairs
Clean the gasket surface with a rotary sand disk or a rotary Scotchbrite pad. Then use a straightedge to check for any raised surfaces where the numbers are stampeD. If there are, dress them down CAREFULLY with a file. Use blue RTV sealant on the gasket on both sides when reinstalling. -
Ebay is your friend here.
-
Fuse Block instead of Fusible Links
AZJeff replied to Torq_Shep's topic in MJ Tech: Modification and Repairs
I am an old guy, and the first cars I drove were from the 1960's and tended to be hand-me-down Ford products from the family. Fords in those days did use the "starter relay bus-bar" approach, but on the other hand, they used mostly water-resistant connectors. Fords were FULL of 'bullet' connectors back from the late-50's until the late 80's. Why AMC didn't use this approach with their connectors back then is a mystery, unless it was just pure economics. It's not like bullet connectors were new or proprietary in 1984 when the XJ was introduced. -
Sway bar drop brackets or extended links?
AZJeff replied to WahooSteeler's topic in MJ Tech: Modification and Repairs
Correct. In my photo above, you will notice my custom-made drop brackets not only drop the sway bar mount about 1 inch lower from the frame, but they also move the centerline of the sway bar mounting clamp forward about 1.5 inches as well. I had to do this in order to get the sway bar links to be essentially perpendicular to the ground when the Jeep is at normal ride height with my 3.5 inch lift.