


ghetdjc320
-
Posts
5212 -
Joined
-
Last visited
-
Days Won
1
Content Type
Profiles
Forums
Gallery
Everything posted by ghetdjc320
-

Project “Tomahawk”
ghetdjc320 replied to ghetdjc320's topic in MJ Hardcore Tech: Epic Journeys to Greatness
Got a full set of factoy SWB skids on the way along with a full black interior. Also have the custom hard roll top bed cover on the way. -
That’s right!
-
True, but each time it’s an “upgrade”
-
I hat buying things twice
-
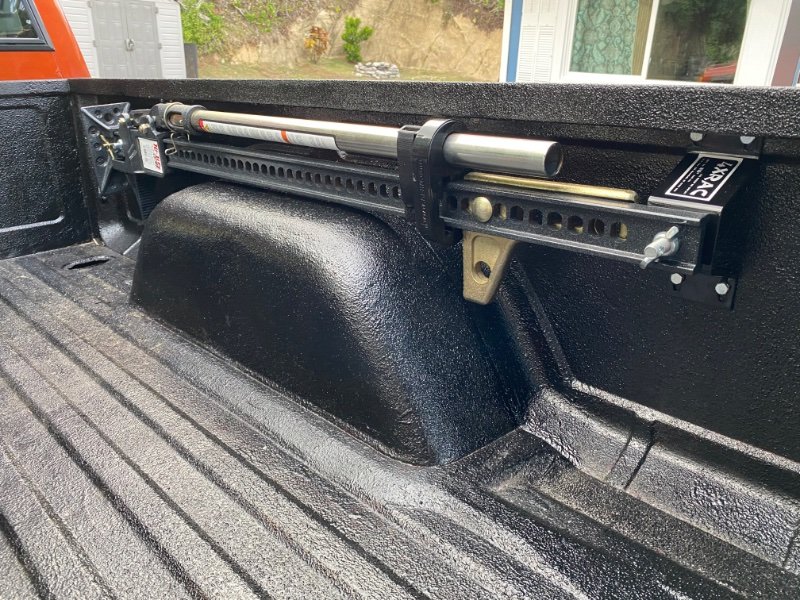
Hylift Xtreme with the hylift mounts
-
Project “Tomahawk”
ghetdjc320 replied to ghetdjc320's topic in MJ Hardcore Tech: Epic Journeys to Greatness
Here is a laundry list of parts I need if anyone has any of the following: 1. good condition grey dash 2. steering column and wheel (also grey) 3. driver and passenger fenders 4. good condition tailgate (this one would need some major work to make it functional 5. front bumper 6. Front flares 7. Possibly a D44 rear I can get a lot of these parts (except dash and tailgate) aftermarket but would prefer to get good used ones. if anyone has a line on any of these parts please let me know. @89 MJ Yeah I believe I will stick with the period correct front and interior. I’ve sourced ZJ steering, upcountry front springs, WJ lower arms and all new bushings. Will also be installing one of my restored hvac panels and some new switch panels. The engine runs very well so I’ll just perform some needed maintenance first but eventually will be doing something with it. The PO installed a cable shifter for the 4wd which I’m going to delete. Had one in a YJ and never wanted one again. They also did a few wiring hacks and setup an aux fan on a switch and setup the fuel pump to run continually with the key on. I picked up all NOS Mopar 10 blade fan, shroud & 01 XJ e fan. Getting a nice parts collection lol. -
Project “Tomahawk”
ghetdjc320 replied to ghetdjc320's topic in MJ Hardcore Tech: Epic Journeys to Greatness
I’m going to need a new dash at some point in time. But am considering a possible 97+ swap if o can find a good donor. The floors on this thing are in fantastic shape! Aside from the passenger side rocker it is almost rust free. -
Project “Tomahawk”
ghetdjc320 replied to ghetdjc320's topic in MJ Hardcore Tech: Epic Journeys to Greatness

-
In need of LP 44 master install assistance.
ghetdjc320 replied to Jesse J's topic in MJ Tech: Modification and Repairs
You’ll probably need to order another shim kit. Your shims should be going UNDER your carrier bearings. It’s so much easier to do this with “setup bearings”. You can also make your own setup bearing by lightly grinding the inside of a used set of bearing until they are able to slip on and off of the carrier. Set your backlash, pinion depth, then find the “zero” lash point of the carrier and add in however many thousandths of preload the specs call for. Add the equal amount of shims to each side then press on a new set of bearings. Be careful installing your seals and make sure to add some assembly lube to all of them. -
Valve ticking on new engine
ghetdjc320 replied to BizarroStormy's topic in MJ Tech: Modification and Repairs
I think he was joking -
Valve ticking on new engine
ghetdjc320 replied to BizarroStormy's topic in MJ Tech: Modification and Repairs
Seriously though, I can’t tell you how many times this gets ignored only to have cam/lifter failure in very short order out of the box. I have no idea what your mechanical skill level is so I have to start off with the basics. Meant no offense though . -
In need of LP 44 master install assistance.
ghetdjc320 replied to Jesse J's topic in MJ Tech: Modification and Repairs
Preload shims come in the master install kit. They should have more than enough shims. Remember, set your depth first. Here is a handy little diagram. Make sure that the oil slinger is under the pinion head before the first pressed on bearing. Here is a super handy and comprehensive step by step guide I’ve used in the past: http://www.billavista.com/tech/Articles/Gear_Setup_Bible/index.html
-
In need of LP 44 master install assistance.
ghetdjc320 replied to Jesse J's topic in MJ Tech: Modification and Repairs
Oil slinger typically goes just under pinion head and it (along with shims) set your pinion depth. Preload is handled with shims on the other side. Both adjustments are 100% critical. -
Are you also running a doubler? There are a lot of different wrangler d shaft lengths
-
I’d guess between 4-5k. I’ve bought and sold recently. All depends on desirability. 6 cyl 4wd swb are fetching quite a bit more but as you said, it’s still an MJ
-
Valve ticking on new engine
ghetdjc320 replied to BizarroStormy's topic in MJ Tech: Modification and Repairs
Did you break in the cam by running it about 2k rpm for 20 mins at startup? -
For u joint size, it just depends what size yokes your using. SYE’s are typically 1310 but can be 1350 same goes for axle yikes. Heck you can every have a 1350 to 1310 u joint. As for the pinion angle you can use shims but you’ll have to change the center pin on your leaf pack so the shim gets bolted to it. Stay clear of shim packs that don’t have a countersunk shoulder for the through bolt. You’ll see what I mean when you research shims. It is easier/better to just reset your perches unless that’s too much work. As Pete mentioned on his post, the pinion needs to point towards the new tcase output. I would imagine an sye will almost be a necessity on more than a 2” lift or so given the driveshaft will be much shorter using a doubler. More like a wrangler driveshaft. For the SYE I’ll still strongly recommend going with the JB conversions kit. It’s a much better design than almost anything else I’ve come across. Here is some suggested reading material for driveshafts and sye’s: https://4xshaft.com/blogs/general-tech-info-articles/driveshaft-angles & http://jbconversions.com/products/sye/np231j_std_sye.php
-
Console pocket switch panel
ghetdjc320 replied to m2bandit's topic in Vendors- members making products for MJs
Sounds good -
If you do an SYE, you will use a CV style. 1310/50 will depend on the yokes on each end. Remember too that you will need to angle your pinion about 1-2* below the transfer case output.
-
Console pocket switch panel
ghetdjc320 replied to m2bandit's topic in Vendors- members making products for MJs
Man it would be neat to make a backlit panel for these holders -
While your in there ( Heater core )
ghetdjc320 replied to Sly_Jeeper's topic in MJ Tech: Modification and Repairs
That’s exactly what I was thinking. That’s less rust then they came with from the factory! -
Project “Tomahawk”
ghetdjc320 replied to ghetdjc320's topic in MJ Hardcore Tech: Epic Journeys to Greatness
They are on their way! Picked up an extra center cap so I can choose the best of the bunch -
He’s running a LP D44 waggy front iirc.
-
Very true, I’ve popped many a u joint out on the trail. Better that than the ring and pinion though! It’s good to have a “fuse”
-
HVAC box refurb questions/advice
ghetdjc320 replied to A-man930's topic in MJ Tech: Modification and Repairs
I power washed all the components on mine. A worthwhile upgrade (albeit, requiring some modification) is to fit the 97+ XJ plate and fin evaporator to delete the tube and fin factory unit. Goo gone will remove the old adhesive fairly well. Take your time to make sure all the clamshell housing is realigned properly and we’ll sealed or you’ll have air leaks. My AC was like a new car after all that work. Well worth the effort. I’ll be tackling this again soon on my new build.