
schardein
-
Posts
2190 -
Joined
-
Last visited
-
Days Won
2
Content Type
Profiles
Forums
Gallery
Everything posted by schardein
-
Brake lights gone out, confused!
schardein replied to Poweralth's topic in MJ Tech: Modification and Repairs
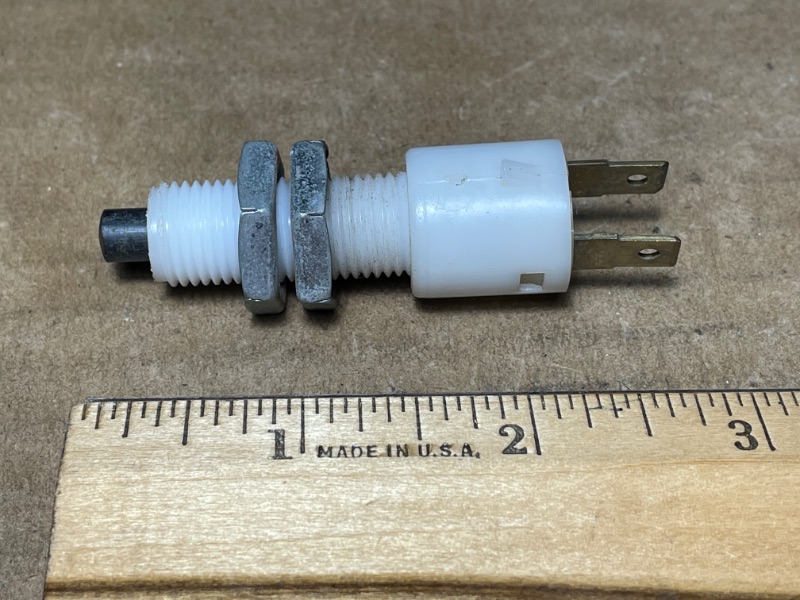
Like Daeson said, the ground is behind the driver side tail light. This diagram from the MJ electrical manual kind of gives you an idea. I don't have a good picture of it handy. For the brake light switch I have a couple comments. From the factory, there would be a clip in the hole that the brake switch goes into. This clip kind of holds it in place. It is designed so that the switch is just pushed into it for installation at the factory, which then sets its adjustment and holds it there. Sometimes, that clip is damaged or missing when the brake switch is removed or replaced. And sometimes when the brake switch is removed, the plastic threads are damaged to the point that it won't hold a good adjustment. Some replacement brake switches come with two jam nuts. The idea is to remove the clip from the mounting hole, and then use the two jam nuts to hold the switch in place and in adjustment. One nut is placed on each side of the mounting bracket. The second picture shows a switch with the jam nuts. Another suggestion would be to look at the fusebox again. A lot of owners of manual transmission trucks have problems with the clutch master cylinder leaking fluid onto the fuse box, which causes corrosion. This then turns into a headache with multiple problems. Is your truck a manual trans? (Tip: add some of your trucks info to your signature line like year, engine, trans, 2/4wd, short/long bed. This can help when people offer advice for an issue)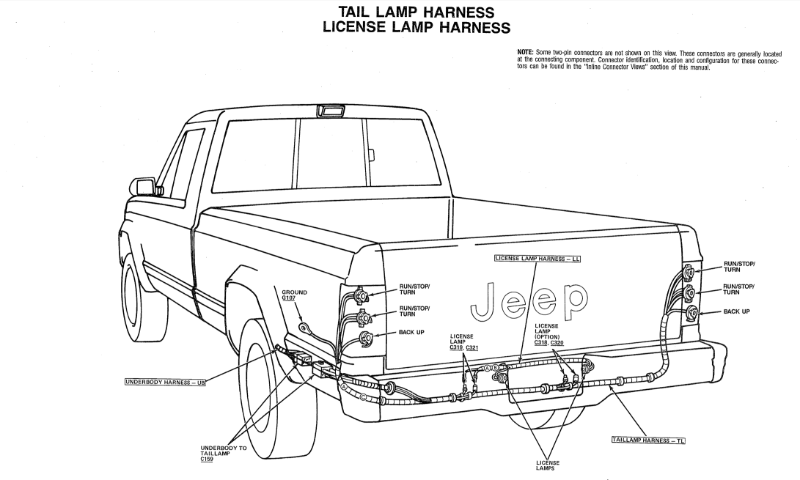
-
Brake lights gone out, confused!
schardein replied to Poweralth's topic in MJ Tech: Modification and Repairs
A blown fuse is usually an indicator of a short to ground. How did the brake light switch fail? Did it show any signs of melting or overheating? If so, could be another indicator of a short. When the brake light switch was replaced, did you inspect the connector for damage as well? It may need replaced to ensure a good connection. When you say "blew a tail light", does that mean a brake light bulb? Or a rear parking/running light? A blown light bulb might just be normal wear. Having repetitive issues like this, I would suggest two things, first ensure the ground points are good. The ground point for the taillight harness is notorious for developing corrosion. Next, if you have ruled out the ground, fuse, and bulbs, I would start tracing the circuit and checking for power. The brake light circuit receives power all the time (the horn and brake lights both work even if the truck isn't running). You can use a simple test light to see if you have power at the brake light switch. If not, move backwards in the circuit from there. If you do have power, move forwards through the circuit, examining the harness all the way from the cab to the tail lights. Another place to look is the steering column electrical connector. Disconnect it and check the terminals in both sides. Clean them up if they look corroded. Just disconnecting them and reconnecting them may be enough to improve a bad connection. Your brake lights run through the turn signal switch in the steering column, so the issue could be there as well.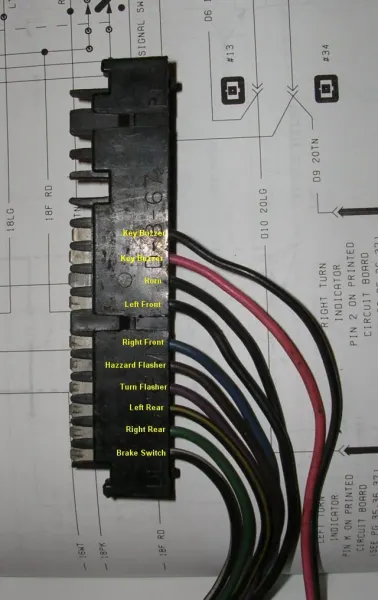
-
Great work! I know several people have asked about this in the past. At one time I was looking at using a GM diode that fits a mini fuse holder. Then wire a mini fuse holder inline. This way it would be easily replaceable in case it ever failed. The elegant way to do it would be to splice the wire at the light end, and find a new terminal that fits the factory Blazer connector at the other end, and crimp on the new terminal (assuming the installer cuts out the factory connector, and splices in the Blazer connector, which is what I did). But that was as far as my planning got. GM diode like this: https://www.waytekwire.com/product/littelfuse-02400104p-1a-mini-diode?gad_source=1&gbraid=0AAAAADzbIvYbTNc55VZETRQk2_yZQUhjB&gclid=EAIaIQobChMIjd-J4NzwhwMV4Ef_AR3iLQscEAQYASABEgIquvD_BwE Just some thoughts, and certainly not to take anything away from your work, but the lights working together was never an issue for me. I find that if I want one light on, having both on is just as good, or better. I also find that I always use the headlight switch knob to turn on the lights, and not the switch on the light itself. If I understand the circuit correctly, neither this setup nor the factory setup allow you to fully disable the B pillar lights, do you know if that is correct? For example, my newer Silverado has a rocker switch in the overhead console that disables the dome lights so they don't come on when you open the door. Neat feature that caused me some wasted time figuring out what was "wrong" when someone switched it without me knowing .
-
What EagleScout said. I have also seen where the plastic in that hole is cracked and broken out, so the screw head has nothing to catch on. So the screw is left out and just the cap is there.
-
Headlights not working solution
schardein replied to moparbrown's topic in MJ Tech: DIY Projects and Write-Ups
Here is a replacement headlamp switch connector that is correct for 1984-1991 XJ/MJ. This includes the wiring pigtails. You can cut off your old damaged terminals and splice on the new pigtails with butt connectors. This is a good option because replacing the damaged OEM terminals requires relatively expensive specific electrical crimpers to do it correctly. Butt connectors can be crimped with generic crimpers. Cover the splice with heat shrink for a lasting repair. https://www.ebay.com/itm/335228868056?mkcid=16&mkevt=1&mkrid=711-127632-2357-0&ssspo=bpFa1QANQb2&sssrc=2380676&ssuid=bpFa1QANQb2&widget_ver=artemis&media=COPY -
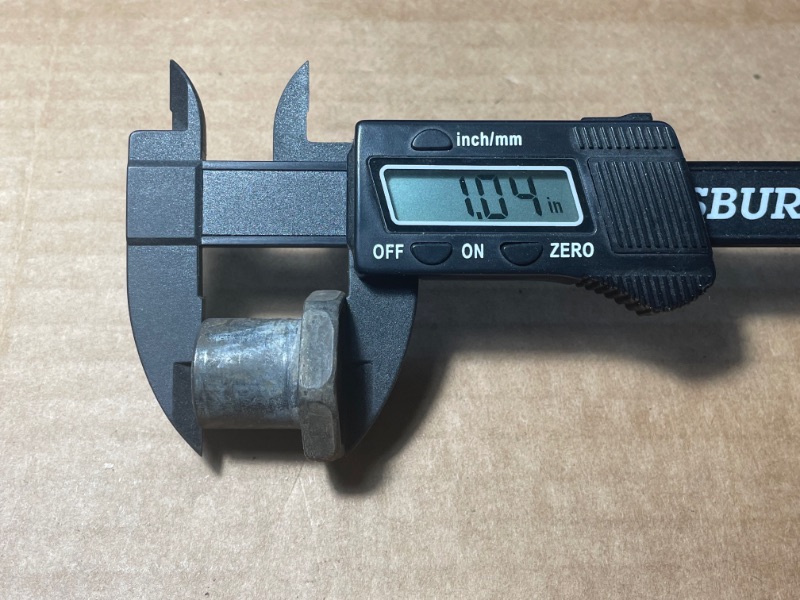
The 87-90 parts manual shows the same part number for the wheel seal on Dana 44s used in the XJ, MJ, and YJ. #83503063. Plug that into Rockauto and you get this: (see pic) Click on "info" for any of those parts and it gives you inside and outside measurements you can compare to your seal. A cheap set of plastic measuring calipers from Harbor Freight are accurate enough for comparison measurements like these.
-
What is this hole in the cowl for?
schardein replied to Eagle_SX4's topic in MJ Tech: Modification and Repairs
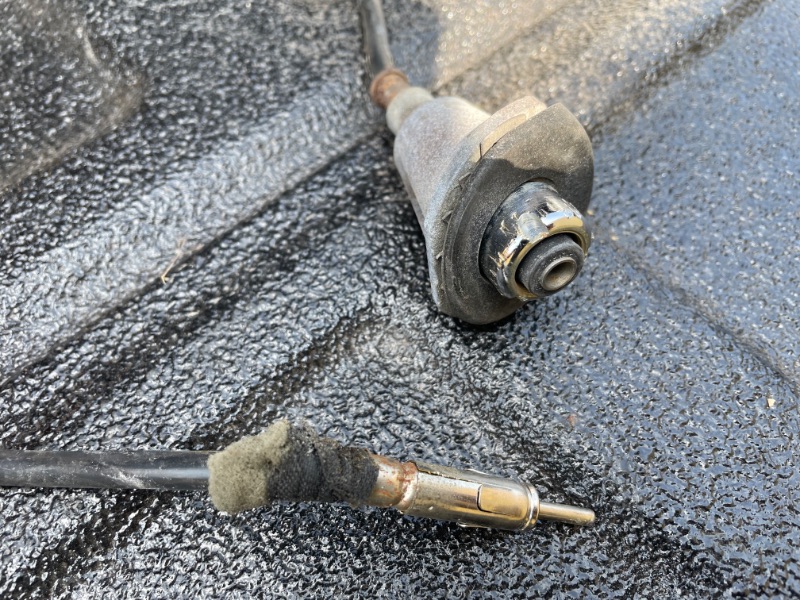
I've never seen a factory hole there. My guess would be for a CB antenna. -
The junkyard didn't charge me for it. So if you could cover shipping that would be good. If you msg me your address I could get a shipping cost.
-
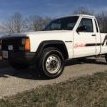
Is this what you're looking for? Good shape, except the chrome mounting nut was stuck in place. I had to use channel locks to get it to loosen up, so it's scarred up.
-
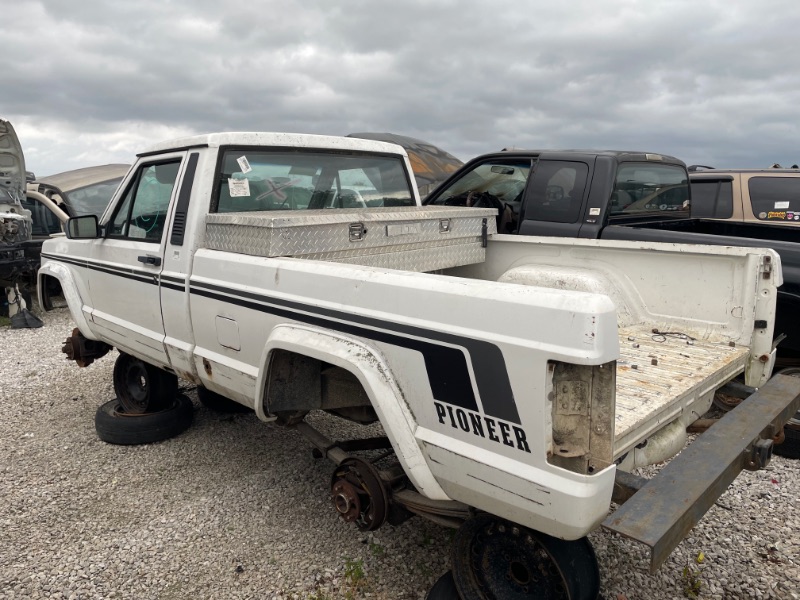
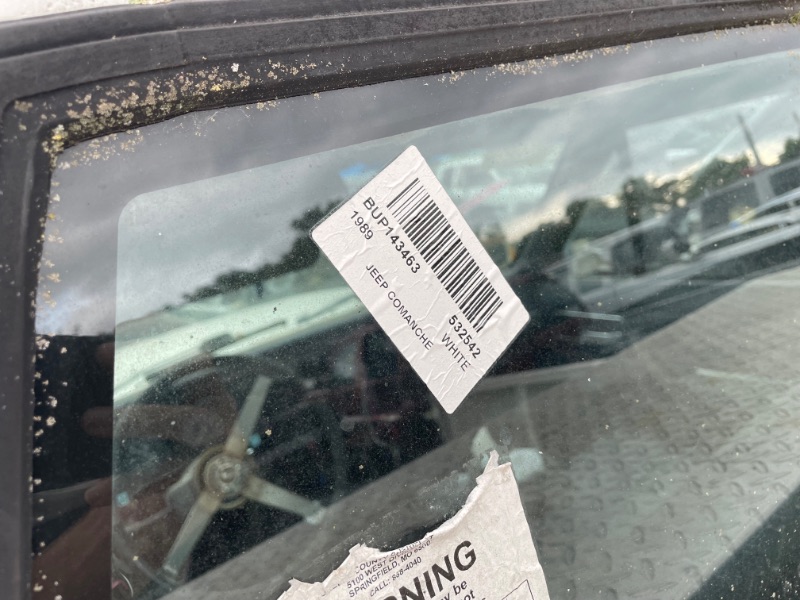
In Buddys Junkyard in Springfield MO on 29 July 2024

-
Tail Light Electrical Gremlins
schardein replied to john.silm's topic in MJ Tech: Modification and Repairs
Read through your post one time, my first thought is the front end swap isn't wired correctly. Maybe someone who has done the swap will have some pointers, I haven't done one. -
White smoke= Water, coolant (head gasket, cracked head) Gray smoke= Oil (bad piston rings, valve guides) Black smoke= Unburned fuel (choke stuck on, carb vehicles) You might have a fuel injector stuck open dumping fuel. Or a bad plug letting raw fuel enter the exhaust. Bad O2 sensor? Not sure on the vacuum hose. Maybe a picture would help.
-
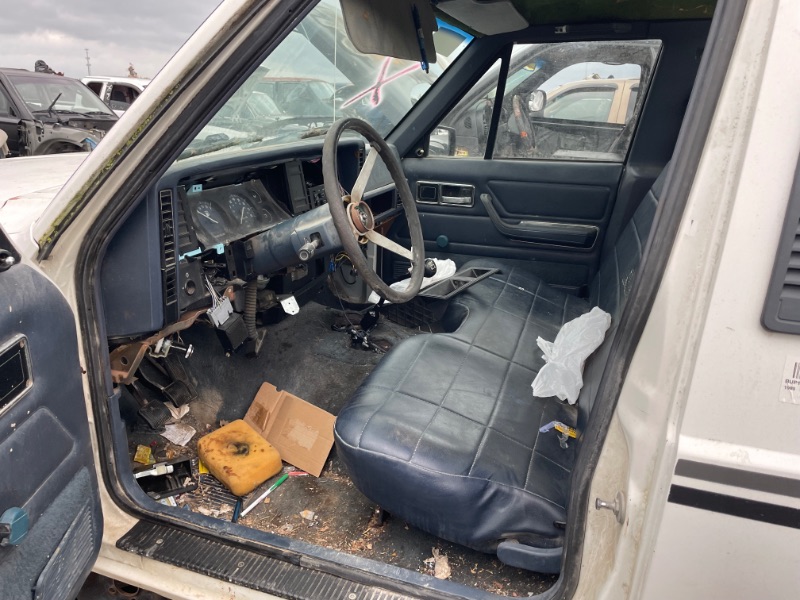
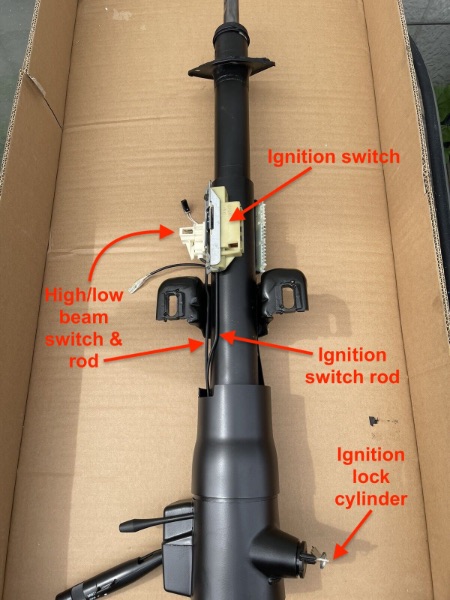
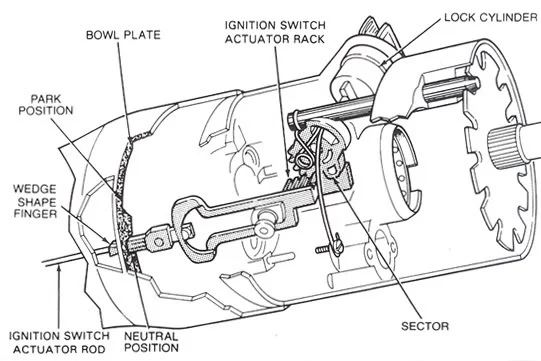
I was trying to distinguish between the ignition switch, which is bolted to the top of the column, and the ignition lock cylinder, where the key inserts, which isn't a switch at all, but is sometimes mistaken for one. It's a little difficult to make that distinction and I probably didn't do a good job. I've thought about your issue some more, and have a suggestion for a simple test. Looking at the first picture, you can see the ignition switch, and the operating rod. That rod connects between the key cylinder and the ignition switch. If you can reach under the dash and feel for it. Then keeping a finger on it, turn the key, or have an assistant turn the key. If the rod moves, the problem is probably the ignition switch. If the rod doesn't move when the key is turned, the problem is inside the column. Don't confuse the ignition switch rod with the high/low beam rod, which is right next to it. If the problem is inside the column, it is likely the ignition switch actuator rack, see 2nd picture. This picture is of a non tilt, auto shift column, but the parts are similar to a tilt column. Hope that helps and let us know how it goes. I have a spare column in the shop, I could do a short video of turning the key and observing the rod movement. I could do that tomorrow if it would be helpful.
-
Could be a problem with the ignition switch. Could be a problem with the linkage inside the column. Unless I was sure it was the linkage, I think I would take a look at the switch first. The title you wrote "ignition switch in column", isn't exactly how I would describe it, since the switch is bolted to the outside of the column tube, on top of the tube, behind the dash. They are kind of a pain to get to, but I would take it out, and inspect the switch. I would use a small screwdriver to move the switch and feel for anything stuck or not moving right. I would also carefully inspect the terminals in the switch, and the plastic connectors and terminals in the vehicle side wiring plugs for any burning, melting, or corrosion. While the ignition switch was removed, I'd turn the key through it's range of motion, and see if it still felt "wrong". Just a couple notes, I have had problems with the column in my CJ doing a similar thing. Part of the problem was the operating rod that goes from the key mechanism to the ignition switch was badly rusted, and would flex. This meant that it didn't give a full range of motion. This is probably not the case in a MJ, since the cab isn't open to the elements like the CJ. When I dug into the column, I found that in addition to the rod being rusted, the inside of the column was gummed up with old dried up grease mixed with years of dirt and dust. Cleaning everything and re-greasing it solved the issue. Reminder, if you replace the switch, they are different for a non-tilt and a tilt column.
-
Intermittent parasitic drain
schardein replied to EdJarHead's topic in MJ Tech: Modification and Repairs
One time I had an issue with a parasitic drain, it turned out to be the glove box light staying on when the glove box door was shut. SF, I did two tours at Quantico. -
First check the fader setting. If that isn't it, I'd wonder about the radio install. If the installers used a plug and play harness adapter, all the wires should be hooked up. But if they cut the factory plugs off and spliced wiring to the new radio pigtail, they may have noticed you didn't have rear speakers and didn't bother hooking them up. I doubt a business would cut a corner like that, but there no way of knowing without checking.
-
Turbine Wheel Center Cap Repair
schardein replied to Dandxj's topic in MJ Tech: Modification and Repairs
I have some experience installing/removing these caps. I don't think one or two broken tabs has much effect on how secure the cap is. -
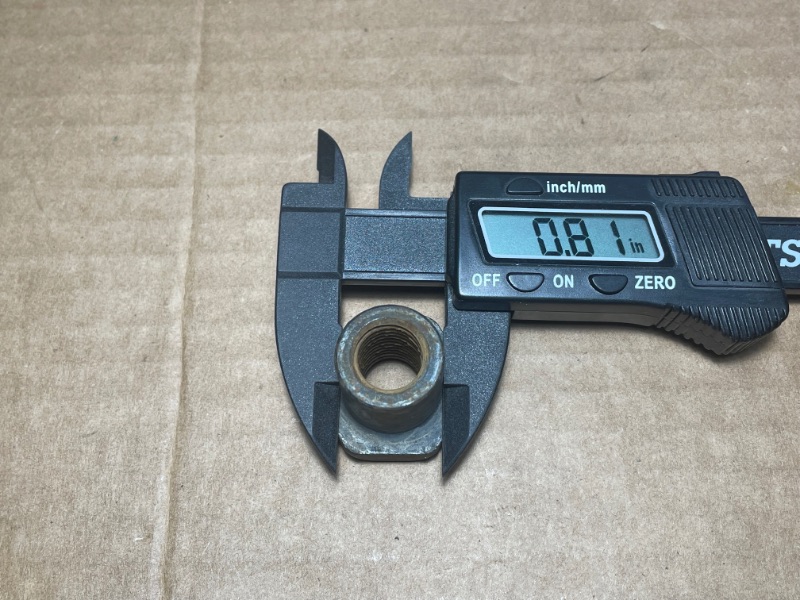
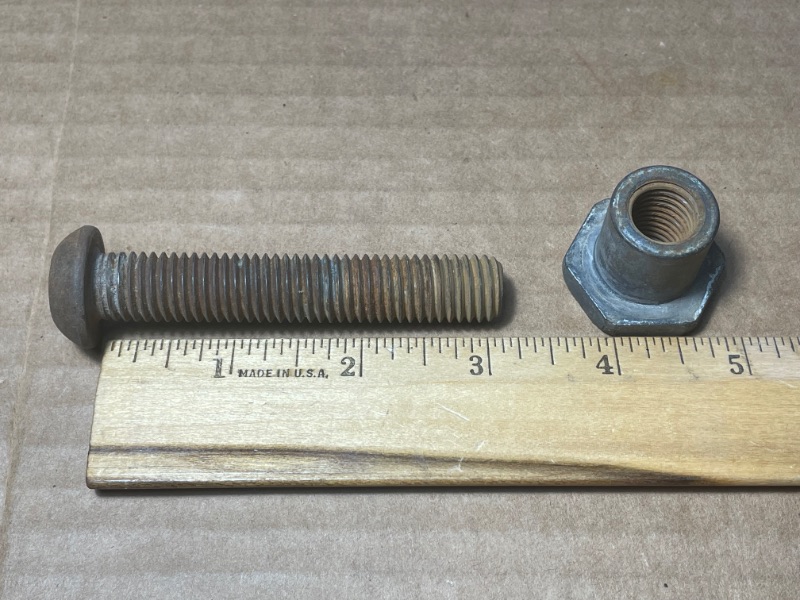
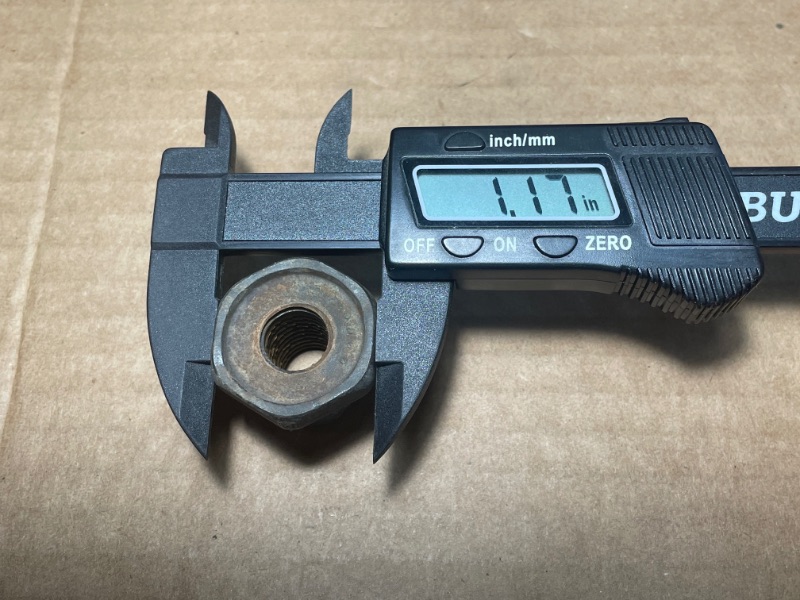
Here are some pictures of the passenger side nut. The bolt is a 14mm and uses a Torx T55 bit for removal.

-
I have a set as well.
-
Was it just hanging there, or did you unbolt it? From the factory it's screwed to the metal dash support.
-
Dang, I just returned from a week long parts finding trip. Had I known, I could have grabbed one of several I saw.
-
Replacement Relay Block Source
schardein replied to Salvagedcircuit's topic in MJ Tech: Modification and Repairs
Are you wanting the entire housing, or just the little retaining tab that plugs into a hole? I think the little retaining tabs are replaceable. I'm not at home to look at my stash to confirm that though. -
Backup lights are not working
schardein replied to Eagle_SX4's topic in MJ Tech: Modification and Repairs
If the problem recurs, you can use this picture to test for voltage at the tail light harness connector.
-
I have this one: https://www.amazon.com/gp/product/B001GF2T84/ref=ppx_yo_dt_b_search_asin_title?ie=UTF8&psc=1 It's rather expensive. I've had it in the windshield of a parts Cherokee that sits in a field, because my XJ and MJ are parked in a garage. So I don't have a lot of experience putting it in place. But it fits well and I'm happy with it, although it seems expensive for what it is.
-
Harmonic balancer replacement
schardein replied to Car Enthusiast's topic in MJ Tech: Modification and Repairs
Yes it would be ok. Just keep in mind that the water pump is not pumping, the cooling fan is not cooling, the PS pump is not pumping, and the alternator is not... alternating? (Charging). The are no ill effects to the damper. It is still damping.