
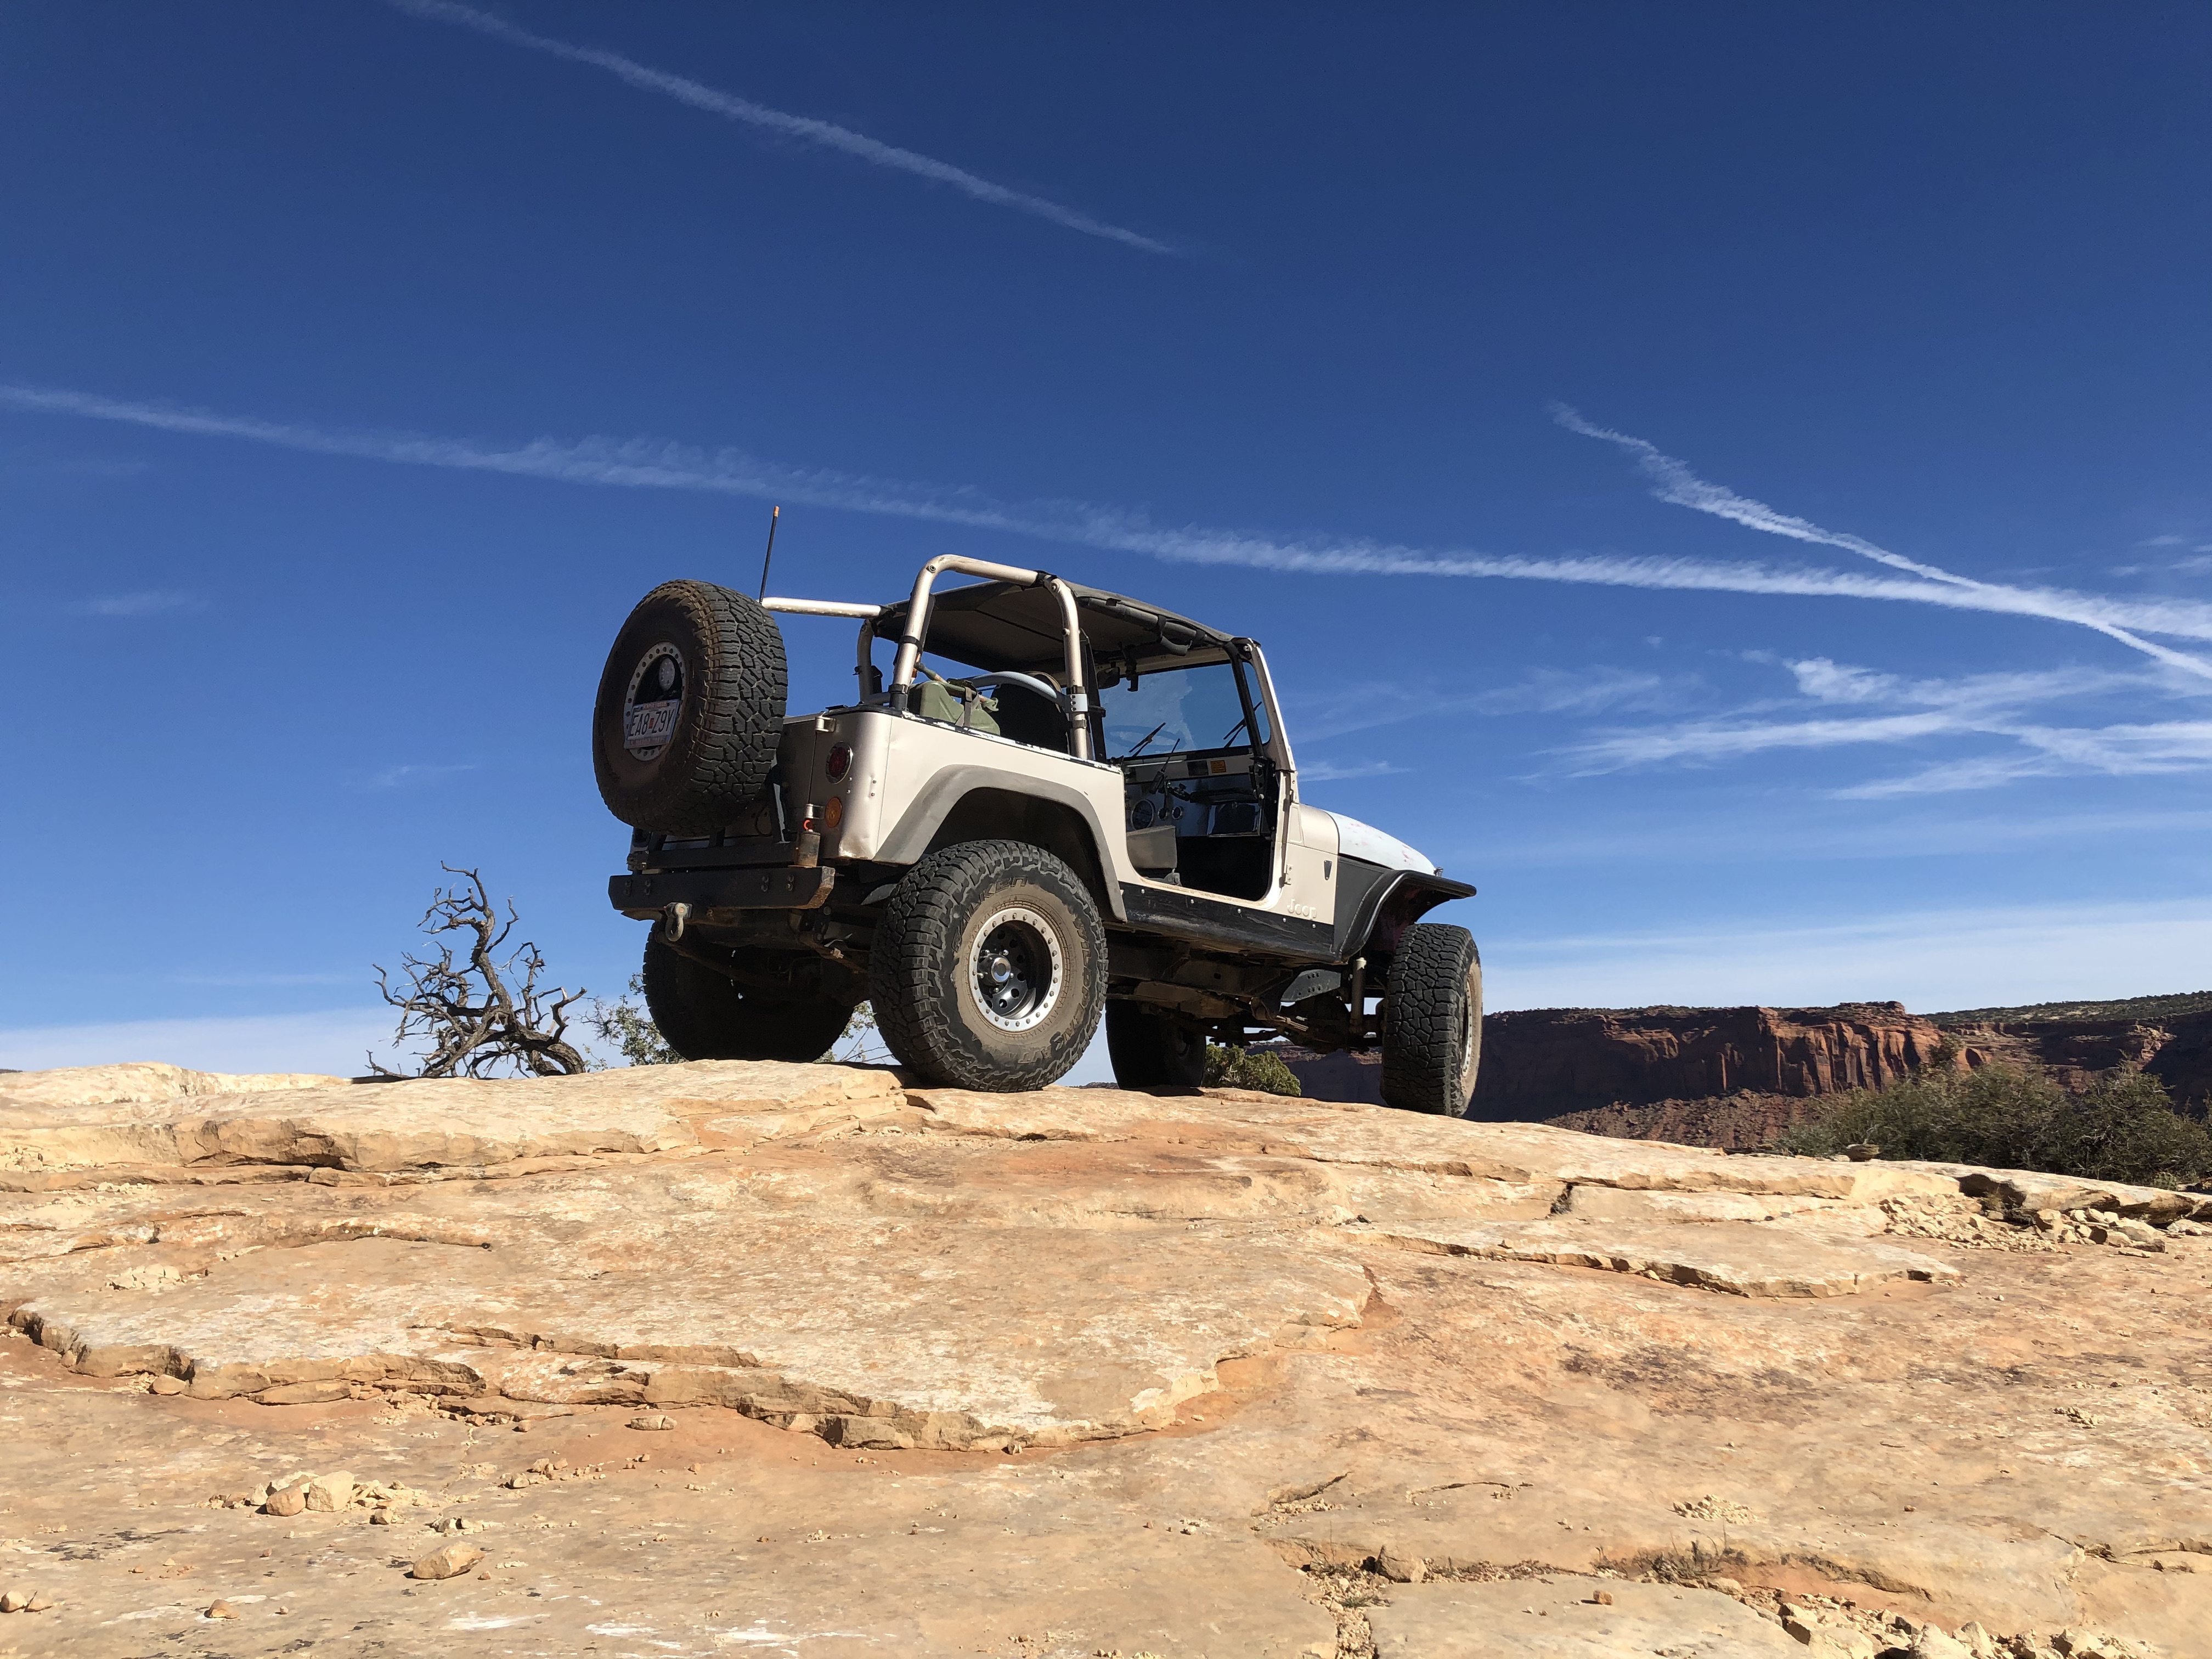
schardein
-
Posts
2190 -
Joined
-
Last visited
-
Days Won
2
Content Type
Profiles
Forums
Gallery
Everything posted by schardein
-
 I meant to mention something about that larger hose. That is where fresh air enters the engine. It is filtered (clean) air from the air cleaner box. Rather than replace the hose, you could put a rubber grommet in the hole in the valve cover and use a regular filtered breather, similar to the one here: https://www.amazon.com/Moroso-68813-Valve-Cover-Breather/dp/B000COO04Q/ref=sr_1_20?dib=eyJ2IjoiMSJ9.-KT67FQuWZXFt3jiLhwuU1EMQJ5i9DVNYDj8av5dds5gcv66t7cIxgTBtaAj1jo3SGVSTOzLXyeNdUNhay0AxcBJ7C1PokbgsltLl6k7ih2zwvIJdBOvYiL9Srzm5hWTtAR58bWZedQmvtvqvQUjVMsl3vblBFlEAA1LimKkmCcS7KmTdGKXMyS1OGdTIdoQCcdTDSbgIdGb0e026KRUaiSaOEayX9ppcxwOzNu2-mw.yedWFLeHlP2ZN4Txy9R4p39xrdwYQcT93rxnCOm0LP8&dib_tag=se&keywords=VALVE+COVER+BREATHER&qid=1731937903&sr=8-20 This is just one example, there are a bunch of different designs that do the same thing. You would just need to match the grommet to the valve cover and the breather to the grommet to make sure it all worked together. And make sure it fits under the hood. And cap off the nipple on the air cleaner box. Personally, I would prefer to keep the factory setup if the parts are still available.
 -
I just read through this post. I have a couple suggestions. It sounds like you intend to replace the fresh air hose, that is the large hose that connects to the front opening in the valve cover. It is part of the Crankcase Ventilation (CCV) system. That is where fresh air is drawn into the engine. I would also remove and carefully inspect the thinner hose that attaches to the rear hole in the valve cover. That is the vacuum side. It uses a "metered orifice". That metered orifice looks to be white or off-white and plugs into the rubber grommet in the valve cover. Carefully wiggle that out, and disconnect the other end at the intake manifold. Then make sure the line is clear. Blowing through it is a good test. It's common for the orifice to be clogged with carbon. If it is, your CCV system will not work as intended. If it is clogged, soak the orifice in a solvent (brake clean, carb cleaner, PB Blaster) and use something like a paper clip to carefully break up the carbon and clear the orifice. The connector for the MAP sensor (green plastic) can be replaced. The connector is relatively inexpensive. https://www.rockauto.com/en/catalog/jeep,1989,cherokee,4.0l+242cid+l6,1179929,electrical-connector,manifold+pressure+(map)+sensor+connector,2597 Rather than cut and splice the factory wires, I would de-pin the old connector. Working one wire at a time, de-pin one wire from the old connector, de-pin the corresponding wire on the new connector, and place the old free wire in its new home in the new connector. Work through the other two. You'll need a special tool to de-pin the weatherpack connector. There are many choices, here is one: https://www.amazon.com/Weather-Pack-Terminal-Extractor-Tool/dp/B0040CRUNO/ref=sr_1_12_sspa?crid=3W3YW97MYOIWC&dib=eyJ2IjoiMSJ9.-guaGmIeFsBVVD4lcyjMg9is5378Y3SzA7C2yoU-Cr7YnIGdbKl8Ds_4rdCzmh86862Jv4GhEgRSdxCXpJJD63Q0KG_4fcpSdkJpWe6fvLg.AeY6QI9by4LhAzS2SZPvta_7buxqbLPpYJ4z8IuMlvw&dib_tag=se&keywords=12014012&qid=1731885133&sprefix=12014012%2Caps%2C283&sr=8-12-spons&sp_csd=d2lkZ2V0TmFtZT1zcF9idGY&psc=1
-
Picked this up yesterday. Sorry, the grab handle was gone. Finding a box to ship this in might be interesting!
-
Small world! I started looking at the seller's "other items" and then saw his address (Vail, Arizona) and realized I know him. We've never met in person, but we have done business a couple times, which led to a conversation where we discovered we have something in common (USMC... and Jeeps of course). Nice guy, I could put you in contact if you wanted to purchase from him directly.
-
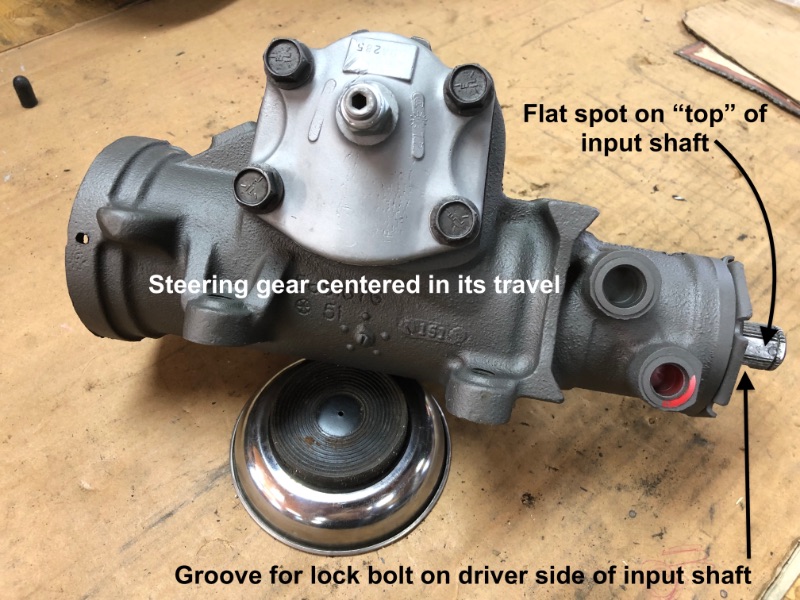
I have a ZJ box in the shop that I could check, but it won't be able to until the weekend. In my experience, centering the steering gear in it's travel ends up with a flat spot on the input shaft at the top, and the groove for the pinch bolt on the driver side and vertical (the attached picture is a CJ box, not sure if XJ is the same, can't look until the weekend). I am not an expert on steering gears, but I have read quite a bit of info at https://www.powersteering.com/tech-tips-1 there is a tech tip on centering the box. I hope some of this helps.
-
I would appreciate having a copy of the PDF if you don't mind sharing.
-
I have one dark blue trim cap. It’s pretty common for them to fade and be a different shade than the surrounding trim.
-
I thought I had a spare console insert. I looked but didn't find it. I also thought the inserts had an indent on the back to cut out for the power mirror switch. But the console I do have, doesn't have any kind of outline on the back. I do have a power mirror switch if you want to borrow it. Someone probably has both and that might save on shipping cost.
-
I've done many, had a few failures, and mostly successes. I always thoroughly clean both surfaces, and lightly sand the mounting puck. Some of the kits include a cleaner or primer pad, and then the instructions usually say to use a tiny drop, "less is more". The failures I had, I think might have been old stock (how long had the glue been sitting on a shelf?) or I actually used to little, trying to heed the instructions. When I used a little more, it worked. I hold the puck firmly in place for a minute or two, then put masking tape over it, then wait 12-24 hours before putting the mirror on. Then I tightened the set screw only enough to prevent the mirror from moving, I think over-tightening the set screw tends to pop it loose. To remove a puck, heat it with a Bic lighter, then grab it with pliers and gently twist. Use more heat if it doesn't move. If you just grab and pull, you'll break glass. I avoided all that in my CJ by using a SxS mirror that mounts to the roll cage. Bonus, it's still there when I fold down the windshield.
-
I understand your reasoning for converting from power windows, just be aware that the manual regulators are notorious for breaking, not working, and requiring replacement. I've sold a handful of them, and they aren't cheap. They are hard to find in good (used) condition, are a lot of work to pull (from a junkyard vehicle), run $20-$35 each at the yard, and are expensive to ship because of their size. Be aware that if your current door panels have the "Jensen Accusound" speaker grills (it will say that on the speaker grill), and you add a manual window regulator, the window crank will hit the speaker grill. Manual window crank was used with the generic (not Jensen branded) speaker grills only, or "radio delete" models with no speakers.
-
Just a heads up, the opening wing windows are cool, but they tend to leak. I deleted them from both my 91 XJ and 91 MJ. Are your power windows factory, or an aftermarket conversion?
-
new pump, new box, but no power steering
schardein replied to Pete M's topic in MJ Tech: Modification and Repairs
I've changed several PS pumps and/or gears in my time. A few years back, I did business with a local guy who rebuilds PS gears (powersteering.com). He included a detailed procedure to refill and bleed the PS system. I don't remember being very careful when I was younger, but the recent ones I have done, I followed his procedure. Here is a link to his instructions. He talks about "air bind" in the procedures. Also, there is a lot of good knowledge on his website if you want to learn about steering gears. https://www.powersteering.com/tech-tips-1/suggestions-for-filling-your-power-steering-system -
Sure thing. I can message you when I plan a date to go. I know another member has been there to grab some interior stuff, there is a post about it somewhere here. Not sure what all he got.
-
Replacing Alternator, will this one work?
schardein replied to BentGear's topic in MJ Tech: Modification and Repairs
The clocking does look the same as the ones on Rockauto. I don't have a Renix to look at, but if I were you, I would look at what I have to confirm the clocking is the same. And reman 105a units are on wholesaler closeout at Rockauto for less than $40. You could buy two and still be at half the price. -
This 89 MJ is in Buddys Junkyard in Springfield, Missouri. No idea if the interior trim is still there. I could grab it for you, but no idea when I might be headed that way.
-
Console Re-installation Fit Questions
schardein replied to JZLAJeep's topic in MJ Tech: Modification and Repairs
That is a great point. On vehicles with carpet, the transfer case shift gate is always under the carpet. I think it should be the same with the rubber flooring. -
Console Re-installation Fit Questions
schardein replied to JZLAJeep's topic in MJ Tech: Modification and Repairs
For what it's worth, the transfer case shift gates are the same for all years 1984-2001. The only difference is the shift pattern between the 231 and 242. It's hard to make a suggestion without seeing it in person. I see 3 possible options. 1. Add more padding under the flooring, so when the console is mounted, it will push down against the padding, filling the gap. 2. If there are high spots at some points, carefully grind the bottom of the console for a better fit, which might work in conjunction with #3... 3. Modify the two mounting points to sit a little lower/tighter to the floor. There is a longer mini console, I'm not 100% certain if the longer one was XJ only and the shorter version was MJ only, or it was a year thing? But perhaps the longer version is shaped a little differently for a better fit on a non-carpet floor? I don't have a short version on hand to compare.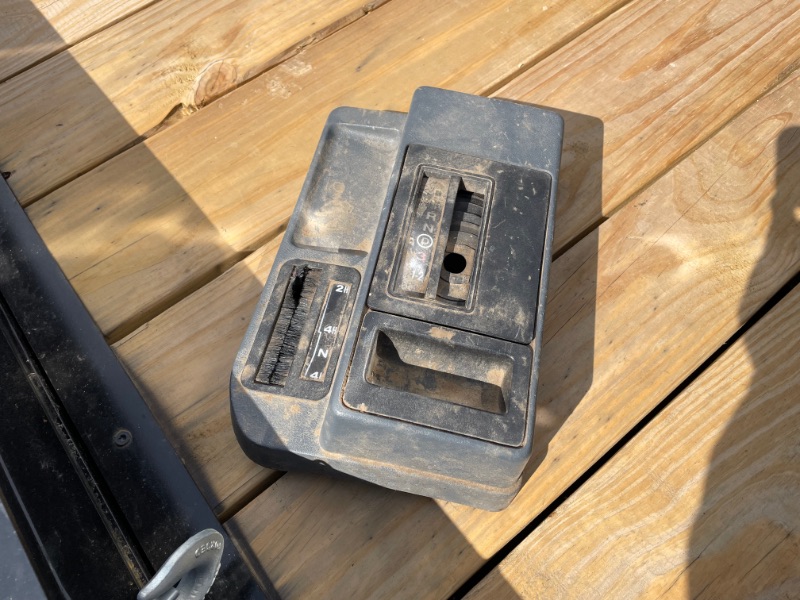
-
I suppose a person could look through the Registry and find build sheets with those codes and compare to the pictures. With enough research one might find enough info to come to a conclusion. Or not. The Sportruck graphics for both 1991 and 1992 were one year only things. The build sheet for my '91 lists K3Z and KWS, don't know which one or if either refer to the Sportruck squiggle. The build sheet for my 91 XJ lists WLZC and WJNP and has the 5 spoke aluminum rims in the post above. I don't know why my 91 XJ build sheet uses 4 digit codes.
-
I can't give any real world experience on which is a good choice, but you might consider Rockauto as a source if you want to save a few bucks.
-
Very cool. Interesting that it's a 96 but has the 97-01 rear view mirrors. I wonder if it's original or an owner upgrade?
-
Normally I would say that a brake pedal that goes to the floor, with no obvious brake fluid leaks anywhere, would indicate a bad master cylinder. Fluid is bypassing worn o-rings inside the MC. But, if you are getting a hissing sound, that is an indicator for a leaking brake booster, as you've said. If you have a Mityvac (hand pump that produces a vacuum for testing things and bleeding hydraulic systems like brakes), you could put a vacuum on the booster and see if it builds and holds vacuum. Booster upgrades are well documented here in the Club. Broad answer is 95-96 XJs and I think WJs? Either booster upgrade requires a different master as Daeson said. Another option if you are in a hurry might be to post a wanted ad for a stock booster. I'd bet that some members have a stock one laying around after doing the upgrade. It would be a quicker/easier repair than finding an upgrade booster if you don't have any junkyards near you.
-
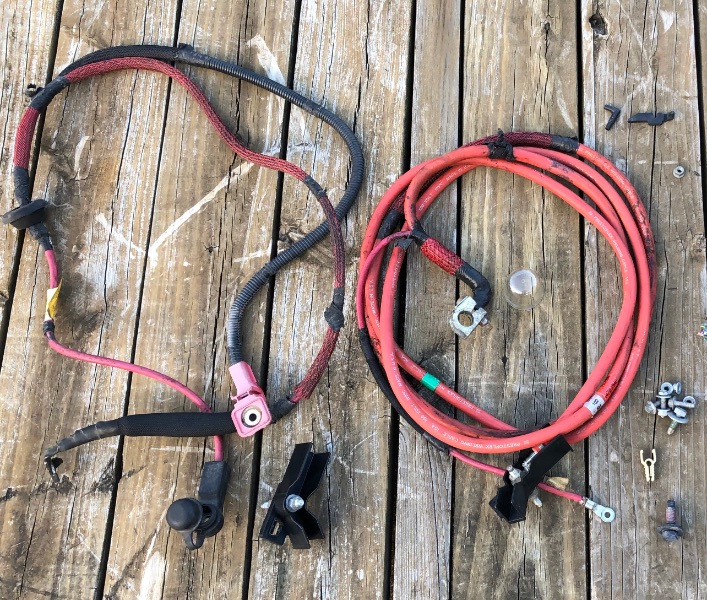
Purchasing pre-made custom cables is a good and simple option. Another option would be to build your own, but it takes an investment in tools and time. I do enough custom work that I can justify buying various crimping tools for large diameter electrical cable, crimp terminals, and large diameter adhesive lined heat shrink tubing. I save a little on the cable because I source most of it from junkyard vehicles. Tip: go to the junkyard and look for Cadillac cars (like early 2000s Deville) or Dodge 300s. They have the battery under the back seat or in the trunk, and with some work you can get good lengths of large gauge cable. Junkyards usually charge a flat "per foot" rate that is much less expensive than buying new. These vehicles often have cable marked as "welding cable" which is great because it has more strands of thinner, pure copper wire making it more flexible and gives it higher current capacity.
-
That's a big reason I created my "special drawer" and inventory for it. Partially it was to make sure I kept parts that I intend to use in future projects, like a 242 shift gate and bezel. Then it also became to keep items that I want an example of for testing or research, like keeping both a blue and black warning buzzer so I could figure out the pinouts for testing them. Or both a pre 92 and post 91 headlight switch. And finally to keep a few really cool rare or obscure parts like a NOS Metric Ton badge, or an OEM chrome tailgate handle.
-
Yep, and it all started because I needed a part, so I thought someone else might need one too. I get a good deal of satisfaction knowing that I helped someone keep their vintage Jeep on the road. My eBay sales have grown a lot since 2018 when I retired from the Marine Corps and was able to devote more time to it.
-
Funny story. I used to work out of a small workshop the size of a one car garage. I bought a spare alternator for the LS engine in my CJ at the junkyard. When I went to store it in the very crowded workshop, I took a minute to look around. I then noticed that there was shelf space behind my tool box that I could probably fit the alternator in. So I moved some things out of the way, looked behind the tool box... and saw a spare alternator. Still today, I'll occasionally open a drawer, or box, or cabinet and find a part I forgot I had. I have a lot of stuff. A LOT. Most of it isn't inventoried. I have gotten into the practice now, anything I get that is fairly large (steering columns are a great example) I tag them with a plastic tag with a wire tie I got off Amazon ( https://www.amazon.com/gp/product/B00F63P2YA/ref=ppx_yo_dt_b_search_asin_title?ie=UTF8&psc=1 ) so at least I know the year/make/model/whatever of the part. I store a lot of things in Priority Mail shipping boxes. I label the boxes with a permanent marker so I at least have an idea what's in them (stereo stuff, LED lights, etc) I purchase "ziploc" bags by the 1000s in various sizes (2"x3", 3"x5", 4"x4") for storing screws, nuts, bolts, etc. I used to write directly on the bag with a permanent marker, but even that can wear off with time. Now, I write on a post-it note and put it inside the bag. I do have a dresser drawer of "special" parts that I save with no intention of selling. Some of these are rare parts, or just "examples" of not so rare parts in case I need one to refer to for some reason. I keep a simple excel document listing each part, and there is a corresponding folder with a picture of each item. The list number matches the photo number (part #1 on the list is photo #1 in the photo folder). It's easy to update when I add something new, take a picture or two and add a line to the list. I've been selling on eBay for 24 years. Lots of Jeep parts, but other things as well. I've kept pictures of each sold item since 2012. Comes in handy sometimes when I can't remember a detail of a certain part, I can reference the old pictures.