


Drahcir495
-
Posts
2862 -
Joined
-
Last visited
-
Days Won
3
Content Type
Profiles
Forums
Gallery
Everything posted by Drahcir495
-
Not trying to Hijack but anyone got pics of the speakers in the door handles? $500 MJ, I may be getting back with you on that design 8) Watchamakalit, you need to go to CW's build up page, and often :brows: He has the complete write up, with pictures, on page 13? Try here -> http://comancheclub.com/forums/viewtopi ... &start=180 That is where I got the idea for the tweeter location - Rich
-
$500 MJ has a picture of them installed in his MJ. Look on the build-up thread here -> http://comancheclub.com/forums/viewtopi ... highlight= 4th page, 3rd picture down - Rich
-
:cheers: I don't know how I missed your build up thread, :eek: :bowdown: I caught up with it this morning! -> http://comancheclub.com/forums/viewtopi ... highlight=. LOVE your spare tire/High Lift combo carrier - Rich
-
Wow, :agree:
-

Console Screw Attachment Question
Drahcir495 replied to SuperWade2's topic in MJ Tech: Modification and Repairs
That has got to be the nicest picture of the factory console mounting bracketry I have EVER seen :brows: -
Thanks 90MJext & jtdesigns :cheers:. Pointers on taking the headliner out, no problem. This is what worked for me :D ~ There is a clip on the drivers side, behind the trim, that will help support the headliner on that side. I wish I had taken a picture of it. I would remove all the supporting trim on the drivers side. This could be a bit time consuming, but it makes for an easy extraction. To be honest, I already had it apart for the speaker and carpet install. Then move on to the passengers side trim. Lower the headliner down on to the pass side seat. It should be supported on the DS with that clip "thingy." I will tell you that the velcro on the front of the headliner is a bear. Don't force it apart; you run the risk of bending or separating the board. I used my hand to ease the velcro apart, through the front of the liner {entering by the windshield, then moving it along the length of the windsheild - if that makes sense?}. Then unhook the liner from the clip on the drivers side, and carefully removed it at an angle. I managed to unhook the headliner from the pass side and was able to remove it from there. The lack of a steering colum and steering wheel made it a breeze. I hope that helps? - Rich
-
Hey WahooSteeler, thank you! The plastic ring on the mirror was a biatch. I broke two of them before I could get one to separate. I did not know that about the tubes, good bit of advise. I guess I was just lucky, I always picked the ones with the see-through headrests. Lol, don't let this stop you from doing your own DIY post :cheers:
-
I am always leary to purchase items that are only listed as fitting the Cherokee. I have been debating on if I should try the XJ Husky floor liners for the MJ. I broke down and ordered a set in black for the pre-1993 range - I already had a single Husky liner from an unknown year XJ, and it was not the best fit. I now believe it is for a newer XJ. These are nice! It appears they will be a perfect fit, once I put the new carpet in - Notice the kick panel light in the picture? Look on page 2 of BLHTAZ's thread here -> http://comancheclub.com/forums/viewtopi ... highlight= I want to thank MJeff87 for the idea; Thanks man :cheers: - TBC
-
The other day at the junk yard I saw an ingenuous way to attach a truck bed toolbox to the bed rail. They are 1/4 inch 20 Jack Nuts. Pretty cool little things - You drill out a 7/16'' hole in the top of the bed rail and slip these things in. They are designed to collapse and lock themselves in. I took every freaking possible measurement to get this thing lined up. Nothing on the bed box was square/consistent from one side to the other. I eventually just line it up so the center of the box was inline with the center of the rear window like this - Then I measure and marked the holes. I did not think about the inner bed wall, and the bit walked :headpop: on the first hole. The other holes went ok, and I was able to start on installing the Jack nuts. The 1/4'' 20 bolts were to short, and I could not get the socket around them in the hole. Without the box on , and the correct length bolts, I F-up all but one of the Jack Nuts - This one came out pretty good, and I am sure the 3 others will be a piece of cake ~ now that I know what I am doing :roll: . I am going to pick up 4 more Jack Nuts, and some 2" cap bolts this week. TBC I picked up some spare Jack Nuts, correctly installed them, and then test fit the cap screw - Looking like it may work :brows: . Then I went and picked up a bedliner - Drilled a few hole in the line and test fit the cap screws again - 2/17 I got the box in and secured -
-
Interior courtesy lights
Drahcir495 replied to attaboybob's topic in MJ Tech: Modification and Repairs
Bob, Do you have any pictures of the finnished product?;) And, do they come on when the doors are opened? I've never had mine working, so I need to know what to expect. Thanks, Rich -
I went to the pick-n-pull some time back and found a set of factory MJ bucket seats. I already had a complete passenger side done, but I still needed the drivers side seat and seat brackets. I decided not to miss out on this rare opportunity, and I picked them both up along with the seat brackets. When I get home, I realized that the MJ seats have a strip of carpet along the back. That is cool and all, but the other bucket I refurbished did not. Instead of destroying a set of original MJ buckets, I decided to wait until I found another two door XJ to pop up in the pick-n-pull. I found a 4 door XJ this weekend with excellent seats in it. I decided to just take the seat cover off the 4 door seat and try to make it work on the 2 door seat frame. During this time, I did find out that the bottom seat cushions are identical for the pass and driver sides. The covers, however, are not. I swapped in a passenger side bottom cushion to the drivers side. It worked out perfectly :brows: The only differences I can see between the uppers covers on the 2 door vs. 4 door version is the lack of the slit for the release knob - I am going to make a small opening with a razor knife; that should correct the problem. Another difference is in the way the bottoms are secured. The 2 door cover uses velcro to secure the bottom to it's opposing piece, while the 4 door uses a system of wires to attach to the fixed seat frame. I don't believe this is going to be an issue - I began by taking off the reclining lever with a small screw driver After I removed that, I moved on to the two head rest adjusters at the top of the seat This piece can be removed by reaching up into the seat, and with the appropriate tool :oops: , colapsing the tabs so it can be pulled free. Looking into the top of the seat - Then I moved on to the two wires that hold the side bolsters on. Just unhook them from the seat frame, and then thread them out of the loops and wire straps. The will empty straight out the bottom. Then it was just a matter of carefully peeling the cover off the frame and foam bolsters - It should end up looking like this - I found that the release mechanism needed a bit of work to get it into shape. I also noticed that a spot weld broke on the frame, so I am going to try to have it fixed before I begin to reassemble the seat with the new cover. To be continued . . . 2/9 Worked on the seat a bit tonight. During the week I put a base coat of the SEM on the seat covers, so I would be ready to re-asemble the seats and touch up after. I also had the frame welded where the spot weld broke. Found another slight difference between the seat covers. The opening at the bottom of the bolsters are a tad smaller on the 4 door covers, but it won't matter all that much - I needed to mark the spot for the reclining knob before I could place the new 4 door seat cover on the 2 door seat frame. I found the area where the knob will exit in the top of the seat. It is in this area - Then I used an awl the make a piont of reference for the final cut Got it very close to the factory location I eased the seat cover onto its new frame and started to press the knob throught the covering - After I refitted the cover, I secured the side bolsters back in place - The bottom, like I stated in my previous post, are slightly different. The two door seat covers are secured at the bottom with velcro. I would need to find another way to correct this. I just cut a hole for the release latch arm and zip tie it to a support bar inside - I had a few extra long Zip ties theat I used to attach the other side to the same internal brace - 2/27 Passenger side seat frame needed some dressing up, so I added the lower plastic cover peice - It gives the installed seat a finished look - I still have to add a few pictures of the steps that I forgot. TBC
-
Loving the arrow antenna :brows:
-
:agree:
-
That dang little plastic clip that the hood support rod clips into, just kept breaking. So, I grabbed a metal clip off a never XJ and installed it. It snapped right in, it just sits a bit lower. Works good, would work a lot better if some of the air conditoning crap was not in the way. While I was in there I put in a factory under hood light from an XJ. It works great :D The light is tethered to the base, so you can pull it out and move it all around the engine compartment. And it also has a magnet attached to it for hands free lighting! It is attached to my new cowl hood . It was obviously missed by the painter. - Rich 6/1 - I modified the under hood light today. I spliced in a toggle switch so that I won't kill the battery when I am working in the garage. ->
-
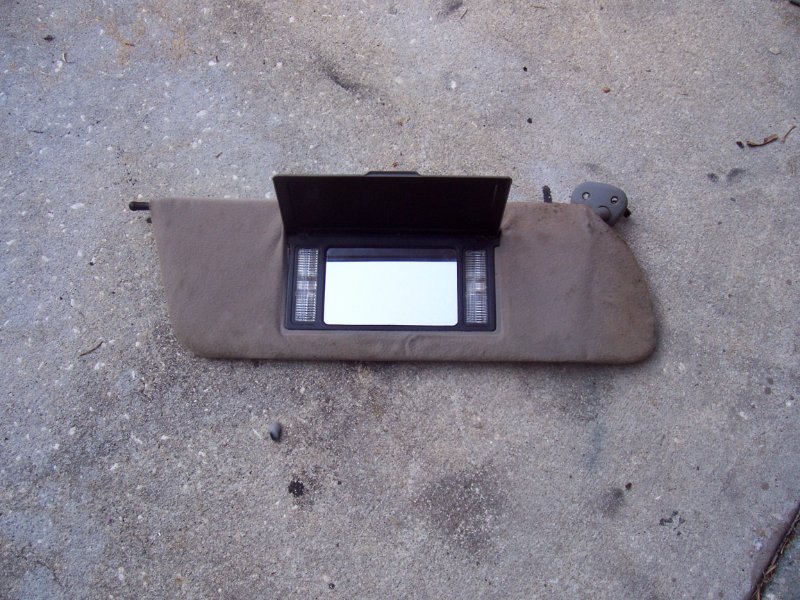
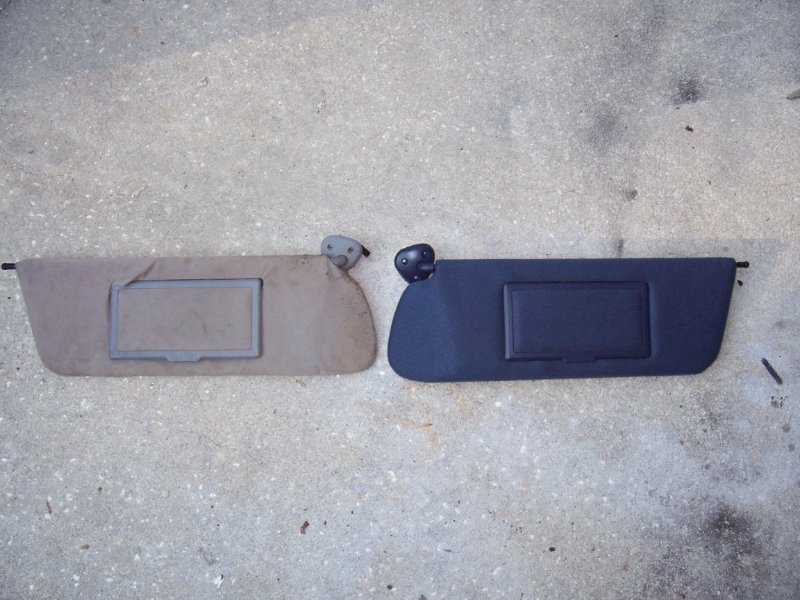
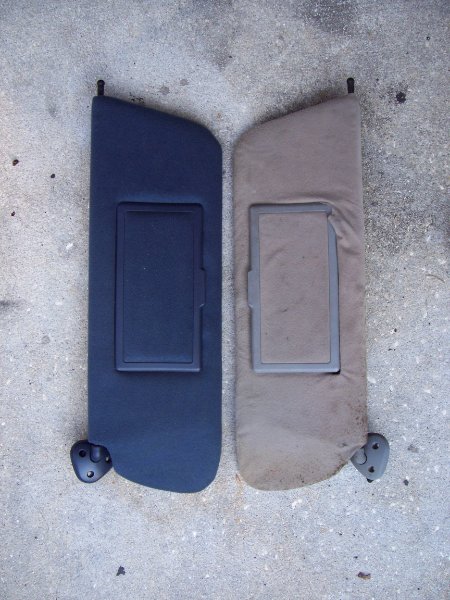
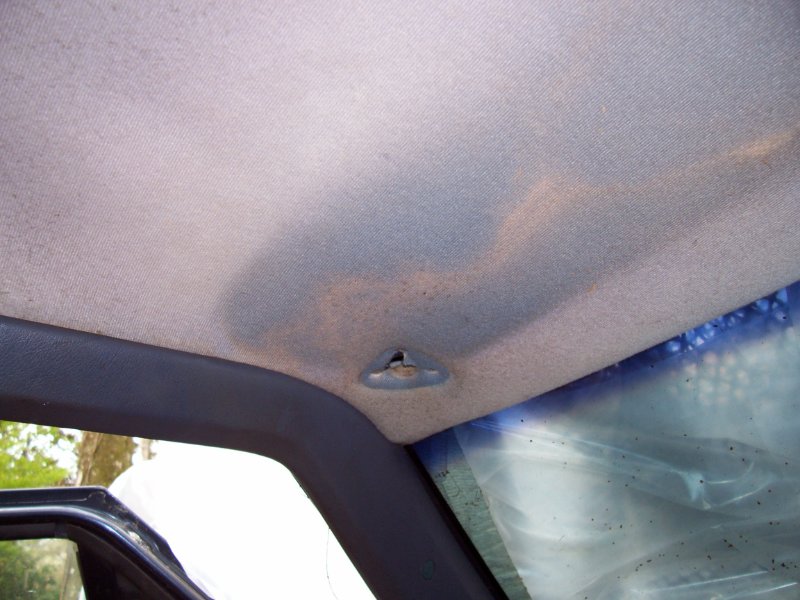
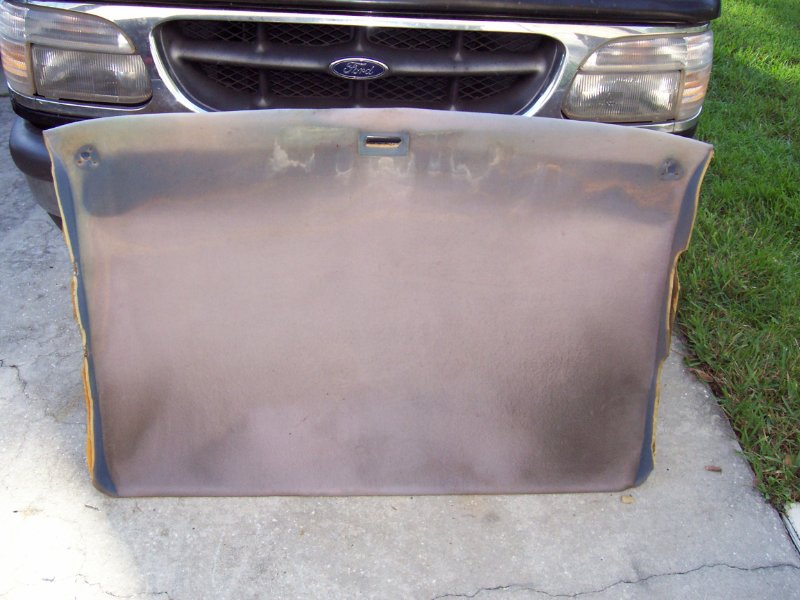
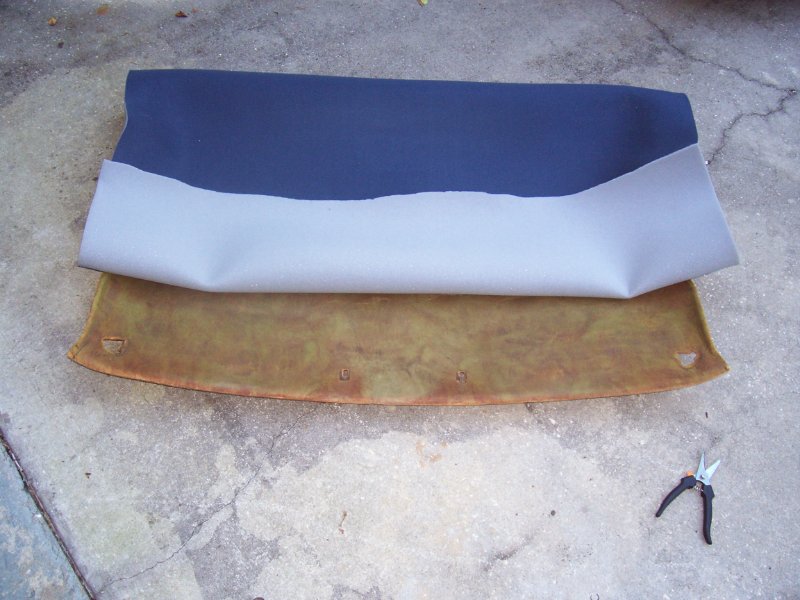
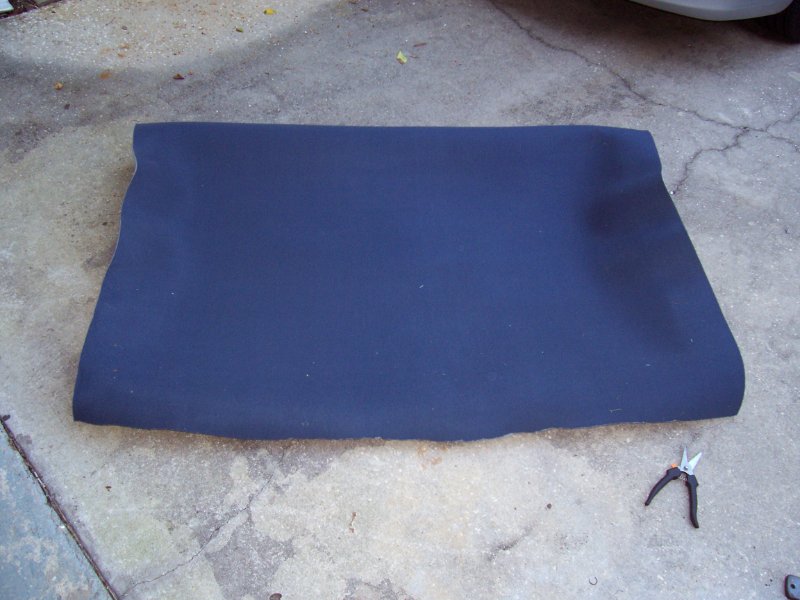
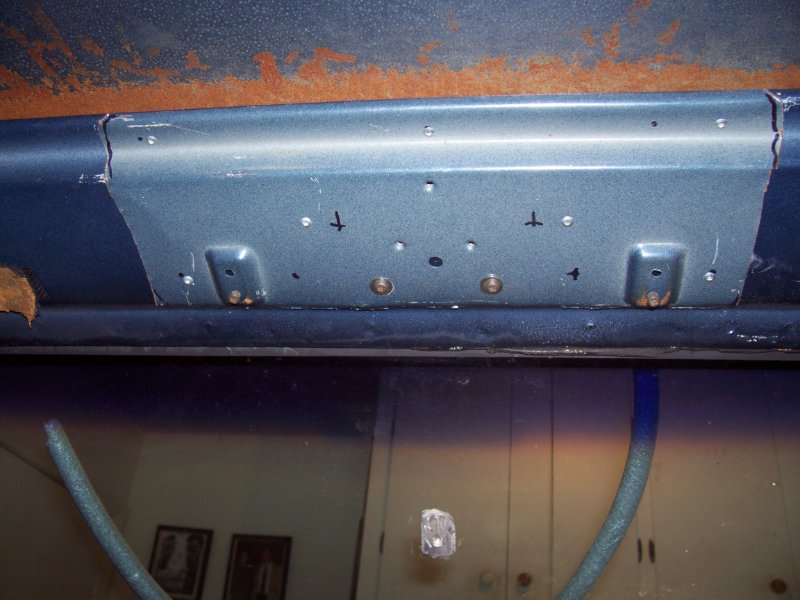
I had a bit of time this weekend to replace my headliner and sun visors. I picked up a set of vanity sun visors, and the overhead console, from a pick-n-pull XJ. My headliner was trashed, so I picked up some headliner material from, humm :oops: humm, Joanns Fabrics. Here are a few pictures from the restoration - I used 3M Foam Fast adheasive to attach the fabric. I made sure to coat the healiner and the foam backing in 6 inch increments. If you try this at home ;) , do not press on the fabric in a way that compresses the foam material. Just enough to ensure that the two are in contact with each other. The vanity visor -> Once again, I used SEM to change the color of the gray trim to match my blue trim - The new visors are shorter than the sock ones, and they have a different mounting system. In order for these spiffy sun visors to work, I would need to fab up some sort of blocks to raise the clip mounts. I am not that creative, so I cheated 8). I cut the factory steel mounting system out of a totaled XJ with some sheet metal pliers. I then attached it {using the existing factory holes to line it up correctly} with some pop rivits. With all the material fastened, I was ready for the install. Before- /uploads/archive-pt/76dd78504bdfd187b9ad234b9a887a8a.jpg During {I am not proud of the use of duct tape here} - After - /uploads/archive-pt/71b28e57bdccbcade0ef959b5b6473fc.jpg /uploads/archive-pt/f57579294949918ae4ed9f8a4a71098e.jpg Afterthoughts and observations ~ I am not a professional, at all. I have to say, I am proud of the job that I did. The color blends a lot better than the pictures portray. It must be the flash, because it looks good otherwise. I added some more velcro to the missing pieces in the back; don't think it helped. The front Velcro pieces were very important. The drivers side has a support cup thingy that really helped align the headliner. I still need to hook up the power to the vanity lights, but I will first need to get the power back in the cab - can't figure that one out :roll: . I hope the glue will hold! I will find that out in time. I wished I had put some paint on the spots where the paint flaked off on the back window frame, it kills the shot . More to come - Rich
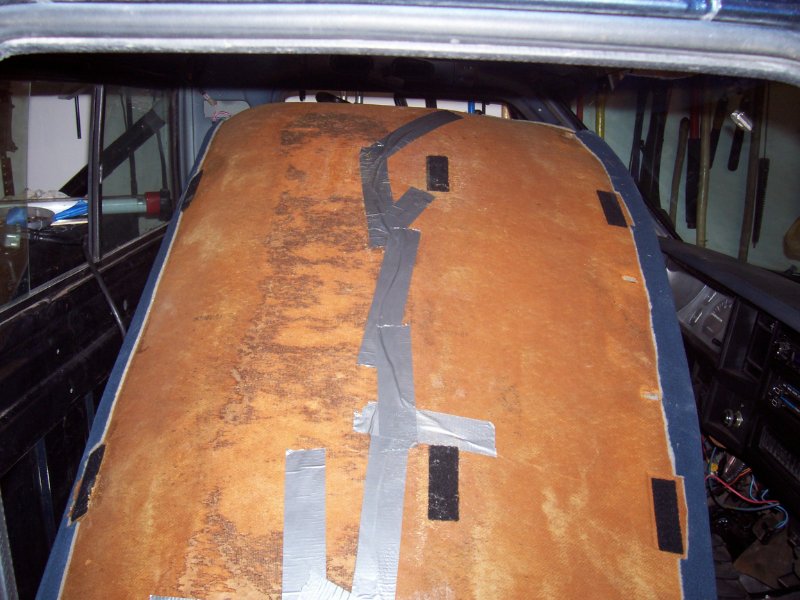
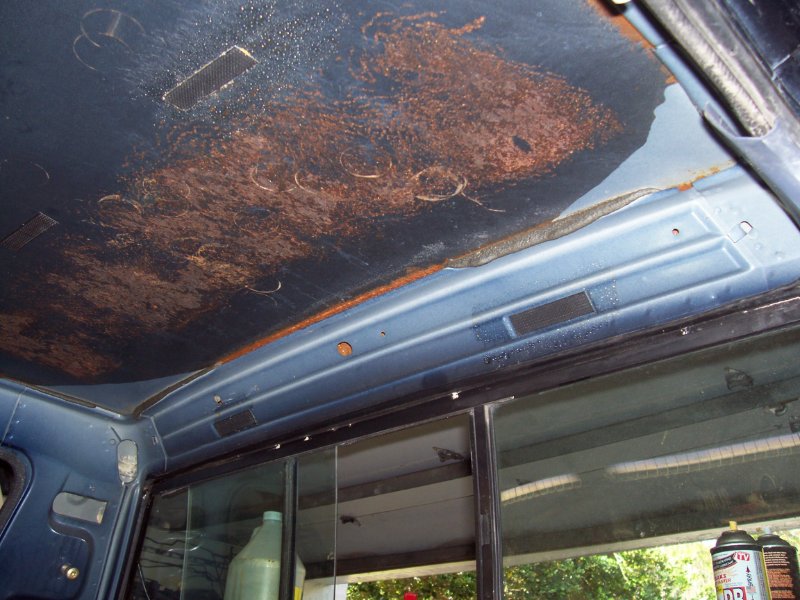
-
I picked up a tilt steering column from a buddy of mine to put into the Comanche. It came out of an 1989 XJ with an automatic transmission. The column was Maroon, so I decided to dye it black with some SEM paint. Then I attached a Grant steering wheel to it. Out with the old - And in with the new - More progress to come, Rich Update - I replace the stock horn button on the Grant steering wheel with one that says Jeep. It now looks like this -
-
I guess I never started a build-up page for my Comanche? After sitting at the body shop for going on two years, I decided to bring the Comanche home. Learn from my mistake; never pay up front :cry:. Introductions first - an 1989 Pioneer long bed with the Metric Ton package. It has the I6, BA10 transmission, 231 transfercase, front D30, and a Rear D44. My goals are to have it re-repainted, add a Rubicon Express 5.5 MJ lift, 33'' tires, AX15 transmission, add a front D44, , Eaton E-lockers F&R, and 4:56. I have plenty of other upgrades in mind, it is just a basic overview of my future plans. I have made several upgrades already in the few weeks that I have had her back. It is going to take me a while to catch up with my progress, but I am loving it! - Rich 1/29/2024 thought it would be nice to add an index to my build thread now that it is in the double digits: Page 1 https://comancheclub.com/topic/7615-drahcir495s-build-up/# Added XJ Tilt Column & Grant Steering Wheel Replaced Headliner Junk Yard Tip; Hood Support Clip & XJ Under hood Light Refurbishing XJ 2 Door Bucket Seats Truck Bed Box Husky Liners Walker Evans Wheels & MTZ Tires Rusted Out Floor Board Repair New Carpet Page 2 https://comancheclub.com/topic/7615-drahcir495s-build-up/page/2/# Bucket Seats Installed Mag Light Mounting New RockCrusher 44 Rear Diff Cover Eaton E-locker Front Dana 44 Install 97 ZJ V8 Steering Upgrade Front Tow Plate & Tow Hooks Page 3 https://comancheclub.com/topic/7615-drahcir495s-build-up/page/3/# Junk Yard Tip #2 CB Install 98 XJ Door Seals PA Speaker & Jumper Cable Quick Disconnect Page 4 https://comancheclub.com/topic/7615-drahcir495s-build-up/page/4/# B-pillar Light Restoration Courtesy Lights 93 XJ 3 Piece Grill & Brush Guard Camber Fix Page 5 https://comancheclub.com/topic/7615-drahcir495s-build-up/page/5/# SW2’s Shifter Knob Upgrade RE Lift Kit Install Rear Dana 44 Build-up w/Eaton E-locker Page 6 https://comancheclub.com/topic/7615-drahcir495s-build-up/page/6/# Broken Shifter Knob Fix Mad4WD Bracket Kit Installed on a Ford 9” JKS Relocation Sway Bar Disconnect Brackets & Sway Bar Installed Fist Pictures of ProtoFab Rear MJ Bumper Test Fitting ProtoFab Rear MJ Bumper Page 7 https://comancheclub.com/topic/7615-drahcir495s-build-up/page/7/# 33 inch Tire in Stock Spare Location ProtoFab Rear MJ Bumper Powder Coated & Installed CB Antenna Mount License Plate Bracket Temp Seat Tilt Fix Chicofluentes0224 Napa Overflow Bottle Install w/Macs Replacement Bottle Page 8 https://comancheclub.com/topic/7615-drahcir495s-build-up/page/8/# Upgraded Headlight Wiring Harness & Side Marker Light Mod Topper Time Light Wheeling Page 9 https://comancheclub.com/topic/7615-drahcir495s-build-up/page/9/# Fuse block repair Brake Switch Connector Repair Eaton E-locker Switch Install Flexing GC V8 Sway Bar Upgrade Page 10 https://comancheclub.com/topic/7615-drahcir495s-build-up/page/10/# Shortening Disconnects Correct Sway Bar Bushings Update Pictures ~ Gator & Camel NP231 Speedo Gear Swap New O2 Sensor Page 11 https://comancheclub.com/topic/7615-drahcir495s-build-up/page/11/# Replacing Harmonic Balancer Wiper Motor HO valve cover New auxiliary fuse block Ground post Page 12 https://comancheclub.com/topic/7615-drahcir495s-build-up/page/12/# Oil filter O-ring replacement Rear main seal Hit 200k Topper painted Rusty floorboard Power steering fix Solid vent window Camping Page 13 https://comancheclub.com/topic/7615-drahcir495s-build-up/page/13/# Broken front axle Outer axle shaft Hub bearing Page 14 https://comancheclub.com/topic/7615-drahcir495s-build-up/page/14/# Oil dipstick fix XJ MJ clock Page 15 https://comancheclub.com/topic/7615-drahcir495s-build-up/page/15/# Damage to MJ Page 16 https://comancheclub.com/topic/7615-drahcir495s-build-up/page/16/# *Start of Rebuild* Winch cradle Towing the Comanche New pup Center console 3 switch plate Nick in Time's REM Mouse damage to headliner Page 17 https://comancheclub.com/topic/7615-drahcir495s-build-up/page/17/# Dash indicator panel restoration Driveshaft Headliner restore (again) BF Goodrich tires Dash switches Gopher tortoise Sun visors Page 18 https://comancheclub.com/topic/7615-drahcir495s-build-up/page/18/# Power coating fail Jeep tailgate stickers Scrambler build-up link Wagoneer header Jumping a MJ Video of car launch Page 19 https://comancheclub.com/topic/7615-drahcir495s-build-up/page/19/# Junk yard score Door armrest cleaned up TJ lift install Passenger side bucket seat restore Orange MJ Dirt Bound Offroad battery tray
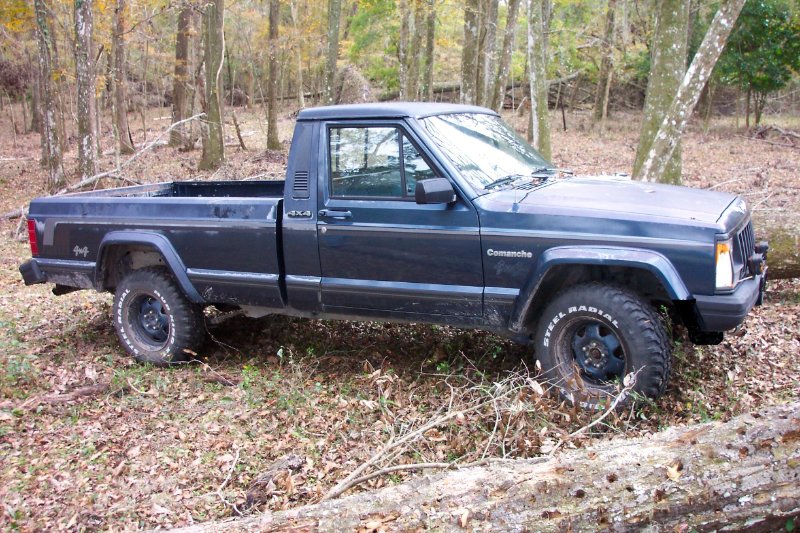
-
Interest in Rock Rails
Drahcir495 replied to Drahcir495's topic in MJ Tech: Modification and Repairs
Soon..... -
Haha, I went throught two trannies and one coyote in my 82 Cutlass. I hit the little fella outside of Syracuse, NY at 1am. My buddy swore it was somebodys dog, so we wrapped it up in the shredded bra and laid him in the trunk. My uncle had to tell us that it was not a dog, naive Floridians :oops: two trannies and a coyote? you're sick man...very sick... Sure. . . it is ok for DirtyComanche to go through two trannies and a deer :roll:. Throw in one Coyote. . . and I am the sick one. At least we did not post pictures of the trannies :D!
-
Haha, I went throught two trannies and one coyote in my 82 Cutlass. I hit the little fella outside of Syracuse, NY at 1am. My buddy swore it was somebodys dog, so we wrapped it up in the shredded bra and laid him in the trunk. My uncle had to tell us that it was not a dog, naive Floridians :oops:
-
That is funny, I just ordered my injectors from him a few weeks back. Work great, shipped fast, and I am happy with what I paid. He set up an aution for just 6 of the 5.0 injectors for me He just moved to Florida, around your area Blhtaz.
-
Hey Confedneck :cheers: , I'm outside the Tampa area. The number of Comanche club members from Florida is gaining momentum. Have you had a chance to go out to Avon park and wheel? I hope that someday we will be able to have a local Pow-Wow - Rich
-
After reading this post, I freaked out. The Comanche around the corner from my work {know, I know! I will put a CC card on it} caught fire. I get home and there is a strong smell of gas in my garage. So, in a panic, I order 6 refurbished 5.0 injectors off ebay :brows:. Get the old ones off, they looked ok, with only one O-ring tweeked. I installed the new ones without any problems, but I could still smell the gas pretty bad. The guy next door stops by and says "what is that coming off the weed wacker by your truck?" Well I found my gas leak :oops:. It's all good, the Comanche runs great and I can sleep now :cheers:
-
Hat order has been placed! Officially this time! :-)
Drahcir495 replied to Pete M's topic in The Pub
This must be why you never replied to my PM. I want to get with you on a payment plan for that DVD you sent out to me. * Pete, let me know if I flip the bill for a hat for XJs4Ever, my money seem no good to him ;) - Rich -
Has anyone used the Husky floor liners in their trucks? If so, how do they fit? I am looking at getting a used set out of an 1996 XJ, so they will be the ones for the 95 and up XJ's. Would the newer mats fit better in an 89, or should I hold out for the 94 and older versions? Thanks, Rich