buxmj Posted December 13, 2010 Posted December 13, 2010 I got mine painted the second time (florida sun is very hard on paint) and I went with 2 tone. The painter had already agreed to paint the flares black (grey truck) but then painted the lower part black and the cowel panel black also. It turned out great. I don't think I've seen a 2 tone scheme I don't like. Can't wait to see more and thanks for sharing!
dave92cherokee Posted December 29, 2010 Author Posted December 29, 2010 http://www.naxja.org/forum/showpost.php ... stcount=19 In an effort to clear out some clutter I'm needing to get rid of this stuff. PM me if you're in middle TN for my address to come pick up whatever you want.
SW86 Posted January 2, 2011 Posted January 2, 2011 i don't know how far you are from me but i could really use that steering box
dave92cherokee Posted April 4, 2011 Author Posted April 4, 2011 Well it's been a while since any updates so I'll get it close to where I'm at. Still trying to figure out what I'm going to do about the rockers, thinking I might order a set of xj rocker replacements and cut them up to remove the gap and get them aligned. Got the sheet metal bent to shape for the floor and welded in place. Stripped the rest of the floor and primered to stop any further rot. Will be cutting some patches to fix the little bit of rot there was on the floor. Got the 3" angle cut, bent, and welded to the frame will just have to finish filling in the rosette holes. Been working on the brake system in the rear and almost all of it has had to be replaced, also drained, cleaned, and refilled the rear diff with royal purple. Next weekend planning on getting the rear doors pieced together, as well as get the straightened rear bumper bolted back up. Will get some pics this week if the rain clears out long enough just hoping the forecast for the weekend is clear.
kro10000 Posted April 4, 2011 Posted April 4, 2011 IMO lift it up onto some 35s, with that kind of length it will be mostly useless off road, but it will look better. When you get done this will be a fantastic piece of work, and I definitely don't have the cajones to take on something like this now. I can't stand the idea of 20s being put on any Jeep (SRT8 up for discussion), and the street manners will be poor on this beast anyway, so you might as well lift it up some.
codymanche Posted April 5, 2011 Posted April 5, 2011 this thing would be bad @$$ once its done. but i for lifting it u went custom this far why stop now
dave92cherokee Posted December 12, 2013 Author Posted December 12, 2013 Been a rough couple of years with all the travel I've been doing for work but when I'm home I make little progress here and there. Right now I'm down to having to get doors created for the rear and the box tube rockers welded in, then a little bondo work and it'll be ready for paint. Going to post all the pic's I've got on photobucket so far for anyone wanting to see all of them. CC has been a far better and more helpful forum than NAXJA as alot of the time posted questions over there seem to go unanswered in local forum if you're not part of the local "click" of guys that hang out.
dave92cherokee Posted December 12, 2013 Author Posted December 12, 2013 Here's some pics of the 88 MJ that I picked up a few years ago after the may 2010 flood. It was sitting near a creek and ended up with water about 3-4 feet up the side. The rear diff was flooded and when i changed the fluid a nice milkshake mix of fluid and water came pouring out.
dave92cherokee Posted December 12, 2013 Author Posted December 12, 2013 Here's some pics of the teardown and chopping of the MJ. I know this will hurt some of you but as said it was in the flood and most of the interior was already stripped when I picked it up so it would have needed everything replaced.
dave92cherokee Posted December 12, 2013 Author Posted December 12, 2013 Here's a couple of pics of just playing around. Found this pic of the dually online and contemplated it but then realized how hard it would be to find the MJ dually fenders (about as easy as finding a new sending unit). Then a pic just playing around with the leftover pieces from the chop, actually gave ideas for a super short wheel base rig that would probably be shorter than any wrangler. Here's a pic of lining up the roof and side pinch seam. Here's one of the first pictures i took showing the differences in the rockers which ultimately led to me deciding to cut them out and weld in 2x6 box tube. Also shows the first patch I put on the frame rails to tie them together. It's 2x3 steel from lowes with pre-made holes in it that provided plenty of space to put rosette welds. There's one on the inside and outside of each frame rail. Here's the trans hump of the mj cut out getting ready to create the patch panel to reshape the floor board for the rear seat. Here's a few pics showing the damage from the flood and improper maintenance. The first one is the bar that goes above the axle between the shoe's inside the drum. The other two show the inside of the drum and what was remaining of the brakes. After finishing everything inside was replaced even the siezed up e-brake cables. Here's a pic of the floor board in primer, it's cut from a sheet of 18 ga then bent into shape and hammered down. Drilled holes around the edge every inch or so to use for welding it down then put a few stitch welds around the perimeter and ground everything down. Here's the initial rough patch job before grinding anything down for filling in the back of the roof. Here's a couple pics of the second layer of frame rail plating. It's 3x3 1/8" that runs from front control arm mounts all the way back to the front leaf spring mounts. It's got rosette welds on the side and bottom as well as stitch welds around the perimeter.
dave92cherokee Posted December 12, 2013 Author Posted December 12, 2013 Here's the first draft of the rear doors. It consists of the back of the MJ door and the front of the XJ door. After welding it together and looking at the position of the windows I decided not to go that route as little more than half of the window would be able to roll down the other front half would be solid in place. Currently looking to find a 2dr being parted out or in a local JY to get the doors from it so there will be a bigger portion of window able to roll down. Here's a couple of pics showing the differences in the rockers and the outer lip. I was initially going to try to line them up but after seeing how much body work it would take to do it decided to go with the 2x6 for simplicity and also added strength. Here's a few pics of it's close current state. I've got the fenders and front doors on as well as the interior and carpet installed inside. Will make a thin plywood panel for the rear wall and carpet it as well. I've got cherokee buckets up front and 00 durango middle row bench seat in the back. Provides seating for 3 or two with flip down console w/ cupholders. Entire inside is covered with fatmat sound deadening to reduce any panel vibrations and unnecessary noise. Here's a rough view of the rockers cut out, I have since ground them down smooth and ready for welding in the box tube, just have to find someone local who's got a welder as I had to sell mine a couple of years ago due to money shortage. View of the frame plating after grinding down, sealing with seam sealer, then spraying with primer to stop rust from forming. View of the custom 2 piece driveshaft and crossmember for the carrier bearing. Got the driveshaft built by AZ drivelines. Couple of pics of the roof after being patched together, sanded down, and primered up. The new straight tailgate and nice straightened out rear bumper. When I got the truck both ends of the bumper were crushed in. Was able to straighten it out then primered and painted it.
johnny quest Posted December 12, 2013 Posted December 12, 2013 its great to see that this is still alive! and its lookin awesome!
AirborneDeth Posted December 13, 2013 Posted December 13, 2013 I like what you are doing here...and it can't be that much longer than a stock extended cab Dakota. I had 2 '98 Dakota's, and I could not park those thing uniess I backed into a parking place! LMAO ****Edit**** Dakota club cab wheelbase was 131.0" It looks like you have about 10" on it. (Thats what she said.)
dave92cherokee Posted December 13, 2013 Author Posted December 13, 2013 The measured wheel base on it is 144" hub center to hub center. Bumper to bumper is 16' so it's got the wheel base close to a full size 4 door.
ComancheKid45 Posted December 13, 2013 Posted December 13, 2013 Very good work....Its like an MJ Mega cab! lol
Rymanrph Posted December 13, 2013 Posted December 13, 2013 As much as I love the idea, I feel like it would need a huge lift and 35s at a minimum to look anywhere close to proportionate. Bobbing the front of the bed might help, but then you lose bed space (obviously). One thing I'm glad that you are doing is using a rear door portion for the back door to maintain the body line with the cab vents. Still curious to see how you handle the glass for those doors. Good luck! Its great to see progress.
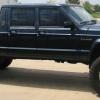
dave92cherokee Posted December 14, 2013 Author Posted December 14, 2013 Trying to find a 2dr xj in the junkyard to use the door out of it. The windows in them are a good bit larger than the windows in a 4dr so will fill up the space better. Then it will have the fixed window in the front of the door. Was thinking of using plexiglass but it scratches so easily so will likely try to find a piece of 1/4" thick lexan to use for the solid window. As for the lift the plan is a spring over and either 33 or 35" duratracs, going off of Alexia's budget lift. I'm aiming for an almost exact replica of my avatar except in desert tan instead of dark blue.
AirborneDeth Posted December 14, 2013 Posted December 14, 2013 Trying to find a 2dr xj in the junkyard to use the door out of it. The windows in them are a good bit larger than the windows in a 4dr so will fill up the space better. Then it will have the fixed window in the front of the door. Was thinking of using plexiglass but it scratches so easily so will likely try to find a piece of 1/4" thick lexan to use for the solid window. As for the lift the plan is a spring over and either 33 or 35" duratracs, going off of Alexia's budget lift. I'm aiming for an almost exact replica of my avatar except in desert tan instead of dark blue. I had Duratracs on my CJ5. I really liked them. I never had them off-road, so I can't vouch for that side.....but they are aggressive looking and weren't loud on the road.
dave92cherokee Posted December 14, 2013 Author Posted December 14, 2013 That's the main reason I'm going with them, I've heard great reviews about them on the road in dry, wet, and the crappy winter mix we get here in TN. And since this will be a street only not to worried about the off-road performance of them.
JT31 Posted December 16, 2013 Posted December 16, 2013 your avatar is my dream mj but with a 4bt cummins.... one day... one day... love your progress so far :thumbsup:
dave92cherokee Posted February 2, 2014 Author Posted February 2, 2014 Well back home and ready to get started on the manche again. I posted on the tnjeeps page to see if I can get any help but haven't heard so I'm gonna ask the wonderful MJ crew here. Hopefully someone's close by in middle tn or northern alabama that would be willing to come by one weekend to lend a hand on the manche. I need to get the brakes bled and the 2x6 1/8" wall box tube welded in place for the rockers and the supports from the tube to the frame rails welded as well. Last time I welded the sheetmetal on the manche I kept blowing through with the 220v welder I was using, so hoping someone on here close has a small 110v welder and can weld sheetmetal decently that would mind coming over and lending a hand. If 1-2 people or 5-6 people want to come the more the merrier. Beer and pizza will be available for all who want to come help out and get the welding/brakes done and check it out in person.
dave92cherokee Posted May 21, 2014 Author Posted May 21, 2014 Well it's been a while since I've posted anything on here and there's been alot going on around the house taking up some time. But now it's ready to get an alignment and the brake system bled by a shop to completely flush the entire system. I found a local welding shop that has a TIG welder that I will likely have weld on the 2x6 box for the rockers. Still searching for a 2dr xj in a JY to grab the doors from to get the back doors created. This is how it's currently sitting in the back yard. I did a slight mixture of Alexia's lift, in front I've got RE 5.5" coils, RE adjustable track bar and mount, chevy brake lines, and RE drop brackets with factory control arms, in the back I've got a chevy drop shackle (which actually gave around 3.5" of lift itself), rusty's 4" SUA leaves, and a dakota brake line. As for shocks I went with the rusty's monotube shocks R11 and R16 which fit beautifully and have plenty of travel being it's a pavement truck. Now I'm working on prepping the box for welding and then will work on the headliner and back wall cover to finish off the interior. All in all happy with it for now as it'll be able to make the drive to my new house we're buying next month, currently on 235's and front has roughly 6.5" lift and back is right around 8" giving it the forward rake.
benjy_26 Posted May 23, 2014 Posted May 23, 2014 i say lift it and make it like a 4x4 mudder!!!!won't work http://comancheclub.com/public/style_emoticons/#EMO_DIR#/thumbs.gif I'm lost. Why wouldn't it work?

Recommended Posts
Create an account or sign in to comment
You need to be a member in order to leave a comment
Create an account
Sign up for a new account in our community. It's easy!
Register a new accountSign in
Already have an account? Sign in here.
Sign In Now