knever3 Posted November 7, 2011 Author Posted November 7, 2011 Started working on the truck again. I just so happened to get sick Friday night of my first day of vacation. :fs1: I am pushing through it and I got my headliner out I bought off ebay three years ago I think. It went in ok it didn't fit like OEM that's for sure. It's too long and too wide so I had to cut it at the edges. Here are some pics of the progress getting the dash and interior in. I got a couple parts off ebay from a Junk Yard, I don't have fog lights or a rear defroster but I might use the switches for something. I ran into a stupid problem. I left the wiring from the Cherokee dash and there was only one plug that is different from the Comanche without A/C and the Cherokee with. The fan wiring goes through the dash harness to the fuse block and you have to remove all the harness and switch it over just for that one. I will cut the harness plug off the Cherokee harness and solder it onto my Comanche one because I'm not about to remove the dash again for that. :fs1: I stopped working tonight because I have to go to the parts store and get metric brake line nuts for the '96 XJ brake booster. Tomorrow, I will get the trans computer installed the brake booster and the wiring for the amp. Not bad but I am not looking forward to getting the under hood stuff done since I remade the engine harness. It doesn't fit like the original one. :( Hope you like the progress, I hope to have it on the road later this week.
knever3 Posted November 9, 2011 Author Posted November 9, 2011 I finished up the brakes today. I installed the '96 XJ dual diaphram brake booster and master cylinder. I used the existing threaded fittings except for one that turned out to be 3/16". I borrowed another flare tool from Jerami my friend that he loaned out from Advanced Auto. For some reason the one that he had made better flares. :hmm: I bled all the brake lines and drilled out the hole in the brake pedal ring with my uni-bit. After grinding off some material on the front side it fit great. The pedal is nice and steady like it should be. I got another vacuum football from a junk yard for $5 and I installed that, I worked on the vacuum lines and hooked up my starter and alternator. I was getting everything switched over from one radiator to another but I have a hard time getting the trans line out I put in. The one in the new radiator is soldered in and the one I have from the old truck snapped in and was threaded. I used my line removal tools but no dice. After getting mad and saying a few choice words my sister called to check up what's been going on lately. I guess it was time to quit for the night. I will figure out what to do tomorrow. Here is some pics of the brake booster.
500 MJ Posted November 9, 2011 Posted November 9, 2011 Are you planning on putting A/C in the truck? If you do and free up the A/C delete pulley neohic is looking for one. I noticed that your HVAC box has A/C so I had to ask. Keep up the good work!
neohic Posted November 9, 2011 Posted November 9, 2011 Are you planning on putting A/C in the truck? If you do and free up the A/C delete pulley neohic is looking for one. I noticed that your HVAC box has A/C so I had to ask. Keep up the good work! You rock! Good catch on that one, Brent! Spare some parts?
knever3 Posted November 9, 2011 Author Posted November 9, 2011 Yes I'll be putting A/C in the truck, but for right at this moment I want it to run and drive so the ac delete pulley won't be for sale. In time though.
knever3 Posted November 10, 2011 Author Posted November 10, 2011 Today I got the transmission line swapped out since I ripped the guts out of the first one. The new radiator has a soldered in line instead of a threaded one, somehow the line was slightly oversize since it was made of steel instead of copper. I got the drive shafts installed and I bought new heater hoses and upper and lower rad hoses. Tomorrow I will finish the trans lines and adjust the Novak transfer case linkage so I have 2wd and so on and then give it a start. Who knows, the first try? Let tomorrow tell. Wish me luck!
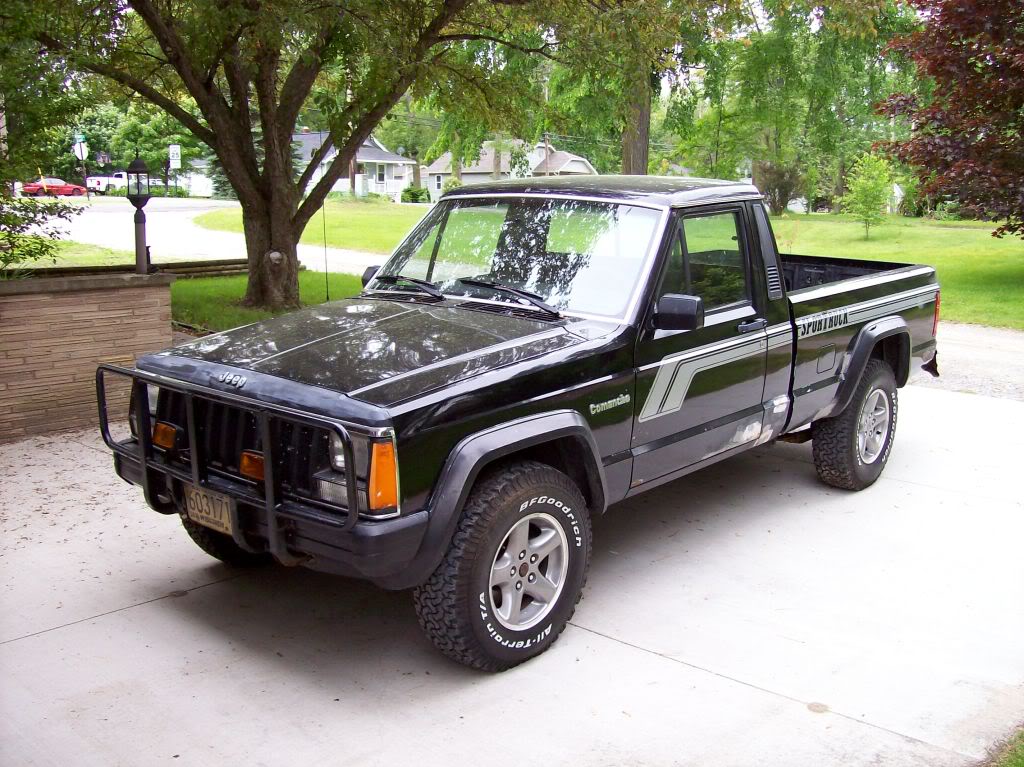
knever3 Posted November 10, 2011 Author Posted November 10, 2011 Well after fixing the trans line connector this morning I added trans fluid and antifreeze and water and fired it up! I need to figure out how to adjust the 241 transfer case because it only wants to be in 4wd, I cannot find 2wd. :hmm: It snowed this morning for the first time this year and after it got nice out so out the Comanche came into the bright sunlight under its own power no less! I have a lot more work to go but this week was all about making it run and drive which it does. If I need to get another transfer case so be it. That will not put a damper on my mood the least bit. I installed the drive shafts and tightened up the suspension bolts since I removed and reinstalled the springs with one fewer leaf and installed JKS shackles. Here are some pics outside and a short video.
500 MJ Posted November 10, 2011 Posted November 10, 2011 Did you check to make sure you have the correct T-Case linkage? I'm pretty sure that it matters if you have it from a 231 or 241...
knever3 Posted November 12, 2011 Author Posted November 12, 2011 I have a Novak Adapters cable linkage so it is infinitely adjustable, I could use some pics of where the actual shifter on the case is when in 2wd, Full time 4wd etc. If it's that picky and grinds when not perfectly engaged then maybe it will work. We'll see. :dunno:
knever3 Posted November 12, 2011 Author Posted November 12, 2011 I got more finished on the truck today. I got the front end buttoned up and worked on the power locks and door speakers. As for the locks I got some actuators with pigtails and rods from the junk yard from a Cherokee 4 door. I planned on installing the actuators and runing them from a keyless entry I had laying around. I figured the doors would be pre-drilled for the actuators and I was right. After installing the lock actuators and speakers I found out the keyless entry doesn't seem to work. :dunno: I will test some more on my bench power supply and maybe revisit it later. The speaker install went very well, albeit a little time consuming. I back mounted the 5-1/4" Diamond Audio speakers so the trim ring would sit flush to the door panel. It turned out very nice, I used more of the Dynamat Extreme I had ordered for the cab. The doors need to be sealed to have good bass response. I was not looking forward to cutting the door panels but this was the plan all along. I had the speakers in my old '98 XJ and they sounded excellent. I will mount the crossover networks in the dash maybe tomorrow before work. I still have to install my deck and amp and run the 2awg power wire I have left over from my car. It's nice to work on the truck and know that you can just start it up and move it anytime. :D
Krotius Posted November 12, 2011 Posted November 12, 2011 That is one pretty truck. Hope mine looks half as good when I am done with it. I'm a huge fan of black on black.
shelbyluvv Posted November 13, 2011 Posted November 13, 2011 why did you cut up those black door panels? I have a set here already cut for speakers I would have traded you! Either way your truck is looking beautiful! Good job so far.
knever3 Posted November 13, 2011 Author Posted November 13, 2011 I had a hard time doing it but I knew it would be better in the long run than to stare at the nice panels as is. I would rather the factory put door speaker grills on the panel before I bought it but it was a radio delete truck.
knever3 Posted November 22, 2011 Author Posted November 22, 2011 More progress, I have been hard at work and got the radio and amps installed. The amp board is not completely finished yet, I still have to make a black carpeted trim ring to cover it. Just for looks so I won't be doing it any time soon. On the to do list is modify the brake pedal switch so I have brake lights and work on the linkage for the transfer case. Here are some pics of what i've been up to. I made all new wires for the engine bay. I was tired of the old stuff so I used 4 gauge for the power and ground and I have 2 gauge for my amps. I ran the power wire through the inner fender and then out into the cab in the kick panel with grommets. All the terminals are soldered and heat shrink wrapped. OLD: New VS Old: Its hard to see but I installed a circuit breaker instad of a fuse. I like them a lot better since you can just reset them or trip them to work on the system. I also noticed I didn't have a body ground attached to the ground harness, there's one now made of 4 gauge. Radio install, I took the time to make the radio fit flush and with a lot of work removing the HVAC controlls and modifying the dash innards with a dremel multitool it fit nicely. I also used soemthing else that I will recommend to anyone, Gorilla Tape, the stuff it three times as thick as normal duct tape and a 10 times more sticky. I used it to secure my wiring before I put the carpet back in. I mounted the 1/2" plywood to a pair of heavy duty L brackets so I didn't have to screw through the cab and I put Industrial velcro on the back top of the board so it doesn't make noise or move around. So it's getting closer, I hope to drive it on Thankgiving.
knever3 Posted November 25, 2011 Author Posted November 25, 2011 I got to drive the truck for Thanksgiving yesterday. Today I used it to rake up the leaves and drive them around to the back yard to burn. I snapped a few pics for you to enjoy.
Rymanrph Posted November 26, 2011 Posted November 26, 2011 Are those 16" XJ wheels? The look good with those tires.
knever3 Posted November 26, 2011 Author Posted November 26, 2011 They are from my '01 XJ and authough I really miss my Cherokee the '98 was quick and the '01 was a dog and of course ended up having a cracked head. I thought the '01 with the coil packs would be faster it was not so. Maybe someday.
knever3 Posted December 29, 2011 Author Posted December 29, 2011 What happened to the donor? I sold that one because the trans and wiring ended up being fubar so it went up north to Traverse City to someone who wanted a trail truck.
knever3 Posted February 27, 2012 Author Posted February 27, 2012 I fianally got around to adjusting that Novak adapters cable shifter so I figured I'd find some mud. On a shake down trip I found a dirt road I didn't know about only a mile and a half from the house. The road is soft on the surface for about 3-4" then it is frozen, just like spring. I didn't want to get into anything rough because my wife was at home fast asleep. Here are a few shots. I wired my rear view mirror up the other day too. It has the nice switches and it stays on while I get in to put the key into the ignition.
freakjeep93 Posted February 28, 2012 Posted February 28, 2012 congradulations you are now my desktop picture lol
knever3 Posted April 6, 2012 Author Posted April 6, 2012 A large update on the Comanche. First off my 242 transfer case was giving me fits so I rebuilt it since I found the shift fork pads missing and one shift fork was worn down from grinding for who knows however long. I ordered a new shift fork and pads and I am in the process in putting it back together. Next is the big news, my 42,000 mile motor is getting kind of tired so I wanted to stroke it, well I found a 4.7L stroker already built for a great price so I picked it up. I need to buy a '99 intake, a header, and new poly motor mounts. I will take off the oil pan to fix a dented bottom and double check the crank to see what year it came out of. The block is a '96 with NVH stamped on it. It has brass freeze plugs installed and it's clean!! I bought some engine primer and paint to make it look nice before installing it. So here's some pics for you all, enjoy!
500 MJ Posted April 6, 2012 Posted April 6, 2012 42K on your motor and its shot? How does that happen?
ajpolitz Posted April 6, 2012 Posted April 6, 2012 Oil is SO over rated. :brows: 42k is just a break in period on these motors. Is the motor bad or do you just want the stroker?

Recommended Posts
Create an account or sign in to comment
You need to be a member in order to leave a comment
Create an account
Sign up for a new account in our community. It's easy!
Register a new accountSign in
Already have an account? Sign in here.
Sign In Now