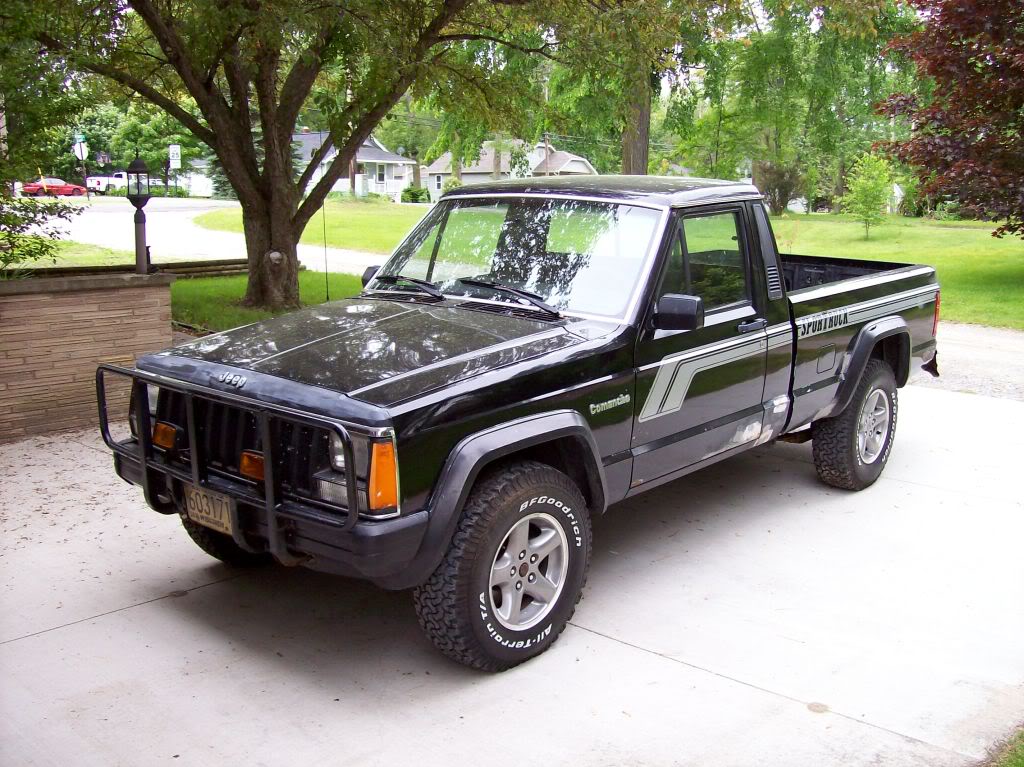
knever3 Posted July 24, 2009 Posted July 24, 2009 Well, I have cought the Comanche fevor so these are some pics when I brought her home: Before I got started: Interior: Set of leftover wheels from my XJ just to see how it would look: Plans are to strip her down, replace floors, repair any rust damage, repaint. Replace brake lines/rear brakes, shocks, and refinish gas tank. I would like to upgrade to full gauges soon also, but that can wait till it's back in one piece.
knever3 Posted July 24, 2009 Author Posted July 24, 2009 Well some expected news, floorboards only Fred Flintstone would adore: Drivers side front, or what's left of it anyway... Drivers side rear: Passengers side: Temporary fix until I can get them redone: After some blasting and grinding: Oh, yeah the temporary seat I made up for transport, not the most comfortable thing but I didn't have any milk crates laying around.
mnkyboy Posted July 24, 2009 Posted July 24, 2009 Other then the floors boards it looks to be in decent condition.
Pete M Posted July 24, 2009 Posted July 24, 2009 Moisture under the carpet can be a real killer. :( Looks great besides. :thumbsup:
driverdave Posted July 24, 2009 Posted July 24, 2009 I am rhino lining my floor I didn't have rot very little rust I guess from looking around I got lucky on the floors, just wish the rest of the truck wasn't so rotted.
knever3 Posted July 25, 2009 Author Posted July 25, 2009 Well, work has begun on the floor boards. They weren't exactly easy and there is much work to go, but here is some pics on the progress...
knever3 Posted July 26, 2009 Author Posted July 26, 2009 Well with the dissasembly there are some spots to address: And after some work removing panels: And off comes the paint! I still have to do some work on the underside when the box is removed; plans include a new gas tank and evap line, new brake lines and rear brakes. I would like to simiplify the rear brake system, the current system has the proporting valve and a return line coming up to the front one. I will have to search the site to do that. I don't need the load sensing valve in back because the lever is already broken.
DirtyComanche Posted July 26, 2009 Posted July 26, 2009 What did you take the paint off with? Big scotchbrite wheel?
knever3 Posted July 26, 2009 Author Posted July 26, 2009 We used 60 grit sandpaper on a 6 inch sander. We will sand it with 120 grit to prepare it for primer, so the owner of the shop says. I didn't make that decision, the shop who is painting it says they always do that. I was quite suprised myself, but without taking it down to bare metal I wouldn't know where to cut and replace bad rust spots. It was a lot of work! There is about 8 places where metal must be replaced along with the 8 holes in the roof where the "Visor" was. I didn't like the look on the truck so I have to weld the holes shut. I know now how much work this is and I wish I could do it all myself, but I don't have a paint booth. I stripped the truck and will put it back together after the paint is done. Thanks for looking.
knever3 Posted November 2, 2009 Author Posted November 2, 2009 Ok, it's been a while since I have updated this build. The truck is now painted and I have put the interior back in minus the headliner for now. I think it turned out great, I will get pictures up as soon as I get my computer fixed. I updated windows to service pack 2 for windows vista 64 and it says my bios is no longer loaded! It will not load windows. I haven't tried to press F8 yet and try to restore it to another date, that's all I can think of :hmm: I will go to LineX to see if I can get my bed sprayed for less than $500, I will do it for $400. On my short to do list is to replace my RR wheel cylinder that's leaking before I change axles and such for a 4wd setup. I don't want brake fluid ruining my wheels. I still would like to buy a heavy duty brush guard so a deer won't wreck the front end. I also need to replace a worn water pump and all the vacuum hoses. Not bad, just can't wait to post pictures for you all to see the progress.
87Warrior Posted November 5, 2009 Posted November 5, 2009 Wow, quick work right there :clapping: Let us know how you tackle the rear brake lines, I am wanting to do the same.
knever3 Posted November 5, 2009 Author Posted November 5, 2009 Well, using another computer now, here are a few pics of restroring the frame. I sandblasted the frame then installed new brake lines to the rear. I tried to find another load sensing brake adjuster, but I decided to do away with it for now. I just plugged the one at the dist block at the front and ran a new line directly from the bottom of the block to the rear brake hose. I used a flaring tool and bought the lined brake line roll so I didn't have any troublesome unions which leak and corrode. After I was done the entire frame and underside of the truck was por-15'd.
87Warrior Posted November 5, 2009 Posted November 5, 2009 What sort of media did you use to blast the frame? This is the next step for my truck.
knever3 Posted November 5, 2009 Author Posted November 5, 2009 I redid the old decaying seat back material just like the underside of your bed. It was torn so I tried to sew a patch on it and then decided to just replace the entire back piece and sew the zipper back on. It was a lot of work and thanks to the help of my parents with holding it the result was something I am very happy with. My mom's cat has a cameo... The picture is of the first attempt of sewing a patch in it. A picture of the material cut out. Here is a couple of a pics of the finished project. I used a stretch black fabric that I sewed on every edge because it unraveled easily. I also bought heavy duty thread and needles.
knever3 Posted November 5, 2009 Author Posted November 5, 2009 A picture of my bed after paint, I am going to line-x the bed sometime, by the way, does anyone have a good shape metal plug, or know where I can get replacement ones?
knever3 Posted November 5, 2009 Author Posted November 5, 2009 I did the gauge swap, and it was much easier than I expected. I forgot to take some after pics, but I did set the mileage back to 39,700. Yes that's correct, only 39k on this truck. It just sat outside someone's garage for a long time. It sure looks nice. When it's light out I will take some pics of the interior. I also finished my floors then put in the new carpet. I used 3M undercoating, 4 cans.
87Warrior Posted November 5, 2009 Posted November 5, 2009 A picture of my bed after paint, I am going to line-x the bed sometime, by the way, does anyone have a good shape metal plug, or know where I can get replacement ones? I can knock one out of my rusted bed for you. It is red. I already have a replacement bed with the plugs! PM me if interested.
knever3 Posted November 5, 2009 Author Posted November 5, 2009 Ahhh, my long awaited donar truck. 4wd is only a couple weeks of work away. Over the last couple days I removed the rear axles of both trucks. I will put new axle seals and maybe a new pan with new gear oil. I will also convert from a ba-10 to an auto. The donar truck is a column shift and mine is a stick so I will make my truck a console shift. I will be looking for parts for this conversion so if you hear of any let me know!! The donar truck has new brakes all around so the swap is all the more worth it, I was crossing my fingers while picking up the truck for a Dana 44, but it wasn't meant to be this time around. I am ordering rear leaf springs from hell creek, I have new 3 inch coils for the front and would match them on the back. Does anyone have any pics of a comanche with 31's and a 3 inch lift? I can't picture it. I don't want it to be to tall for 31 inch tires. Pictures would be awesome so I can make up my mind what to buy. Thanks
Oizarod115 Posted November 6, 2009 Posted November 6, 2009 .. you're going to need to slow down the progress a little bit otherwise you'll never give it up when he's old enough to drive! :clapping: :clapping: :clapping: :bowdown:
knever3 Posted November 9, 2009 Author Posted November 9, 2009 I have made up my mind. After much deliberation about what I want I am going back to an automatic. The donor I have is an automatic on the column so I will have to get the necessary shifter for the floor from an XJ in the JY sometime. As much as I would like to keep the manual it would be much easier to go with the auto. Because of the needed driveshafts and crossmember parts I would have to find anyway this seems like the logical choice. I have driven an auto 4wd comanche and it rode like a cadillac on the road. Not to say that mine will with the 3 inch lift provided by new rear leafs from hell creek and the new springs I got with the donor truck. I plan on replacing the ball joints and upper and lower control arms with new bushings for the front end. I ordered an adjustable trac bar from hell creek also. The brakes are relatively new, will make sure everything is good before installing the axle. I will get new brake hoses too, and oh yeah, shocks also. I will install a moog trail boss steering damper on the front axle too. I don't know why they paint them white? I will repaint it black to match the other components. For the rear axle I am going to replace the axle seals and fluid. I will sand blast and grind any rust and paint before installing. I found the U-joints are bad, not to suprising so they will be new spicer joints. The continued work will have to wait till I get back from Florida, I hope the hurricane will not make it over to us! I would like to stay in the hurricane for the experience, but not on the cruise after the wedding, a cousin of mine, not me. Stay tuned for more pictures of the progress, I can't wait till I can drive this. I think 6 months is a long time to wait for a build, I don't know how people can wait years!! If anyone would like any pictures of something specific feel free to ask. The stereo system will have to sit on the back burner till I get it on the road. Moving out of the garage on it's own power will be priority.
knever3 Posted November 20, 2009 Author Posted November 20, 2009 Well, I have made some progress after coming back from Florida. I have removed the axles cleaned everything up replaced the pinion seal and the brake shoes. I gave it two coats of primer today and took pictures but when I went to use my camera again it broke. I think I got sand in it from sand blasting somehow? My springs from hell creek arrived when I came back so they will go in soon as I get the axle and brackets painted. Here is a question: My new hell creek springs have 5 leaves in them, my old ones 4. I thought only the metric ton package had 5 springs? I ordered them with a 3 inch lift, standard strength. I don't want this to ride stiff so did they give me the right ones? Thanks!
Pete M Posted November 21, 2009 Posted November 21, 2009 you might want to ask HellCreek to be sure, but I'd hesitate making that much of a comparison between brand new lift leafpacks and the old factory leafs. the number of leafs does not necessarily directly correlate to an overall stiffer leafpack (thinner/thicker leafs, softer/stronger steels, etc). Yes, the factory metric tonnes had a 4+1 configuration while stock factory leafs had 3+1.
knever3 Posted November 23, 2009 Author Posted November 23, 2009 Ok, not much to say about the build over the weekend. I was looking for u-bolts and shackle bolts since Saturday. After calling every auto parts store in Midland TWICE and burning a half a tank of gas I sit without u-bolts. :wall: I finally broke down to have them custom built because no one carried 9/16"x2-5/8x6.5" u-bolts. Sooo the place I took my old one into subs it out. They fax the spec sheet to the builder and they truck them back. I found out who they use and called them 4 hours after I dropped them off. They said they never recieved a fax!!! :mad: I called the parts store and they said there was a mis-communication, ya think! I said I should have called them direct myself instead. So I guess I will have my dad pick them up tomorrow since they are closed after I get out of work. I did however get the grade 8 bolts nuts and washers from fastenall today thanks to Pete telling me where to go. Something that seemed so easy cost me the entire weekend off Sat, Sun, Mon in my case. I guess I got my leaves raked up and burnt. Sometimes life changelleges you in ways that direct your talents elsewhere. Have a good one. :waving:
knever3 Posted November 28, 2009 Author Posted November 28, 2009 I am happy with the progress last night. I got the old rear end in the donar Jeep. I unbolted the entire assembly from my Comanche and bolted it in the donar one. The new one with those 3" lift leafs from Hell Creek is installed. My girlfriend came over to help me which I am truely grateful for. I had the rear axle on a set of pipe stands and a cart I made to roll it around on casters. Let me tell you, that was the best idea yet! I just rolled it into my shed to paint everything and back. That is what I am planning for the front axle too. Next is to remove the rest of the drivetrain to convert the column shift auto donar to my 5 speed to a floor shift. Let the fun begin!!!

Recommended Posts
Create an account or sign in to comment
You need to be a member in order to leave a comment
Create an account
Sign up for a new account in our community. It's easy!
Register a new accountSign in
Already have an account? Sign in here.
Sign In Now