
Eagle_SX4
-
Posts
1262 -
Joined
-
Last visited
Content Type
Profiles
Forums
Gallery
Everything posted by Eagle_SX4
-
Front brake maintenance - caliper guide pins
Eagle_SX4 replied to blanzawa's topic in MJ Tech: Modification and Repairs
Is this what you are looking for? https://www.rockauto.com/en/catalog/jeep,1986,comanche,2.5l+150cid+l4,1181382,brake+&+wheel+hub,disc+brake+hardware+kit,1736 -
Yes, the change was between Renix and HO. The change was the trip reset button moved outside of the speedometer for the HO.
-
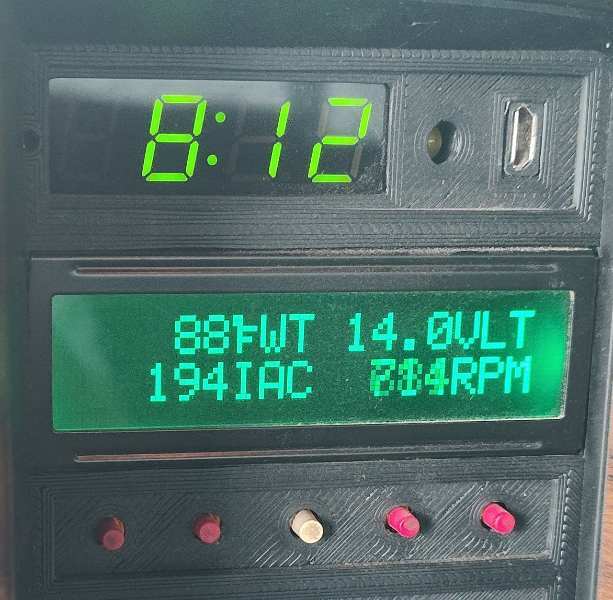
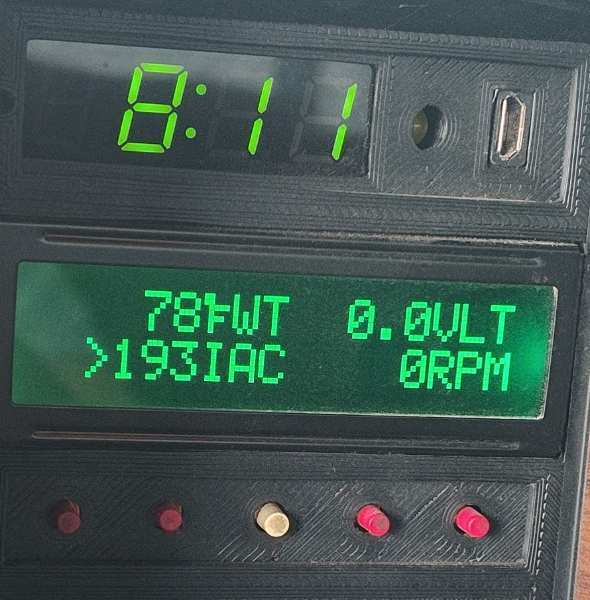
Okay, I can see the voltage flash for less than a second after the REM boots up.
-
Does anyone know why my REM shows 0.0 volts with the key on engine off, but 14.0 volts when the engine is running? Edit: With the engine off my battery measures 12.7 volts with a digital multimeter.
-
What should I do while the carpet is pulled up?
Eagle_SX4 replied to jodawill's topic in MJ Tech: Modification and Repairs
It goes all the way up the firewall. The dash needs to be pulled to get it out with out cutting it in half. -
Rocker Switch question
Eagle_SX4 replied to TheNerfsmith's topic in MJ Tech: Modification and Repairs
These switches have been used and fit in the factory slots. -
No the XJ axle perches are not the same distance apart as the MJ ones. They will need to be cut off and rewelded. Here is a good diagram of the difference.
-
fuel pressure regulator leak help!
Eagle_SX4 replied to RustyRodder's topic in MJ Tech: Modification and Repairs
The piece going through the o-rings and clip is just an installation tool. Which makes it harder to install the clip. The o-rings and spacer go inside the fuel pressure regulator and the clip goes on the fuel line. They are not meant to be installed together. -
fuel pressure regulator leak help!
Eagle_SX4 replied to RustyRodder's topic in MJ Tech: Modification and Repairs
I had the same leak last year and the only parts I could find to fit the Renix fuel rail are from Crown automotive. The part number is 83502745. The cheapest place to buy them is from Quadratec. You might as well replace the o-rings on both the feed and return side at the same time so order 2. (They are the same on the Renix fuel rail) https://www.quadratec.com/p/crown-automotive/fuel-line-repair-kit-jeep-wrangler-yj-cherokee-xj-comanche-mj-and-93 There are 2 o-rings per fitting with a spacer in-between them. Make sure both old o-rings are removed when installing the new ones. -
Found a similar one on Facebook from 5 years ago. https://www.facebook.com/photo/?fbid=3550157985084080&set=gm.4398706666832341
-
"It's all in the Door Knob, Knob!"
Eagle_SX4 replied to SGTSnacks's topic in MJ Tech: Modification and Repairs
I agree with the above roll the window all the way down remove the lower exterior window trim, just slide it up to remove it. Then with a hook made out of a stiff wire fish around in the door and hopefully pull the latch mechanism to open the door. -
1 more thing to add. In 1996 the power steering pump changed on the 4.0, as did the intake manifold to accept the new pump.
-
Could be if it is a T that would make it a Laredo and if it is a 1 it would be a base model.
-
I think this is the correct VIN. This vin is on eBay in an add for a cargo light bezel.
.webp.ee669a463cea305cd3ad48b713765aa5.webp)
-
Ultimately I would like to put a XJ44 under it but that will wait until I find one at a good price. If the 35 breaks I will might swap to a Chrysler 8.25 as they are easier to get quickly.
-
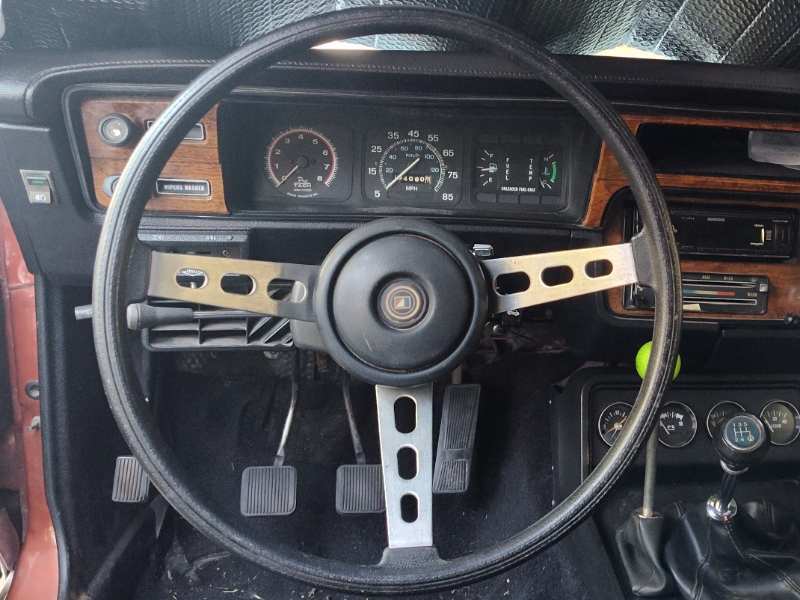
On with the AMX theme. The spoke slots in the horn button had to be widened to fit the earlier wheel. Otherwise a direct swap for the bent steering wheel I had.
-
I am very excited. This build is slowly becoming an Eagle AMX. If only I could find a brushed aluminum dash for it.
-
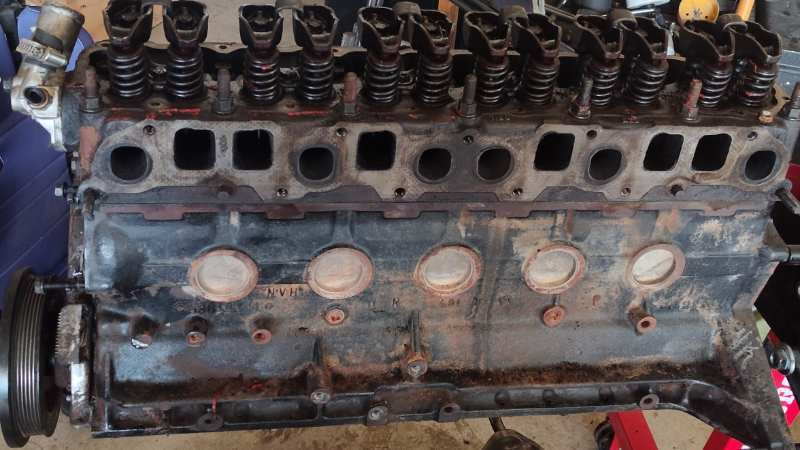
Since I put a fresh 4.0 into my Comanche. I have noticed just how much clatter the tired 4.0 in my Eagle has. So I have decided to build a 4.6 stroker for it. Last week I picked up a 4.2 crankshaft. Today I picked up the block and head I am going to use. '96 NVH block with a 7120 head (soon to be ported). I need to decide on what pistons and cam I am going to run then it will be off to a machine shop. The short block came out of a '97 TJ (P.O. rebuilt a different motor and swapped it out) and the head I got out of a '93 ZJ in the junkyard.
-
That is the coolest aftermarket part I have seen!! I wonder if it would be possible to add a power ram to original slider window.
-
31-Throttle body to MAP hose upgrade
Eagle_SX4 replied to fiatslug87's topic in Cruiser54's Renix MJ and XJ tips
Here you go. Looks like napa updated their part numbers and removed the dashes. Elbow, CRB 2670 Vacuum hose, CRB 2672 Brass fitting, WH 05703B102 -
33-Converting to an open cooling system
Eagle_SX4 replied to fiatslug87's topic in Cruiser54's Renix MJ and XJ tips
I have one I pulled off my truck that is rust free. If you want it PM me and we can work something out. -
I was also having this problem and figured out how to view all the content you have started. Go to the "Content I Started" page then click on "show filters" then "Time Period" and type in 10,000 and hit enter. Then all the threads you have created will show up. I haven't figured out how to keep that data saved yet because when I refresh the page it goes back to 365 days only.
-
Wiring up dash indicator lights after 4WD swap
Eagle_SX4 replied to SCJ Steve's topic in MJ Tech: Modification and Repairs
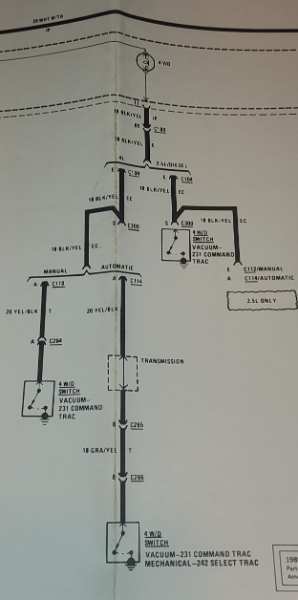
Hopefully this pic is easier to read.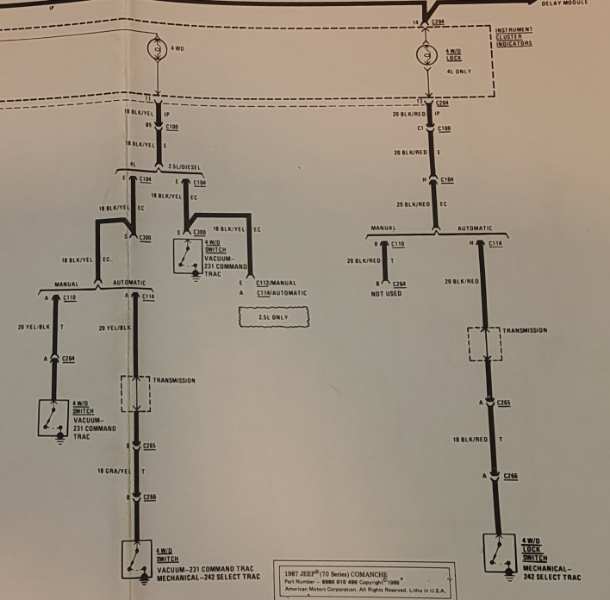
-
Wiring up dash indicator lights after 4WD swap
Eagle_SX4 replied to SCJ Steve's topic in MJ Tech: Modification and Repairs
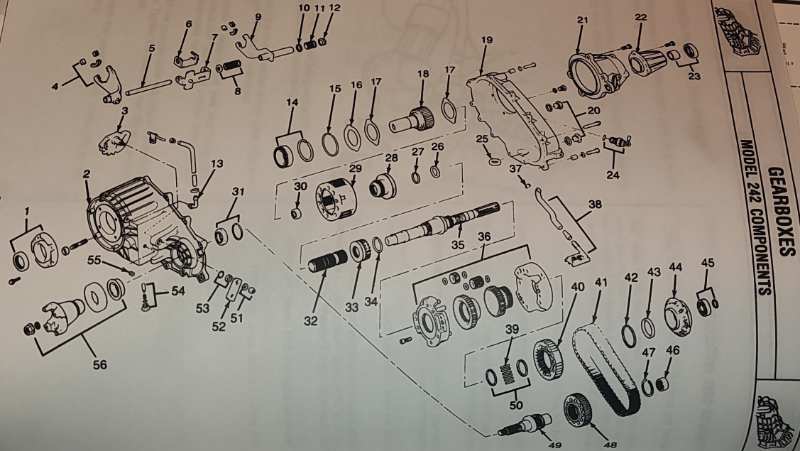
The 242 case never had a vacuum switch on the transfer case, it also never had a CAD front axle. It is a standard electrical switch with 2 wires, black/red used only by the 242 for the full time light. The other is grey/yellow switching to yellow/black after a connector that is used for the part time light. The ground for the lights is through the body of the transfer case an added a ground strap to the transfer case would not be a bad idea. These pics are from the '87 Comanche electrical schematics and parts diagram part 24 on the diagram.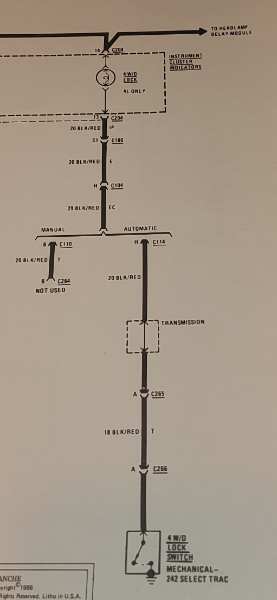
-
Here we go again! A 1986 Eagle
Eagle_SX4 replied to eaglescout526's topic in Member Projects: Other Cool Stuff
That does look great. Even with the part numbers you posted I still can't find one for sale. Can you share a link?