Gojira94
-
Posts
677 -
Joined
-
Last visited
Content Type
Profiles
Forums
Gallery
Everything posted by Gojira94
-

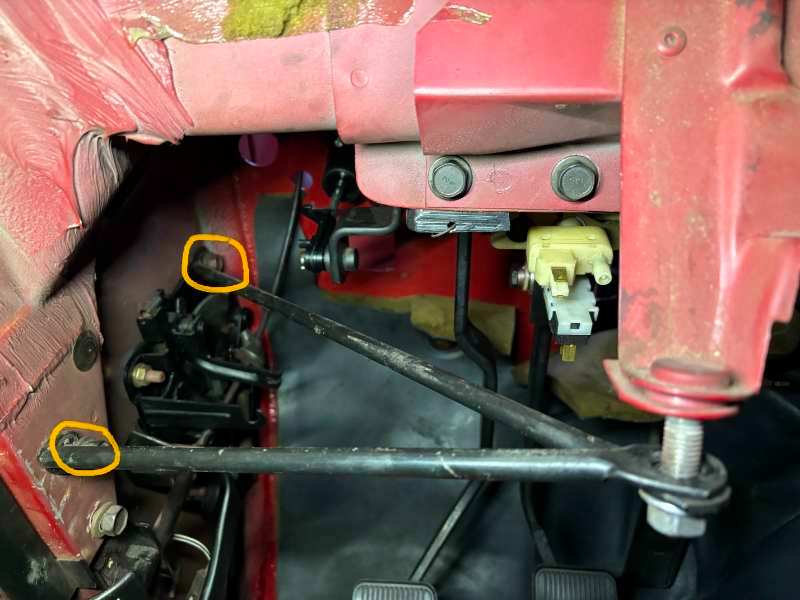
Chunk of steel in front of steering gear
Gojira94 replied to Anthi4078's topic in MJ Tech: Modification and Repairs
Confirmed present on a 96 XJ in my local boneyard a little more than a year ago. Question came up when I showed it in my build thread. Disappears from the parts catalogs in 97. -
Something to know about the Moog stuff- a lot of the suspension parts you find in Autozone, Advance, some others that are 'house brand' box have numbers that start with ES, DS and K are re-boxed Moog parts. Some are "country of origin" USA, some are Taiwan (just as good) and an ever growing number are China. That Detroit axle kit is 100% re-boxed Moog part numbers. Point well made that the stamped steel arms may not be as thick as OE, can't be sure without comparing. Weight comparison would be the quick and dirty way to get an idea. The lower ball joints do indicate (for now) country of origin = USA, but no guarantee.
-
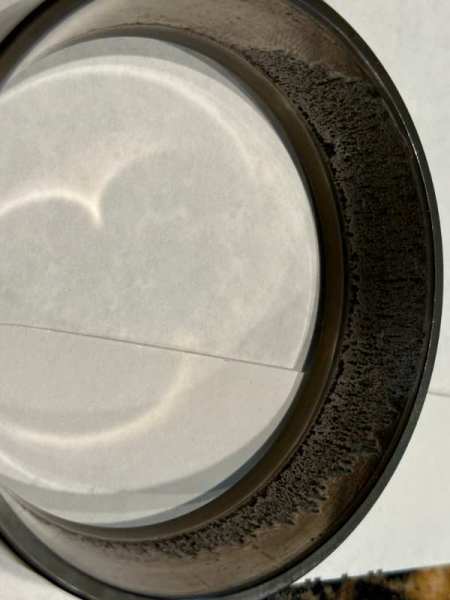
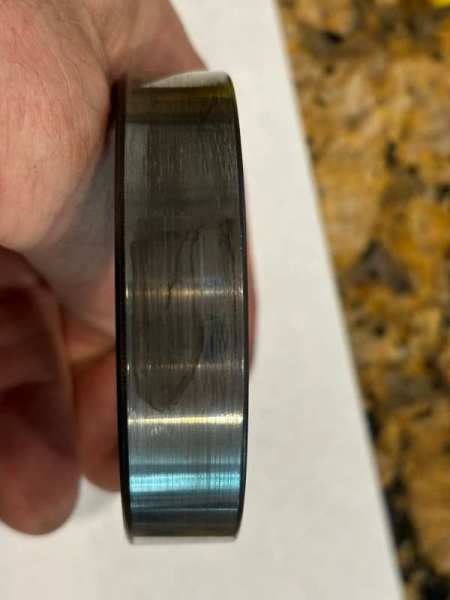
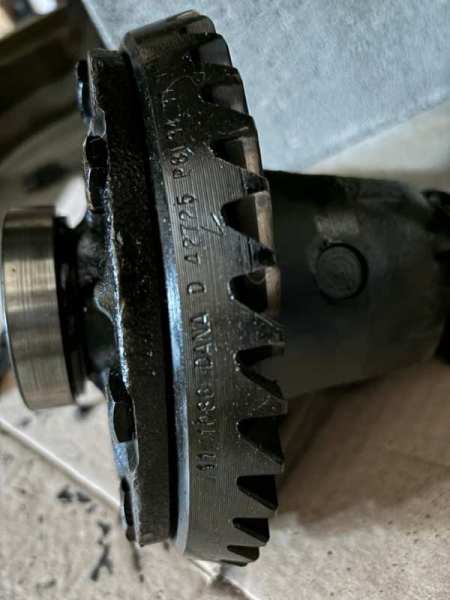
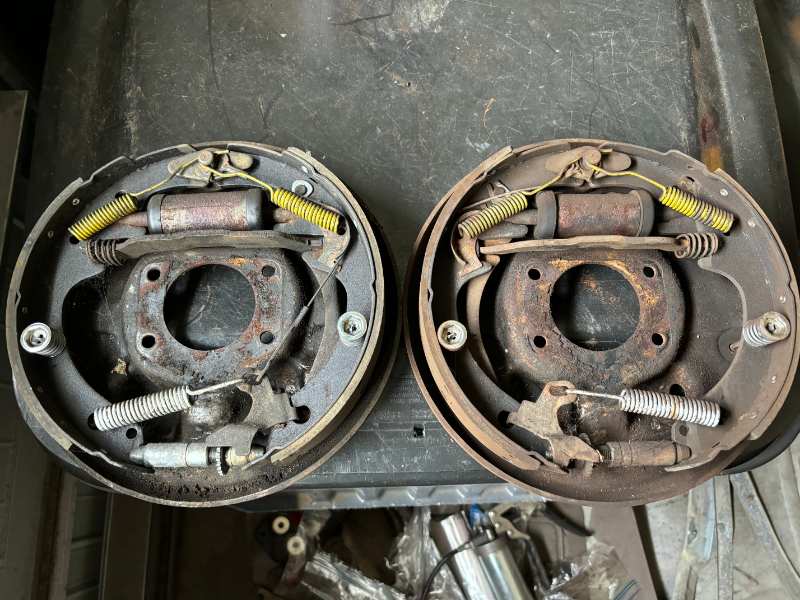
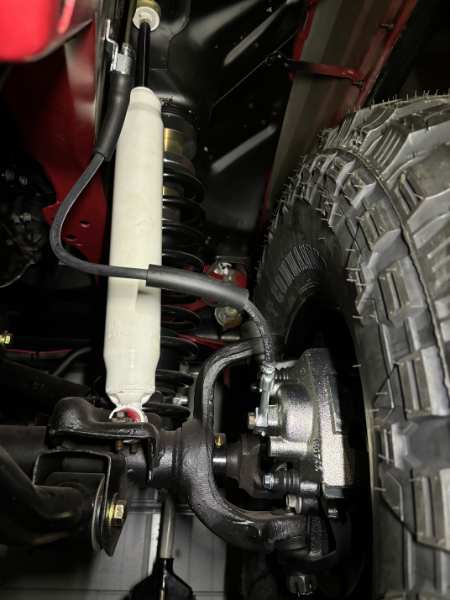
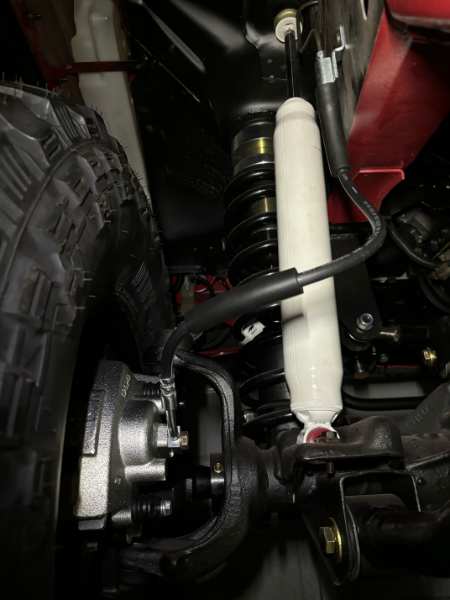
In a holding pattern for the most part. Got the rear brakes blown apart so I can clean and paint the backing plates. Doing a little cleanup, I noticed this on one of the carrier bearing races. The carrier didn't have any discernible side-side play when I pulled it but there was obviously no preload, hence the decision to replace the bearings. Glad I didn't roll the dice and just run it. It'd have burned up good in no time...
-
Agreed. There's a worm gear on the motor side and a round gear inside the main housing. A broken tooth or two from age/ fatigue on the round gear is the issue. This same arrangement was the bane of headlight motors in multiple GM vehicles in the 80s-90s. I recently had to pull my manual MJ regulators. In lieu of the original rivets I used 1/4"- 20 x 1/2" bolts with prevailing torque nuts. Nylon lock nuts would work as well. When you're done with the repair, you can pull the motor off the 96 regulator by bending back the motor housing tabs. Manually slide the flex shaft back and forth and you'll see the broken tooth/ teeth.
-
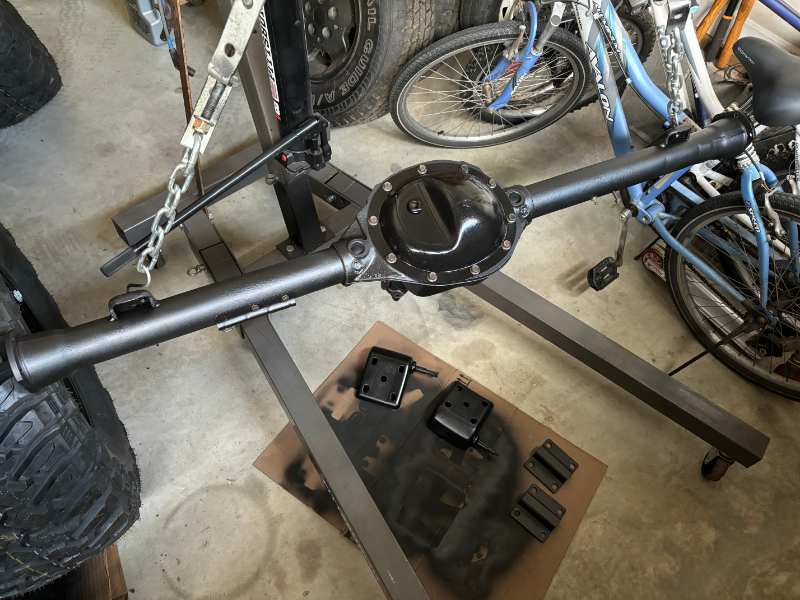
Only update from the weekend- D35 housing is cleaned up. Base coat of Por-15 topcoat, followed by undercoating. Inner tube seals are on the way, carrier is at my machinist in Raleigh getting new bearings. Axle bearing kits may take another week to show up. I plan to have the housing back in SOA with the new leafs (leaves?) this week, with just the axles to go.Then I can take measurements for the rear driveshaft.
-
This video shows what a block with sediment in it looks like. It's a HO example but the plugged hole where our Renix temp sensor would go is an eye-opener. 1:05 Preview of the issue 35:01 - 35:52 Overview of where the issue is 38:33 - 43:37 Expansion plugs/ temp sensor plug removal and the full reveal of rust sediment 52:52 - 53:33 Blowing it all out with a pressure washer Dex Browder and his machinist brother, Justin. A fun and informative channel...
-
Renix and HO bored throttle bodies available!!
Gojira94 replied to cruiser54's topic in MJ Tech: Modification and Repairs
I got one of his in May. Mine is a 63mm HO TB, but he's still doing both HO and Renix TBs. -
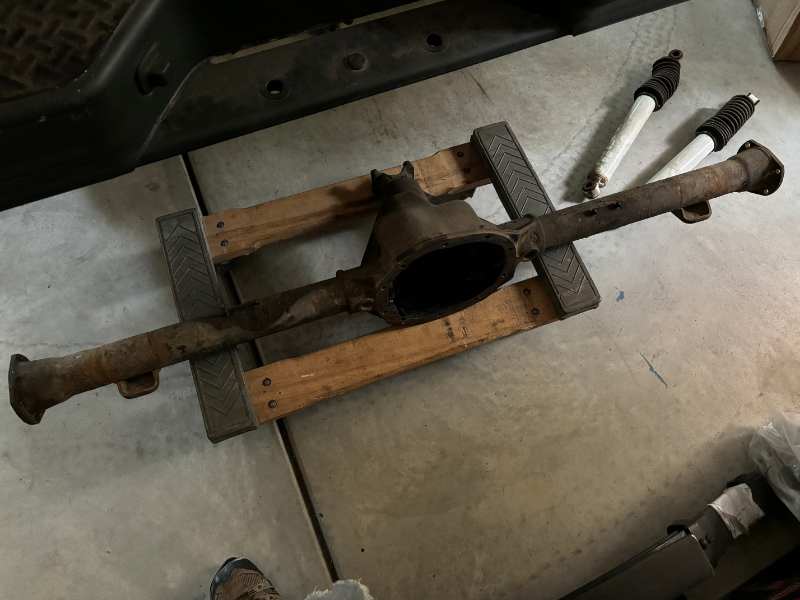
D35 (non c-clip) is out. It needs carrier bearings and axle bearing kit. Pinion bearings and seal have been replaced not too long before I got the truck. Preload is good, bearings are smooth and seal is in good shape with no leaks. Axle splines are straight, axles look good for what they are. Running what I got until something else presents itself. Rear brakes aren't awful, but I have all new hardware and shoes anyway. And an opportunity to clean and re-paint the backing plates.
-
Recommended fuel pump brand(s)
Gojira94 replied to mark 39's topic in MJ Tech: Modification and Repairs
With Advance Auto folding up a large chunk of its US footprint, a fair number of NOS Bosch 69302 pumps are turning up. I picked one up on EBay for about $70 USD. Came in a CarQuest (Advance’s commercial side) box. Comes with all that’s needed to fit in our sending units in place of the original, longer, 70mm roller-vane pumps. -
Front brakes installed. This is a PowerStop kit for 1999.5 XJ with cast rotors. Had to make a run to the boneyard for banjo bolts. Snagged a pair from a 97 V8 ZJ and another from an 06 Grand Cherokee. Exactly the same bolts all the way back to 91 apparently. Hoses are from Autozone - 777848 and 777849, 22" OAL. Pulling apart the rear brakes today on lunch break from job #1.
-
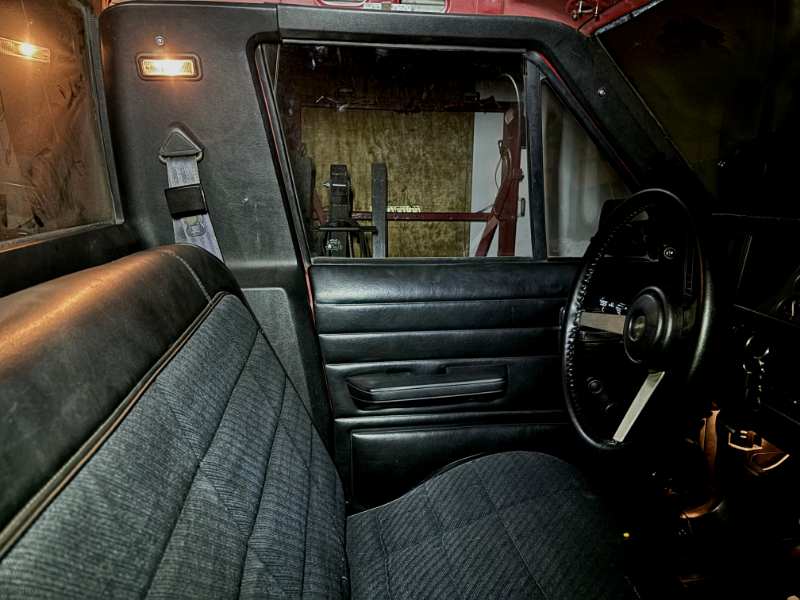
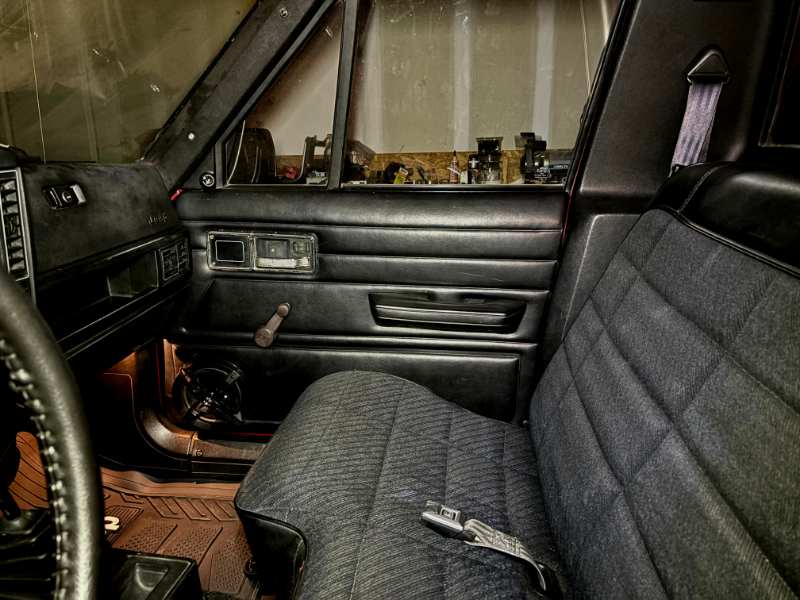
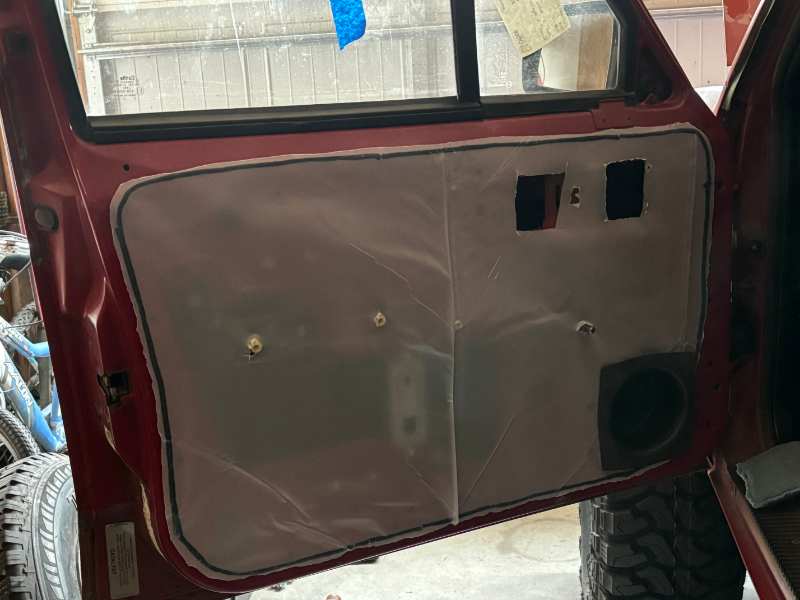
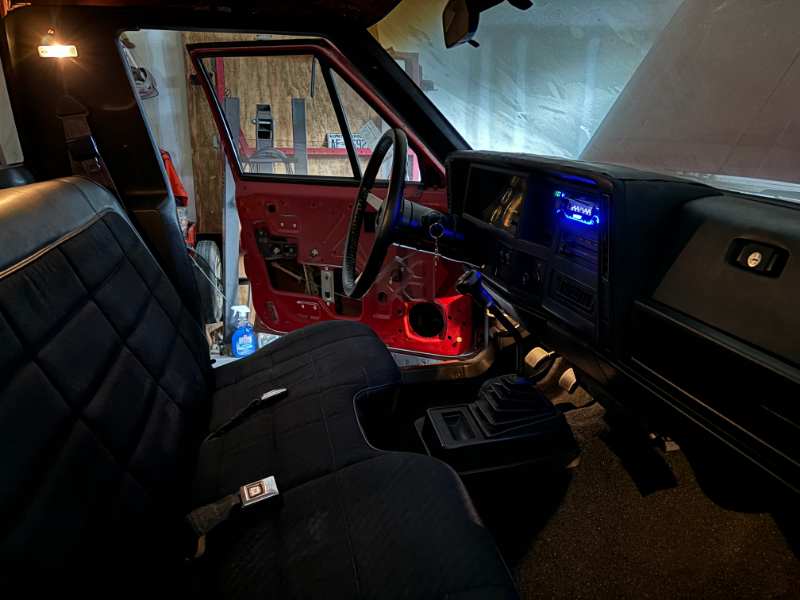
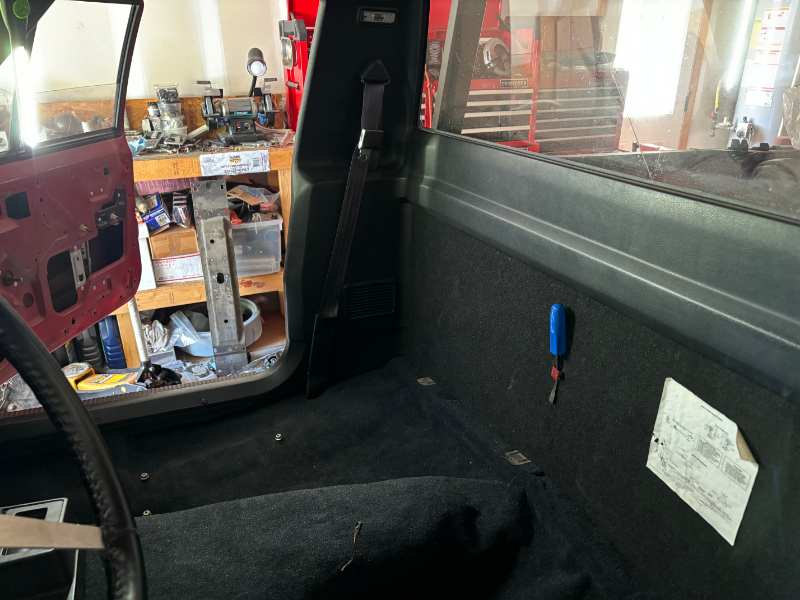
Doors finished.
-
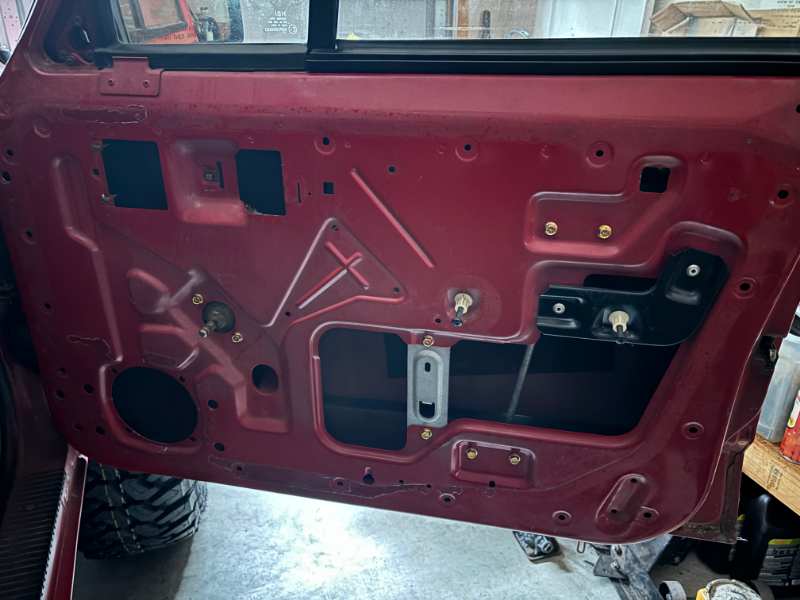
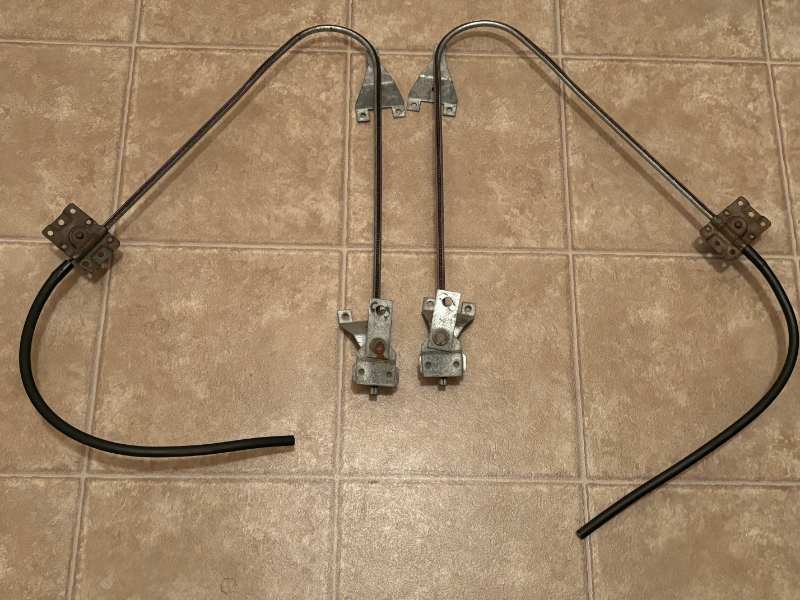
Passenger side regulator and both new door locks in. Missing half the regulator fastener hardware for the driver's door, but I'll pick that up from job #2 at 5:00. Taking the driver's door lock out, I noticed the short rod attached to it was disconnected from the latch assembly and there was electrical tape around it. And... the one at the lock cylinder was also taped and partially destroyed. Fortunately, I had a couple compatible rod clips left over from door work on my C1500 a couple years ago. All back together and works like it should. Passenger door, ready for panel: This is the lock cylinder kit I used:

-
Passenger side regulator had dropped its receiver tube and there was no way I was going to get it back on the barbed end without pulling it. A little heat to soften it and I got it back on there. Followed instantly with ice to shrink and bond it as best as possible. I pulled the other one and greased both with synthetic grease. I don't know if that's a no-no, but the difference is amazing. Before they were both loud and very stiff. The ideal fastener to reinstall them would be stainless or yellow zinc M7-1.0 x 10mm ~or~ 9/32" x 1/2" but good luck finding those without having to wait a day or two at Fastenal or Amazon. Next best is 1/4"-20 x 1/2." With either nylon locking nut or prevailing torque nut on the back. The original rivets spin when you drill them, so you have to hold the back side of them with pliers while you drill. The nut to release the glass is 18mm. There's a wave washer under it.
-
it’s going into closed loop, O2 is working. Runs fine with TPS at 10% base. But… I’d like to see idle RPMs a tad higher. I read somewhere for a Renix manual anywhere from 650-800 is fine. I think I will adjust the base idle screw a hair. That’ll get me closer to 750 and probably raise the IAC counts a bit. I can only guess what that is, surprised the REM doesn’t pull and display that. I’m used to tuning GM stuff and IAC counts are a core indicator of a number of things, especially getting bigger cams to idle/ low speed off-idle without surge. EDIT: I take that back, REM does have an IAC indicator. However, Renix ECU only tells if it's moving one way or the other. ("<128 / >128"). I'll have to look at that again, but I'd expect it to be still and not moving up or down (stable at whatever counts it has at idle). IMG_0106.mp4
-
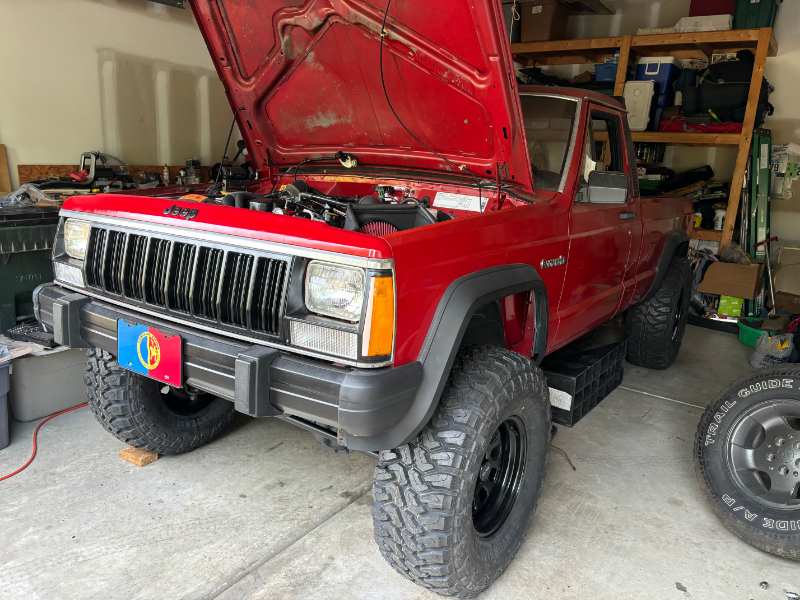
Thank you, thank you! There's still quite a few things to get squared away but she'll be on (and off) the road this summer for sure!
-
She's sitting on her 33s now. Rear still isn't lifted but tackling that soon. Trying to completely finish the interior before moving on. Throttle body from Leigh Performance Machine is on, having issues getting the adapted TPS up to range. Right now it's adjusted maxed out at 10% idle / 85% WOT. Haven't run it yet, but will today. I don't know if the bored throttle body's idle set screw is moved during machining or not, might have to ping Jeff for more info on that. I don't want to pull the TB and mess with it if I can avoid creating another issue. Trying to get 3 variables to line up- determine set screw ideal position, TPS happy, and IAC counts NOT maxed or bottomed out to compensate.
-
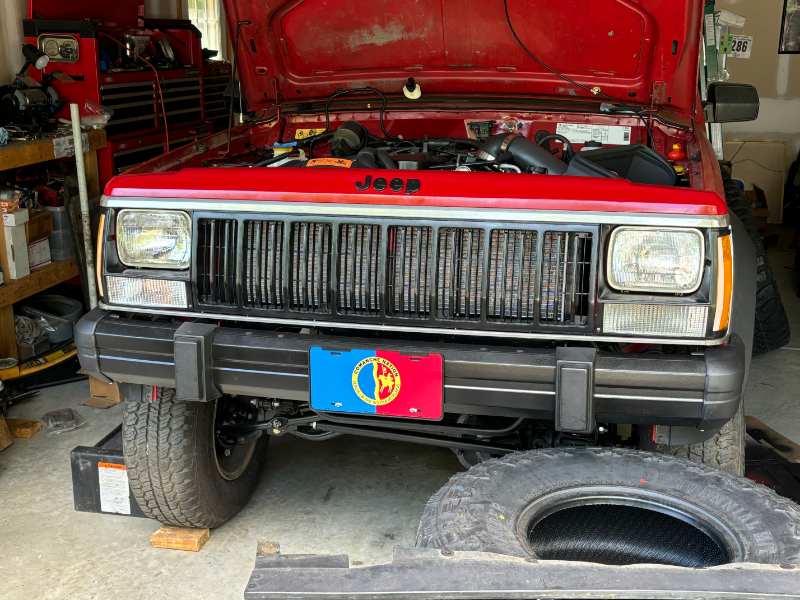
Seat brackets cleaned up and painted. Spent some time with the Bissell Green Machine on the seat fabric and it came pretty darned clean. Bumper is adjusted and secured tightly now.
-
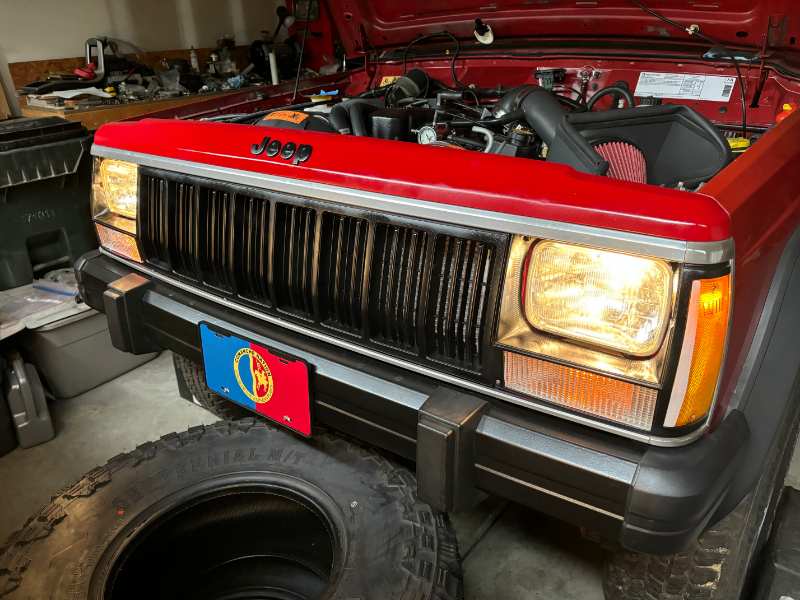
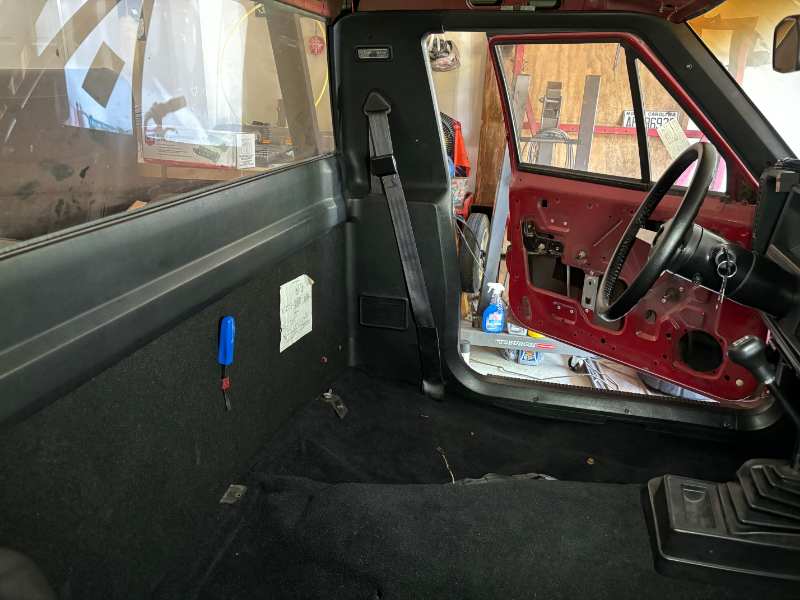
Header panel is on, all lights work (yay). Bumper needs to be adjusted up and tightened, lower valance needs a clean before going back on. Interior is complete except for headliner, bench seat and visors, which hopefully I can knock out tomorrow. Doors will be their own thing, side-project. The regulators need some maintenance and cleaning. Door cards are in great shape. In the next week, I'll be onward to rear suspension. Also need to get those 33s mounted on the steelies ASAP.
-
Header panel stripped, cleaned and reassembled. O'Reilly-mixed Colorado Red in a rattle can worked pretty well to put some color back on it. It was pretty beat up. There's a deep enough crack above the Jeep logo that's going to have me looking for another header panel at some point but it's fine for now. The 10-slot grille is long gone but I don't mind the look of the 8.

-
4.0 Renix - Timing is off 180° but runs
Gojira94 replied to Big_Mark's topic in MJ Tech: Modification and Repairs
I'll just say this last piece on it- Getting the timing gears set up has absolutely zero to do with installing the distributor, which is typically a much later step in engine assembly. The dots are to help line up the cam/ crank relationship when assembling the shortblock. If, due to age/ wear/ fatigue, the timing chain skips a tooth, that certainly will affect (severely retard) distributor timing, as it's driven by the cam. By the time we're installing the distributor, the timing cover is on and the dots are out of sight. So we use the timing tab marks, plus other supplementary methods to determine if we're on #6 or #1. Suck, squeeze, bang, blow. Putting your thumb on the spark plug hole of #1 and turning the crank tells you whether it's sucking or squeezing as it approaches TDC/ timing tab at 0*. We need #1 squeezing air/fuel, preparing to fire as it nears TDC to install the distributor. While #1 is squeezing (air/fuel), #6 is blowing (exhaust out). That's why they're both at TDC at the same time. The difference is what the valves are doing. A word on spark advance- We need to light the fuel/ air mixture some number of degrees of rotation before TDC because it takes a measurable amount of time for the mixture to burn. We want the peak of the energy from that burn to occur just after TDC, so the maximum possible amount of energy from it pushes the piston downward. That ideal point of finishing the burn completely varies by engine combination, but average naturally aspirated is about 12-14* after TDC. This ideal point after TDC is referred to as MBT (Maximum Brake Torque). Less efficient head combustion chambers need more time to complete the burn, so we light them earlier with more spark timing advance. More efficiently designed chambers burn more quickly and need less lead time to finish the burn by the MBT point. Our heads (every AMC/Chrysler inline 6 factory head) are not very efficient, and require a fair amount of timing advance to hit that 'finish at MBT' goal. Which really underscores the importance of Cruiser54's distributor indexing lessons. -
Thank you, sir! Your build is coming along very nicely as well. My dad is in Linville and he said to bring the MJ up when it's roadworthy. We might could meet up in WS for a side by side red 87 MJs pic sometime.
-
What it took to get reverse lights...
Gojira94 replied to Gojira94's topic in MJ Tech: Modification and Repairs
Evidence of C115 having changed sometime after 1987. This is an 87 SporTruck column shift auto 4.0. As my current ECH is from either 89 or 90, that tracks with a connector change.
-
4.0 Renix - Timing is off 180° but runs
Gojira94 replied to Big_Mark's topic in MJ Tech: Modification and Repairs
If the crank and cam gear weren't (visually) tilted at an angle to each other, but directly above and below one another... With the crank gear dot at 12:00 + cam gear at 6:00, both #1 and #6 piston are at top dead center, with #6 firing, #1 on exhaust stroke. With the crank gear dot at 12:00 + cam gear at 12:00, both #1 and #6 piston are at top dead center, with #1 firing, #6 on exhaust stroke. While one cylinder is firing, its companion is on the exhaust stroke. This is true for cylinder pairs 2&5 as well as 3&4, but only 1&6 have the 12:00 & 6:00 relative positions we use to "time" the engine. So... when we pop in the distributor, with #1 at TDC, firing, the dots are 12:00 cam gear and 12:00 crank gear, but hidden behind the timing cover. If you install the distributor with the timing cover off, and dots at 6:00 and 12:00, you're installing it 180* out. -
4.0 Renix - Timing is off 180° but runs
Gojira94 replied to Big_Mark's topic in MJ Tech: Modification and Repairs
I've seen this question come up time after time after time in the SBC world. The dots are for ease of lining things up when clocking cam and crank together. 6 and 12 is easier to see if you're off a tooth than at 12 and 12. Dots at 6 and 12 is the companion cylinder of #1 firing, not #1. In the SBC world, once the timing is set and the engine spun to #1 firing/ TDC, the dots are at 12 and 12. Dots together in a SBC are #6 firing, as 1 and 6 are both at TDC at the same time. Just so happens 1 and 6 have the same relationship in the AMC/Jeep/Chrysler I-6 engines. Crank rotates 2x for every 1 revolution of the camshaft... -
These are the only 2 I've ever seen on an XJ or MJ. Is that one possibly an extra from a donor?