Gojira94
-
Posts
677 -
Joined
-
Last visited
Content Type
Profiles
Forums
Gallery
Everything posted by Gojira94
-

Rear axle bearing for base model 2wd
Gojira94 replied to Glenn Bint's topic in MJ Tech: Modification and Repairs
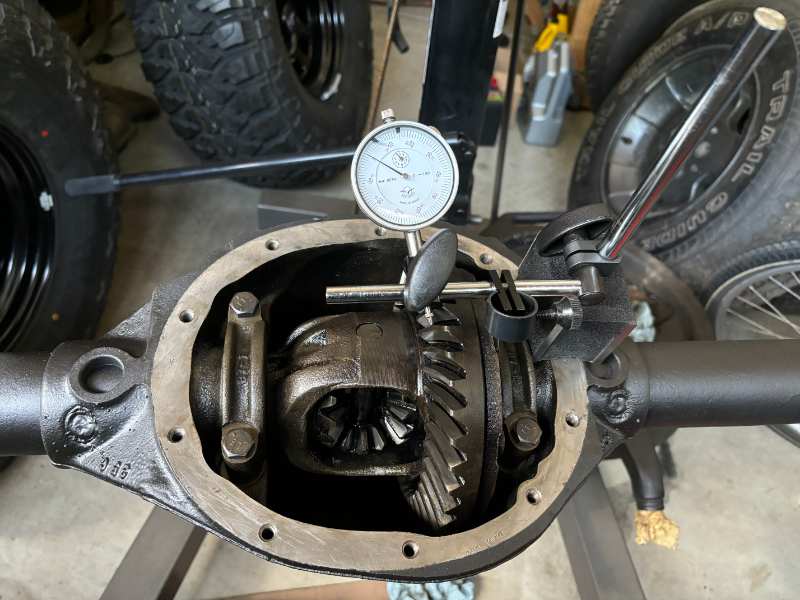
Just did this recently on my Dana 35. Pull the drums off. On the axle flanges there is a hole that allows you to get to the 4 nuts/ bolts that hold the retainer plates for the bearing and seal behind them. The bolts come through from the rear of the axle tubes and are indexed with a flat spot to clear the tubes. No need to remove the brake backing plates/ brakes but they'll now be loose, held in place mostly by the lines going to the wheel cylinders. The axle shafts slide right out, as there's no c-clips on the Dana 35 until 1990 model year. Dana 44 will be exactly the same if you have that axle. The non c-clip axles have the retainer plate, seal, bearing and safety collar pressed into place, so you'll need to get the kit for each side. If you don't have a pretty beefy press, you'll need to take your axle shafts to a machine shop to have it done. -
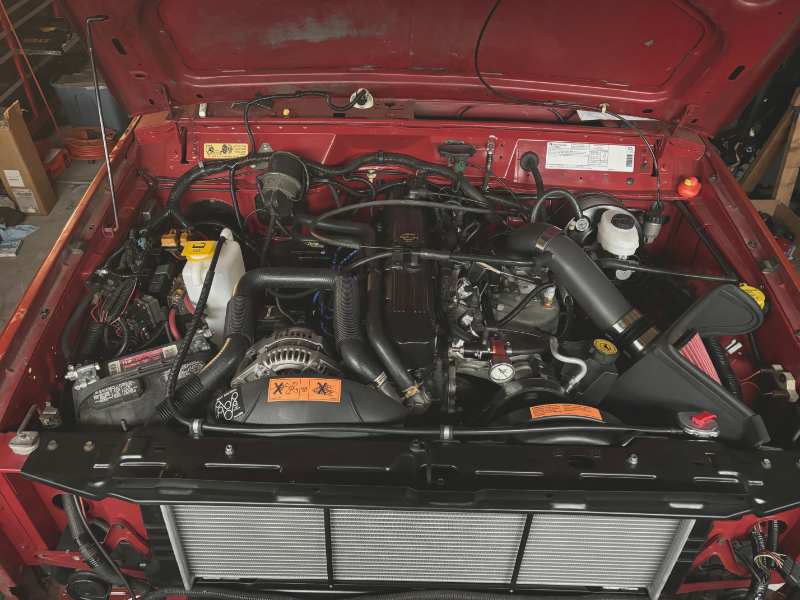
In honor of Cruiser54's posts about running an HO on Renix, here's an example. Cruise servo has been positioned to use the HO throttle bracket setup. Air cleaner and fuel rail are aftermarket, obviously, neither Renix nor HO...
-
Park = Reverse, Rev=Neutral, etc., kinda
Gojira94 replied to AnotherOldJeepGuy's topic in MJ Tech: Modification and Repairs
Pioneer CA1177 available through Autozone online for $62 looks like a decent deal with $4.99 shipping. It's $81 on Amazon... I checked CA1177, that's the one you want. There is a CA1176, but it's longer and for a floor shift automatic (Cherokee). -
Park = Reverse, Rev=Neutral, etc., kinda
Gojira94 replied to AnotherOldJeepGuy's topic in MJ Tech: Modification and Repairs
Setting it with it in low gear is fine too. That would be the cable's max extent of movement in one direction relative to the shifter detents. Go for it. -
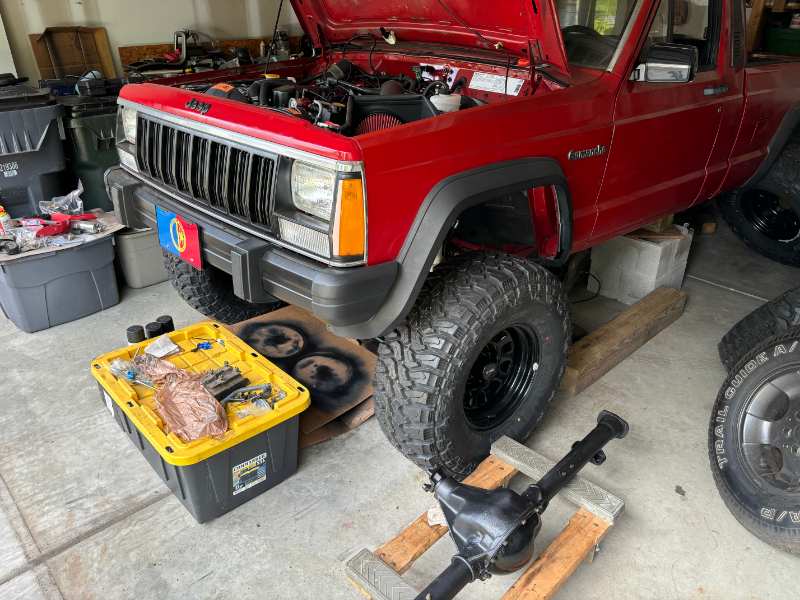
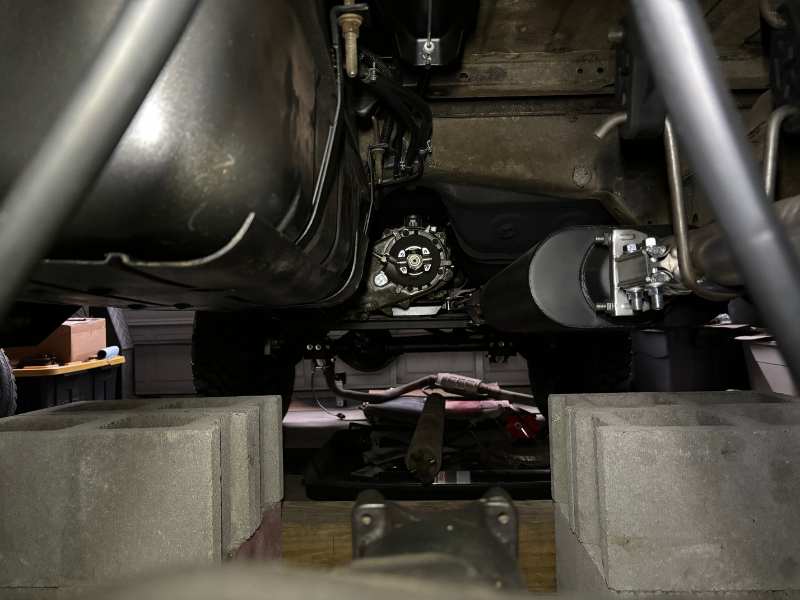
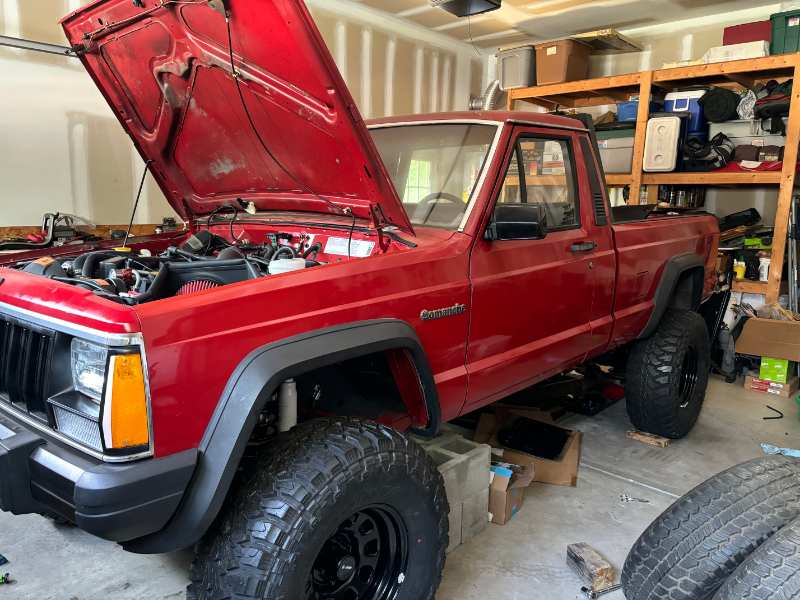
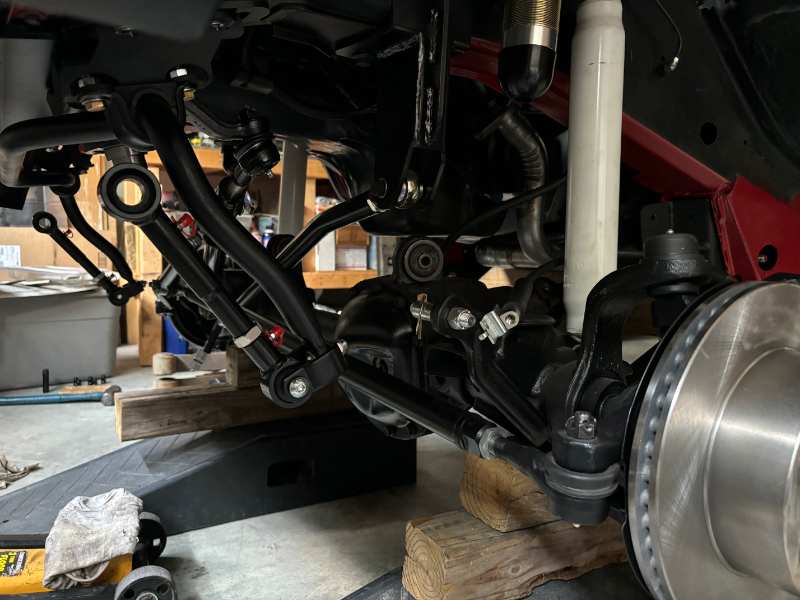
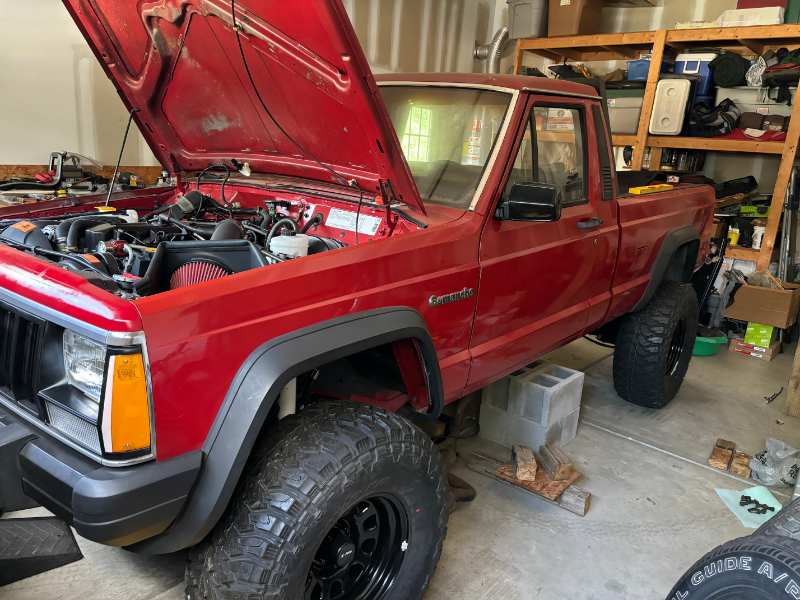
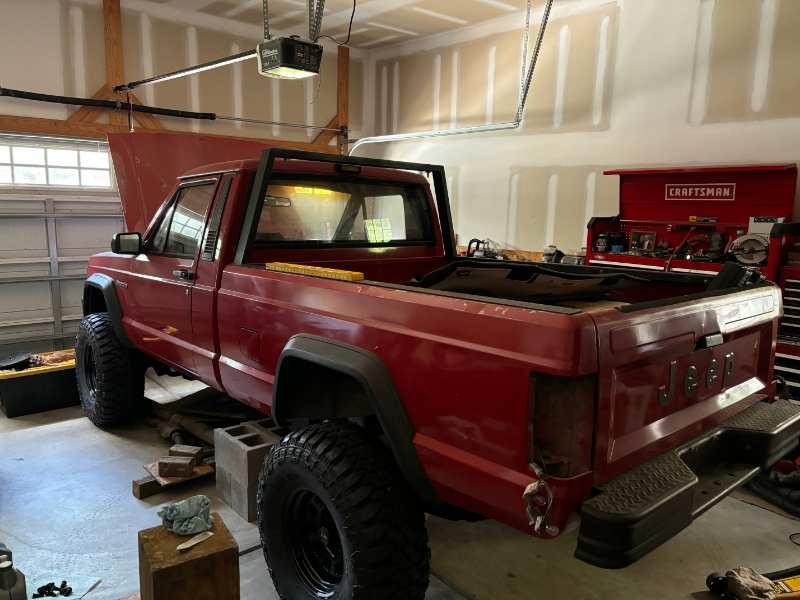
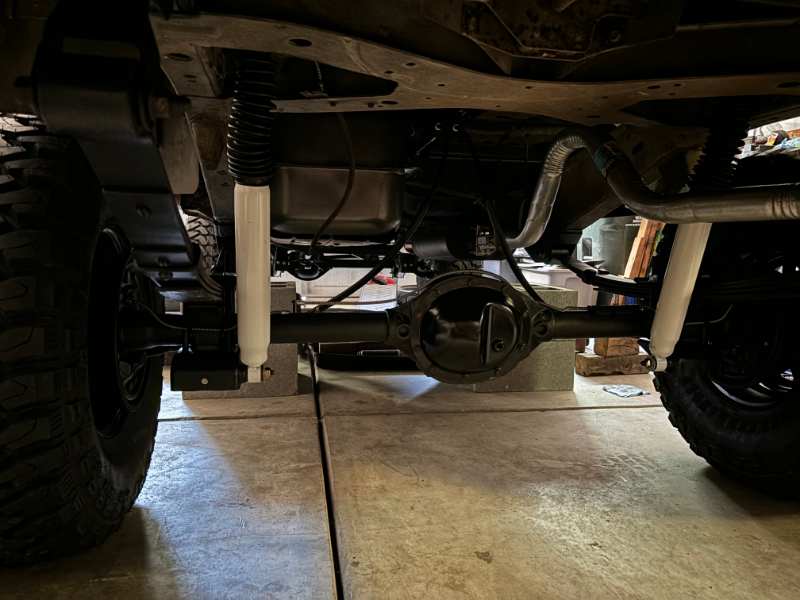
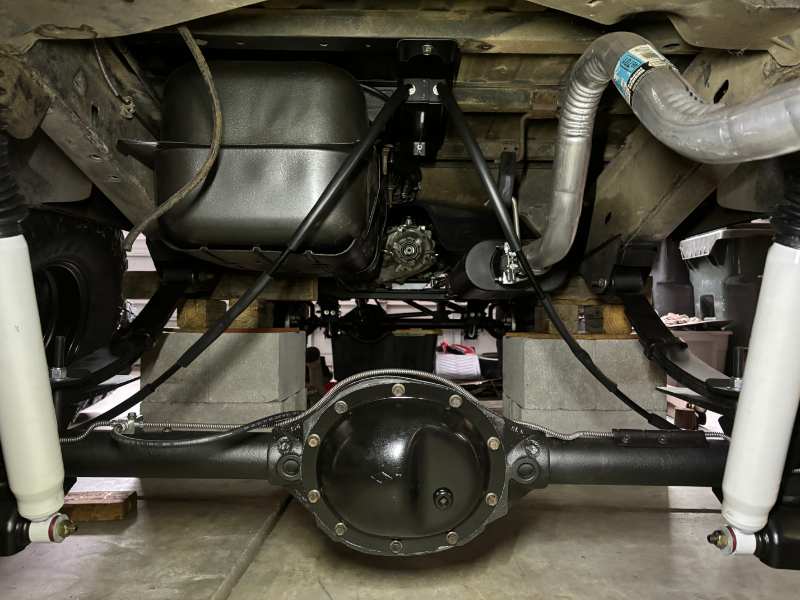
Should have posted earlier this week, but some more progress has been made. XJ shackles in (for now). Just short of another inch of drop in the rear. Rear ride height is 14.25" so that's 5.05" rear lift with leafs not yet broken in. Front is 13.875, so that's 6.125" lift. I can swap the MJ shackles back in when the rear springs settle. Installed the transfer case on Monday. Today I pulled apart and reassembled the rear suspension and made a shave to one small part of the SOA setup to get another 8* of upward pinion angle. Driveshaft measurement is 47.5" center to center of u-joints. Ordering a driveshaft from Tom Woods soon.
-
‘66 Buick LeSabre hood.
-
Pinging under load need help
Gojira94 replied to ja_racing's topic in MJ Tech: Modification and Repairs
No knock at WOT is probably because it's essentially going into OL briefly, in power enrichment mode. PE Ignores O2 feedback and ramps in extra fuel. PE "attack" has a period defined in the ECM probably in milliseconds, where it ramps up from a little extra fuel to quite a bit more, probably over the course of about a second and a half. When you lift, it exits PE and returns to looking at closed loop qualifiers and goes back into CL as soon as they're met (probably over about 3-4 seconds). While it's doing that, PE "decay" is dialing back the fueling to normal, for part-throttle driving. 47* of advance is a LOT. Lean fuel/ air charge requires more time/ advance to burn. If it's running like that all over part throttle, you may just be a little lean across the board. If by chance you have an adjustable FPR, you can bump it up a pound, maybe two and see what the change to part throttle timing might be. Knock can be caused by a lean condition (think mini lean misfires), or pre-ignition/ detonation. Ghetdjc320 mentioned loose quench. That, or head gasket bore being too large can cause pockets of heat to build up at the outer edge of the combustion chamber in the tiny gap between the head and block. Ideally that area has the head gasket fire ring not recessed too far between head and block. Ideally, quench should be in the range of .038" - .045" but as long as the fire ring size is good, a lot of OEMs get away with quench as loose as .060" - .070" with no issues. In that range, you're mostly losing air velocity and chamber burn efficiency, and requiring more timing advance to complete the burn of the air/ fuel charge by 12-14" ATDC. Our engines are at the loose end by default, and have inefficient chambers. Half of quench calculation is the deck clearance, how far the distance the piston is in the hole below the deck. Ours is about .030" with a 6.125" rod and factory deck height of 9.450" - 9.456." So with a common .040" compressed thickness head gasket, quench is around .070." If we open up the bore, we might have to find a gasket with a larger fire ring diameter, and this is when we have to be careful. Fire ring diameter has to be larger than the bore, but not by much. Fire ring diameter .030" - .050" greater than cylinder bore is what we want to shoot for. I'm reading your specs as a 293.68CI / 4.8L, with a 4.2L crank and 4.0 rods, no overbore. I'm guessing you chose a factory style head gasket (probably ideal) and the block hasn't been decked. If the head gasket is something different with a larger fire ring, that can aggravate the conditions you're seeing. Fire ring too big, deep recess between head and block: / head | here gasket ====== block Fire ring sized right with acceptable quench: / head | gasket == block Fire ring sized right with loose quench due to thicker gasket: / head | here (thicker | here gasket) == block As for the knock sensor wiring stuff, have a look at this thread. Important details about the wiring and shielding of the knock sensor connector, particularly post #4. -
Jeff, you doin' allright? Been a while...
-
Yes, on Renix, there's a max of 3. The one at the back driver's side corner of the head feeds the gauge. The second one is on the driver's side of the block above the oil pan and behind the knock sensor, and it is the one that gives the ECU an ECT signal. The possible third is on the lower driver's side of the radiator (large diameter) and it's a temperature switch to close the relay circuit to turn on the electric cooling fan (if equipped). 91-up is HO and moves functions of 2 & 3 above to a single sensor in the thermostat housing. early-mid HO era keeps the gauge cluster sending unit/ switch at the back of the head, for either temp gauge or engine hot lamp.
-
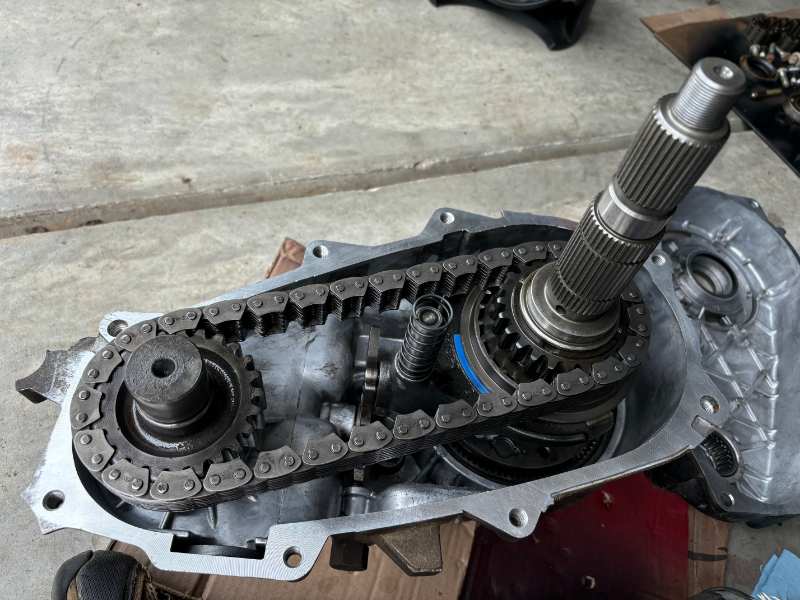
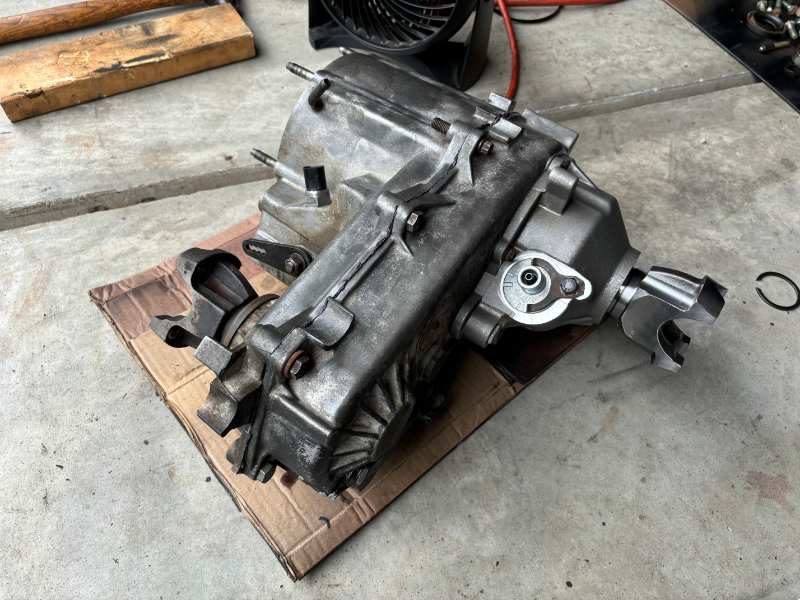
Slip yoke eliminated... I didn't need the mode fork/ rail after all. The YJ had the shorter rail. I thought about keeping the synchro but the caged roller bearings on the mode shift synchronizer were more than I could deal with without a press. CAD-equipped vehicles needed it to get the front output up to speed, later ones had the front output/ shaft already spinning so not needed. Swapped out the mode fork pads (partially destroyed, glad I did go through this case after all). The sector plate is swapped so I now have true neutral disconnect as well. The kit I got is from Dorman. Actually a VERY nice kit. Casting and machining on the tail housing is very impressive. I'm guessing the price of other kits is due to coming with a Spicer yoke. I know where a couple of those are if I want one later... I'd been researching and noticed that Rough Country and Advance Adapters use the same part number for their kits (50-7906), so it seems more than a couple outfits are selling the same thing that's sourced from India. Well, those folks have been casting and working metal a thousand years before western civilization existed, so I'm not losing any sleep lol.
-
Welcome to another NC'er! I love the Saxapahaw General Store. I met another clubber at our local pick-n-pull a couple years ago and another member here in Clayton. We just got another one in Garner recently. More pics/ info, please
-
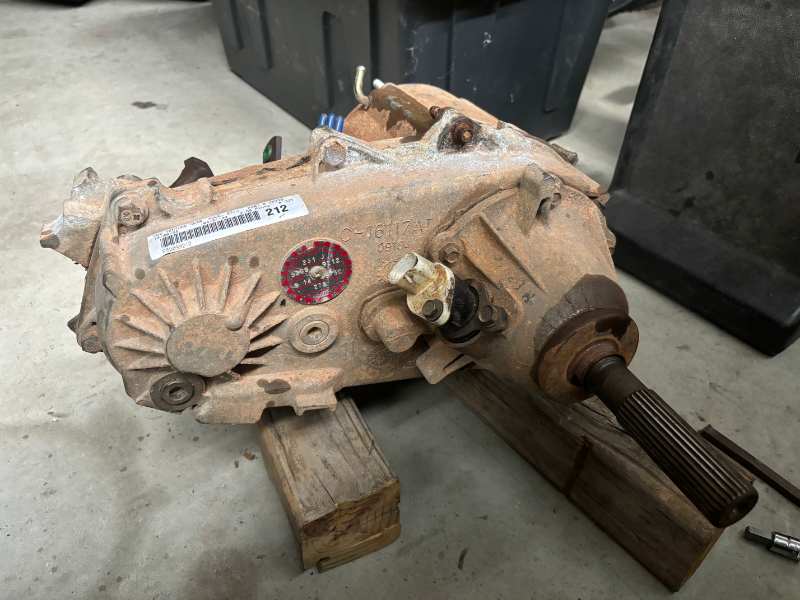
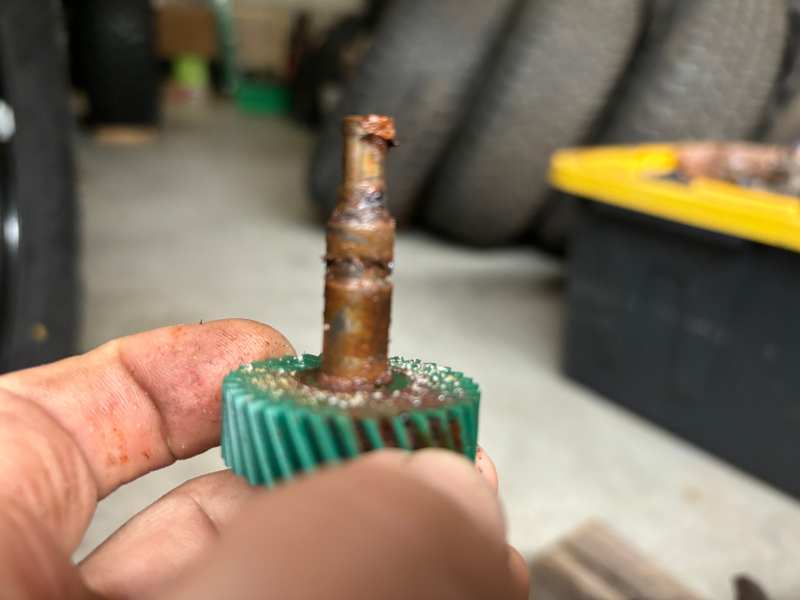
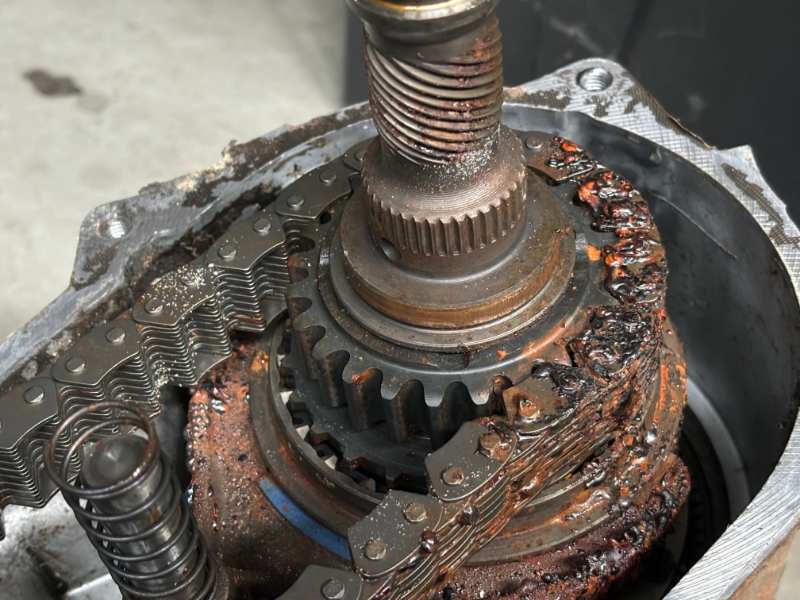
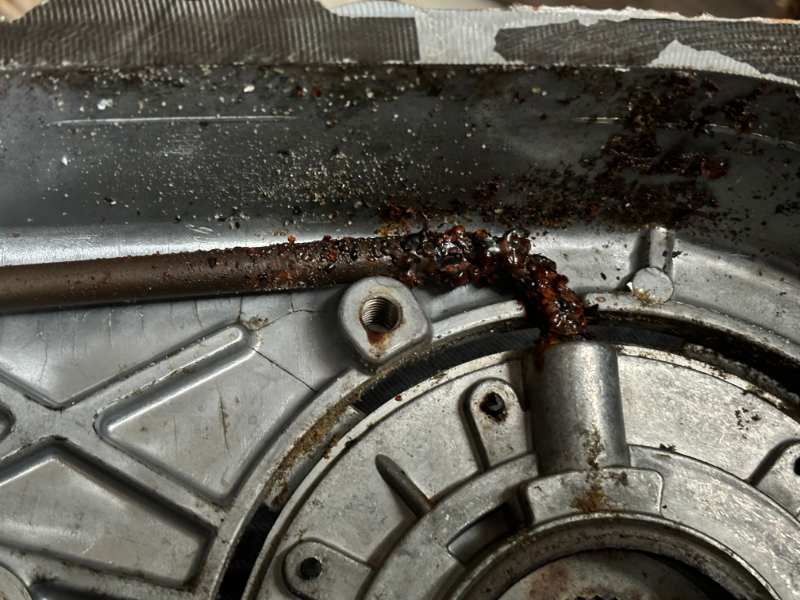
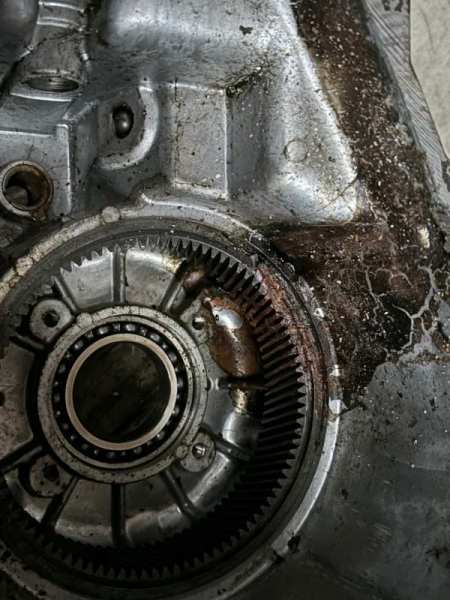
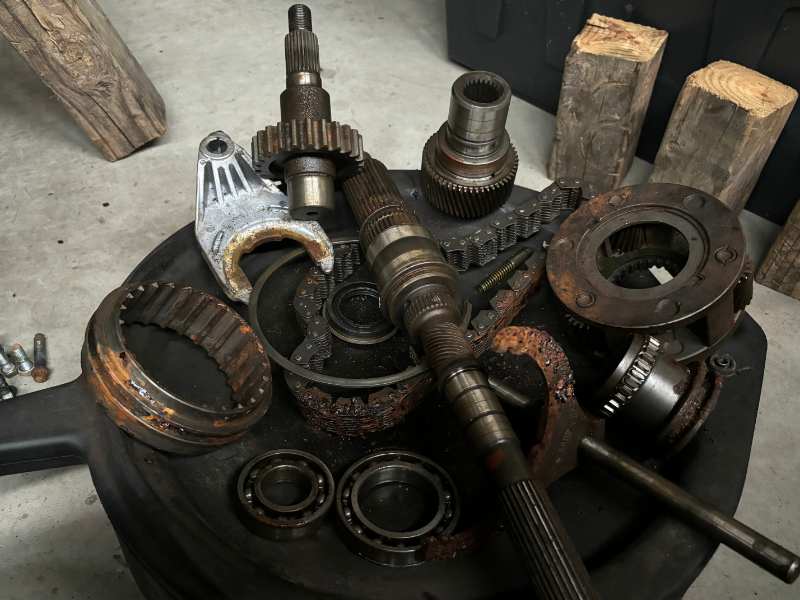
Transfer case carnage. This is the spare I wanted to rob parts from. I see why it's locked up. Destroyed by water. Planetary and chain are trash. Sector plate is good, input surprisingly is good, front output and rear drive sprockets are salvageable, maybe the shift rail. I'm going to wire wheel everything that looks bad and see how much pitting there is and make final determinations on the parts I wanted from it.
-
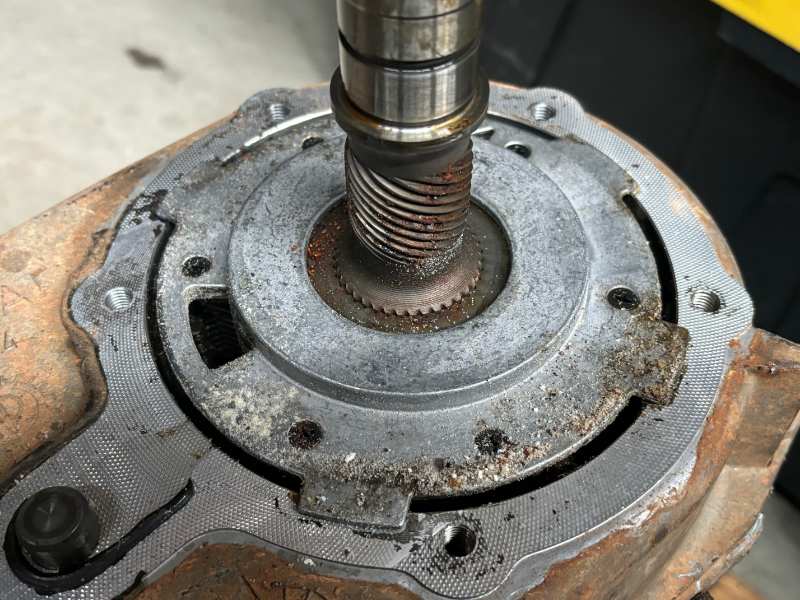
No pics but a quick update - SYE ordered, will be here Monday. Angle of the rear diff will require some work for a double cardan shaft. The shorter XJshackle will draw the rear down another degree or two but I can work a fair amount of rotation adjustment into the SOA with slight modification. TC Plan: I have a 98 XJ 231 I bought super cheap from a NC4x4.com member back in 2022. Something's wrong inside, so I'd opted to use the 93 YJ's 231. I'll crack it open tomorrow. Front output won't move and it won't shift. Rear shaft is free. I'm going to try to cannibalize the shift rail, sector plate, rear drive sprocket and mode hub from the 98. The 98 shift rail won't need to be shortened for the SYE tail housing, and I won't have to mess with the caged needle bearings on the drive sprocket from the 93. And I'll have true neutral disconnect with the 98 sector plate.
-
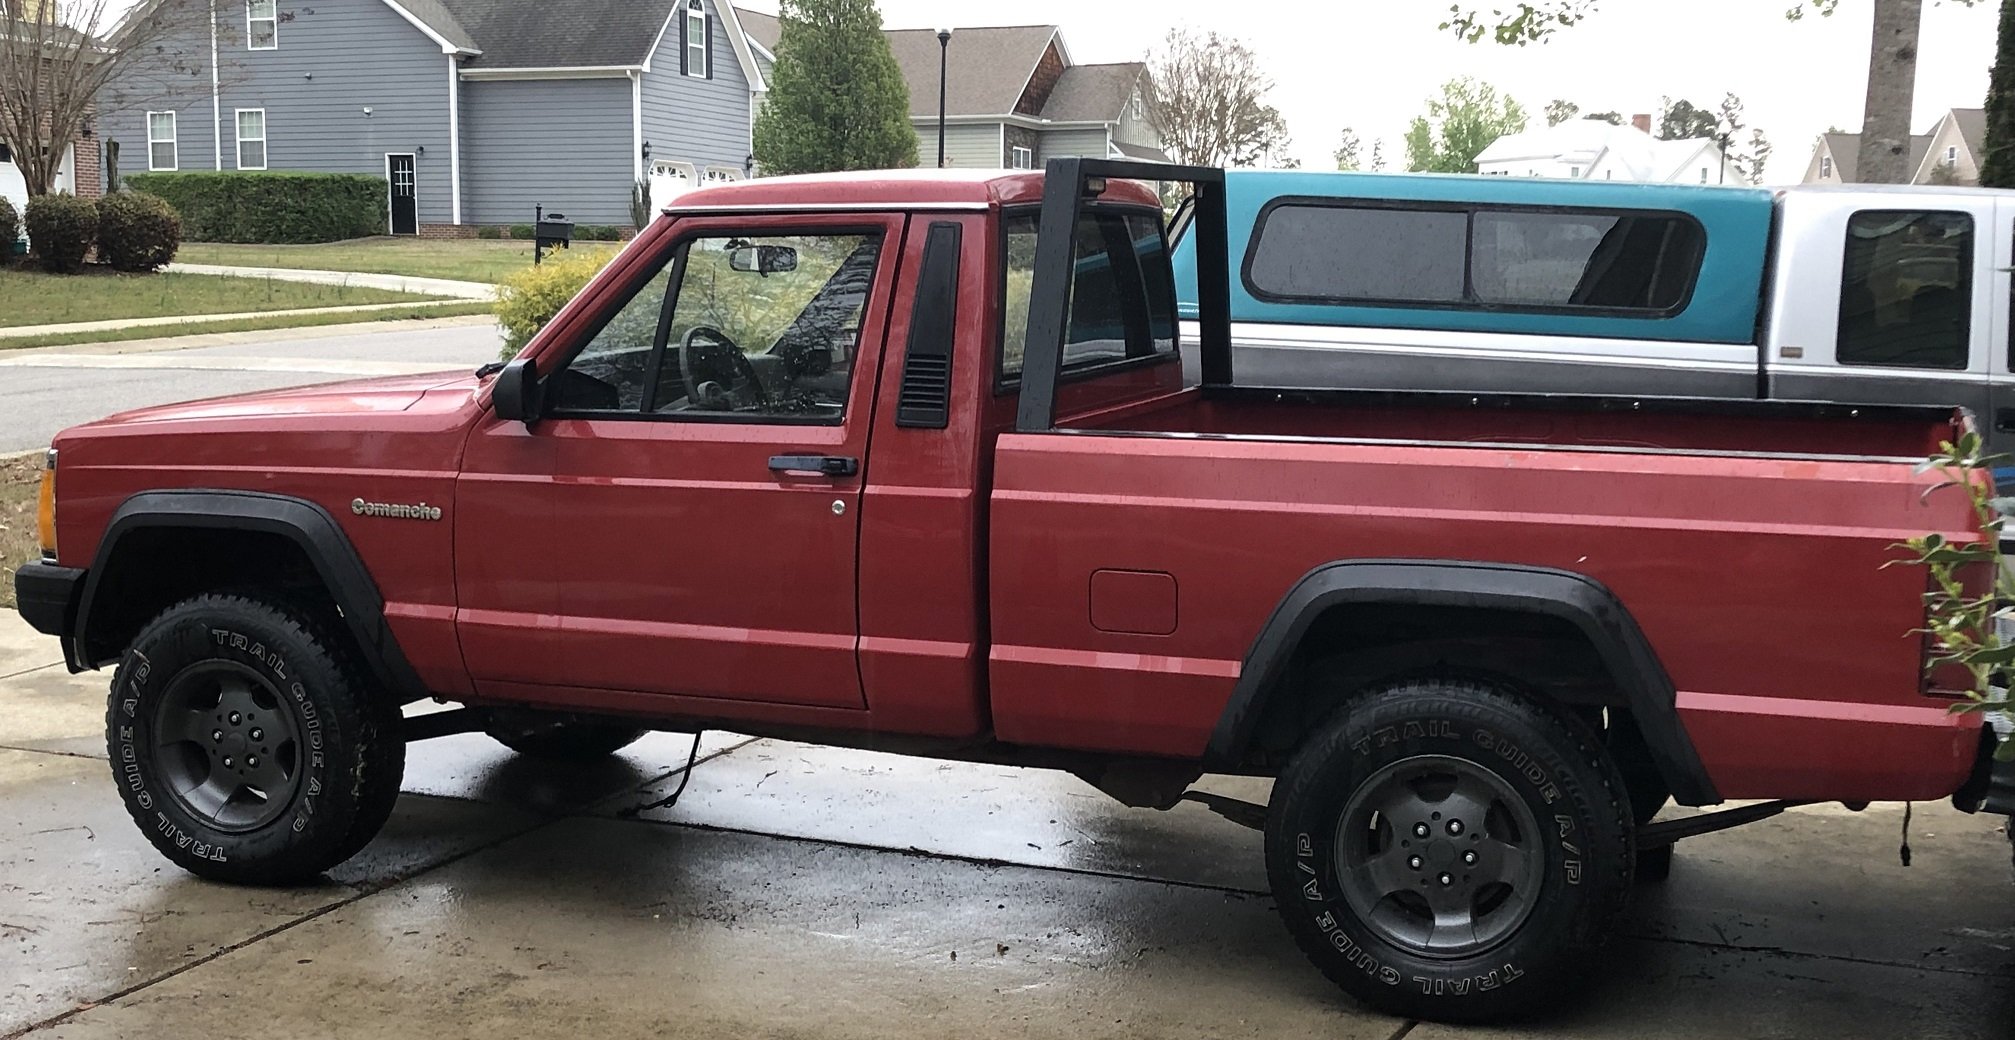
Taddraughn's 1989 Comanche Progress Thread
Gojira94 replied to taddraughn's topic in Member Projects: Your Comanches
Cleveland area? I'm in the Flowers area behind the Harris-Teeter. Small world. Glad you saved this one, making some progress! -
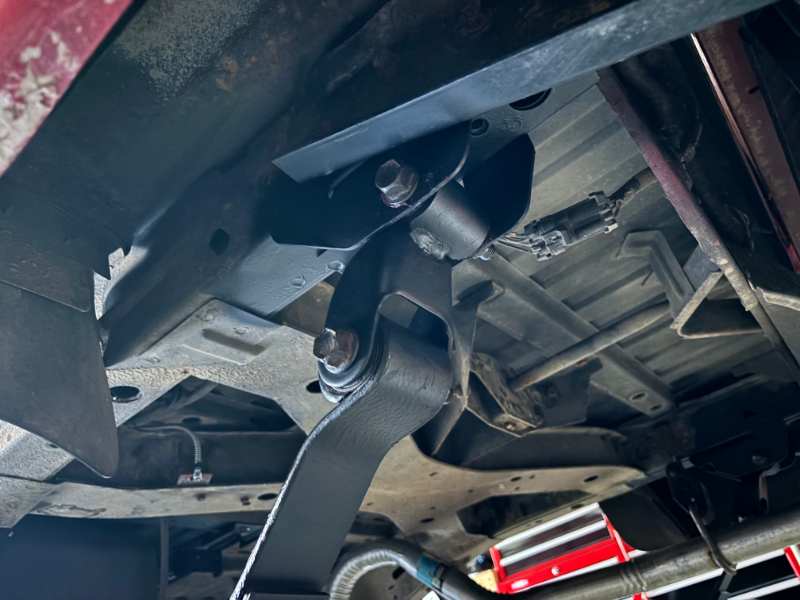
Worked yesterday 9-6 and didn't feel like messing with it after, so I knocked it out early this morning. I added 18mm to the ACOS on both sides, lengthened the track bar by about 1/8." Also lengthened the UCAs until my pinion to front shaft centerline were within 2-2.5* of each other, close enough. My caster is about 5* so we'll see how she acts on the road soon. Front ride height is now at 13.875." I was shooting for 14" or a hair under. Any higher than this and I'll be in cut-and-roll territory, might already be there. The rear is still a lot higher than I'd like. It should settle but in the meantime I'm going to throw some XJ shackles at it until it does. The lower I can get it in the rear, the more that will help the front effective caster.
-
Taddraughn's 1989 Comanche Progress Thread
Gojira94 replied to taddraughn's topic in Member Projects: Your Comanches
Welcome to the forum, great find! Quick and easy thing to check is pull the valve cover and see if anything feels loose while rolling it over by hand, i.e. pushrod slack or a loose rocker. The 4.0 wasn't really known for piston cracking until the later years (96-04) but possible. Pulling the cover will also give you some insight as to how well it was kept on oil changes. If it looks a bit sludgy, an engine flush cycle with Liqui-Moly might free up some deposits if there's anything in the lifters gumming them up, as well as helping to free up the rings. Click the link below to add your MJ's VIN number to the registry when you get a chance: 1989 -
I always was hesitant on black wheels on anything too. But this one made sense and has a good aesthetic, I think. Much appreciated! Rear stuff is completely set, except the cable management for the parking brake cables. I have a couple of ideas that will be simple, effective and cheap. Front is apart again to set the upper control arm length for pinion angle. Track bar was originally set for centered on exactly 13.75" ride height, so it's my guide, along with brake rotor sighting along the pinch rail looking back. I'm adding .6" to the ACOS to fill out the missing .5" from the front lift. I may go .75" and adjust the track bar and UCAs accordingly. We'll see. I just don't like how high it is in the back. Though I know it'll likely settle maybe .5" over time.
-
Thanks! Got her on her feet today. Rear height is 14.50" (+5.3" lift) Front height is 13.25" (+5.5" lift) Rake is 1.7" R > F I'm going to add another .5" - .75" to the ACOS up front and let the leaf springs settle. I'd like to see about 1" of rake, max. Just my preference on stance.
-
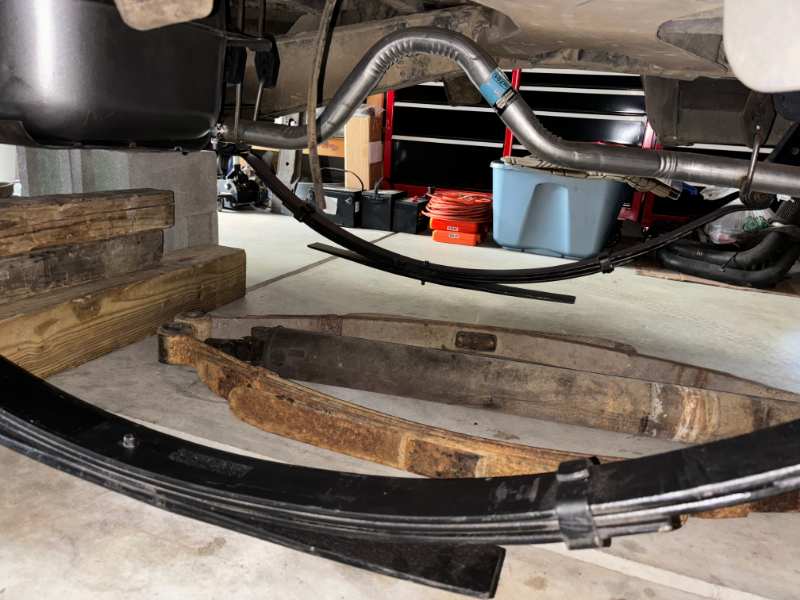
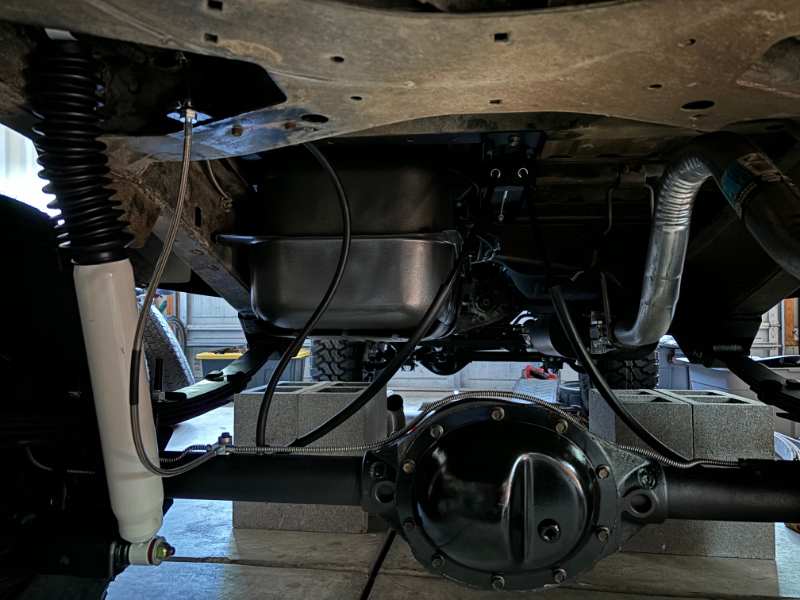
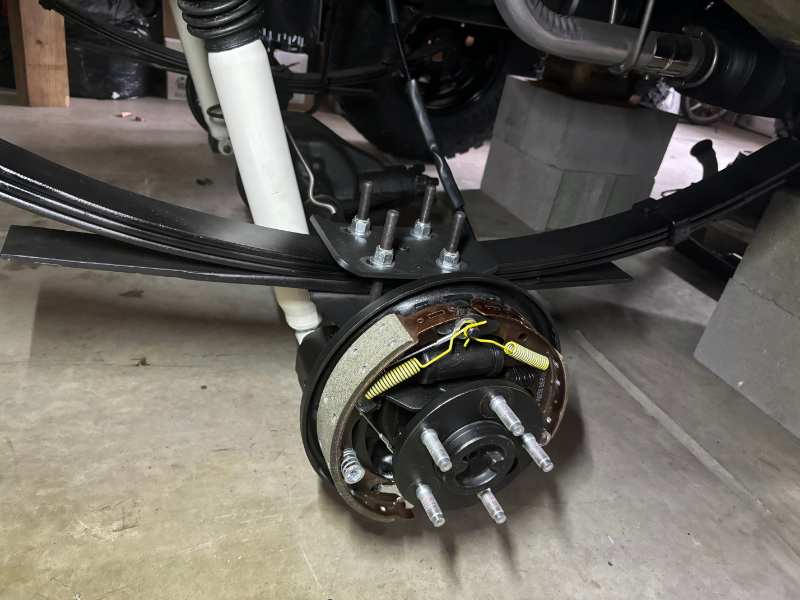
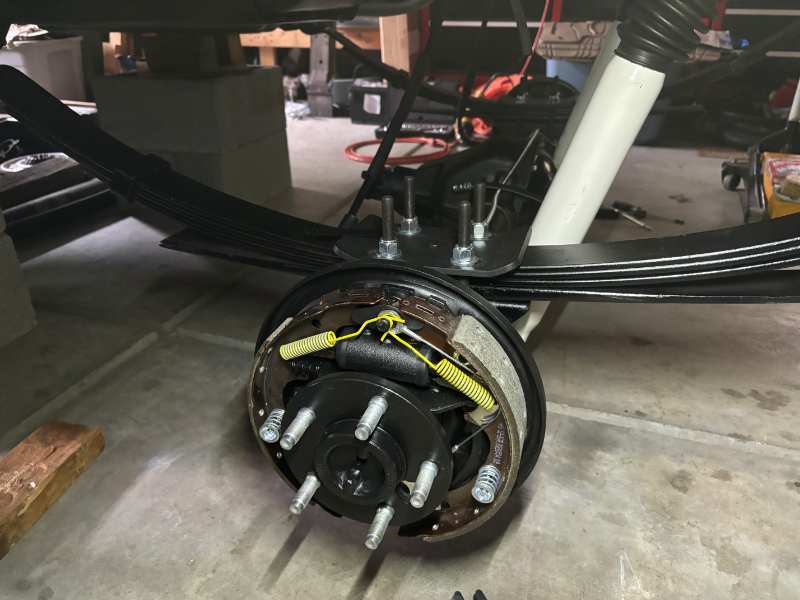
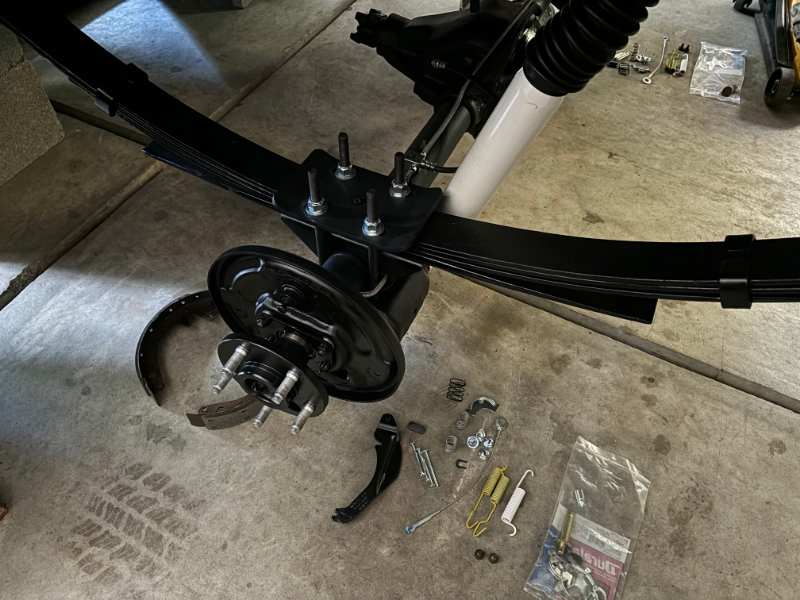
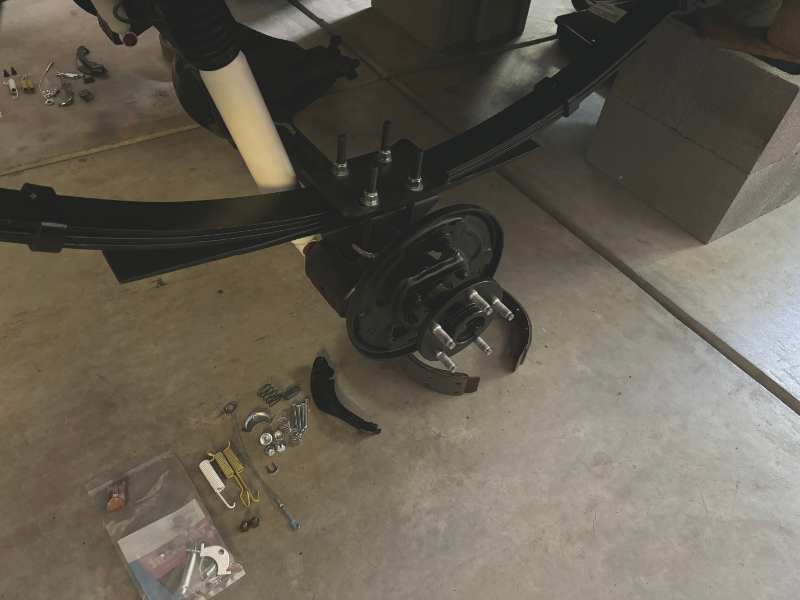
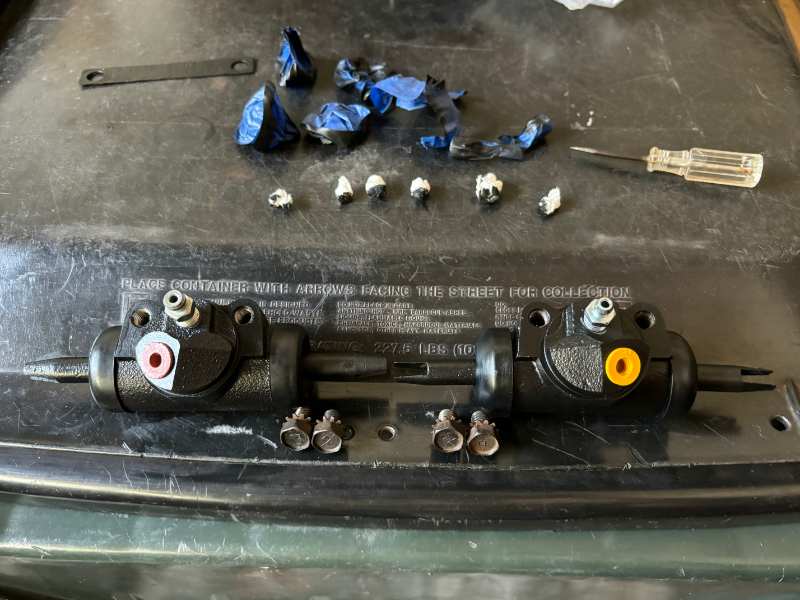
Had a little time to get the brakes together last night after work. Parking brake cables are stock length, and this is full droop. I had to route them under/ inboard of the leaf springs. I think I'll make a pair of looped brackets 3"-4" long where the original loops used to be. Need to adjust the shoes with the drums on and then set the parking brake adjustment. Then I'll get her on her feet and see what I have for rear ride height.
-
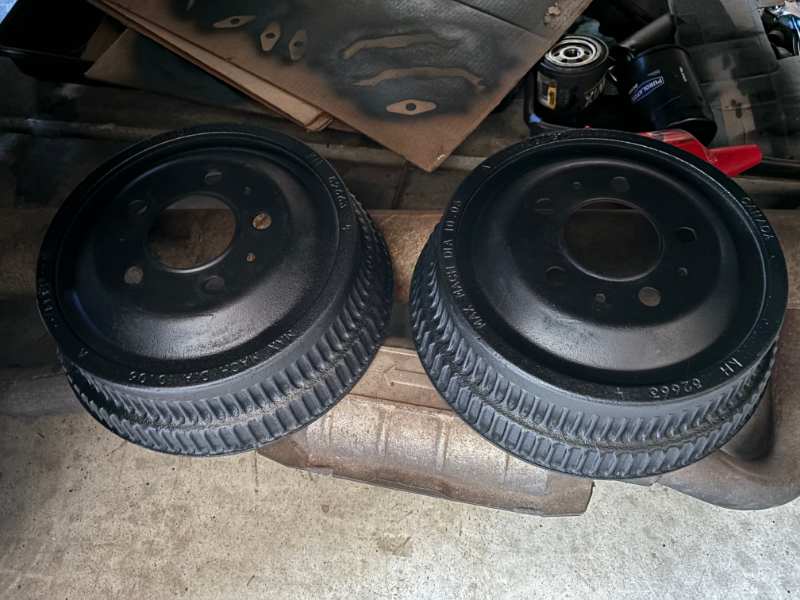
Longer wheel studs in, shocks mounted, all rear brake hardware staged and ready for assembly.
-
Need some dimensions - yet another lift thread
Gojira94 replied to Tex06's topic in MJ Tech: Modification and Repairs
Quick numbers - your lift is: 2.8" rear 4.0" front Which gives you .8" of rake R > F, so it looks almost level, with the weight of the topper probably not sagging it at all with those beefy leafs. -
Project Morris: The 89 to 99 Comanche Long Bed
Gojira94 replied to RuBacon's topic in Member Projects: Your Comanches
Looking at your lift question thread, it appears you have a stock-ish lower plate/ shock mount. And your compressed shock length at ride height is about 2 1/2" - 3" of uptravel. I thought maybe you'd moved the lower shock mount higher at first. In your case, if your lower mounts are near stock location, it's difficult to say why the body of the shock is positioned that high. Put some more pics of the rear shock setup in your lift question thread? -
Need some dimensions - yet another lift thread
Gojira94 replied to Tex06's topic in MJ Tech: Modification and Repairs
I found this thread to be helpful. Extracted from M.R. 277. There is a +1" difference in factory ride height front and rear for 4WD models. 6" lift for a 4WD model would be 13.75" front and rear would be 15.2". It's also my understanding that the factory rake (rear height > front height) is about 2 inches, with these measurements equally changed with lift (or sag). -
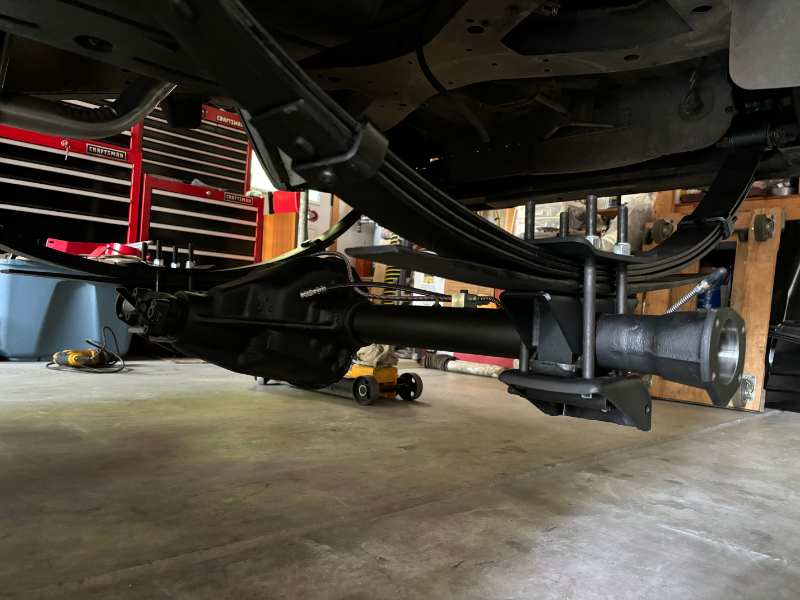
SOA is in. The temporary shackles I put on showed way too high in the back far beyond what it'll settle. So I threw the original shackles back on. I'll need a 24+" rear brake hose to accommodate full droop. And the axle vent tube is 6-7" too short as well. Wheel stud installer broke on the 3rd stud... I'd hoped to get it all back together yesterday. Working on Volvos again today, so it'll have to wait a day or two.

-
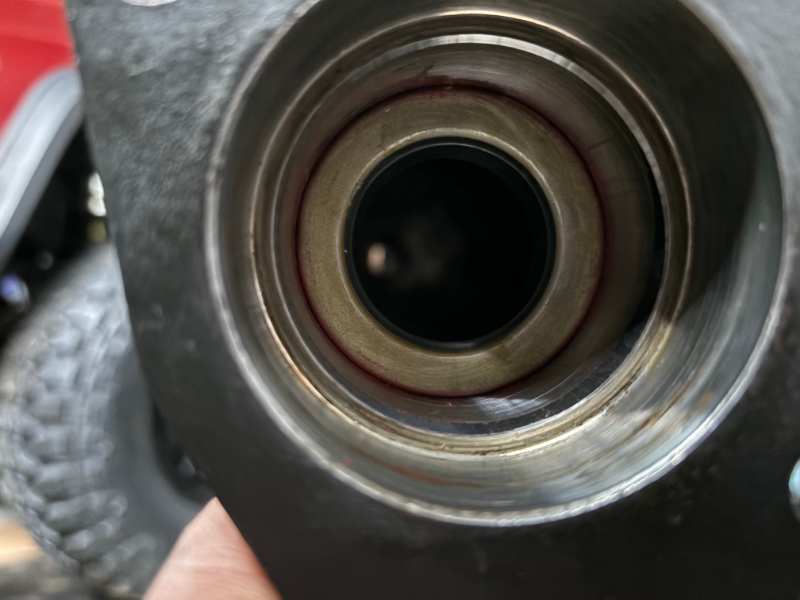
Science... Axle tube seals... Leaf springs installed (General 97-555). I picked up a cheap set of Chevy drop shackles for the moment so I can work on settling the springs. The temporary shackles will net 1.5" lift. If 5.5" SOA, this will make 7" give or take. Front is 6.5-6.75" right now. Something adjustable/ boomerang after that.