
Gojira94
-
Posts
677 -
Joined
-
Last visited
Content Type
Profiles
Forums
Gallery
Everything posted by Gojira94
-
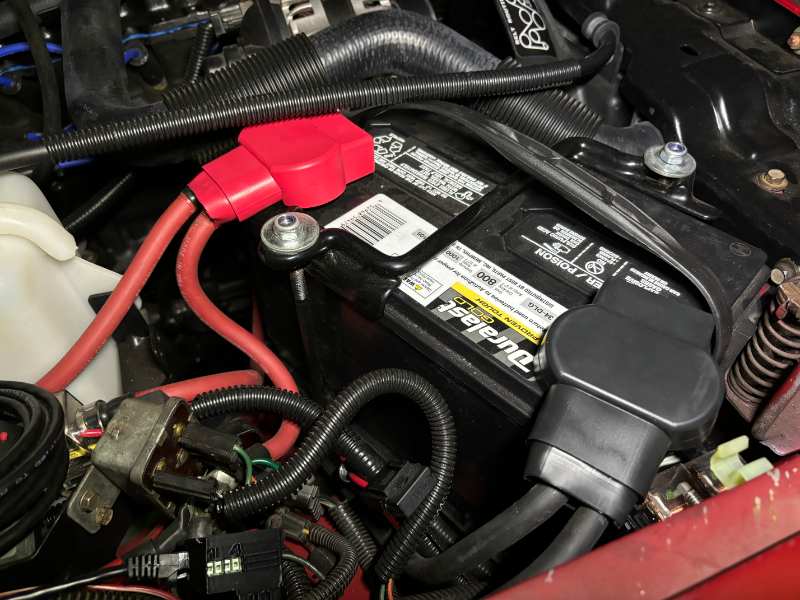
So I basically took from Thanksgiving through New Year's off from my own projects. I did do brakes and motor mounts and tires/ alignment on my wife's XC70 but mostly left my tools in the box for a while. Basically kept the MJ battery charged and looked at it now and then. Now getting back to things to get her rolling under her own power. Covers for the milspec terminals (Fastronix, made in USA, $13.87 shipped):
-
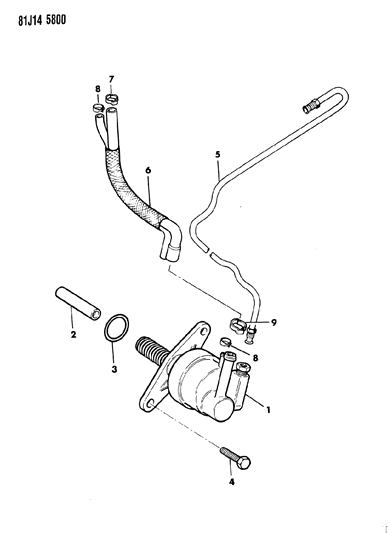
Welcome to the forum. Hopefully someone with a 86/ 2.8 MJ can offer some feedback as well. If you're referring to #5 in the diagram you might try the usual PB Blaster on the fitting and some gentle taps with a brass hammer first. If you don't have flare nut wrenches you can pick those up for about $15 apiece at your local parts store. You can determine the size with standard combo wrenches first. Or are you battling #6? On those you'll need to pry open the metal collars #8 / #9 that secure them to the pump before you can slide them off.
-

86 2.8 serpentine belt question
Gojira94 replied to ratrapp's topic in MJ Tech: Modification and Repairs
All accessories on the Jeep 2.8 setup are set up for CW rotation. The early 90s 2.8 S-10 with serpentine setup has CCW rotation on the water pump, which would mean swapping out the timing cover as well (water routing shape on the inside of the cover). Would require a swap to a CS130 case alt., PS pump moves down. Hardest part, maybe the deal killer, would be trying to place the compressor. S10s used the Harrison R4 'pancake' compressor and almost no other compressor would fit in the S10 location for it. S10 accessory = bad option mostly due to AC compressor difficulties unless swapping for an R4/ custom hoses for it. The 93-95 Camaro L32 3.4 also does CCW rotation of the WP, which would need the L32 or S10 2.8 cover and water pump, everything else CW rotation. Only accessory relocation for that would be the compressor (extend wires for AC, swap to CS130 case alt., probably swap to a Sanden R series compressor, custom AC hoses, different radiator hoses). No simple/ cheap options, I agree, for now just get those belts tight enough -
Clutch Slave FUBAR or not?
Gojira94 replied to Gojira94's topic in MJ Tech: Modification and Repairs
One tip I'll share (not at all new to the world) is when pulling the trans (any trans/ any car), is once you have the transmission supported and pull the crossmember, droop the trans about 3" vertical from where it would be on the crossmember. This eases access to the upper bellhousing bolts. I use a string of wobble extensions at the socket end and an 18" 1/2" extension at the ratchet/ breaker bar end for about 3 - 3 1/2 feet of curved reach. Here's the important part - before you try to separate the trans with the driveline drooped a bit, support the engine at this temporary angle at the front of the oil pan or crank pulley so it doesn't rock forward and up when you separate the trans and push the bellhousing up into the tunnel. That's a moment when you may have somewhat tenuous control over a heavy mass of metal in motion, so keeping still things still saves some headaches. If you're doing something quick, you can leave things where they are. If you're going to need more than an hour or so, relieve the tension on the engine mounts by moving the engine back to its normal angle and support it while you do trans work. And then put the tilt back on it when you're ready to reinstall the trans. -
That's a 'High Line' cluster earlier than 87-88, so if your MJ is an 86, it's probably the original. The noise and behavior seems to indicate a hitch with the tenths mile position on the barrel inside the speedo. It could be as simple as cleaning and lubricating the barrel to relieve the sticky end at the tenths position. I will say it's NOT super simple and great care would need to be taken while working with it. You'll have to get into it to find out what's going on though. Member @boxyjeep has significant experience with all the variants of clusters from 84-96, repairs, and also sells some electric speedo conversion kits and a good video of the differences and changes in clusters here: Jeep Cherokee XJ Gauge Cluster Repair Guide Another video of how to extract and work with the barrel here: How to Calibrate Renix Gauge Cluster After Full Gauge Cluster Swap
-
The Comanche has failed me
Gojira94 replied to hgeranium's topic in MJ Tech: Modification and Repairs
I've found 2 things from doing quite a few lock rings of this type- sometimes the o-ring is just a hair too big and won't seal properly because it comes out of round once you seat the SU top plate and start tapping the lock ring into place (and you can't see what it's doing behind the SU top plate). Second, I like to lightly smear the o-ring with Vaseline or even Chapstick to keep it in place and oriented and settling into the groove properly while things go together. Helps to prevent leaks you can't see but can certainly smell. -
Clutch Slave FUBAR or not?
Gojira94 replied to Gojira94's topic in MJ Tech: Modification and Repairs
Ahhh, ok. You meant during your conversion. Understood. I had some success yesterday. I’ve got more than enough clearance underneath and a trans attachment for my 3-ton jack. i separated the trans just enough to get the slave out. I popped off the bleed line with an old fork/ wrench clutch tool. I got the bleed fitting off, cleaned the threads up and dug out a brake bleeder of suitable size from my toolbox. I’m satisfied enough with it to give it an go and try to bleed it before I put it all back together or look for another slave. All i need from this one is to last until next summer. By then I should be in a position to do the conversion like you did. -
Clutch Slave FUBAR or not?
Gojira94 replied to Gojira94's topic in MJ Tech: Modification and Repairs
You were changing it while you were replacing the slave, or doing the whole clutch job? I had the luxury of installing mine (3/4") on the floor of my garage before stabbing in the engine/ trans together. The real shame is I gave away a complete clutch setup including flywheel and slave to a local wheeler to get it all out of my way. It was a 93 YJ setup with all new LuK parts (<1000 miles). I could have robbed the bleed line off of that slave. Oh well. At least I'll have a spare. If I eventually need to replace the one inbound now, I can swap the line from that one over to the bad one I have now, with new EPDM o-rings for good measure. I had 15 minutes during my lunch break to get started pulling everything (WFH job 1 most days). I got both shafts out, shifter and exhaust head pipe pulled. Almost not fair, this rig doesn't have anything that's damaged, jacked up or have rusted fasteners anymore. -
Clutch Slave FUBAR or not?
Gojira94 replied to Gojira94's topic in MJ Tech: Modification and Repairs
Not right now. I can replace an internal slave on one of these in about 1.5 hrs, with the most of that being fiddling with the transfer case nuts. I'd very much like to do the conversion but another $800 on the MJ just isn't doable any time soon. My wife's XC70 just took $900 with another $300 coming soon. -
Clutch Slave FUBAR or not?
Gojira94 replied to Gojira94's topic in MJ Tech: Modification and Repairs
I was finally getting ready to actually use the clutch for the first time. This was the last thing it needed to run and drive. It hasn't moved under its own power since 2017, according to the NC Emissions Inspection Unit. I can't get the bleeder/ fitting off the bleed line, and it's bending and very not happy. Slave is trash, I'm calling it and yanking the drivetrain. Looking for another slave now. -
Clutch Slave FUBAR or not?
Gojira94 replied to Gojira94's topic in MJ Tech: Modification and Repairs
This is what I started with: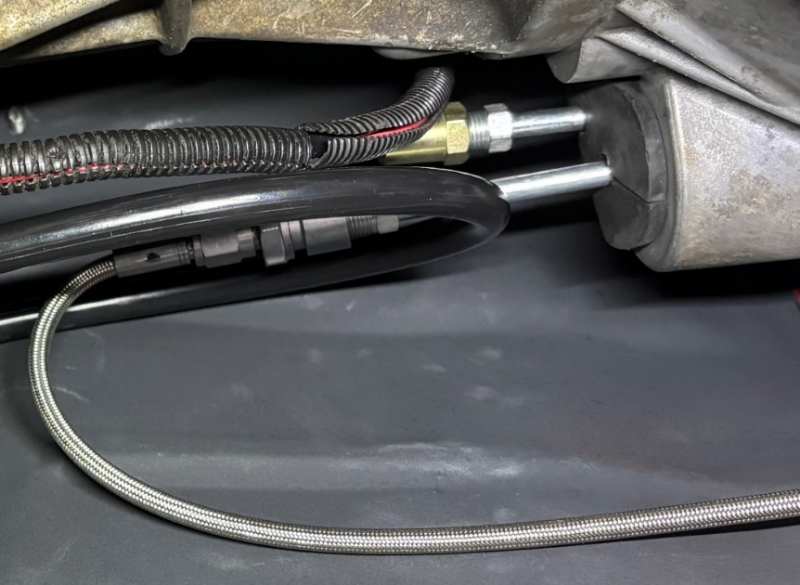
-
I just went out to the garage to get started bleeding the clutch. Doing that would put me one good nut and bolt session from driving my project for the first time. But no. F no. The bleeder did NOT want to come out. Not at all. I got it to crack loose and it was tight all the way off and I wanted to see why. The orifice end looks bad and there was some sort of residue on it. Cleaned it off and tried to screw it back in but it was still tight. So I thought "I'll go find another bleeder, and pull off the fitting it goes into and clean that out for peace of mind." That piece also did not want to budge with very heavy force. The bleed line bent and I heard the unmistakable sound of the retainer dropping off the roll pin that holds the slave in place and into the bottom of the bellhousing. See pic below of the bleeder screw and the (old) roll pin retainer to locate the slave: My questions are: 1) how critical is that retainer being in place? 2) should I risk cleaning out what the bleeder goes into with solvent and a q-tip, cross my fingers and hope for the best? Or, would I be better off yanking the drivetrain and putting a new slave in it? PITA but I'm not opposed to it. Thanks


-
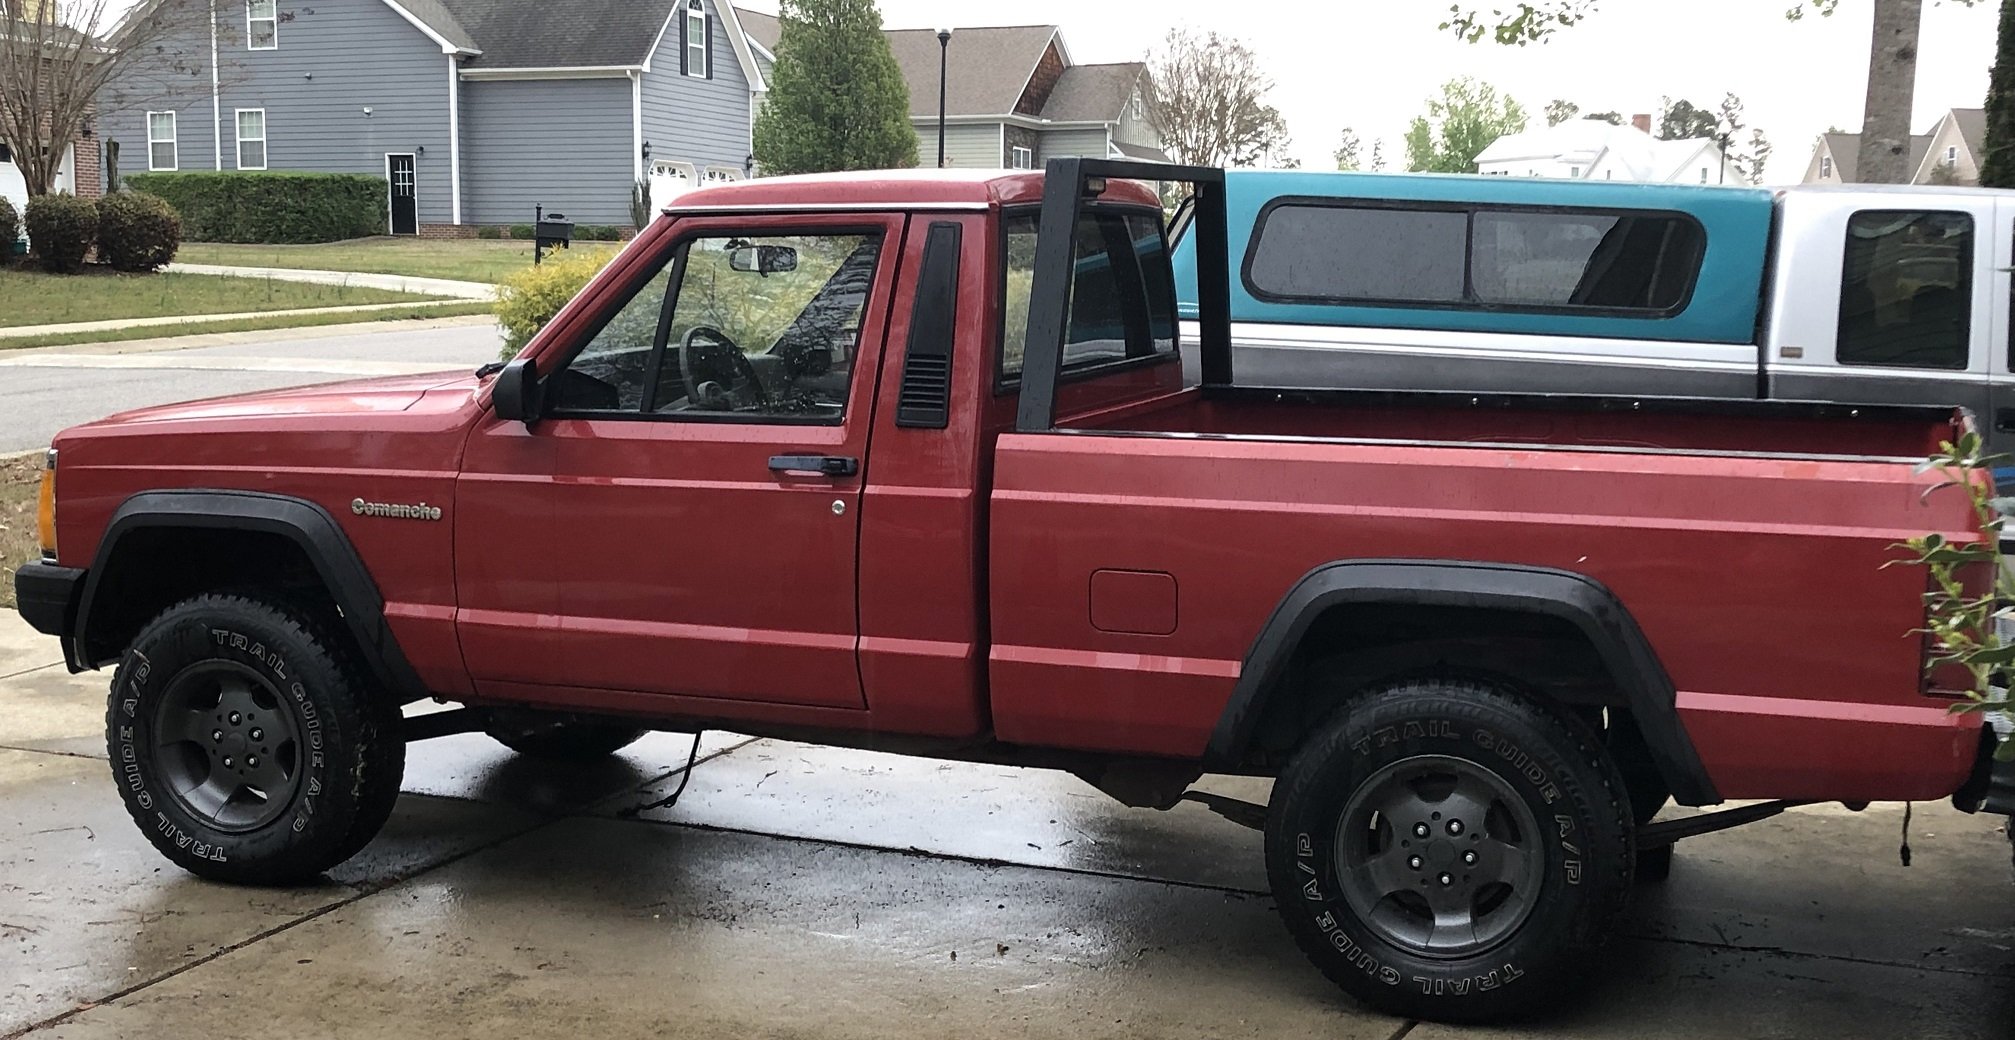
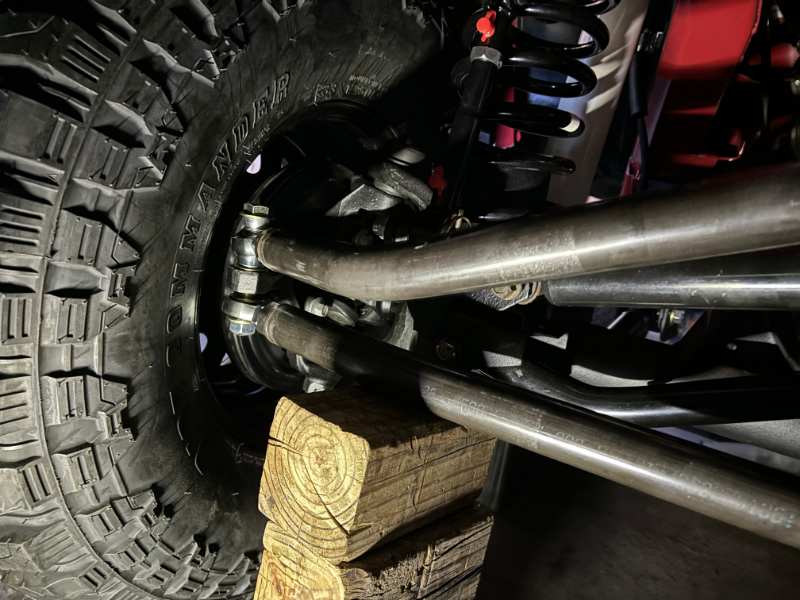
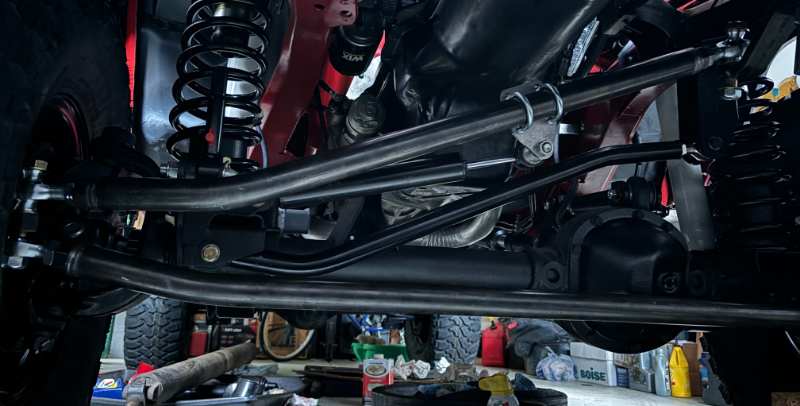
Trail Forged setup with 'high lift' drag link. I swapped the drag link out due to the heim joint angles being steeper than I felt comfortable with. Much better angles now. The drag link isn't nearly as close to the oil pan as it looks in the first pic.

-
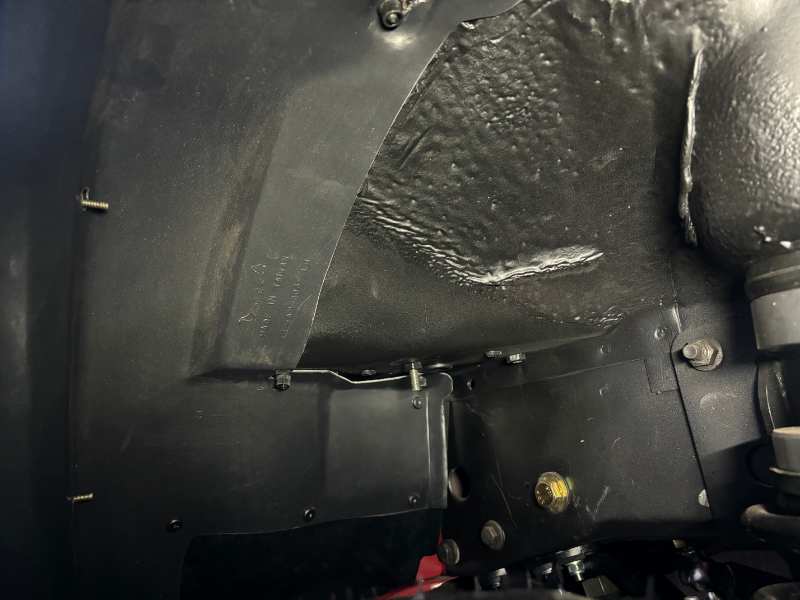
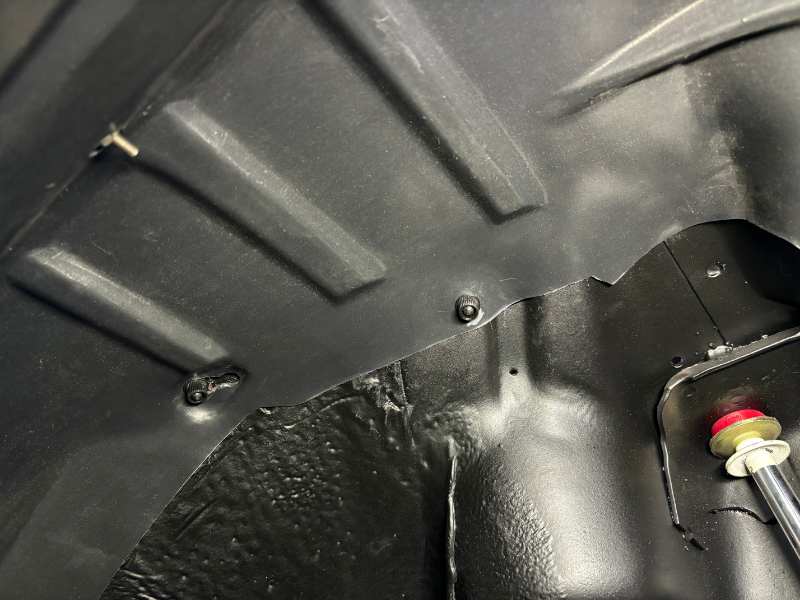
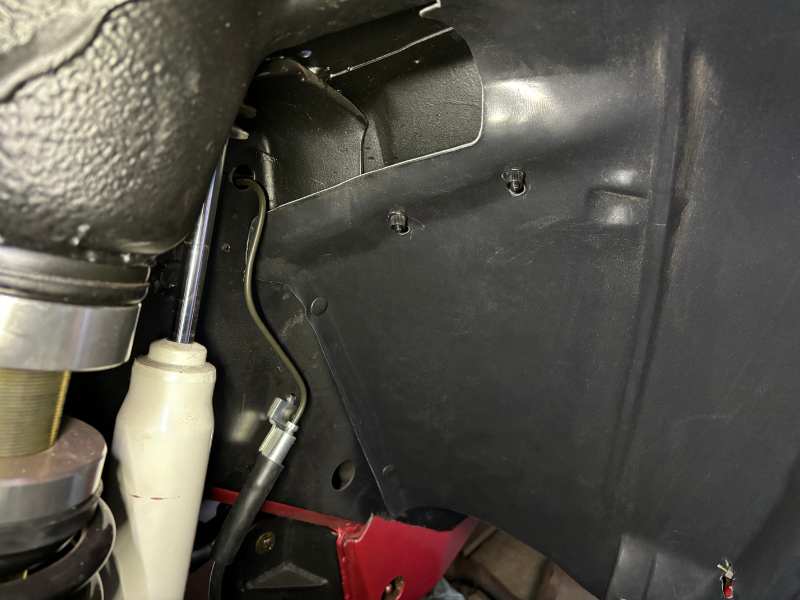
Also from Saturday - got one of the new fender liners in. Fitment is... decent but by no means perfect. A couple of the holes aren't quite right and require a little trimming. I think I can do a better job on the other side. New rubber flaps up front from Detroit Muscle Technologies.
-
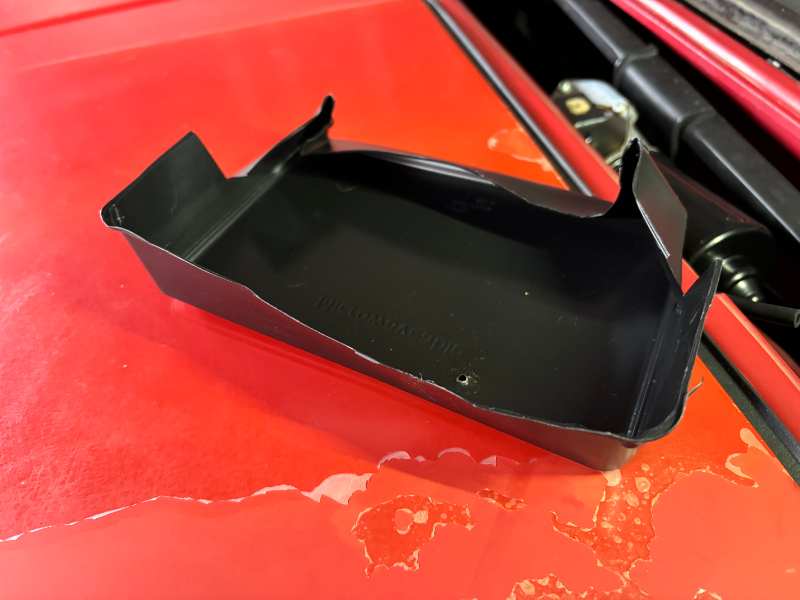
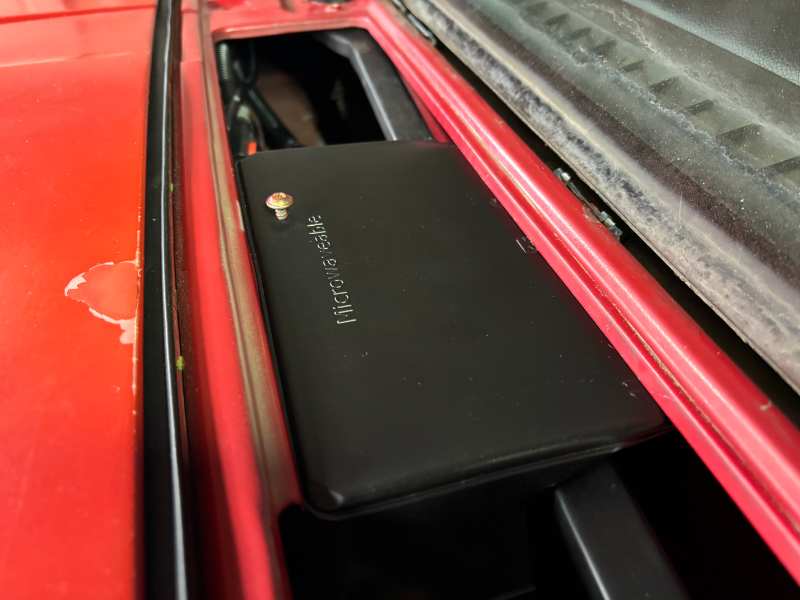
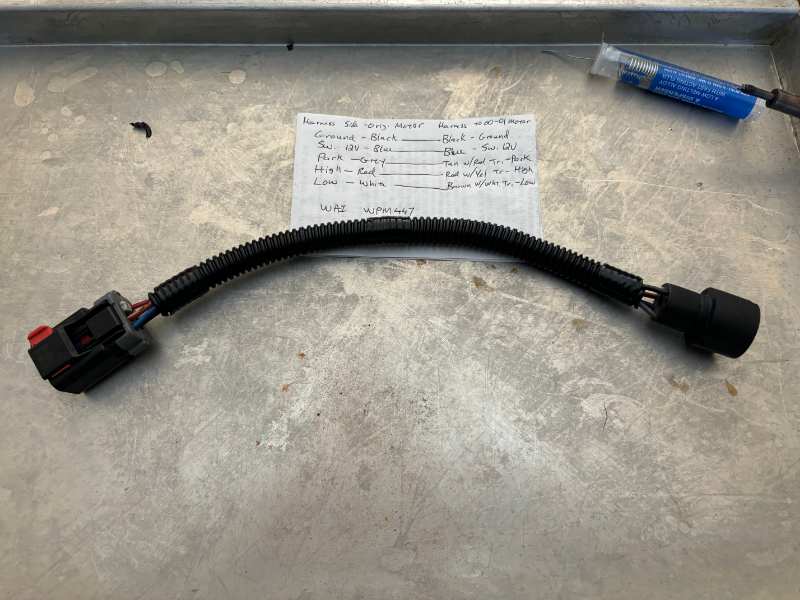
Finished up the wipers on Saturday. The harness adapter works with no issues. I was wondering what I was going to do about not having the rubber jacket around the motor and I had a thought pretty far outside the box. That's a microwaveable meal tray trimmed for flexibility and fitment is more than acceptable lol. I spent parts of 2 days getting all the scale and peeling clear coat off the cowl cover with a .002" feeler gauge and soft brass brush. Then wet sanded the lines between base and old clear. Next, some dish soap and 1200 grit on the areas of base that had been exposed to remove oxidation. I also touched up a few spots with a very small brush - sprayed Rustoleum Colonial Red in the cap and dipped the brush in it. Finally, I cleared the whole thing with Upol/ Raptor diamond coat 1k. I'm impressed with it, dries very hard and very fast and has very decent UV protection. Maybe one day I'll fork out 8-10k for a real paint job but in the meantime I'm just trying to keep it red and protected from peel and rust. New later arms...
-
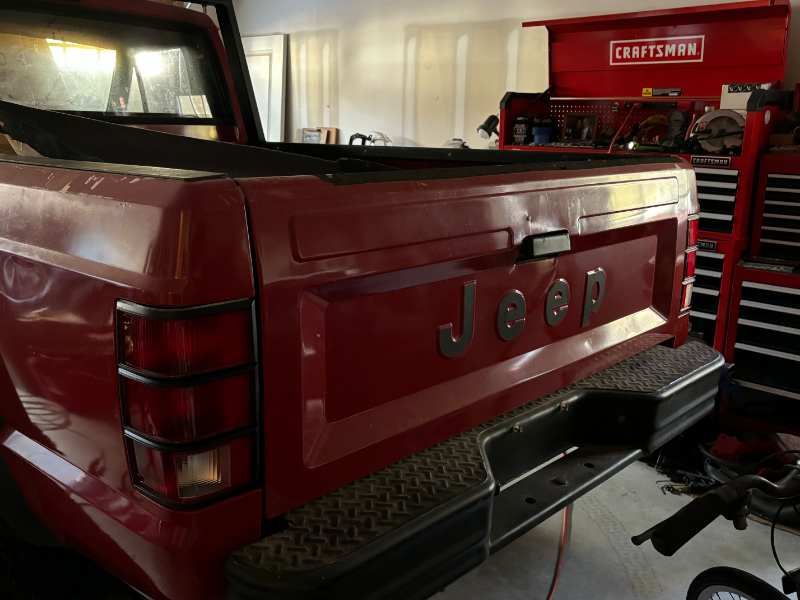
Thank you! I’m afraid that Key Parts may not make another run of them. We’ll see. Like a number of their XJ/MJ specific parts, this black trim version is now out of stock in their EBay store. Lenses are also out of stock. I hope this wasn’t a one-only ‘last hurrah.’
-
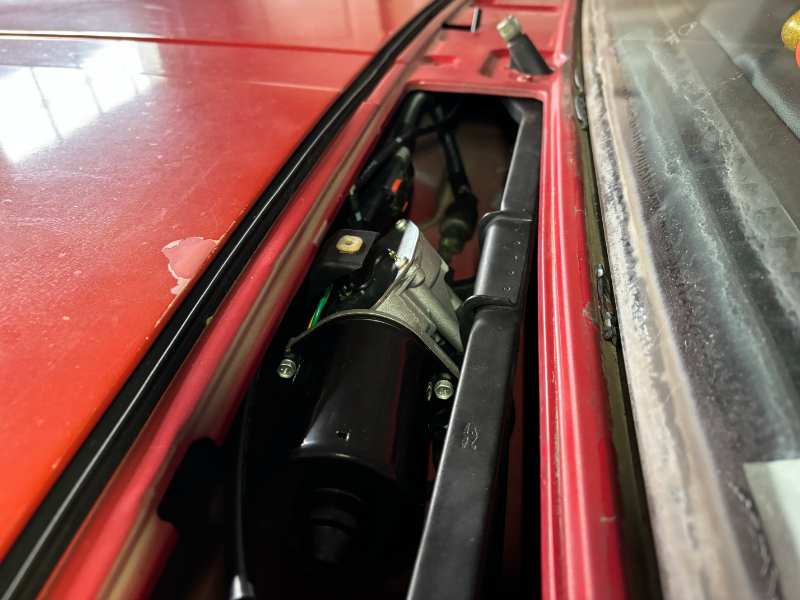
I went to the trouble of cleaning out, re-greasing and sealing the original wiper motor maybe 2 years ago. I jumpered it in high and low positions directly with a battery, and it's slow and noisy. Technically it works, but no sense using it and then replacing it soon out of frustration. I got the harness side wiper motor connector from a 2002 WJ- the colors are slightly different from some of the XJ examples posted elsewhere here but no big deal. The WAI WPM447 has the later connector and is $4 cheaper than the WPM438 with no connector. So I built an adapter to keep the harness side uncut and connect to the newer motor. It's about a foot long, more than needed, but again, no big deal hiding inside the wiper cowl.

-
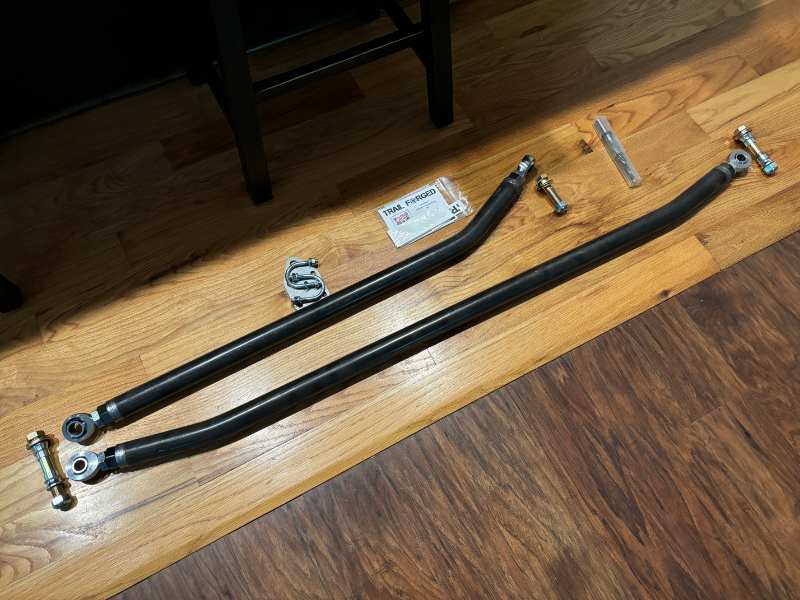
Long time, no update. I'm stuck waiting for a different drag link from Trail Forged (long story, we'll see how it ends - Update 11-14-25: shipped today, should be here tomorrow). So in the meantime, I'm trying to pick off anything else I can ahead of the maiden voyage. I picked up one of the last 10 pairs of black-trimmed Key Parts tail lights. Now out of stock, I have my doubts they'll do another run. I meticulously cleaned out the tail light pockets, re-coated the insides and hung the new lights:
-
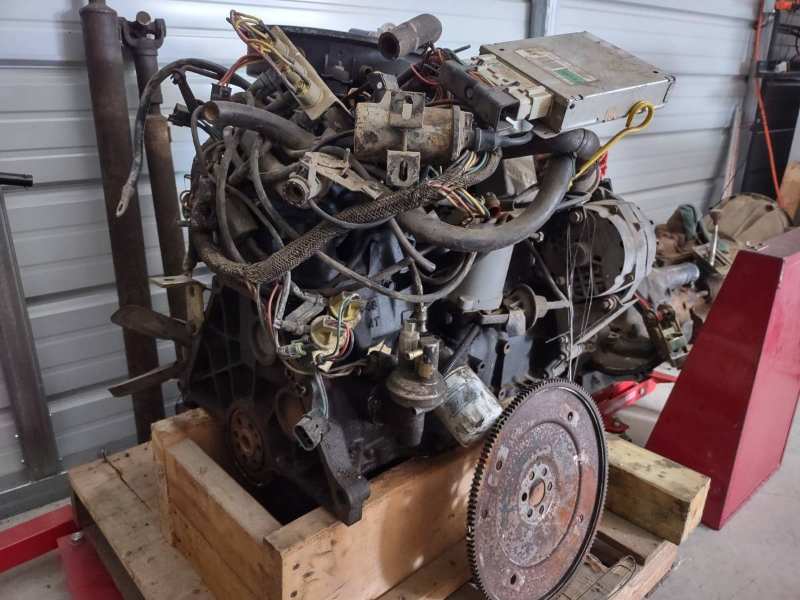
Craigslist ad, this is about 25 min east of me. https://raleigh.craigslist.org/pts/d/raleigh-1984-jeep-25-engine/7888957940.html
-
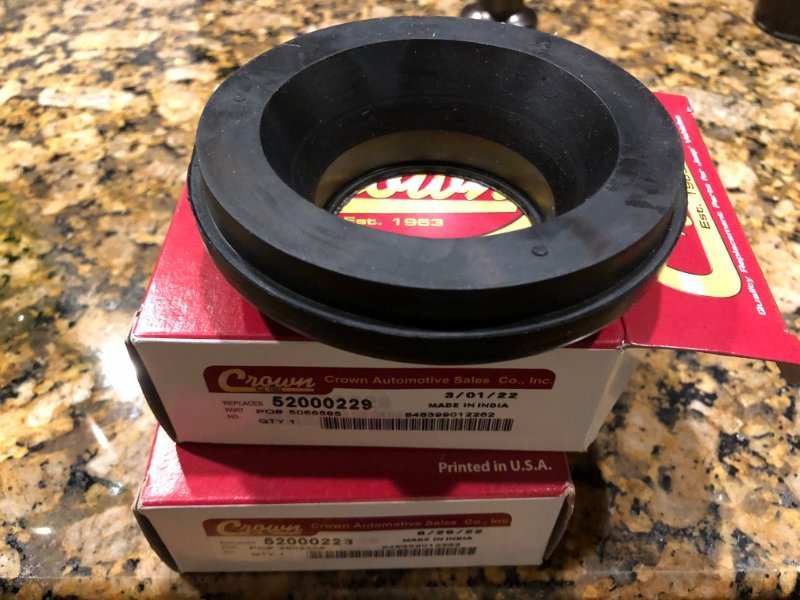
These? It's what I replaced mine with. Steel core inside. Also, I've noticed the holes under the coil/ module assembly can allow water to enter the void above the spring/ cushion. Only way to drain trapped water is to remove the bumpstop/ cup that's screwed into the middle on the bottom side. Later XJs have the bumpstop cup welded on. Every one I come across in the boneyard has a wet slimy grimy mess under the expansion tank and open holes with water surely inside that void. If I owned one of those later XJs I'd get in there, drain it, flush it, hose it with rust converter. I sealed all the topside holes on my MJ to prevent water getting inside. My bumpstops were screw-in, but have been replaced with ACOS. At least with the earlier XJs and the MJ you can pull the bumpstops once in a while and drain any water.
-
Since you're in Roanoke, I'd at least stop by and have a chat with the folks at 501 Shenandoah Ave NW. Are you buying your MJ back from the insurance company or (?)
-
OMG this Trail Forged setup is BEEF. Steering clearance issue is solved. Their instruction setup pics have the steering damper on the tie rod with a factory track bar (?!). My TB interferes so I have it on the drag link instead. Mocked up with lengths set within a degree or two on the toe, nothing tightened up yet. I ordered mine bare steel for DE1634 coat instead of their powder coat (black not availalble). Next is to pull and paint and reinstall and check toe again and adjust as needed to get close enough to drive it to the alignment shop. Did some computer work on a friend of a friend's Hunter alignment machine so I'm invited for an "as much time as you need" alignment.
-
This was worth the wait. I was thinking that massaging the drag link's bends to gain steering clearance on the passenger side would be a solution. That works, but having to replicate that on a wear item on a big lift when a replacement is needed wasn't an attractive option, long term. This build has required a few things one would call a 'big ticket item' but aside from new tail lights from Key Parts (coming early November) and at some point a Dana 489 from ECGS, this is probably the last.
-
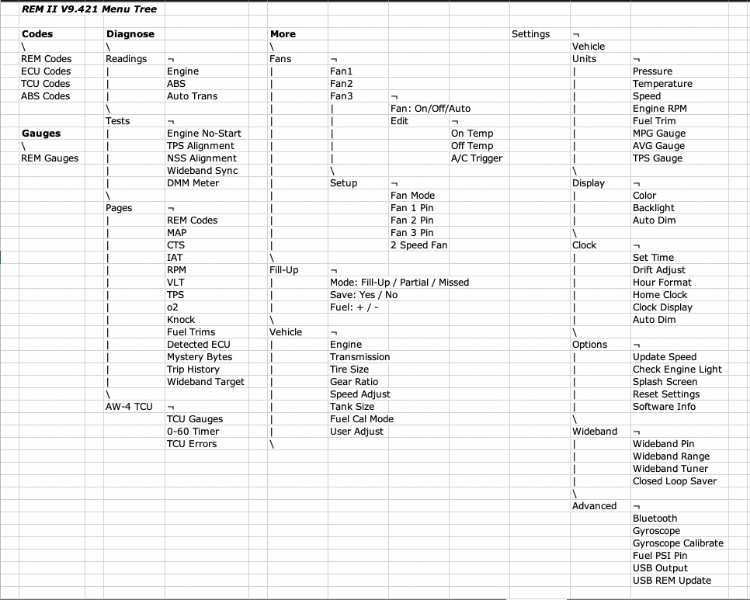
I'm embarrassed to admit, but I've had some difficulty navigating the menus on my REM. I reached out to Nick and he was gracious enough to provide me this menu tree for ease of layout/ navigation. Added here with his permission. This might ought to be stickied for new REM owners like me, and periodically updated as needed.
-
Grill Cowl Screen 55008832
Gojira94 replied to JimiGibbs's topic in MJ Tech: Modification and Repairs
This is an option https://keypartsonline.com/87-99-outer-wiper-cowl-and-cowl-screen-combo/