
Gojira94
-
Posts
718 -
Joined
-
Last visited
Content Type
Profiles
Forums
Gallery
Everything posted by Gojira94
-

Clutch Slave FUBAR or not?
Gojira94 replied to Gojira94's topic in MJ Tech: Modification and Repairs
This is what I started with: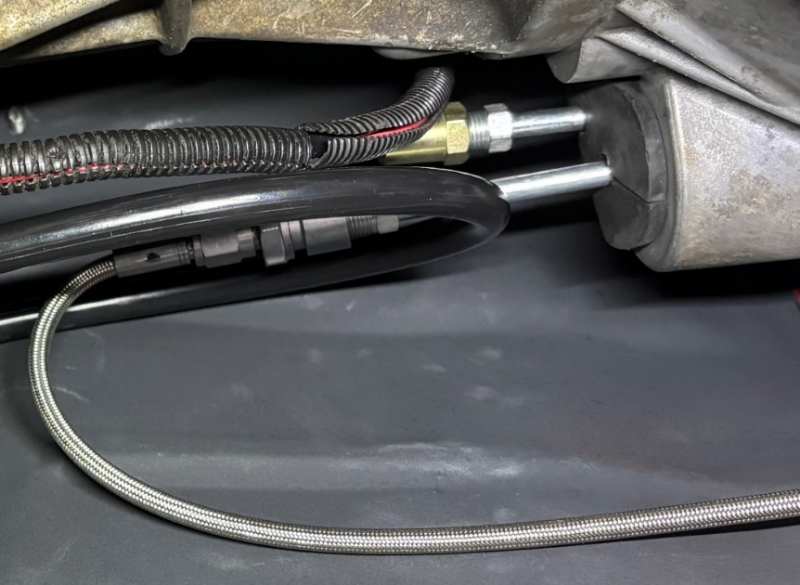
-
I just went out to the garage to get started bleeding the clutch. Doing that would put me one good nut and bolt session from driving my project for the first time. But no. F no. The bleeder did NOT want to come out. Not at all. I got it to crack loose and it was tight all the way off and I wanted to see why. The orifice end looks bad and there was some sort of residue on it. Cleaned it off and tried to screw it back in but it was still tight. So I thought "I'll go find another bleeder, and pull off the fitting it goes into and clean that out for peace of mind." That piece also did not want to budge with very heavy force. The bleed line bent and I heard the unmistakable sound of the retainer dropping off the roll pin that holds the slave in place and into the bottom of the bellhousing. See pic below of the bleeder screw and the (old) roll pin retainer to locate the slave: My questions are: 1) how critical is that retainer being in place? 2) should I risk cleaning out what the bleeder goes into with solvent and a q-tip, cross my fingers and hope for the best? Or, would I be better off yanking the drivetrain and putting a new slave in it? PITA but I'm not opposed to it. Thanks


-
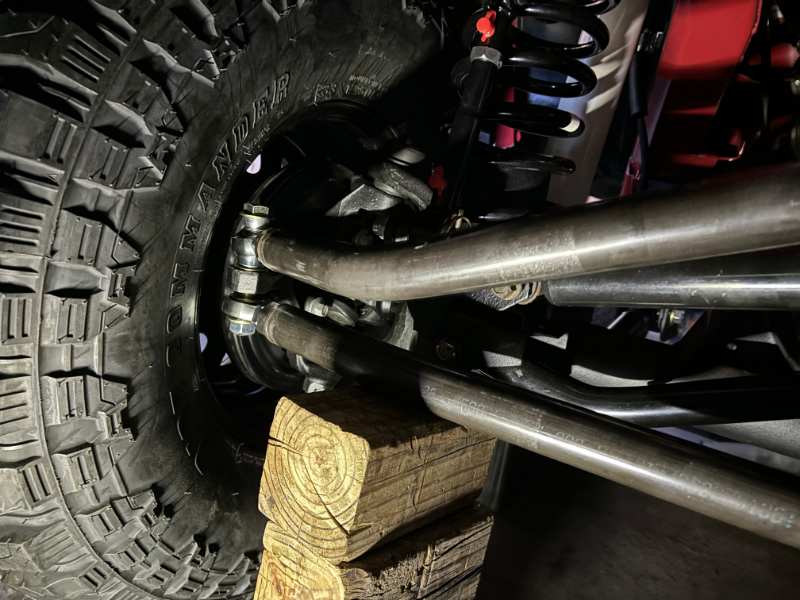
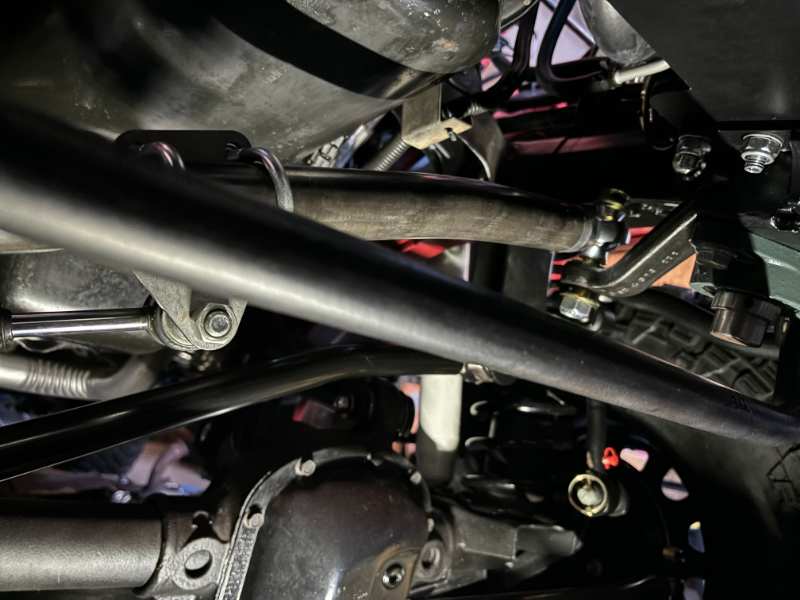
Trail Forged setup with 'high lift' drag link. I swapped the drag link out due to the heim joint angles being steeper than I felt comfortable with. Much better angles now. The drag link isn't nearly as close to the oil pan as it looks in the first pic.
-
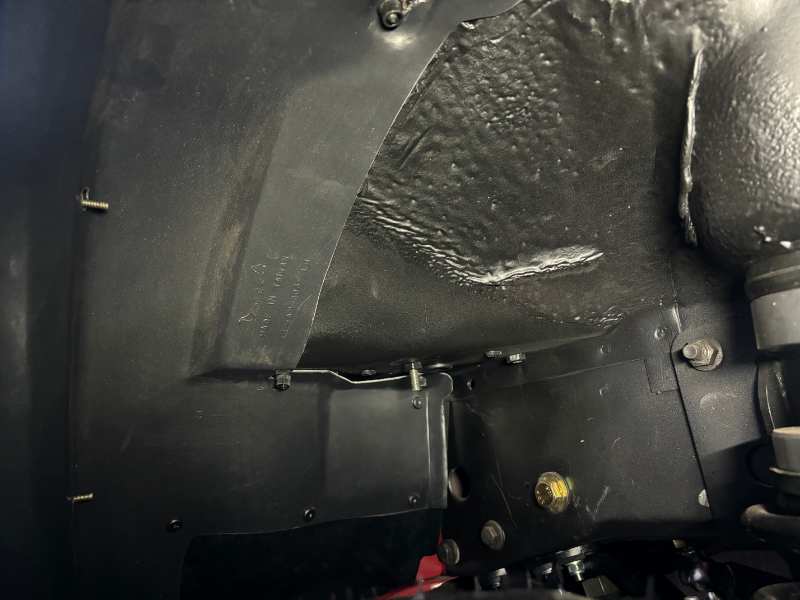
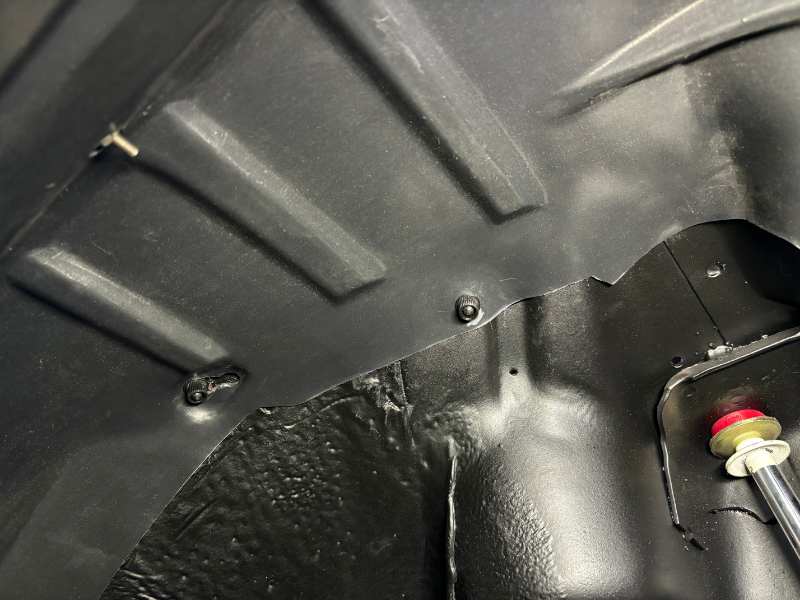
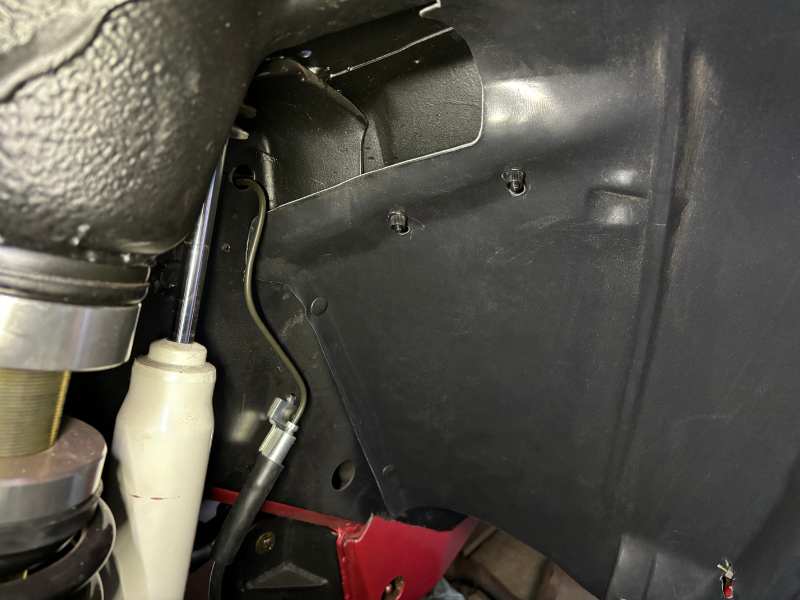
Also from Saturday - got one of the new fender liners in. Fitment is... decent but by no means perfect. A couple of the holes aren't quite right and require a little trimming. I think I can do a better job on the other side. New rubber flaps up front from Detroit Muscle Technologies.
-
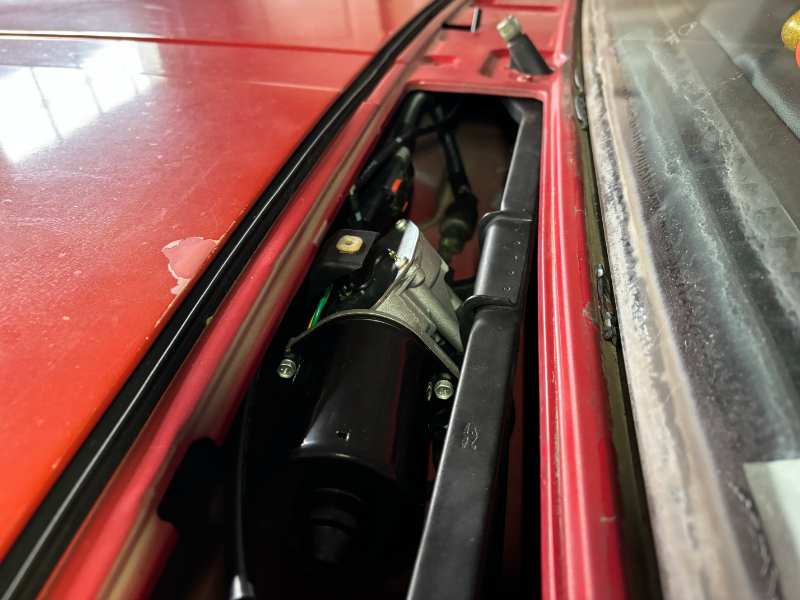
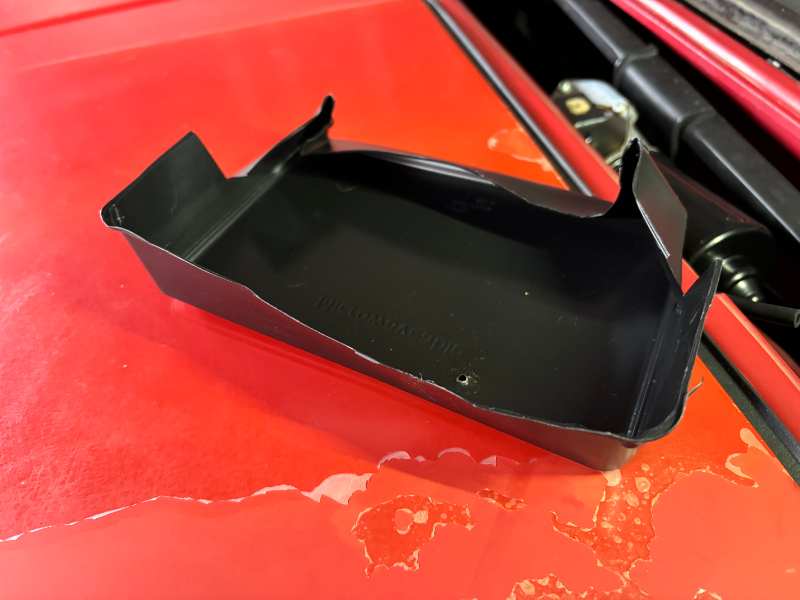
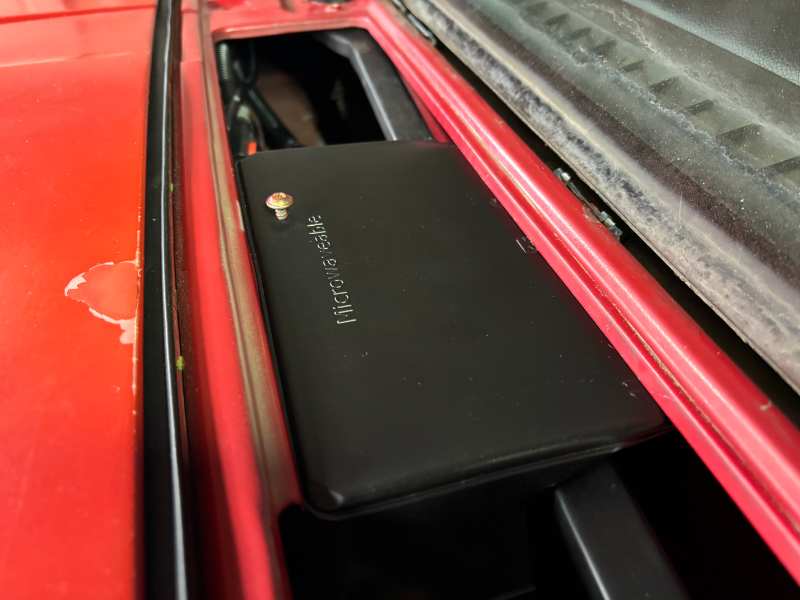
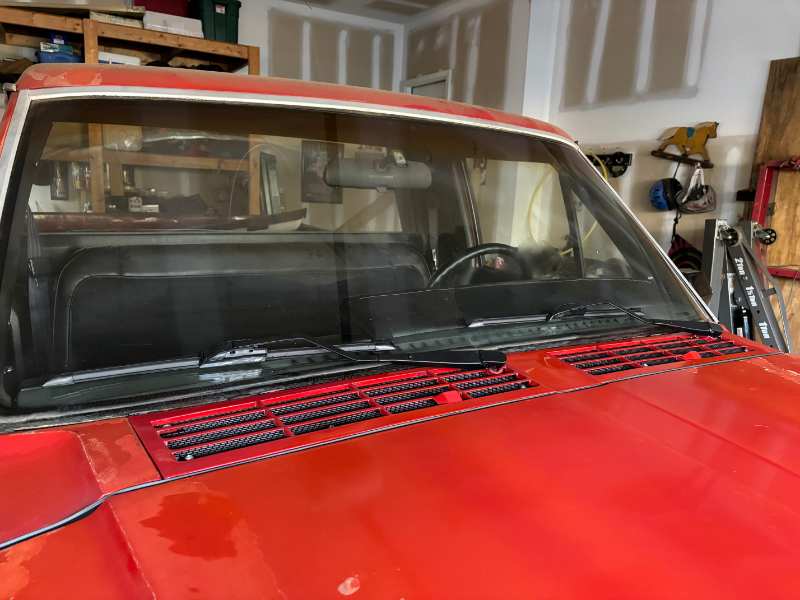
Finished up the wipers on Saturday. The harness adapter works with no issues. I was wondering what I was going to do about not having the rubber jacket around the motor and I had a thought pretty far outside the box. That's a microwaveable meal tray trimmed for flexibility and fitment is more than acceptable lol. I spent parts of 2 days getting all the scale and peeling clear coat off the cowl cover with a .002" feeler gauge and soft brass brush. Then wet sanded the lines between base and old clear. Next, some dish soap and 1200 grit on the areas of base that had been exposed to remove oxidation. I also touched up a few spots with a very small brush - sprayed Rustoleum Colonial Red in the cap and dipped the brush in it. Finally, I cleared the whole thing with Upol/ Raptor diamond coat 1k. I'm impressed with it, dries very hard and very fast and has very decent UV protection. Maybe one day I'll fork out 8-10k for a real paint job but in the meantime I'm just trying to keep it red and protected from peel and rust. New later arms...
-
Thank you! I’m afraid that Key Parts may not make another run of them. We’ll see. Like a number of their XJ/MJ specific parts, this black trim version is now out of stock in their EBay store. Lenses are also out of stock. I hope this wasn’t a one-only ‘last hurrah.’
-
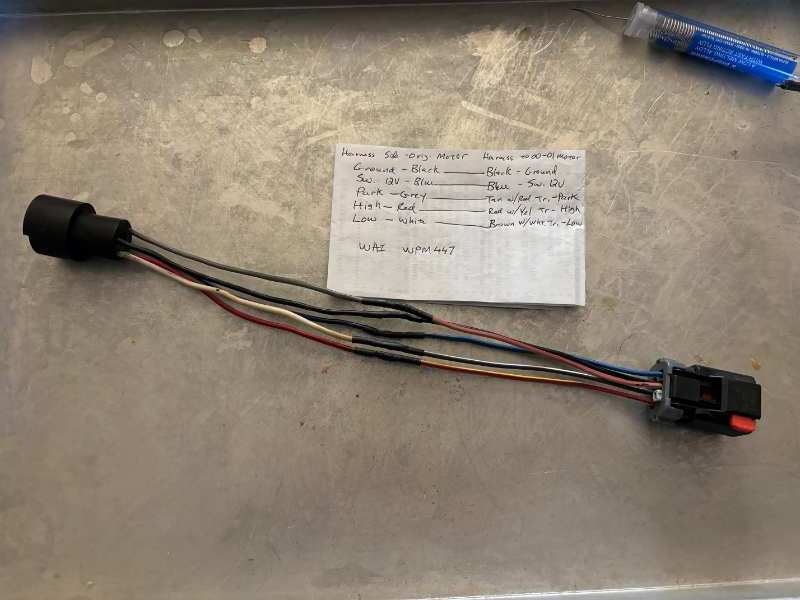
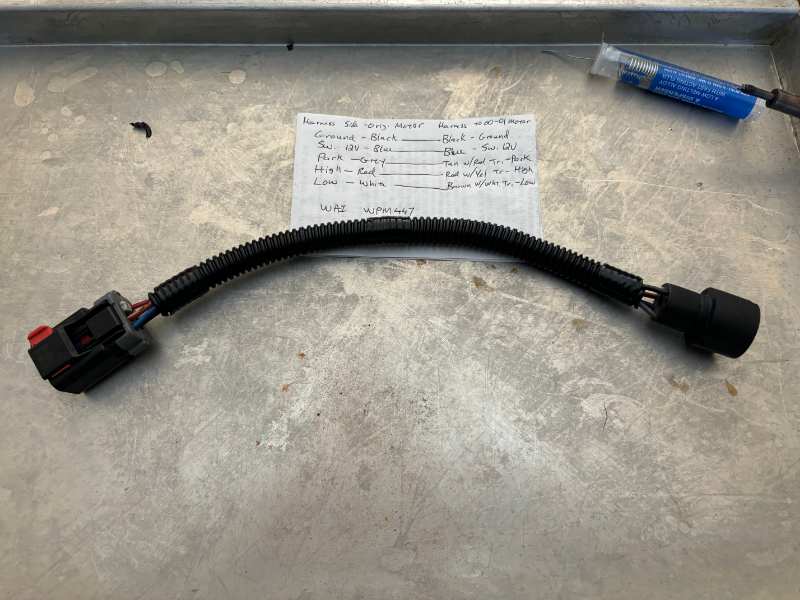
I went to the trouble of cleaning out, re-greasing and sealing the original wiper motor maybe 2 years ago. I jumpered it in high and low positions directly with a battery, and it's slow and noisy. Technically it works, but no sense using it and then replacing it soon out of frustration. I got the harness side wiper motor connector from a 2002 WJ- the colors are slightly different from some of the XJ examples posted elsewhere here but no big deal. The WAI WPM447 has the later connector and is $4 cheaper than the WPM438 with no connector. So I built an adapter to keep the harness side uncut and connect to the newer motor. It's about a foot long, more than needed, but again, no big deal hiding inside the wiper cowl.
-
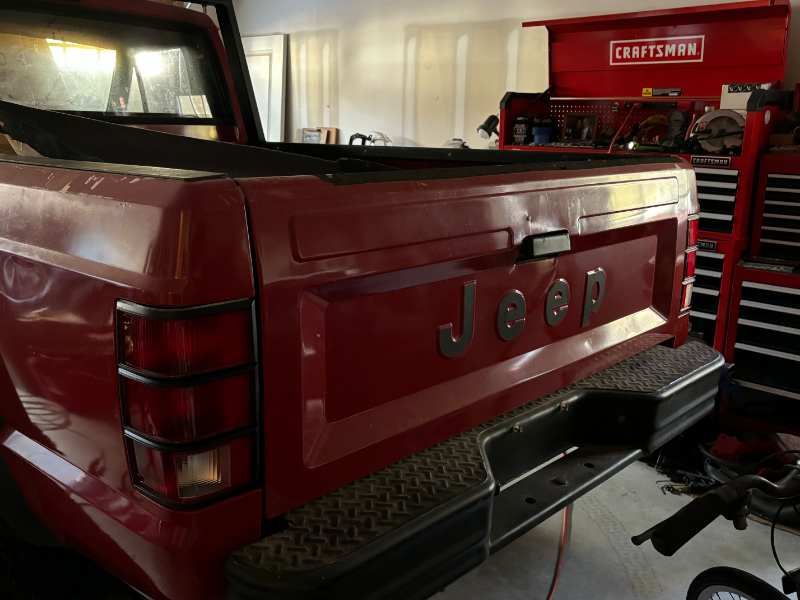
Long time, no update. I'm stuck waiting for a different drag link from Trail Forged (long story, we'll see how it ends - Update 11-14-25: shipped today, should be here tomorrow). So in the meantime, I'm trying to pick off anything else I can ahead of the maiden voyage. I picked up one of the last 10 pairs of black-trimmed Key Parts tail lights. Now out of stock, I have my doubts they'll do another run. I meticulously cleaned out the tail light pockets, re-coated the insides and hung the new lights:
-
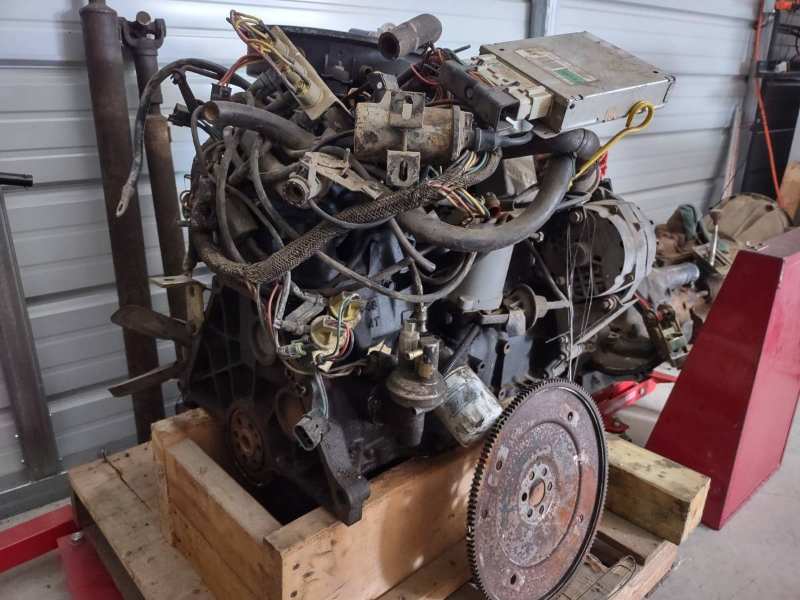
Craigslist ad, this is about 25 min east of me. https://raleigh.craigslist.org/pts/d/raleigh-1984-jeep-25-engine/7888957940.html
-
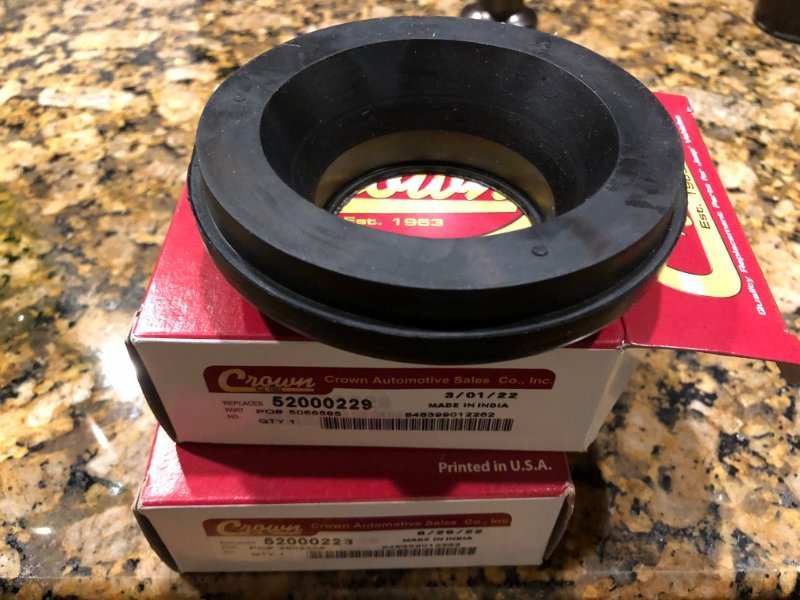
These? It's what I replaced mine with. Steel core inside. Also, I've noticed the holes under the coil/ module assembly can allow water to enter the void above the spring/ cushion. Only way to drain trapped water is to remove the bumpstop/ cup that's screwed into the middle on the bottom side. Later XJs have the bumpstop cup welded on. Every one I come across in the boneyard has a wet slimy grimy mess under the expansion tank and open holes with water surely inside that void. If I owned one of those later XJs I'd get in there, drain it, flush it, hose it with rust converter. I sealed all the topside holes on my MJ to prevent water getting inside. My bumpstops were screw-in, but have been replaced with ACOS. At least with the earlier XJs and the MJ you can pull the bumpstops once in a while and drain any water.
-
Since you're in Roanoke, I'd at least stop by and have a chat with the folks at 501 Shenandoah Ave NW. Are you buying your MJ back from the insurance company or (?)
-
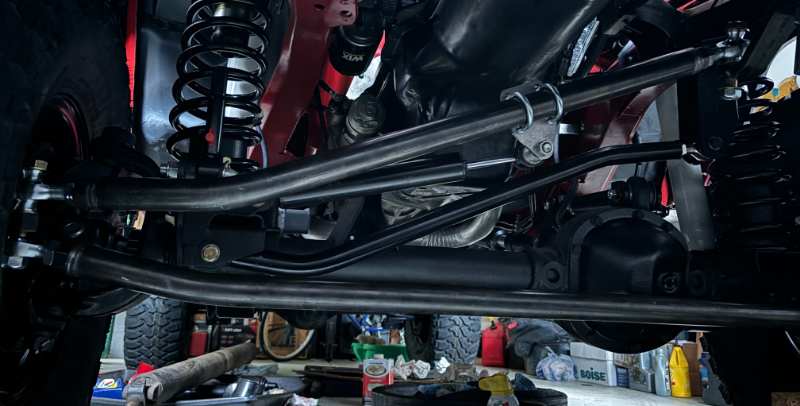
OMG this Trail Forged setup is BEEF. Steering clearance issue is solved. Their instruction setup pics have the steering damper on the tie rod with a factory track bar (?!). My TB interferes so I have it on the drag link instead. Mocked up with lengths set within a degree or two on the toe, nothing tightened up yet. I ordered mine bare steel for DE1634 coat instead of their powder coat (black not availalble). Next is to pull and paint and reinstall and check toe again and adjust as needed to get close enough to drive it to the alignment shop. Did some computer work on a friend of a friend's Hunter alignment machine so I'm invited for an "as much time as you need" alignment.
-
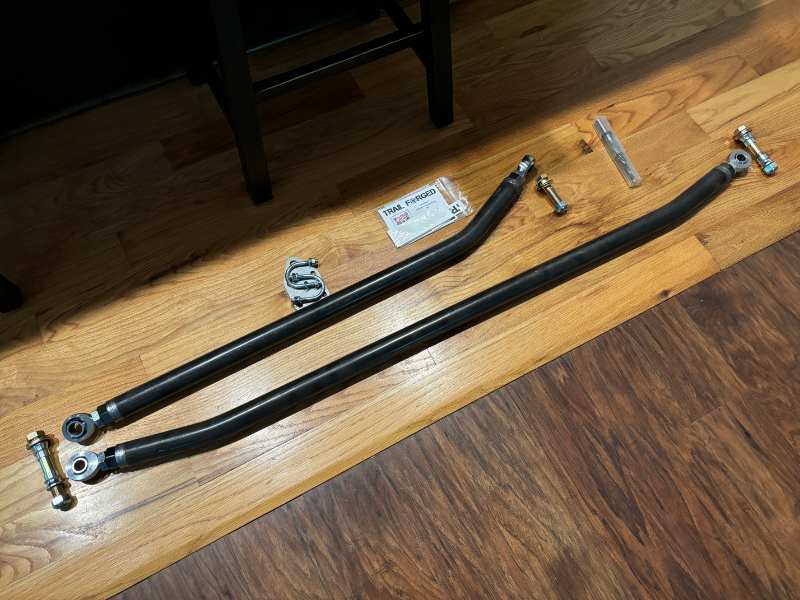
This was worth the wait. I was thinking that massaging the drag link's bends to gain steering clearance on the passenger side would be a solution. That works, but having to replicate that on a wear item on a big lift when a replacement is needed wasn't an attractive option, long term. This build has required a few things one would call a 'big ticket item' but aside from new tail lights from Key Parts (coming early November) and at some point a Dana 489 from ECGS, this is probably the last.
-
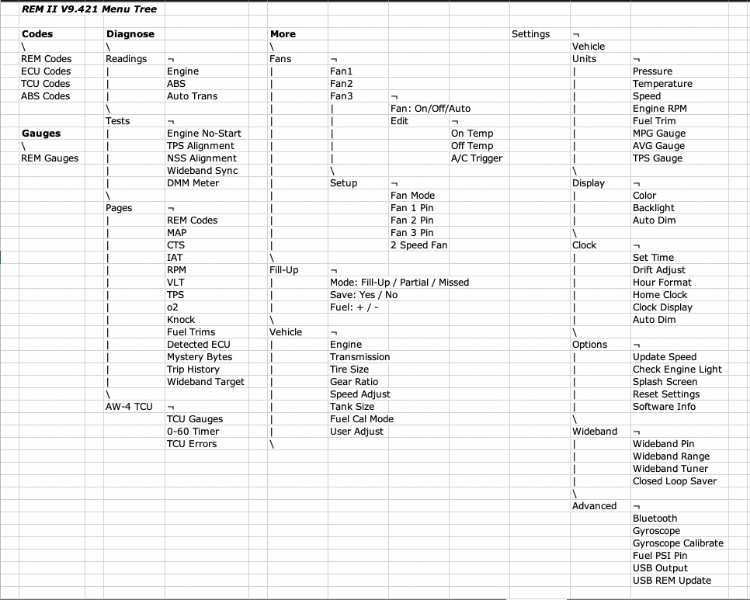
I'm embarrassed to admit, but I've had some difficulty navigating the menus on my REM. I reached out to Nick and he was gracious enough to provide me this menu tree for ease of layout/ navigation. Added here with his permission. This might ought to be stickied for new REM owners like me, and periodically updated as needed.
-
Grill Cowl Screen 55008832
Gojira94 replied to JimiGibbs's topic in MJ Tech: Modification and Repairs
This is an option https://keypartsonline.com/87-99-outer-wiper-cowl-and-cowl-screen-combo/ -
Article title uses the word 'bizarre.' Truth... https://www.theautopian.com/wip-a-deep-dive-into-how-china-started-building-bizarre-jeep-cherokee-xj-clones/
-
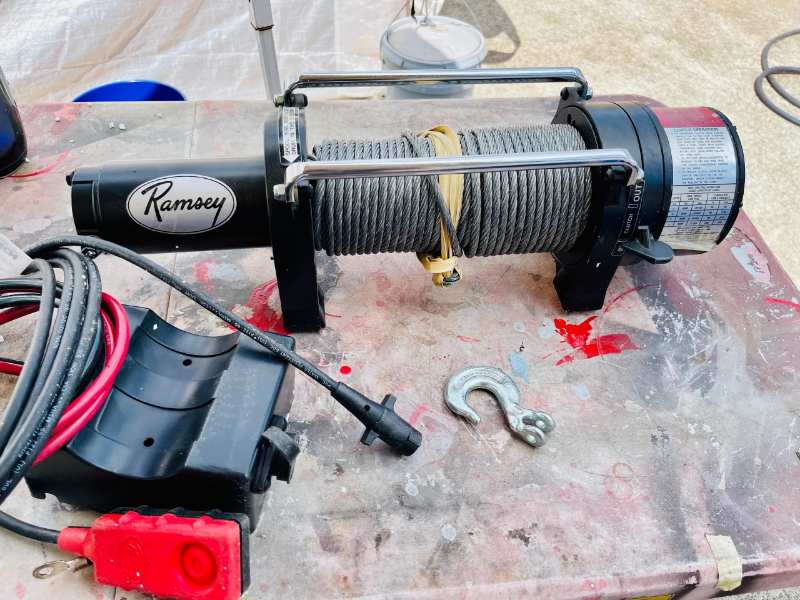
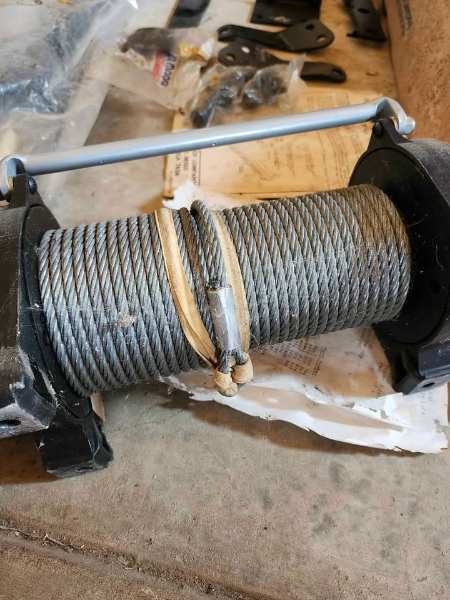
Another reference pic of the winch assembly itself. The stuff at the left foreground is associated with a Jurassic Park Jeep setup, so ignore.
-
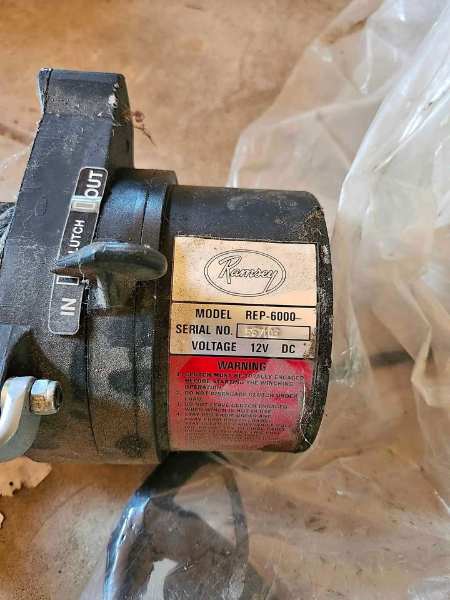
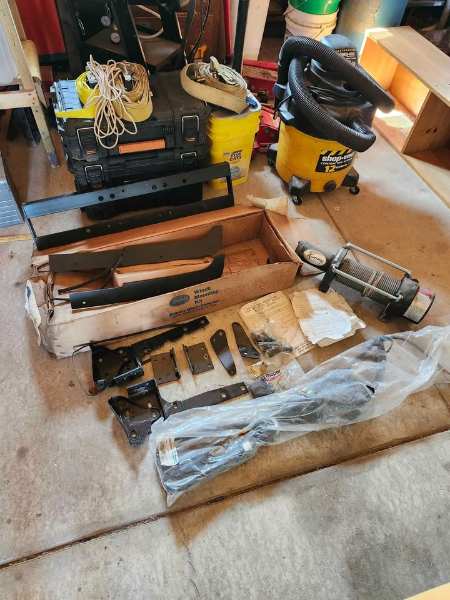
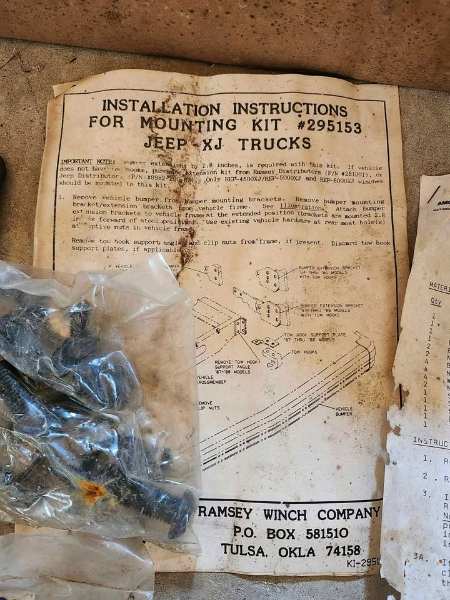
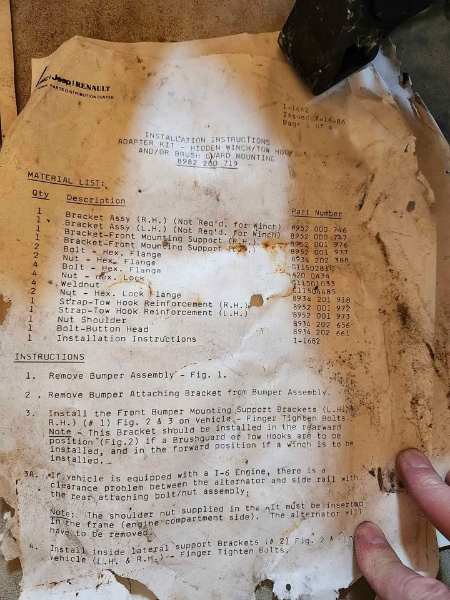
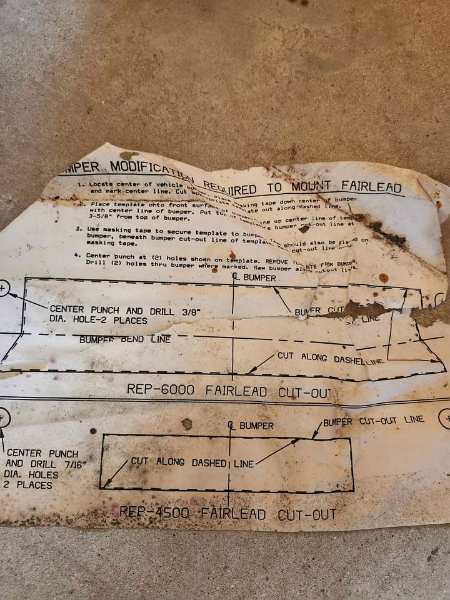
Thread necro, but I saw this (sold) kit on FB Marketplace from a year ago (2024). Only pics of actual full kit I've ever seen.
-
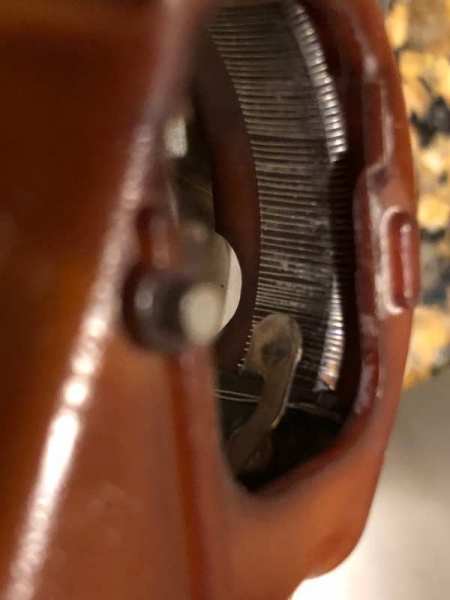
The side cover on the sender comes off, and you can clean the elements inside with a q-tip and 91% alcohol. How sketchy is the rest? Pics?
-
Better pics with everything preliminary adjusted and tightened. Ignore the blown apart steering stuff at the moment... Off Low beams High beams
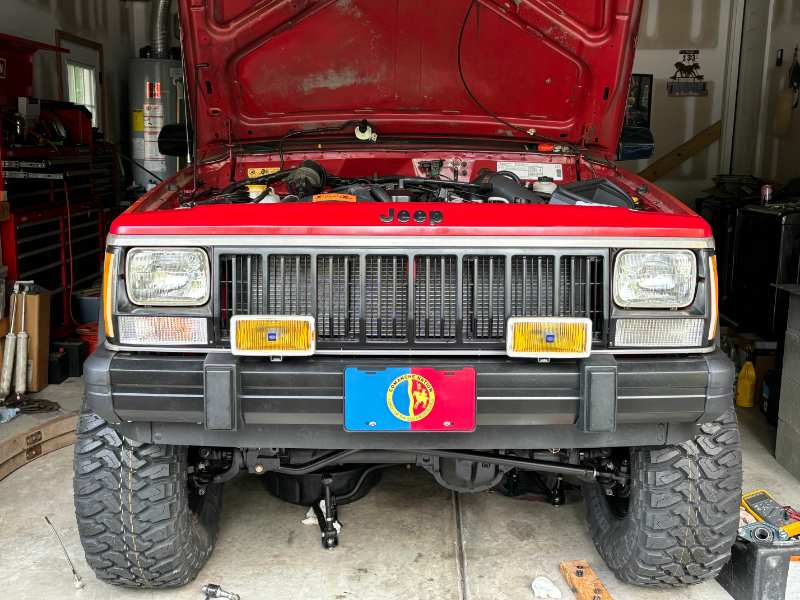
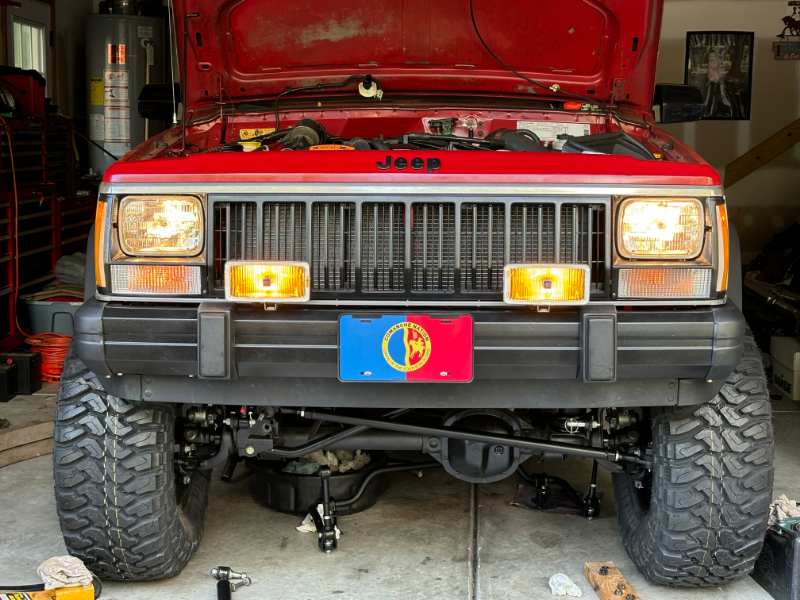
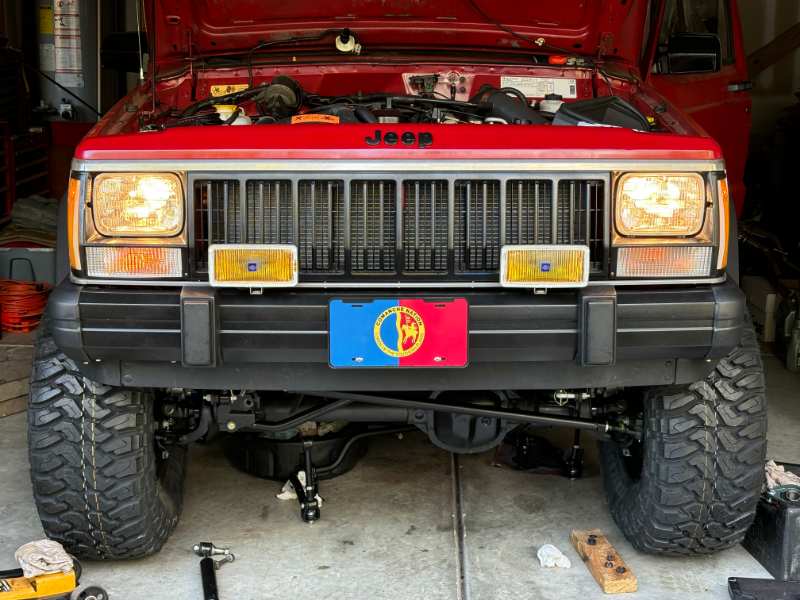
-
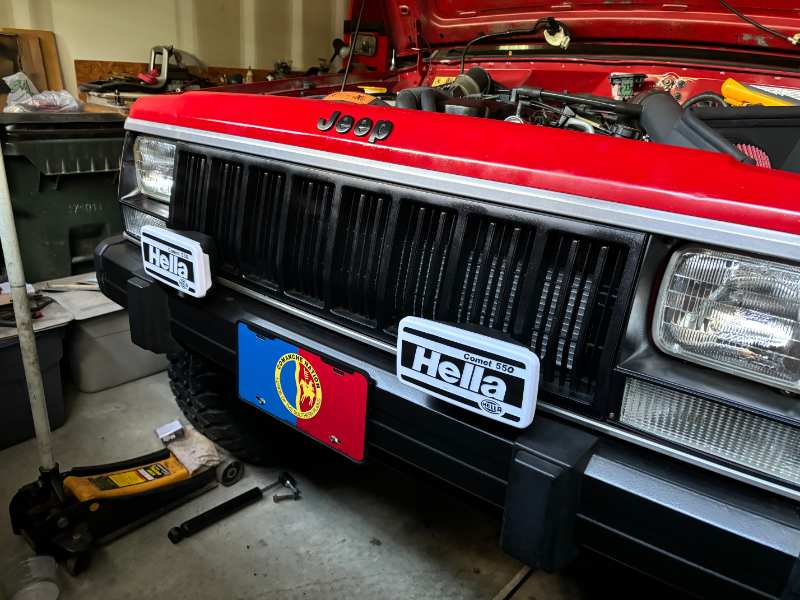
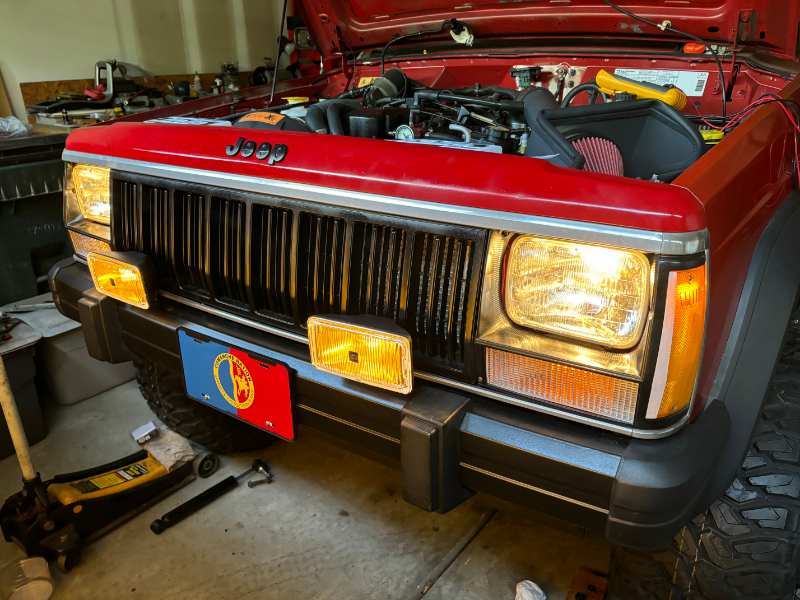
Still waiting on my local fab shop for something to cure my steering interference issue. In the meantime I went ahead and checked off another item on my wish list. Hella 550s, under $100. Wired in for factory style operation. Tapped the wires for C102 pins 6 and 10 on the engine control harness side since my lighting harness lacks all the fog light goods. Made 2 Y harnesses for the lights' power and ground and tucked them in neat with split loom. Hung the relay in the driver's side inner fender well close to where it would have been factory. Loving it...
-
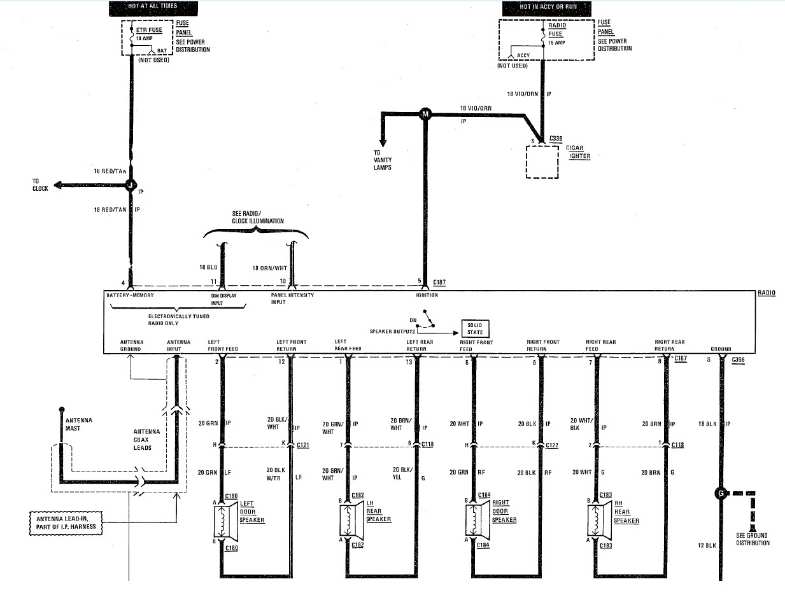
Your aftermarket stereo will (should) come with a connector for itself, with bare ends for whatever you're putting it in. I used a Metra adapter from Crutchfield for the factory harness side. I don't have a 1990 Electrical manual, but I believe it's the same as 1988. https://www.crutchfield.com/p_120701002/Metra-70-1002-Receiver-Wiring-Harness.html?tp=2977
-
ZJ V8 Steering Upgrade notes and experience
Gojira94 replied to coolwind57's topic in MJ Tech: Modification and Repairs
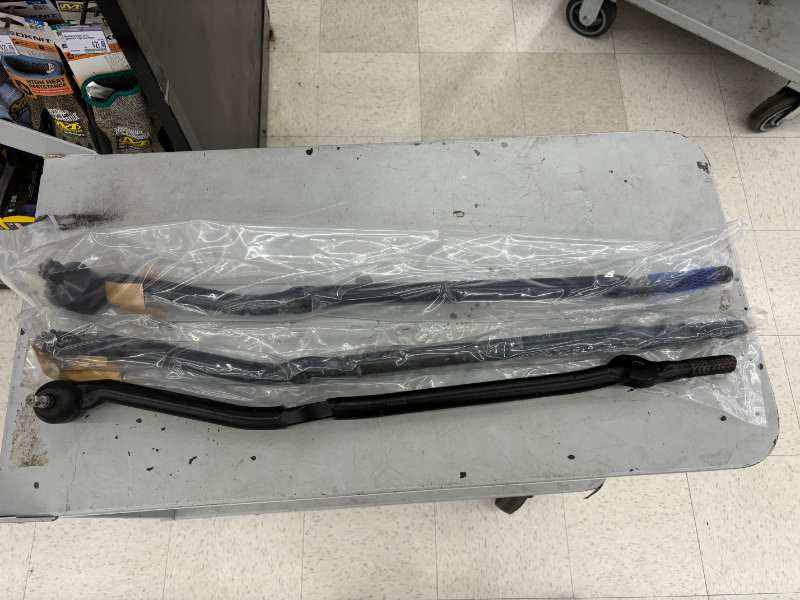
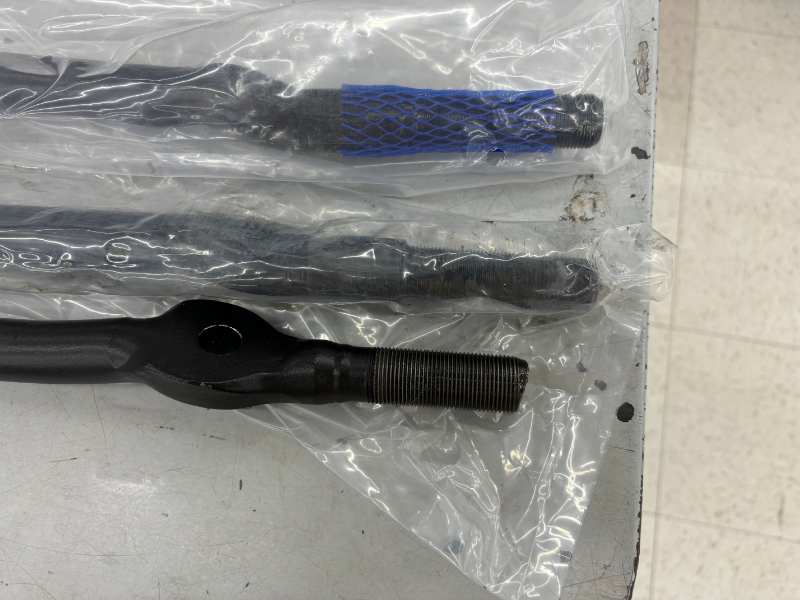
From bottom to top - Drag links DS1238, DS1311, DS1310: The most conspicuous difference is the steering stabilizer stud boss orientation. 1311 is rolled rearward a hair more than our 1238. The 1310 is rolled back even further. I can't see a way that this would matter at all, function or fitment. Tie rod stud boss is identical on all 3- .553" small side, .625" large side. Sleeve threading orientation to centerline of the drag link is straight on the 1238 and 1311. It's slightly canted to the rear on the 1310. The 1310 is .65" longer at the threaded sleeve end than the 1238, and the 1311 is .88" longer than the 1238.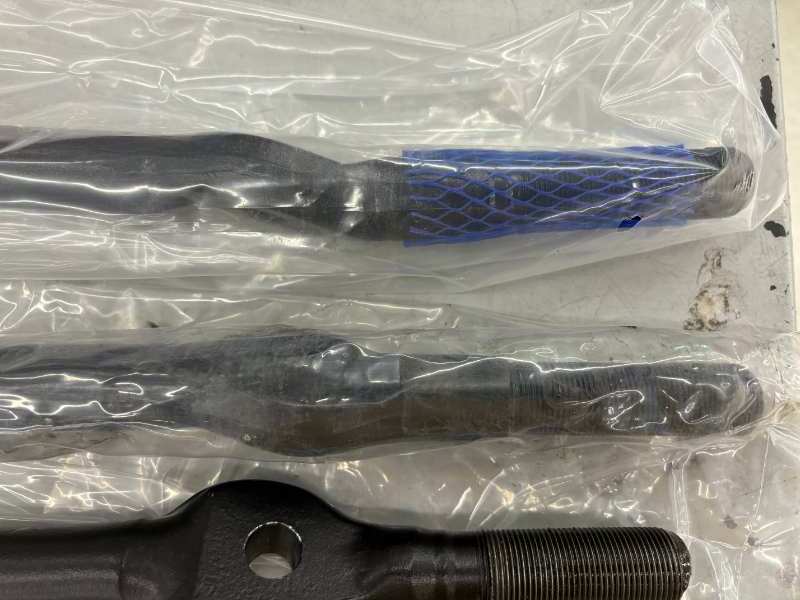
-
Might be helpful, this guy @WAEMID IVis a Club member. One of the best dissertations on CAD, its vacuum, and indicator light I've ever seen: 4x4 dashboard light
-
Taddraughn's 1989 Comanche Progress Thread
Gojira94 replied to taddraughn's topic in Member Projects: Your Comanches
Mine's a complete drivetrain swap from a '93 YJ, plus '99-'01 intake and keeping the 93 exhaust manifold on the '93 7120 head. My exhaust is a mix of off the shelf parts. But it's all controlled by Renix computer and harnesses. I did have to do some mods to the harness wrapping on the injector harness for the IAC and TPS connectors to get them to reach, plus making a harness extension for the IAT. I did a Durango V8 alternator swap with an external regulator as well, but all the original Renix harnesses could still be pulled and put on any other Renix vehicle, plug & play. The engine control harness is from '89 or '90, pretty sure it's '89. So all sensors I have are for Renix. Essentially I just went the route of least effort/ lowest cost I could manage to run an HO drivetrain on Renix. any 4.0 head will fit on any 4.0 block...