


ghetdjc320
-
Posts
5212 -
Joined
-
Last visited
-
Days Won
1
Content Type
Profiles
Forums
Gallery
Everything posted by ghetdjc320
-

Electrical connectors compilation
ghetdjc320 replied to ghetdjc320's topic in MJ Tech: Modification and Repairs
This is the connector I’m referring to. Do you know the part number for the female plug by chance?

-
Electrical connectors compilation
ghetdjc320 replied to ghetdjc320's topic in MJ Tech: Modification and Repairs
Do you have a manufacturer and part number for that one? The HO cluster connector is the one I’m referring to. Here is the temp sensor connector I haven’t been able to locate.
-
Electrical connectors compilation
ghetdjc320 replied to ghetdjc320's topic in MJ Tech: Modification and Repairs
Whatever you have data on would be great! Headlamp connector i have somewhere and will post them up. The tricky ones are the various JDM spec connectors such as mirror switch, gauges, hvac control deck connector, overhead console and that infamous temp sensor connector for the gauge sender (this one I’m still looking for). -
Let us know how it turns out
-
As I'm going through my build using a custom harness, I'm having to identify several connectors that have been a bit difficult to find. I was thinking of compiling the manufacturers and part numbers into a single thread in the DIY section for quick reference. I figured this info would be useful as original wiring harnesses in good condition are getting harder to come by. A reference chart could be useful for both restoration and modification. If you come across a specific connector, post it up and I'll add it to the master list. Please provide the connector location or what it plugs into, the manufacturer and the model number. A picture would also be great. If you need some help identifying a specific connector for replacement this might be a good resource also.
-
Project “Tomahawk”
ghetdjc320 replied to ghetdjc320's topic in MJ Hardcore Tech: Epic Journeys to Greatness
I think we should start a thread with all the known electrical connectors and part numbers as they can be tricky to find. I’ve been tracking down everything I can find and the one that stumped me was the power mirror switch connector. It, along with various other electrical parts were made in Japan and don’t use the standard Delphi/Aptiv/TE connectors. Fortunately I had a connection from working on Japanese watercraft that came through and found this most obscure of connectors. It is a Yazaki PA series with .120 pins. This is the 7 position connector that connects to the board connector for the mirror switch.

-
Project “Tomahawk”
ghetdjc320 replied to ghetdjc320's topic in MJ Hardcore Tech: Epic Journeys to Greatness
BORA custom wheel adapters just came in. Super awesome product. They offer lifetime warranty and inscribe your invoice number into the back of each unit. The rears are only 19mm thick and the fronts are 27mm thick. There are custom made for this Jeep with the JT M14 lug studs and the specific KJ (71.50mm) and JT wheel (71.54mm) hub bore. These are both hub and lug centric for a smooth solid ride.
-
Project “Tomahawk”
ghetdjc320 replied to ghetdjc320's topic in MJ Hardcore Tech: Epic Journeys to Greatness
Good to know. So it sounds like the f150 brake light should fit against the body in my application so long as I open up the appropriate holes for it. Here is what I’m thinking of running: https://www.morimotohid.com/Ford-F-150-15-Morimoto-X3B-LED-Brake-Light?quantity=1
-
Alcan is top quality stuff. They make the leaf pack based on how you use the truck not just how high you want it to sit
-
Project “Tomahawk”
ghetdjc320 replied to ghetdjc320's topic in MJ Hardcore Tech: Epic Journeys to Greatness
The 97+ NP 242 4wd indicator switch is a 4 pin unit which provide a separate continuity for the “full-time” and “part-time” 4wd positions. I identified the connector as a Delphi 12065298. -
Project “Tomahawk”
ghetdjc320 replied to ghetdjc320's topic in MJ Hardcore Tech: Epic Journeys to Greatness
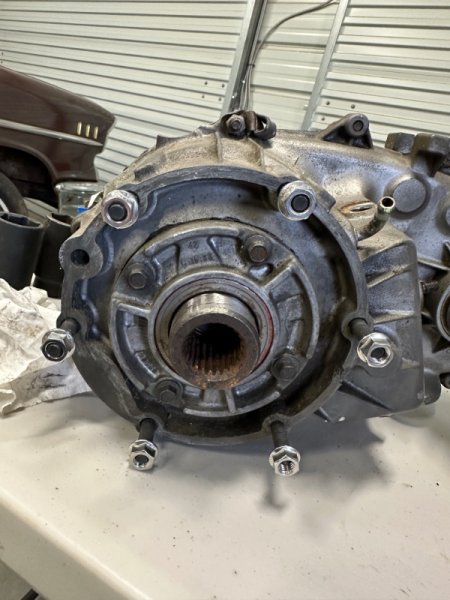
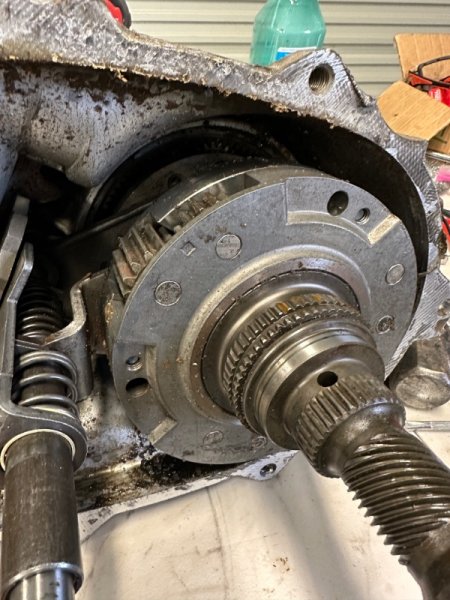
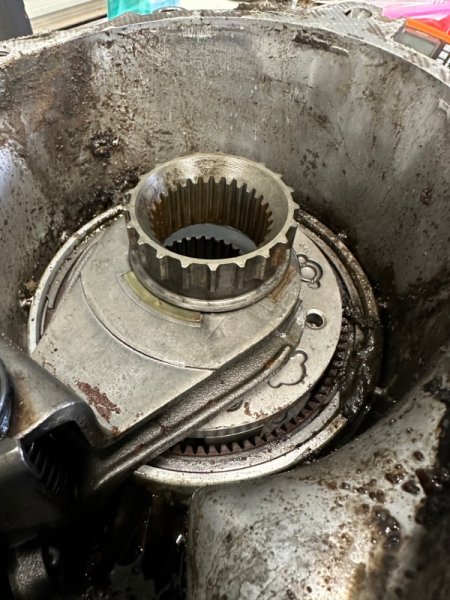
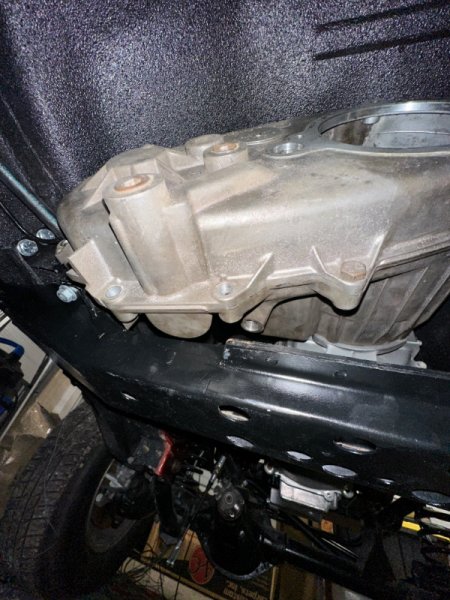
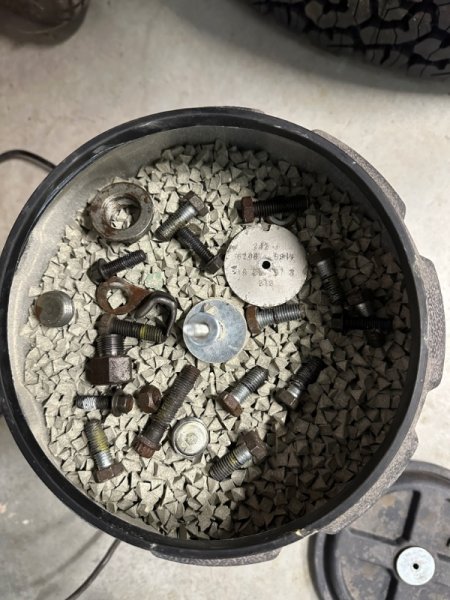
Stripped down the NP242 getting ready for a build. This thing was nasty inside. Once I had it all stripped down i used it to mock up where it was going to mount to check for clearance. Much easier to maneuver an empty shell. Put all the old hardware in the tumbler.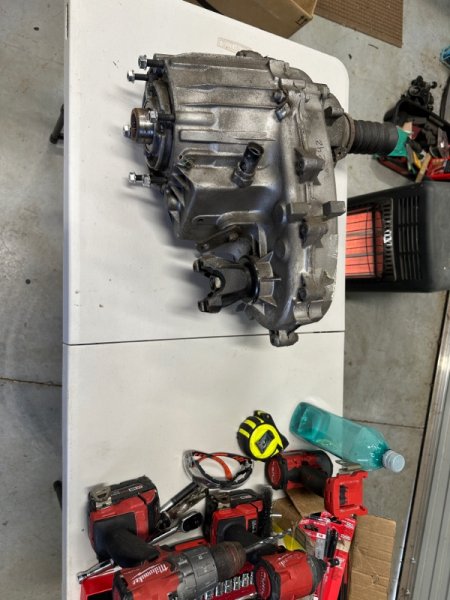


-
General spring makes a replacement spring that is good for about a 2" rear lift and they really don't ever settle/sag. Deaver or Alcan will make you a custom pack if you want. Otherwise your stuck with Rusty's or Hell's creek. Bastard packs are another decent option depending on the application.
-
Rust at Top Edge of Firewall/Cowl
ghetdjc320 replied to H3ADBANG4L1F3's topic in MJ Tech: Modification and Repairs
If water can make it down in the seam than so can por15 . Jack up the truck so the rusty seam in the cowl sits just a bit lower. Seal off the cowl drain and thin out some por15 (5% dilution with paint reducer). The thin dilution will run down into any place water was accessing. After drying, I'd follow that up with another coat or two of non-diluted por15. If you can reach back in there with a paint brush on an extension that would work too. Also, a thin caulk/paint scraping blade on an oscillating tool works wonders at removing the factory seam sealer and really exposing any rusty areas hidden below. -
Project “Tomahawk”
ghetdjc320 replied to ghetdjc320's topic in MJ Hardcore Tech: Epic Journeys to Greatness
Thanks for the info! I've been looking at the Morimoto 3rd brake light options. If you would have used the BPD adapter, would you have to have cut some larger holes for the back of the 3rd brake light? Do you think the contour matches the MJ cab in that area? -
Project “Tomahawk”
ghetdjc320 replied to ghetdjc320's topic in MJ Hardcore Tech: Epic Journeys to Greatness
The connector for the 97+ front clip wiring arrived. Very cool that it’s all ready to go. Just need to ID the wiring. The painless kit is quite easy to use overall and a pretty good option for the MJ. There are a few tricky items to sort out wiring on such as the wiper system, ac request and some of the lighting but it’s not overly complex. Integrating factory door locks, power windows, air locker system, audio system, heated seats, overhead console, dash cam etc. is where the complexity really comes into play.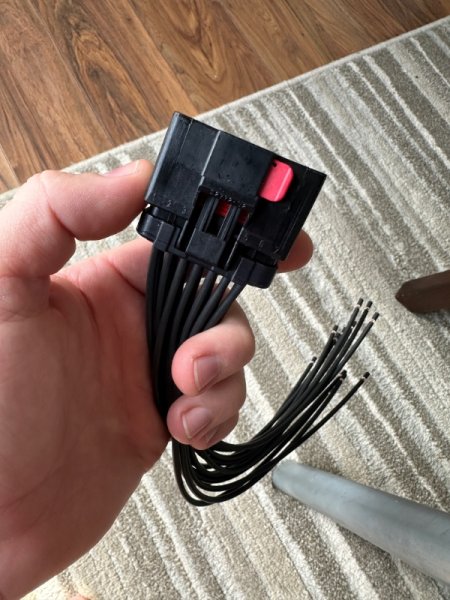
-
Project “Tomahawk”
ghetdjc320 replied to ghetdjc320's topic in MJ Hardcore Tech: Epic Journeys to Greatness
More parts. NP242 SYE from Tom Woods along with an oem 6 pinion planetary and front and rear 1310 pinion yokes with u bolts

-
I do like the CAD housings though. That upper control arm mount cast into the cad housing was awesome. The thin sheet metal bracket they added to the passenger side in later years was junk.
-
X2. Go with the method listed above, simple and effective. And it’s the spider gears that spin internally. Locking the passenger side will cause your driveshaft to spin all the time but you will likely never notice it or any MPG changes
-
Project “Tomahawk”
ghetdjc320 replied to ghetdjc320's topic in MJ Hardcore Tech: Epic Journeys to Greatness
This may not look like much but this was a lot of electrical work progress . Finished the refurbished e-brake install and the tail lights wiring from the fuse block to the bed. Integrated the air line for the locker along with the amplifier wiring. Also routed the overhead console wiring. The console itself has just been professionally rebuild and the circuit boards have been conformal coated now which should last a long time. I have wiring for a 3rd brake light and would like to add one but have a nice cargo lamp I was going to install. @Limeyjeeper You used a ranger 3rd brake light correct?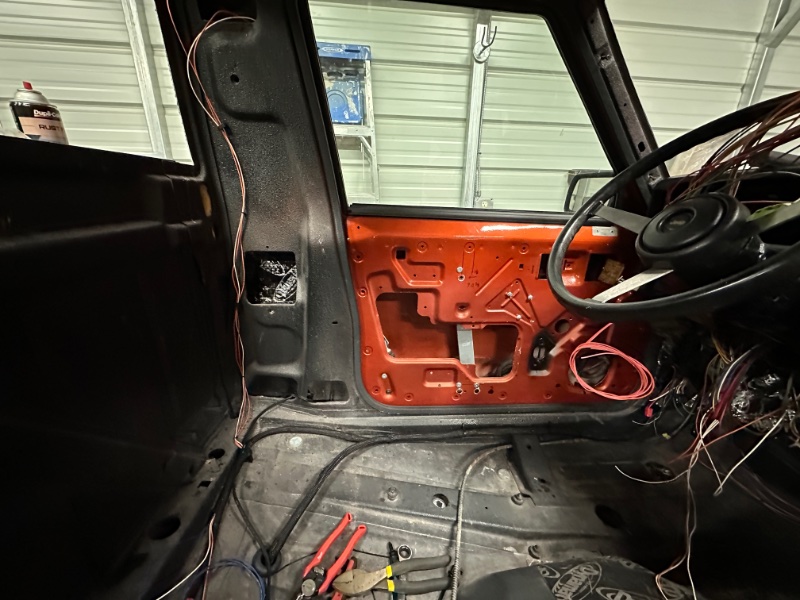
-
Project “Tomahawk”
ghetdjc320 replied to ghetdjc320's topic in MJ Hardcore Tech: Epic Journeys to Greatness
I didn’t measure it exactly but the front section of the hole is about 1.5” forward from the original cutout. I’m going to use a universal inner shift boot and mount it on a custom shaped aluminum plate that I’ll secure to the trans cover. -
Project “Tomahawk”
ghetdjc320 replied to ghetdjc320's topic in MJ Hardcore Tech: Epic Journeys to Greatness
Modified trans tunnel cover, rebuilt tcase shifter. All sealed with “right stuff” and stainless fasteners used. Added copper antiseize to all original machine-thread bolts as I’ve had to fight them far too often when they get rust-welded
-
Project “Tomahawk”
ghetdjc320 replied to ghetdjc320's topic in MJ Hardcore Tech: Epic Journeys to Greatness
Agreed. I have an extra drivers side fender that was unusable I can try on. They actually seem pretty straightforward compared to doin say a new sheet metal panel. -
Need to ID a connector part number
ghetdjc320 replied to ghetdjc320's topic in MJ Tech: Modification and Repairs
Went to mouser and started filtering till I found it. They have a visual search there that is easy to use. Much easier to find these 14 pin connectors than say a 2 or 4 pin one though -
Need to ID a connector part number
ghetdjc320 replied to ghetdjc320's topic in MJ Tech: Modification and Repairs
Found it! Aptiv part 10763414. These are Aptiv/Delphi Apex 2.8 series connectors. -
Project “Tomahawk”
ghetdjc320 replied to ghetdjc320's topic in MJ Hardcore Tech: Epic Journeys to Greatness
The odd thing with the flares is that you don’t get any sort of template. It’s obvious that the placement of the bolts is not an exact science for Notch. You just have to eyeball everything then mark and drill. And if you’re off by a bit, just make the holes bigger with a unibit and use the huge washers provided .