


ghetdjc320
-
Posts
5079 -
Joined
-
Last visited
-
Days Won
1
Content Type
Profiles
Forums
Gallery
Everything posted by ghetdjc320
-
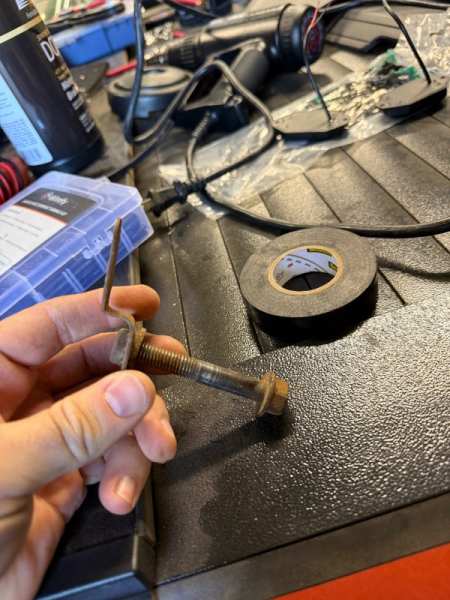
I'm reinstalling my tailgate and need to see how the lower hinge pivot points are mounted to the body. These are the ones that mount near the taillights. It looks like there is some sort of bolt and nut on one side and a smaller bolt going into a threaded hole. Any pics or diagrams would be great
-

General Spring replacement leaf
ghetdjc320 replied to JIMMYRIG's topic in MJ Tech: Modification and Repairs
Let us know how they work out for you if you don’t mind -
General Spring replacement leaf
ghetdjc320 replied to JIMMYRIG's topic in MJ Tech: Modification and Repairs
I will say, the spring rates they have along with the free arch specs have been quoted on here before but the specs they have don’t match parts manuals from the era. No complaints though, they are a great low lift spring. But definitely not an oe replacement. Both springs should ride about the same on road but there is more overload on the 1700. Free arch and lift should be the same. Definitely less flex from the 1700’s, though the 1250’s also suck at flex unless you’re wheeling with a loaded bed. Id recommend the 1250’s for pretty much any application for an on/offroad rig -
Project “Tomahawk”
ghetdjc320 replied to ghetdjc320's topic in MJ Hardcore Tech: Epic Journeys to Greatness
Front fenders are getting trimmed for the notch flares. Honestly, the fitting from the Notch flares is utter crap. Lots of work to get them to fit correctly. Grill, fenders and hood all getting prepped for final fit up and paint.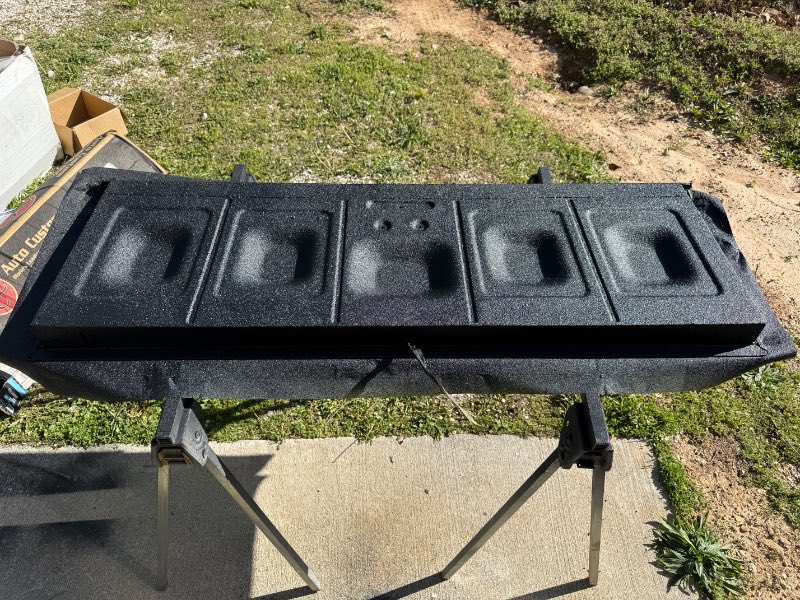
-
Project “Tomahawk”
ghetdjc320 replied to ghetdjc320's topic in MJ Hardcore Tech: Epic Journeys to Greatness
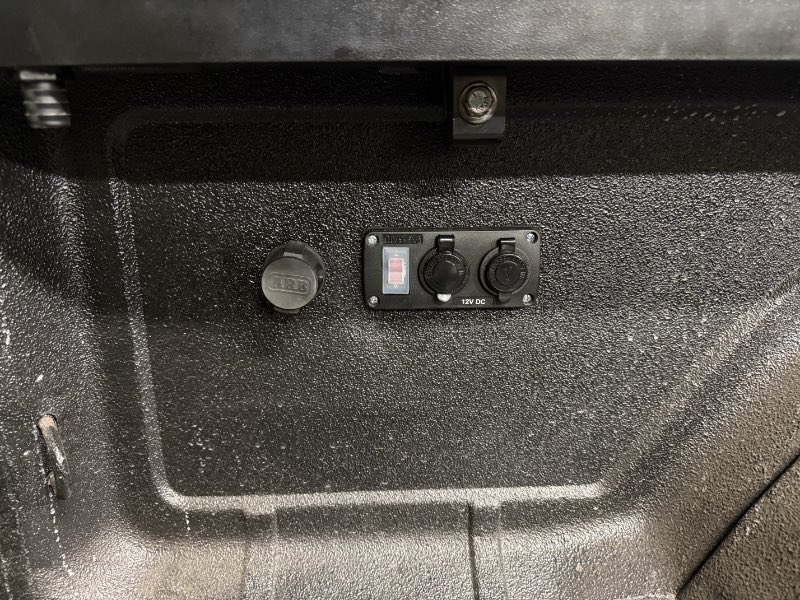
It’s from blue sea systems. They make a bunch of styles of these panels with various modules depending on what you need. -
Project “Tomahawk”
ghetdjc320 replied to ghetdjc320's topic in MJ Hardcore Tech: Epic Journeys to Greatness
-
Project “Tomahawk”
ghetdjc320 replied to ghetdjc320's topic in MJ Hardcore Tech: Epic Journeys to Greatness
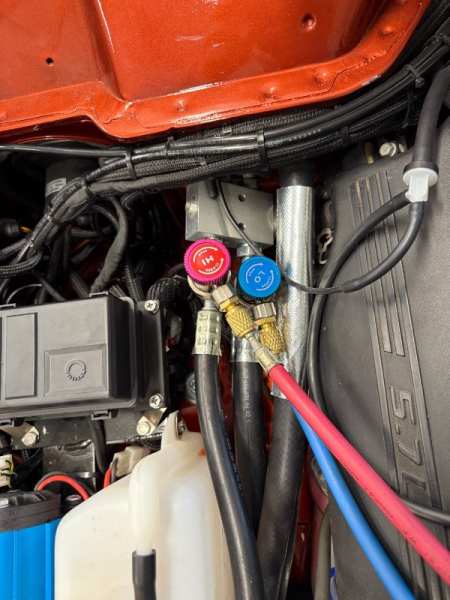
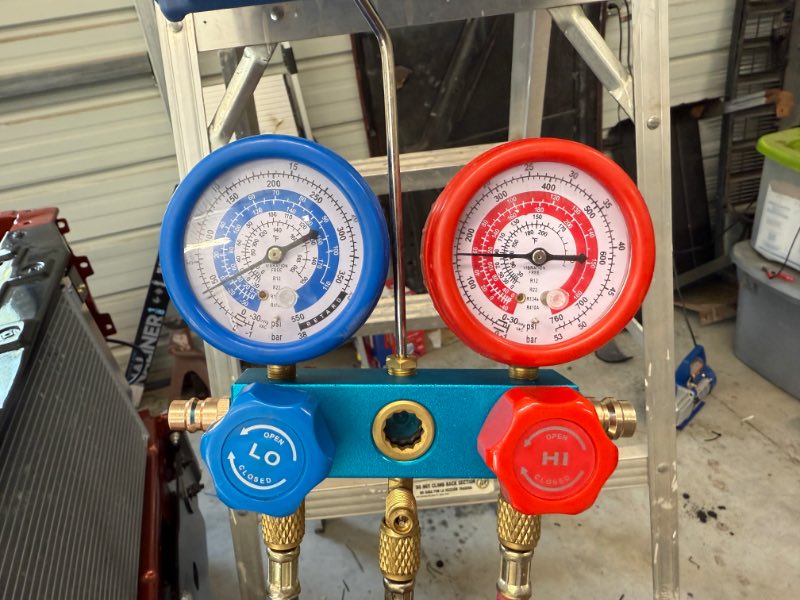
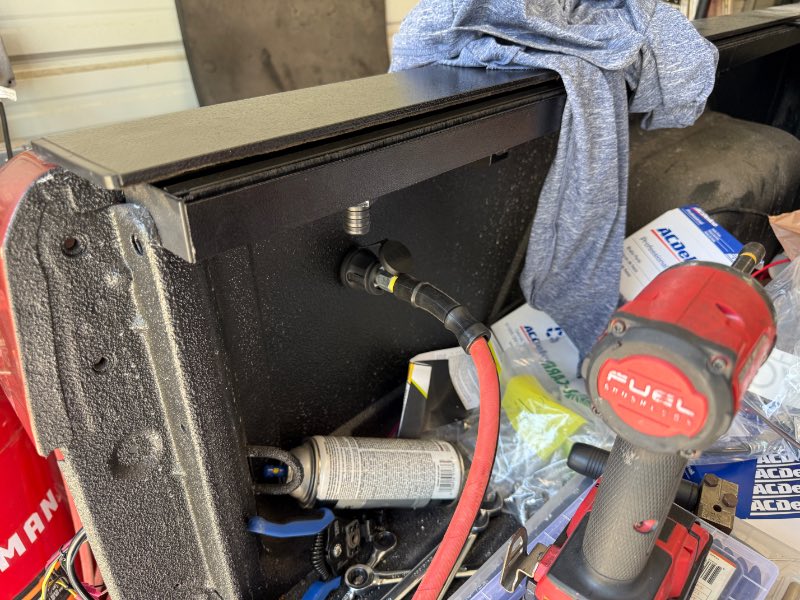
Tech note for the A/C system: The C5 corvette PCM does indeed need a 12v+ switched input vs the 12v- that is rumored on pin 17 of the red connector (C1). I was unable to activate the A/C at first and had to rewire the relay to provide the 12v+ signal. I ran the relay ground signal through the evaporator core thermistor (freeze switch) to switch off the relay if a freeze occurs. I also was not getting 5v reference signal on pin 45 of the red connector which is supposed to provide the 5v reference signal to the corvette a/c pressure sensor. I was able to repin that connection to an unused 5v reference signal that the eco provides for an automatic transmission output. This made everything work perfectly. The ECU now has full data and control over the A/C system so it will automatically account for speed, engine temp, engine load, wide open throttle and rpm to determine when the compressor should activate. This level of control will ensure a long lasting A/C system and modern factory style ac functionality. It's worth noting that it took 28oz to fill my a/c system and get a 42psi low side and 160psi high side reading. This A/C system is quite custom but I am running the later style parallel flow condenser and evaporator which require some slight mods. I'm also running an aftermarket dryer from vintage air and all my hoses are custom made. I used a nice T adapter fitting to install the 10mm port for the GM pressure sensor. I ran both my high side and low side ports right off of the expansion valve which provides the easiest access ive ever had to service the system. I have an extra high side port I installed down at the compressor so if I ever need to compare high side readings before and after the condenser & dryer I'll be able to quickly diagnose any issues. On the subject of A/C oil, genuine Sanden compressors come pre-filled with the correct amount of oil (in my case for the SD7B10 - PAG 100). The amount of oil in the compressor is sufficient for up to 4lbs of freon per Sanden. My system took just under 2lbs so the levels are excelent. If you ever flush out your A/C system, lookup your compressor specs to see how much oil the compressor needs. This is how much you should add to the system. When vacuuming a completely new system, the oil is not extracted during the vacuum application so there is no need to add more. This would only be when purging out an old system. The vacuum is applied to help dry out any moisture and remove contaminants. -
truck twitches to the left under heavy braking
ghetdjc320 replied to Pete M's topic in MJ Tech: Modification and Repairs
If it’s a true 3” lift then it’s about 3/4” that the track bar moves. Adjustable track bar solves this issue as you can tune it in. I’m not sure the reason behind the drop brackets though with a 3” lift. Some adjustable lowers and stock uppers is all that’s needed with that lift height to set your caster properly. -
It’s the bead that can present a problem. But it should be fine so long as you don’t air down much when off-road
-
That’s a very wide wheel for the tire width. Looks nice though
-
truck twitches to the left under heavy braking
ghetdjc320 replied to Pete M's topic in MJ Tech: Modification and Repairs
What kit is this? -
Project “Tomahawk”
ghetdjc320 replied to ghetdjc320's topic in MJ Hardcore Tech: Epic Journeys to Greatness
Yep, this is a digitally controlled air outlet. It can air up or down tires to a specific preset very quickly. There is a blue sea power panel that will be installed next to it as well -
Project “Tomahawk”
ghetdjc320 replied to ghetdjc320's topic in MJ Hardcore Tech: Epic Journeys to Greatness
-
If you haven’t found one yet, I can send you this one. Just cover shipping. I can drop it at the post office today.
-
Run the 1250 springs . Even those are a higher spring rate than most MJ’s came with.
-
I think that may be a difference between long bed and short bed
-
You could loosen it and wiggle it out of place, I suppose, to get the steering shaft to come free but there is still no need to do anything with the actual column
-
Although not original, these are very nice kits: https://blackmagicbrakes.com/ols/products/heavy-duty-flag-nut-with-arp-high-strength-ss-bolt ive ran them in all my Jeeps that use this style track bar setup
-
How to View HEIC Images?
ghetdjc320 replied to AnotherOldJeepGuy's topic in Forum Issues, Ideas, Testing
HEIC is a typical iPhone HD format and should be viewable on apple devices running the latest software. iPhone tends to default to this file format when taking pictures but it can be updated to use a more compatible file type (aka JPEG) -
Why are you guys doing anything inside the cab to remove the steering shaft? All you need to do is loosen both bolts and the steering gear box. There is no need to loosen the steering column for this job
-
To remove the stock shaft, it’s easiest just to pull out the steering box. There are two retaining bolts on the shaft itself, one on each end.
-
PM sent
-
That’s it! Can I get one?
-
With a pre 90 knuckle, I'm thinking you could swap over the WJ rotors or run the WK rotors. The calipers I'm running are WK2 calipers and thy bolt on to the knuckles once the holes have been enlarged slightly.
-
Thanks for the info! I think the long standing unanswered question has been whether or not we can just use WJ unit bearings on a D30 without using the WJ knuckles or spacers. Opens up wheel availability for 5x5 patterns without adding to the track width