


coolwind57
-
Posts
992 -
Joined
-
Last visited
-
Days Won
6
Content Type
Profiles
Forums
Gallery
Everything posted by coolwind57
-

Anybody running 12 hole injectors?
coolwind57 replied to WahooSteeler's topic in MJ Tech: Modification and Repairs
I've got an extra set of 746s that are less than a year old if you need them. Contact me and make me an offer. -
Jeep Turbine 10-Spoke Rims Restoration
coolwind57 replied to NEO auto's topic in MJ Tech: DIY Projects and Write-Ups
interesting without the caps. I assumed they just wouldn't look right without them, but you've got me kinda diggin' the look. i agree with WahooSteeler. -
Heater hose sizes for 87 MJ
coolwind57 replied to Top C's topic in MJ Tech: Modification and Repairs
i remembered that there was a funky issue with using 97+ heater hoses on our Renix MJs, but I couldn't remember exactly what it was. I had to go look up my notes, which I posted under my build thread. Here's what I did for my conversion last year: I converted from closed to open system. I did the upper hose pressure cap technique, retaining my Renix-era radiator. I used a later model XJ reservoir and found that I was able to fit it pretty well back on the firewall, facing opposite of what others had facing. My old pressure bottle mount was modified and with a little welding, it all fits securely. Painted white because that's all I had at the time. I'll probably go over it with some black paint later on. Man, it sure cleared up a lot of space around my oil filter. Simplifies the heater hoses and overall cooling system now so that even I can understand and more easily troubleshoot. I used the curved ends nearest the heater core of the 97+ heater hoses that I acquired from the junkyard. Also fitted in a Prestone backflush port. Heads up if you don't already know: The 97+ heater hoses will fit perfectly--if you want reverse flow into you heater core, which you DO NOT WANT. In 97, Jeep cleaned up all the mess and complication of the heater control valve mess, but in doing so, they also reversed the outside diameters of the two heater core pipes. So in other words, the front of the 97+ heater hoses plug in to the water pump and thermostat neck of the Renix era engines perfectly. The rear ends of the hoses are now opposite IDs of what they should be to fit Renix. A bit of a disappointment I suppose as I had plumb in 3/4" to 5/8" reducers for both hoses..thumb.jpg.32682280a8ca387f7f4f1a2f2a263d48.jpg)
.thumb.jpg.92522bddb4cabf1be109a15747f034a4.jpg)
-
Upgraded Battery Cables!
coolwind57 replied to MeanLemons's topic in Vendors- members making products for MJs
yep I witnessed the same effect. I climb a couple mile hill on I-64 on my way home each day. That's where I pleasantly noticed the difference. -
I too deleted my EGR-- I completely removed it, gutted and filled the EGR assembly block that goes onto the intake. I cut off the EGR tube and welded up a plug on the renix header. Also repaired my cracks and welded in gussets between the header tubes for added strength. Finally, I added a flex tube just after the downpipe turned horizontal. Just some ideas for you, amigo.
-
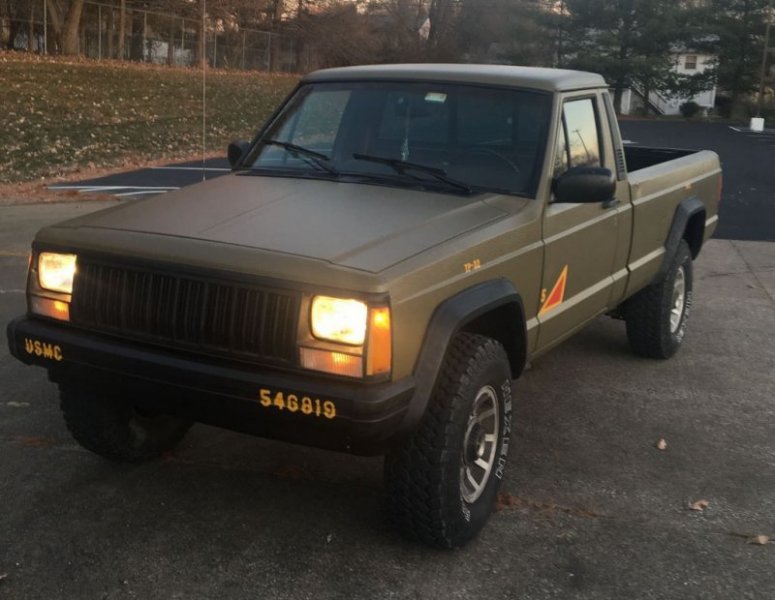
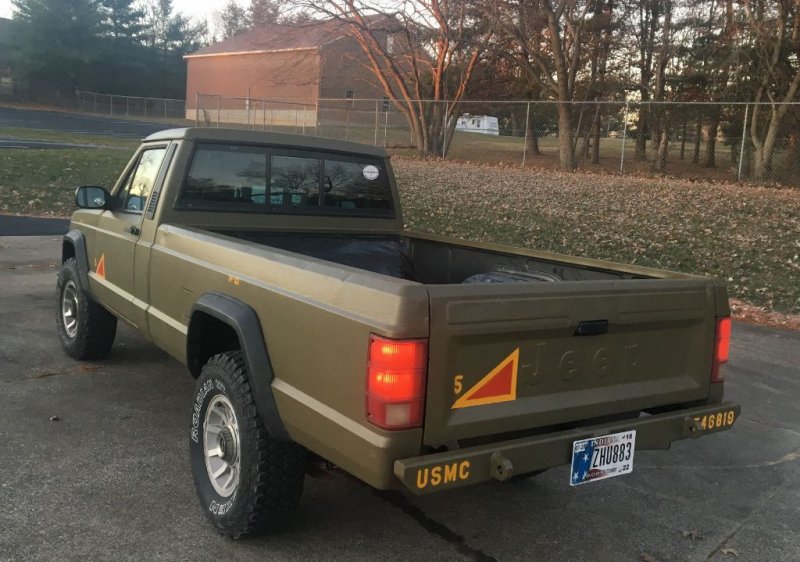
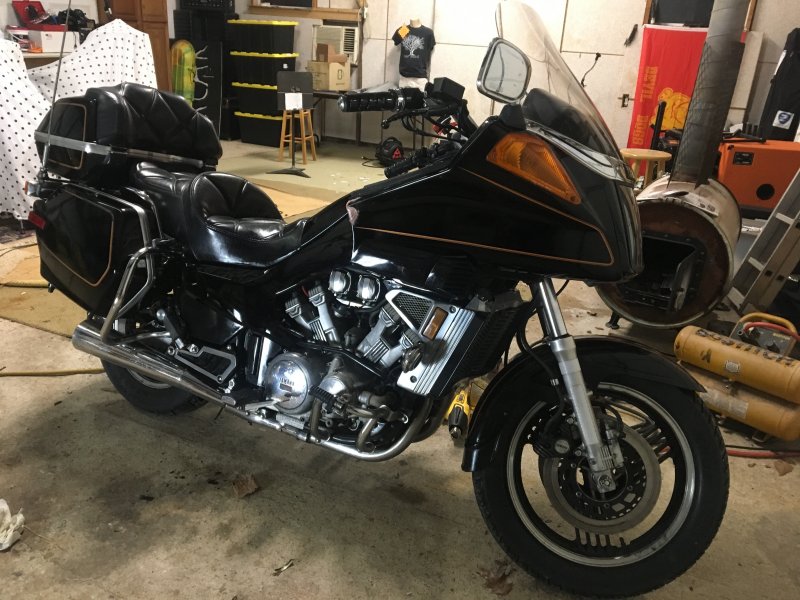
My hot, much-younger wife and I: I'm in a band: My project bike, 1983 Yamaha Venture: And, "Warrior" before I put his foglights on:


-
I'd go open system, man. One of the best things I ever did. May solve your issue outright, but at least it'll make it easier to troubleshoot in the future. You're thermostat may be dead now.
-
Good work, Pete
-
Yes. Same here. Tap that bad boy when its removed from the engine. I too have a bored out 60mm Renix TB from Meanlemons. I'm very happy with it. That dumb plastic vacuum MAP hose (and the two pieces on the ends) causes more people to curse over irratic rpm and idle issues than about anything.
-
I'd be curious of what you did (if anything) that made it better. You've got mine and Pete's curiosity stirred up.
-
My first thought would be to check that MAP sensor vacuum line. It runs from the MAP sensor on your firewall to a port on the side of your throttle body. A poor connection or a crack in the hose effects critical vacuum, which makes your vehicle run like hell--especially at idle. Your symptoms are nearly exactly the same as mine when I discovered a bad connection here. Mine put out a horrible unburned fuel smell at idle too.
-
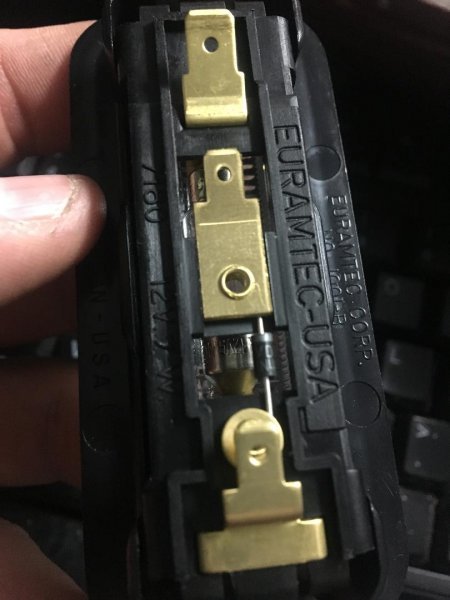
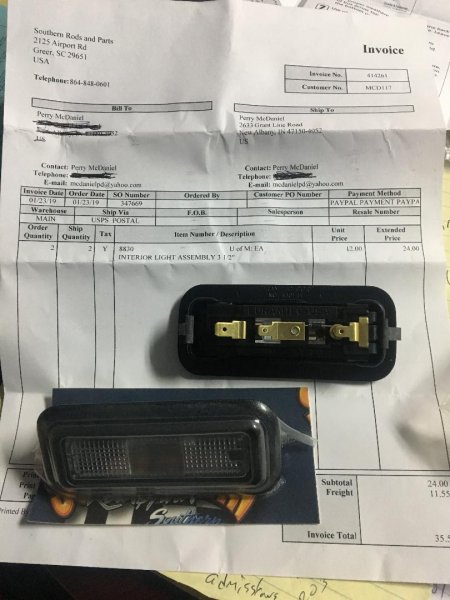
I recently ordered Euramtec interior flip to replace my aggrivating stock pillar lights. Bought them from Southern Rods and Parts and they arrived about 4-days later, from SC to my home state IN. Modification of the existing pillar light holes was extremely simple: I just cut MAYBE an 1/8" of the thin plastic pillar cover on the forward vertical side. Simply used a utility knife, as again the plastic is so thin there. No need for cutting to enlarge the horizontal sides. Once you snap the two pieces of the light assembly apart, the mounting half pops right in your newly enlarged hole. A couple of things I learned: Changing the bulb required me to separate the two pieces of the light assembly (unless someone else knows a trick that I couldnt figure out). To pop the two pieces apart, stick a flat screwdriver in between either of the two ends of the assembly, prying the two tabs. The interior lense assembly pops out from the front. I eliminated the stock harness connector and wired in new female spade connectors onto the 3 Jeep wires. The BLACK with TRACER wire went to the center terminal. The SOLID BLACK to the end that has the diode. The RED goes to the opposite end. This is if memory serves me correctly. Lighting was really improved, but if you really want to go big, get this light from Amazon: https://www.amazon.com/gp/product/B01EJO3QIK/ref=ppx_yo_dt_b_asin_title_o00__o00_s00?ie=UTF8&psc=1 Don't make the mistake like I did and be looking into this thing when you accidently make an electrical connection. I was seeing spots for several minutes afterwards. This pair looked to be of quality as I unwrapped them. Even came in their own, nice little storage box like you'd see when you buy jewelery. These things are insanely bright and when installed, light up my cab as bright as a lightning storm. Best upgrade for ol' Warrior I've done in a long time. Highly recommend.

-
Yes, that would be great. I tried a time or two and couldn't figure it out. Please feel free to advise.
-
Ah. You got me. Also called a one-directional-current thing-a-ma-jiggy.
-
Replacing Brake Distribution block
coolwind57 replied to dinghyboy's topic in MJ Tech: Modification and Repairs
I did not jumper it. I'm pretty sure I just left it hanging. -
Replacing Brake Distribution block
coolwind57 replied to dinghyboy's topic in MJ Tech: Modification and Repairs
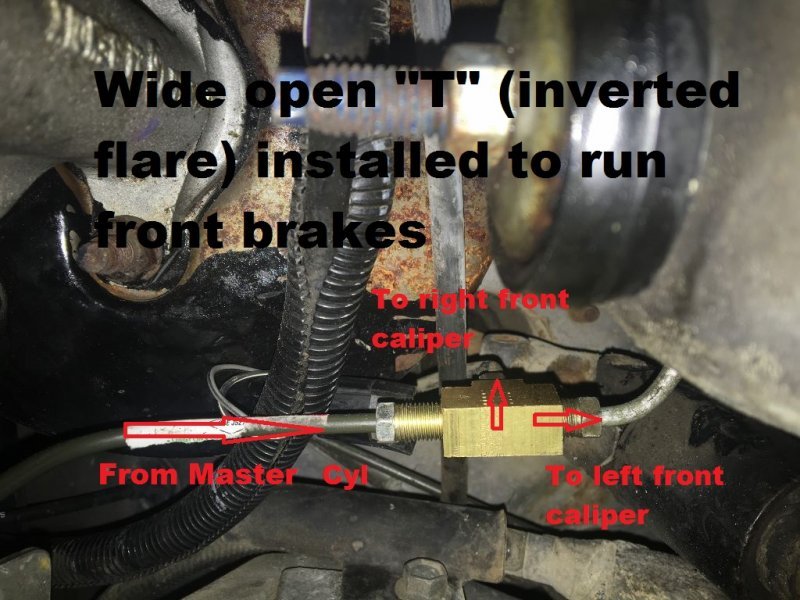
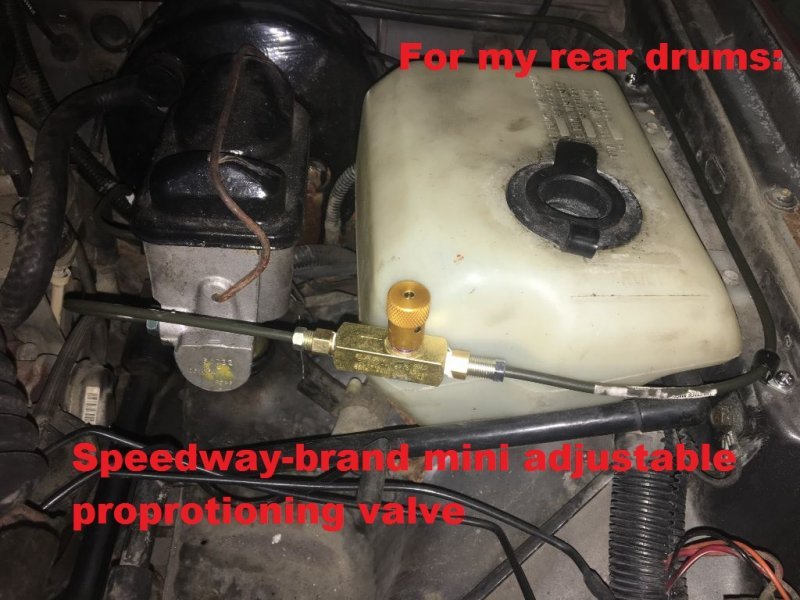
I suppose I didn't really answer your question with my first response: I completely removed the entire proportional block and tossed it in the trash. I copied the majority of my write-up for you to ponder upon. Pluses and minuses to everything, my friend. This thing I did drives a couple of people crazy that I "illegally" removed my brake warning light. These same guys have probably cut out their catalytic converter. Anyhow: MY SITUATION: Original front disc and rear drums. Height Sensing Valve (HSV) half-assed deleted by PO. Still had 2 old crappy rusty brakes lines running to rear. Acceptable brakes as a whole, but redoing it all because I already have the truck apart anyway and didn't like the rusty, brittle looks of things. Plan is to renovate brake system for added reliability and maybe even get some added performance as a bonus. I chose to start things off by trying Cruiser54's front Proportional Valve (PV) trash and replace procedure. This seemed logical as a way of simplifying things and perhaps improving front brake performance.. Plus He's got real-world experience doing this and it has worked for him multiple times. I figured at least to me, that the MJ PV was designed to work a system that included the additional second brake line to the rear (to be used in cases of front brake failure) AND a system including a well-working HSV. Since I now have neither, the MJ PV is no longer being used exactly according to its design with those two aspects missing. The MJ PV meters the front brakes down considerably after the brake line run into it from the master cylinder. Just look up some of Cruiser54's pictures of those tiny little orifices in there. Remove entire PV and then T-off to your front calipers, using an inverted flare brass T. You should get better braking because the small orifices of the prop valve to the front brakes are eliminated. You're now running near-full opening size of the hard brake lines that are coming off direct from the master cylinder. Makes sense to me so I did it: and here's a view from side/bottomp: Now technically I should experience slightly better front brake because I have larger interior diameters running from the master cylinder on through to the calipers. Because I am eliminating some front and rear "bottle-necking" I used to have at the now-removed PV, I agree with many others here that an Adjustable Proportioning Valve (APV) may be a good idea FOR THE REAR BRAKES. This should eliminate any rear brake lockup that I may experience if I am running a heavy payload. The original intent of this thread was to see where other guys were mounting their APVs. I ended up deciding on mounting mine under the hood after all. Even though TJ1 had a cool location on his rig, I ultimately sided with HOrnbrod's opinion of not having brake lines inside my cab. Mounting near the rear of the bed would likely affect longevity and stable function due to full exposure to elements. I completely eliminated my two old hard rear brake lines and ran a new single line back there the the axle. So here's where I ended up mounting my APV: I chose the Speedway APV because it is compact and appears to be simple and tough. Another cool feature is that it allows for full shut down of fluid to the rears, which can possibly come in handy when working on your brakes. REMINDER: If you've read much on the topic of HSV deleting/PV deleting/running a single line to your rears, keep in mind that you'll lose that safety feature that allows full braking to the rears in cases of front brake failure. Speedway didn't have comprehensive flow specs on that mini APV that I show in the picture. it shows gpm and max psi and states that it can be completely shut down whatever line it is controlling if desired. I was curious of flow characteristics during "fully open" setting. FYI for the benefit of anyone interested in this particular device, I sent them a message and here's their response: Perry, I just spoke with one of my techs and he stated that it will not be fully open when the valve is fully open, there will still be some restriction there. Thinking around 20% restriction, so it'll flow 80% of the fluid that a straight line will. As far as I know, we do not offer a proportioning valve that will flow as if there is nothing there while fully open, however the purple proportioning valve might flow a little better as it is not a complete shutoff valve while fully closed, there will likely still be a bit of resistance there. https://www.speedwaymotors.com/Speedway-Purple-Adjustable-Brake-Proportioning-Valve,23498.html My brakes ROCK now! Got my MJ running last night and took her for a spin. My brakes were not so bad to begin with. But now they are excellent! Feels like I have 4-wheel disc brakes. Many thanks to Cruiser54 for the advice on ridding the front proportional block. I have killer good brakes, and I now have the ability to adjust the rears (or shut them down if I choose to)"" Additional notes: 1. It took some active shopping around to find the correct sized fittings/adapters to use stock flare fittings and MC orifices with new....I didn't want to have to cut double flares on new and factory brake lines, so I had to use my brain a bit during shopping to avoid cutting/flaring. 2. By design, I certainty now have isolation of from and rear brakes, for sure! Front and rear have two different and very separate paths. They obviously already have two different reservoirs inside your master cylinder. My system continues from there to NOT cross paths with each other. As I had mentioned in my original comment on this thread above, there are advantages and disadvantages to nearly anything you do. I'm pushing full volume to my front brake calipers now instead of dealing with a factory bottle neck. Overall, front-and-back, I can say that I've got superior braking ability compared to what I originally had. And at great cost and time savings. Disadvantage is that I may lose some "fail-safe" capabilities, if you will. I will no longer have a working brake warning light. I weighed perceived consequences, and then decided on my course of action. This method works for me, no regrets. 3. If I lose my front brakes, I still have rear brakes, although the addition of the aftermarket adjustable prop valve doesn't give me full 100% use of the brake line ID. I do not know to what degree my rear brakes assist my stopping if I suddenly lose my front. In my 35+ years of driving, I don't recall ever running into the loss of brakes of either end, so I'm not too worried. I can shut down my rear brakes totally if I want to. If you like to show off and do burn-outs, then this is a nice feature! This isn't me, but I give it as an example. Shutting down rears is also nice if you're working on your rear brakes and want to shut off fluid completely.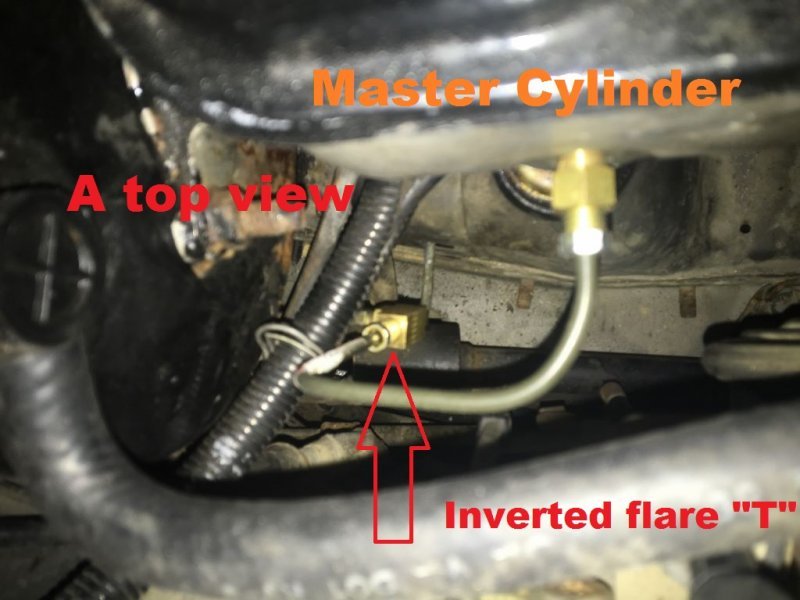
-
Replacing Brake Distribution block
coolwind57 replied to dinghyboy's topic in MJ Tech: Modification and Repairs
This is what I did: 1. Removed front proportional block. Install inverted flare T to the front brake lines. 2. Removed both rusty lines going to rear (Height Leveling Valve had already been bypassed by PO). 3, Installed single brake line to rear, with adjustable proportioning valve installed under the hood near the master cylinder. -
Replacing Brake Distribution block
coolwind57 replied to dinghyboy's topic in MJ Tech: Modification and Repairs
i deleted my brake distro block altogether with no regrets. Freaked a couple people out here on the forum, but Cruiser54 has successfully done a few. I've had no negative issues and much-improved braking with even the stock booster. It's another option for you to look and and evaluate. -
Got my Euramtec lights in just now. Not bad looking and quick shipping from Southern Rods and Parts. Four days since I ordered, from South Carolina to Indiana. Interesting. They used a resistor connecting a link between the second and third spade connections.

-
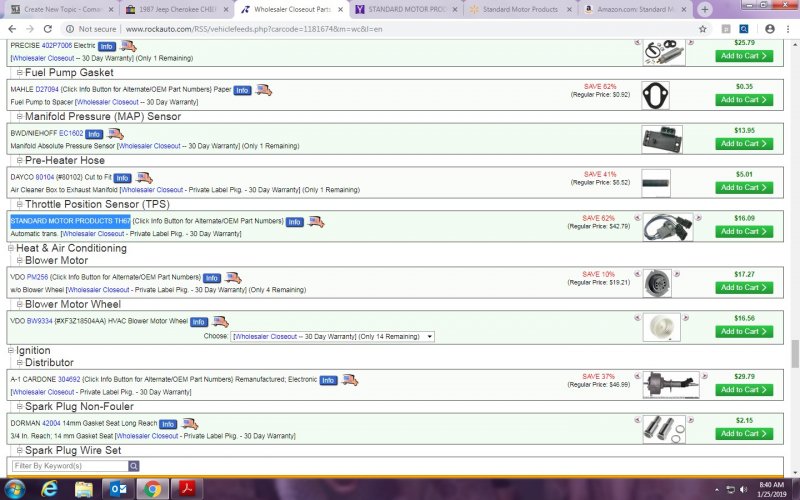
For those looking for a new TPS, I just noticed that Rock Auto has the TH67 on clearance for $16.09. Amazon sells them for $39.99. It's my understanding that this is a fairly reputable TPS brand.
-
^^^^ditto what he says. I have a couple of pics of what I did on my build thread, page 3 if you're curious. Look up "Coolwind57's"
-
You beat me to him. He was out of stock when I contacted him.
-
Oh, I am so saddened to hear this. Don sure was a great source of friendly and competent help for me as I worked on my truck. Many private messages back and forth and he never appeared irritated that I asked for his help so often. To Don's Asawa: Taos puso po akong nakikiramay saiyo. Rest in Peace, my friend.
-
ouch. $29.95 each! Found these on eBay, and they run $16.99 each, plus $2.69 shipping from Michigan to Indiana. https://www.ebay.com/itm/Tracker-Marine-Interior-Map-Courtesy-Light-7180-/110649595878 I just ordered my pair here. $35.55 total for two, so about the same price as those on eBay. The are $12 each, but $11.55 to ship them both. Looks like they're using a different part number, however it looks to be the same light.
-
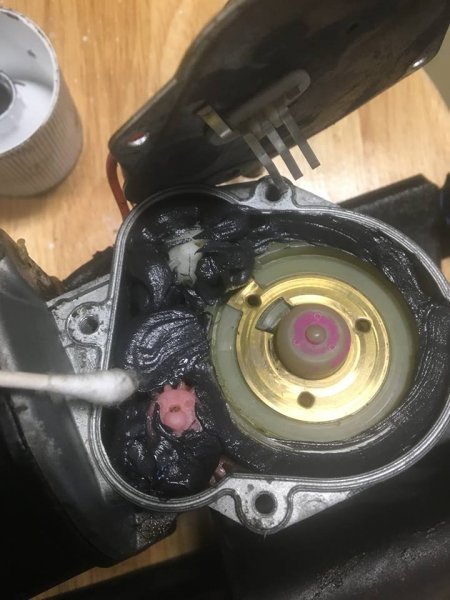
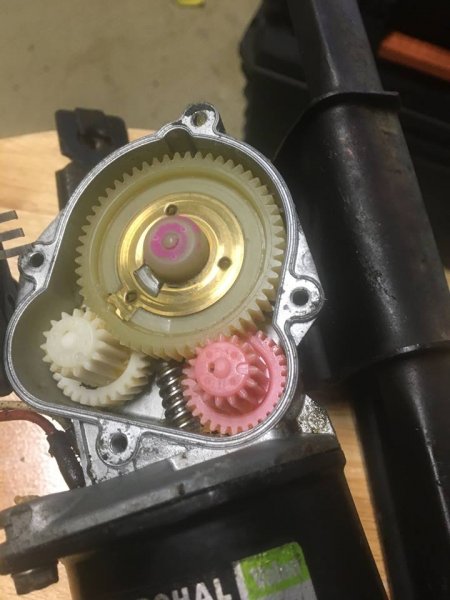
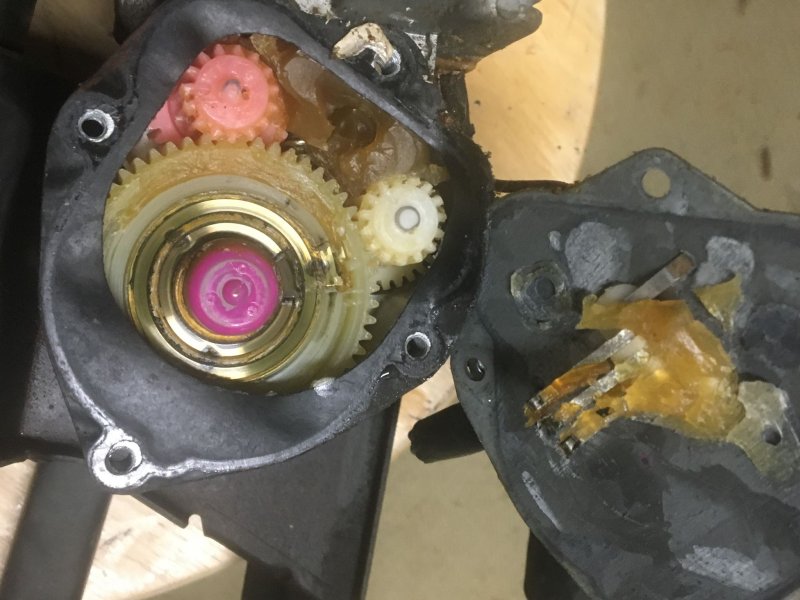
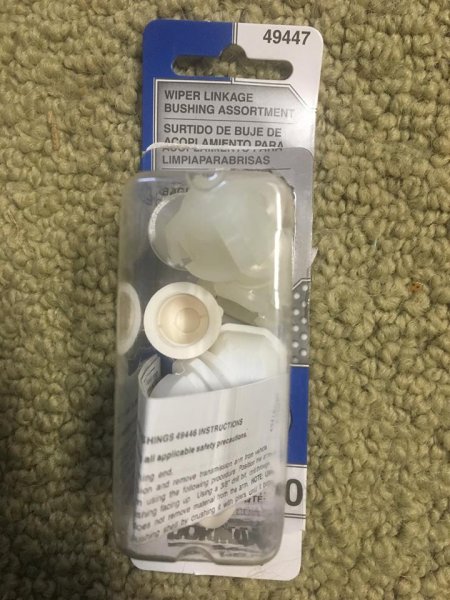
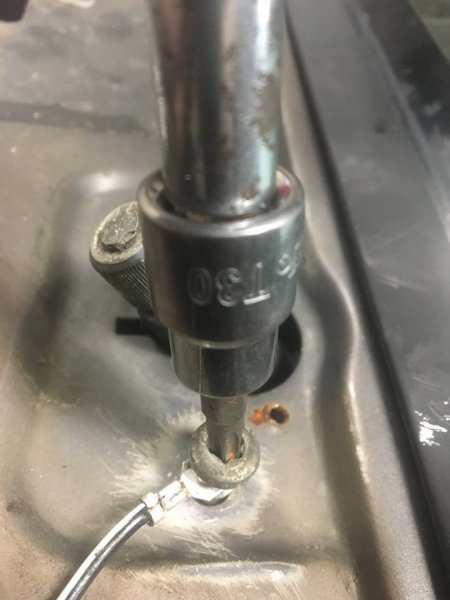
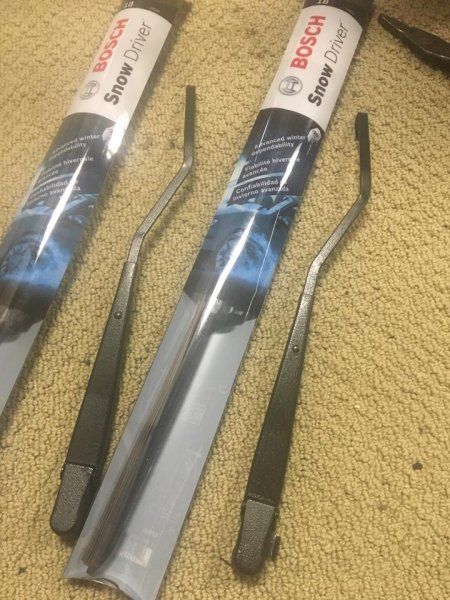
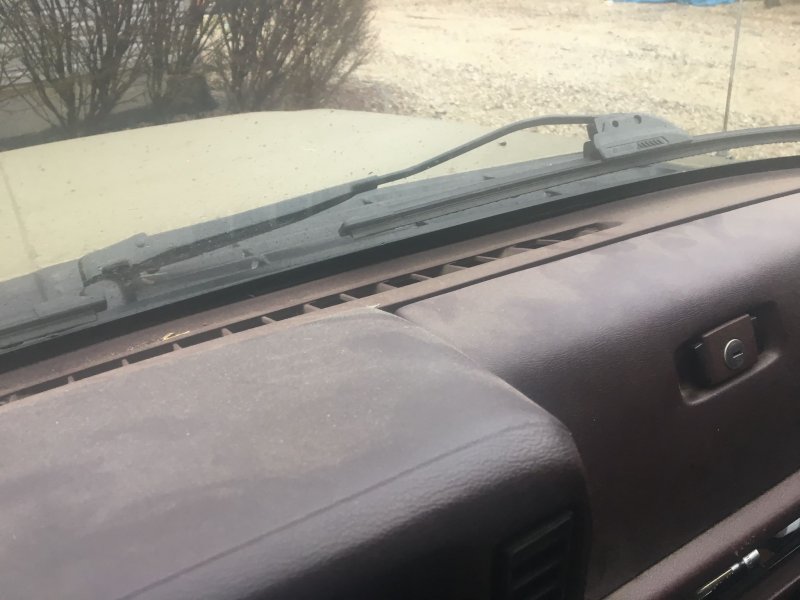
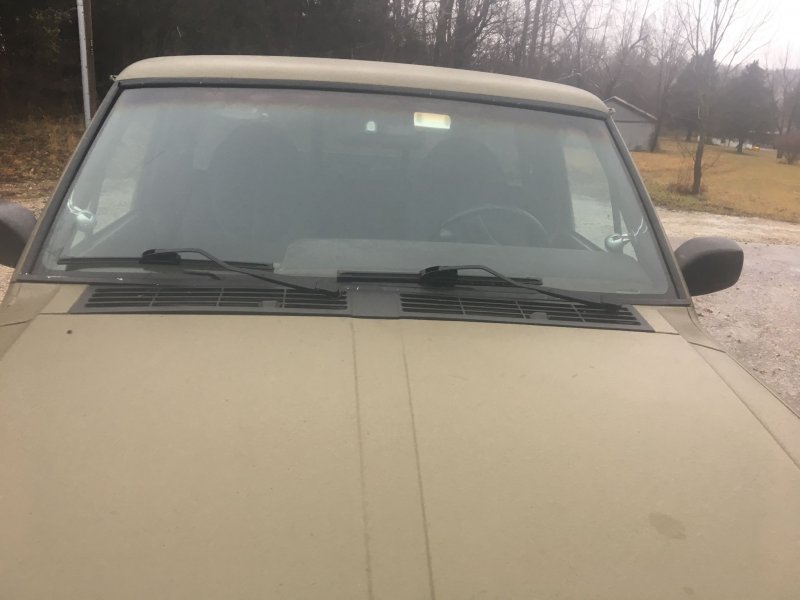
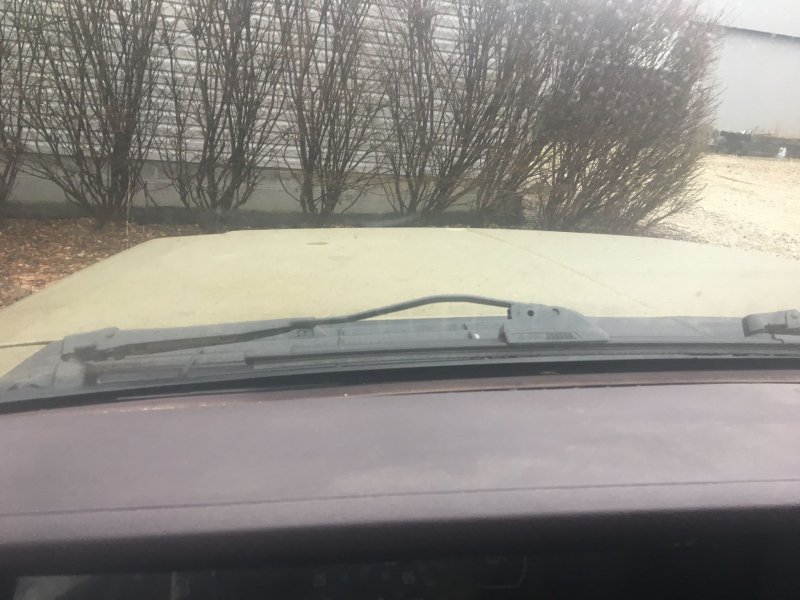
So, I did my wiper work yesterday. All went well and I documented with tons of pictures and posted a write-up. It can be found by searching "Comprehensive wiper modification, upgrade and maintenance". I did these things to improve my wiper performance: 1. Replaced the wiper arms from original side-pin style to 1997+ XJ J-hook style. 2. Cleaned and repacked my wiper motor gear housing with MolyB grease. 3. Added an additional ground wire from the wiper motor to the cowl. 4. Replaced the three wiper linkage bushings. Nasty, hardened gear grease: Cleaned up: And packed with MolyB Adding an additional wiper motor ground. I did use OxGuard here, just not shown. The new wiper linkage bushings you'll need if you're needing replacement: New blades and the 97+ J-hook wiper arms: Installed:
.jpg.3c5cb6e07f48b43a965a196da4a9013f.jpg)
.jpg.f78d301a5fec0b2dec48b746d50fd7b0.jpg)
