
coolwind57
-
Posts
992 -
Joined
-
Last visited
-
Days Won
6
Content Type
Profiles
Forums
Gallery
Everything posted by coolwind57
-
I didn't alter time between oil changes. Yep, you're paying an additional $4 to $5 I suppose. But I disagree that it just makes your changes more expensive. Your few extra bucks gets you the benefits of added capacity.
-
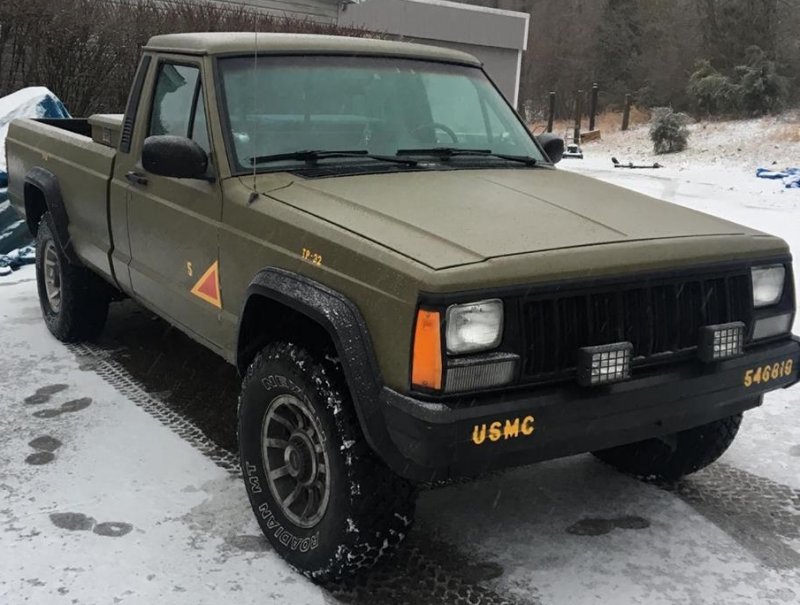
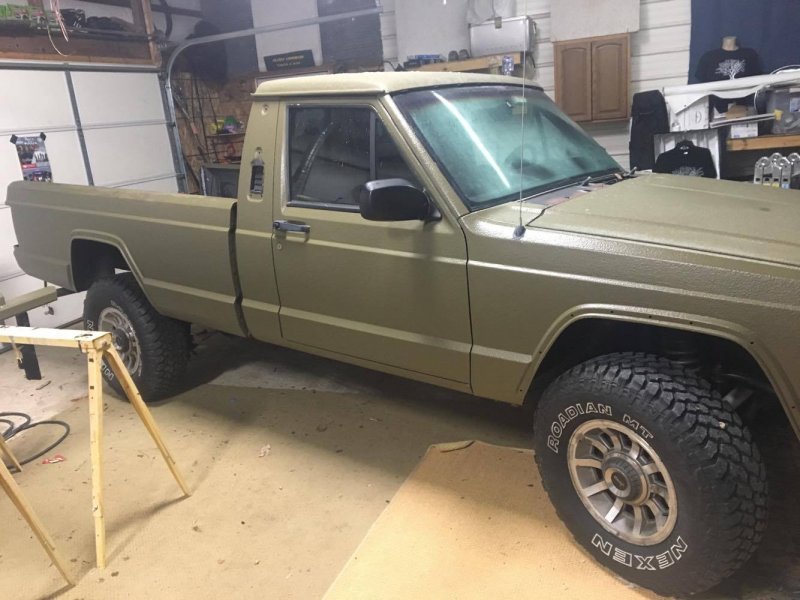
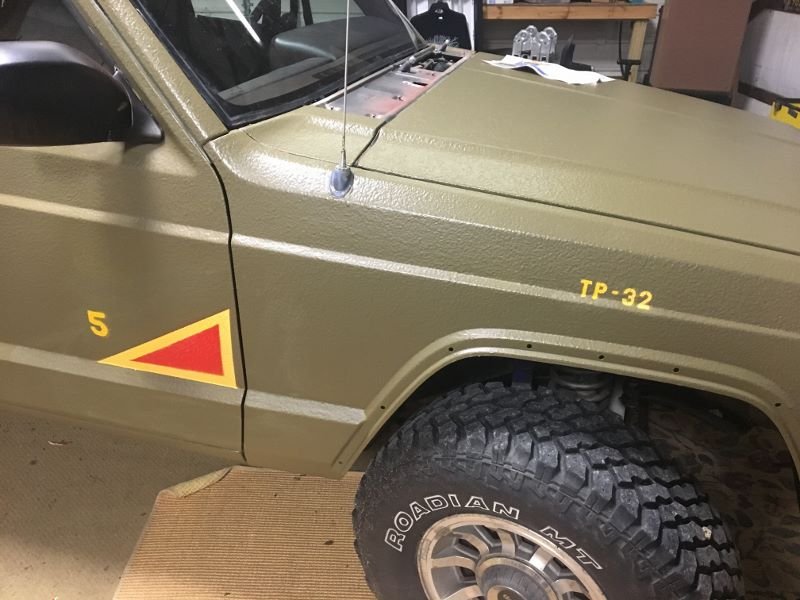
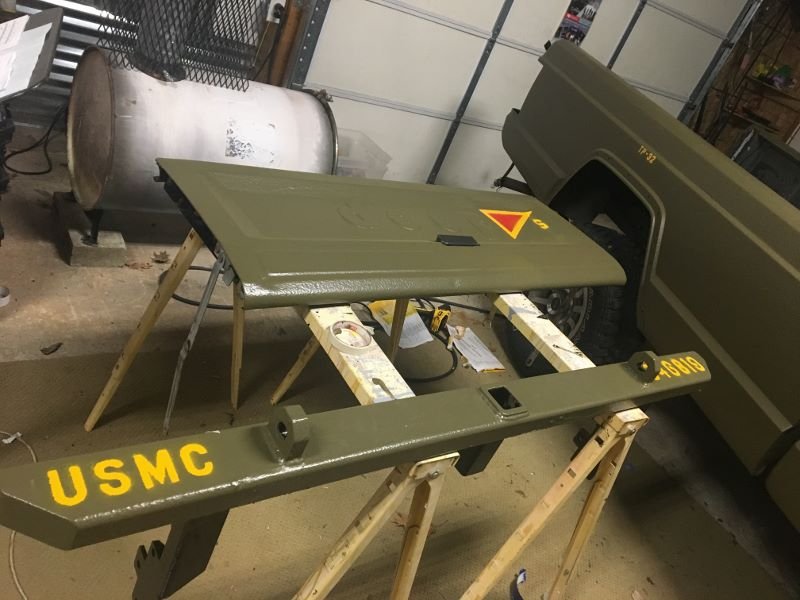
Mine with MonstaLiner WWII Olive Drab. Zero regrets.
-
I did my truck in MonstaLiner WWII Olive Drab. No regrets. I ran a DA sander over my existing crappy finish. Please don't?? Matter of opinion, my friend. I love mine. I can go through the woods and not worry about tree branches scratching paint. I get TONS of complements. It's funny how people always like to stroke and rub the finish with their hands. I've got two coats of MonstaLiner, as they recommend, and I feel like any more would be unnecessary. And i agree with Swampy that the 2-gallon kit was probably less than 30lbs. I'd coated my entire rig with the exception of the bed interior. May do that later this Summer but I'm in no hurry. Pete M is correct: There's advantages and disadvantages. This works for me. Like toughness and hate the thought of easily scratching and dealing with prolonging the life and looks of paint? Use your truck like the utility vehicle it was born to be? Plan on hanging on to your MJ for a while? Then please do.
-
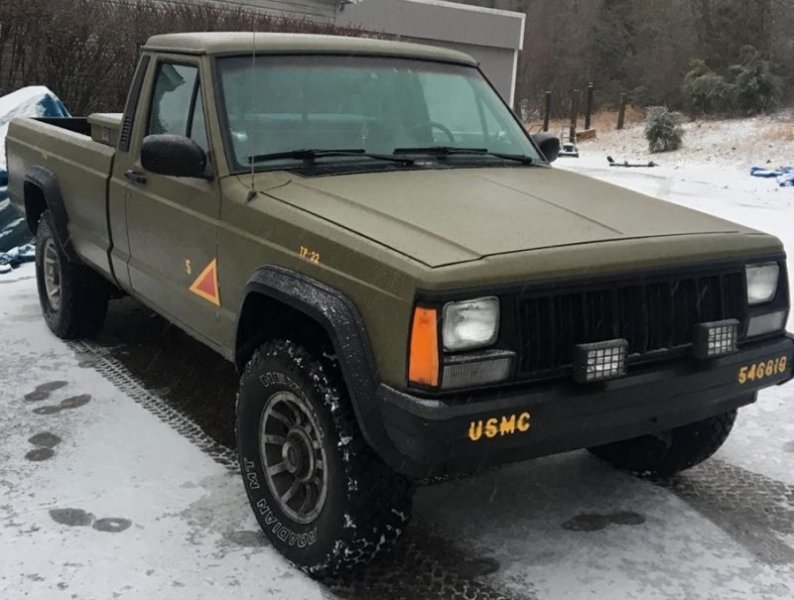
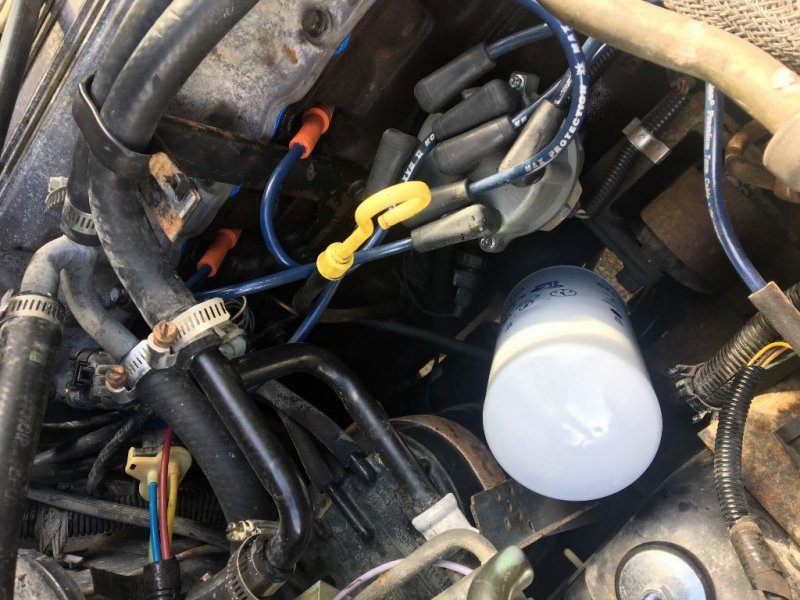
I'd looked into this filter's performance in the past, and man, Baldwin sure doesn't put out much detailed information. Here's a few shared stats that I found on a quick search of forums: 23 microns, flows at 23 gpm Made in USA The BT is their prefix for "Spin-on Lube or Hydraulic/Transmission Filter" Anti-Drainback Valve 8 psi by-pass relief Some guys really get into the detailed discussions and ugly arguments that most always ensue. Many folks talk/argue about micron ratings. Check out what Baldwin says about micron ratings: Micron Ratings are arbitrary values assigned to filters or media. Although a “micron” is a length (1 millionth of a meter), a “micron rating” is not actually a measured value. The micron rating for a filter quotes a particle size without establishing the filter’s efficiency at removing that size of particle. A window screen will remove some 5 micron particles, but it will not be very efficient. Since a micron rating cannot be verified, filter manufacturers are safe in assigning any number they want. We do not recommend comparing filters based on micron ratings. To compare filters, the filter industry has established standardized tests for measuring performance. These tests also include Life and Efficiency Tests (SAE HS806, J726 and J905) and Beta Ratio Tests (ISO 4548-12 and ISO 16889). These standardized tests, along with the meticulous recording of test conditions, insure that filter manufacturers compare “apples to apples.” LIFE AND EFFICIENCY TESTS Life and Efficiency Tests are the most accurate and objective way to compare the performance of filters. A life and efficiency test measures the filter’s ability to remove a standardized contaminant from a standardized fluid that is flowing at a constant rate and constant temperature. The test continues until the contamination increases the differential pressure drop across the filter to a specific, predetermined level. The test results will include a Time Weighted Efficiency (%) and a Capacity (grams). BETA RATIO TESTS Beta Ratio Tests measure a filter’s ability to remove particles of a given size. In other words, the tests measure the filter’s efficiencies at specific particle sizes. The beta ratio test actually counts the particles in the fluid before the filter and after the filter. This test is generally done on hydraulic filters. SUMMARY In summary, equipment owners should consider all of the factors when choosing filters for their applications. You should try to closely follow crossreference and specific application recommendations. When comparing filters, you should note the questionable nature of micron ratings and try to get standardized test information. As for me, this filter had worked for many and I feel good about putting it on. I've read comments from a few guys that have cut them apart, and their comments suggest that the construction is above average. Hadn't run across anything on whether or not the filter's media is synthetic or cellulose/paper. I've not read a single comment that someone said the Baldwin BT-251 had destroyed their engine. And I dig the color. Prior to the pretty red Baldwin, i used the nearly equally-sized WIX 51773:
-
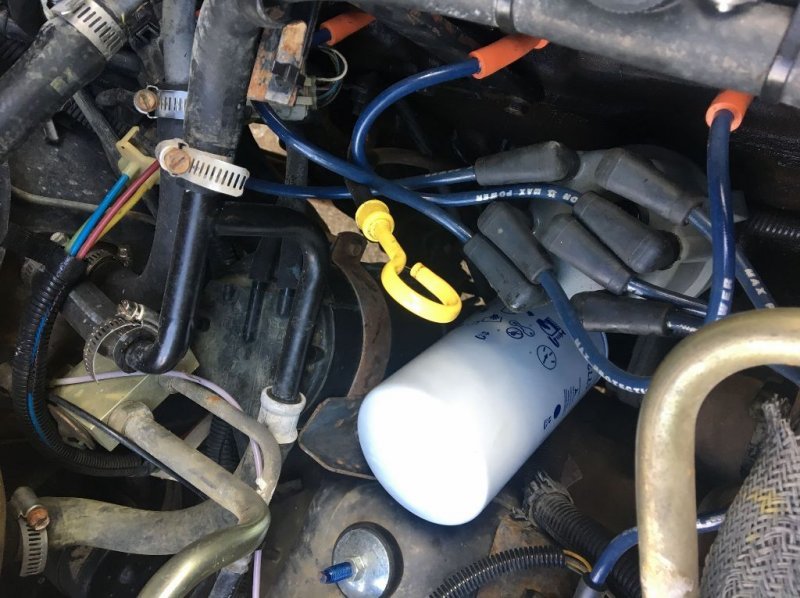
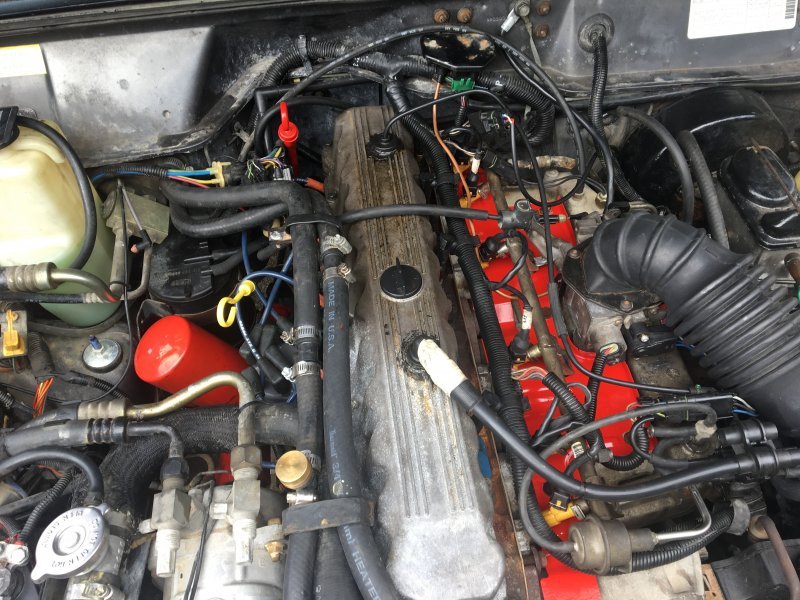
Here's mine on my 89. Believe it or not, the matching paint color that I used on my intake heat shield and dip stick wasn't planned. Just a color I had laying around. I just want each of my components to look better after I work on them.
-
I did.
-
That's the one I have in my Renix 89.
-
 Pretty cool.
 -
Sporadic delayed starting
coolwind57 replied to coolwind57's topic in MJ Tech: Modification and Repairs
Whoa! That's far-out. By the way, I did do Cruiser's connections clean up, to include coil removal and refresh. Performed this 4-5 Months ago. Can you describe what you mean by "the feed", please Pete? you mean the center wire from the coil to the distro cap? -
It's now happening about 50% of the time. I can't seem to pinpoint a pattern. Very inconsistent. Anyhow, here's the deal: Sometimes it takes the engine WAY too long to start upon cranking. It fires just at the point where you're thinking of shutting key off and cranking again. When it does start during these times, it'll sputter a bit with low rpm for just a couple of seconds and it then corrects itself. i usually see a light plum of fuel-stinky smoke out the tail pipe. The other 50% of my starts happen within a couple of seconds of cranking. I put new NGK coppers in on Saturday but no improvement. Expensive copper-contact distro cap is maybe 4-5 Months old. Most other engine parts are new (CPS/AIC/TPS, etc). Wires are 7-Months old and have maybe 8000-9000 miles on them I think. I suppose my first check will be fuel rail pressure, so I'll go and rent the gauge again from Autozone tomorrow. Perhaps I'm losing pressure over time, but I don't know if i should be shooting out rich fuel smoke upon this delayed engine starting if my fuel rails have less than ideal pressure drop. I do have all new injectors and injector o-rings so I'm thinking pressure drop is probably unlikely. This issue crop up on anyone else? Anything jump out at you guys right off the bat?
-
Thoughts on handgun safes
coolwind57 replied to coolwind57's topic in MJ Tech: Modification and Repairs
Sounds very 007-ish, I love it. It'd take some fab work for sure and providing there's adequate room in this area. Very cool idea. -
Thoughts on handgun safes
coolwind57 replied to coolwind57's topic in MJ Tech: Modification and Repairs
So, where's everybody mounting their gun safes in their MJs? haha. I guess I concede the thread for the purpose of a more engaging topic. But for others out there: don't forget your ol' pal Coolwind57 if you have pics or good location/fabrication experience. -
i went in in 86 and retired 2006. I began military life with an M-16 in the Air Force. Full auto/Semi Auto selector switch. Anyone here ever fired full auto via an M-16? After three rounds, your weapon is pointing straight up in the air. Ineffective, but pretty cool. We also had no forward assist or chrome plating in the chamber and our handguards were triangular. Anyhow, I recall even seeing crates of the elusive "green-stocked" M-16s that were never fired. Probably early Curtis Lemay-era weapons. They had green stocks and handguards, which was pretty different that the black that everyone now sees. I wonder where they are now. I even went SWAT (The USAF called it EST) and we did a one-day sniper course during initial training using an M16 with a 4X scope. That course overall kicked my butt, but the "sniper" portion was pretty lame. the 5.56mm sucked as a sniper round. But we went through the motions and got to piss all over ourselves as we layed silent and still in the San Antonio Texas sun all day. We finally began seeing M-16A2s just as I transferred to USMC 6-years later. The Marine Corps had M-16A2s during my wild ride and I think they began transition to the M-4 as I left. The US Army had already transitioned a few years earlier. i also remember when we finally dumped the XM-148s for the M-203 grenade launchers. Both were mounted under the M-16 rifle. The XM-148 had a stupid, clumsy trigger mechanism. During my time, USAF SWAT and Combat Controllers often used the GAU-5/A (or GUU-5/P), which was a shortened "CAR-15" or "Shorty M-16" essentially. I don't recall seeing anything other than a standard-issue sling during my 20-year career, even in Special ops, but my memory is pretty bad these days. You know, Eagle I think I do recall receiving a bible but I don't recall it being "issued". If memory serves me right, I think they brought some folks in from a Christian organization and they officially passed them out to us, not Uncle Sam.
-
Thoughts on handgun safes
coolwind57 replied to coolwind57's topic in MJ Tech: Modification and Repairs
This was the kind of stuff I was looking for. This is likely where I'll mount mine. I'll have to check ease of use on the passenger side, however. With my Dakota seats, it might just end up being easier to get out and place weapon in a safe located behind the driver's seat. I was hoping GrayWolf would chime in and maybe even provide a pic or description of his safe, which I recall him mentioning at one time. Yep. Same scenerio here. I just need a temporary stash site that has good combination of security and functionality that fits my use. I'm former law enforcement. I'm good on laws and consequences of loss, but I'm specifically looking for some input and ideas from those whom are securing their weapons inside their MJs. Would love to see what's working well for you guys. -
Thoughts on handgun safes
coolwind57 replied to coolwind57's topic in MJ Tech: Modification and Repairs
I suppose that would be ideal, but not totally required. I'd be ok with exiting then stowing if i could do it without making all a big epic event. -
Thoughts on handgun safes
coolwind57 replied to coolwind57's topic in MJ Tech: Modification and Repairs
I'm leaning against these. I haven't read much good on these as far as reliability unless you get WAY over my idea of an acceptable budget. I'm don't care for key-operated ones either, as that's just another key for me to lose. What I am leaning towards is maybe a 4-combination latch. No batteries required. But more important is the security and location (accessibility). I kinda don't like cables, even with their 1500-lbs of force resistance--still cut them pretty easily. As far as accessibility, I'm not concerned with "quick access." The handgun will be on me most of the time. But I need occasional storage at times when I'm out and about. I'd love to see some mounting ideas/ingenuity that I know some of you guys have. -
Thoughts on handgun safes
coolwind57 replied to coolwind57's topic in MJ Tech: Modification and Repairs
Yes, I'm allowed to carry. The best place to carry is on your body until you arrive at a location that does not allow handguns inside (gov't buildings, my work, etc). I'm good on all the rest of your input. Just looking for ideas on how others have mounted their pistol safes. -
I'd like to permanent-mount a small handgun safe in my truck. I thought of installing (or custom building) a little vault to install in my recently installed dakota console. Only if I can make it really secure since it is a common place for thieves to look into. Or perhaps somewhere under or around the driver's seat. Maybe up against the back wall. I mean, the MJ is not exactly the most secure vehicle to have a gun stored inside, so, what are you gun-toters doing for handgun security?
-
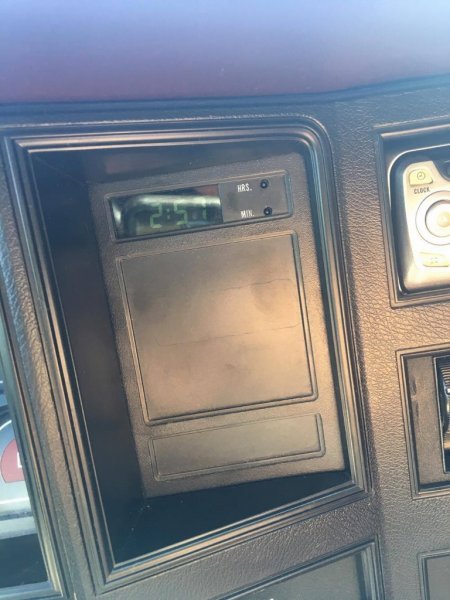
Back in early September 2017, I found a digital clock in a Cherokee at the junk yard. I pulled it and paid $4 for it. As I opened up my MJ's dash expecting to have to splice wiring to get it to operate, I was elated to find the unused connector just behind the dash! SCORE! PnP, baby! I think the digital clock was pulled from an 88 or 90 XJ, I can't remember for sure. But it is the one noted for putting out pathetic dim lighting. But, I'm happy. I popped a new bulb in the back and slapped her all back together and I have a factory clock now. Next time you're at the yard, look around those Xjs for one if your MJ doesn't yet have one.
-
what are the most useful youtube Jeep repair videos you've found?
coolwind57 replied to Pete M's topic in The Pub
yes, him and bleepinjeep are my two go-to guys. learned a ton from them. -
Check all of your bulbs again and ensure the gunk (old bulb grease) is cleaned out. I have very similar oddball things happen and it was all because of a bad bulb connection. I would've gambled my life that it was some crossed wires or a more complex issue like that. I couldn't believe how simple it was to correct such crazy problems by replacing a bulb and cleaning a socket. It'll be worth your time to start by pulling and inspecting bulbs and cleaning socket connections. Good luck, man.
-
How I installed Dakota Seats
coolwind57 replied to coolwind57's topic in MJ Tech: DIY Projects and Write-Ups
yes sir, I agree. BTW, I did mention the use of the armrest in #7 of my final notes as an indication of judging seat height. i have found that I comfortably alternate my elbow from door-mounted arm rest to window opening. If you guys attack this project in a method similar to mine, then I'd emphasize the part of my write-up regarding "dry-fitting". Elevate your Dakota seats where you want them by using spacers (spare metal, wood, whatever you have laying around) and sit in the cab. Adjust as necessary before final welding. Because of the dang protrusion of the driver's side tunnel, I struggled to get my seat centered behind the steering wheel at first. You might not like sitting in my seats but I have them fabricated just the way I like them. It's tight in that cab, so take your time and get them set in there right the first time. -
youngfred's 91 Eliminator
coolwind57 replied to youngfred's topic in Member Projects: Your Comanches
Pretty sure I'm an oval-to-the-rear guy. 8-months and I've nothing negative to report. -
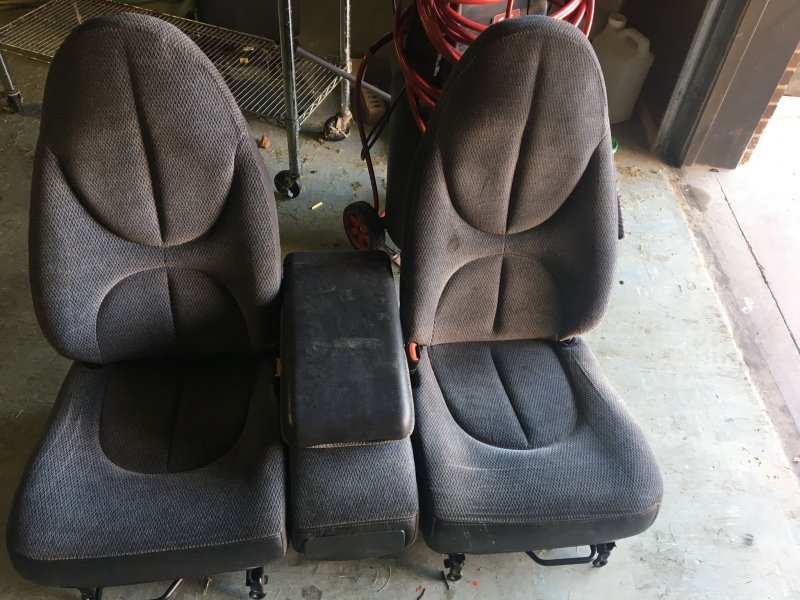
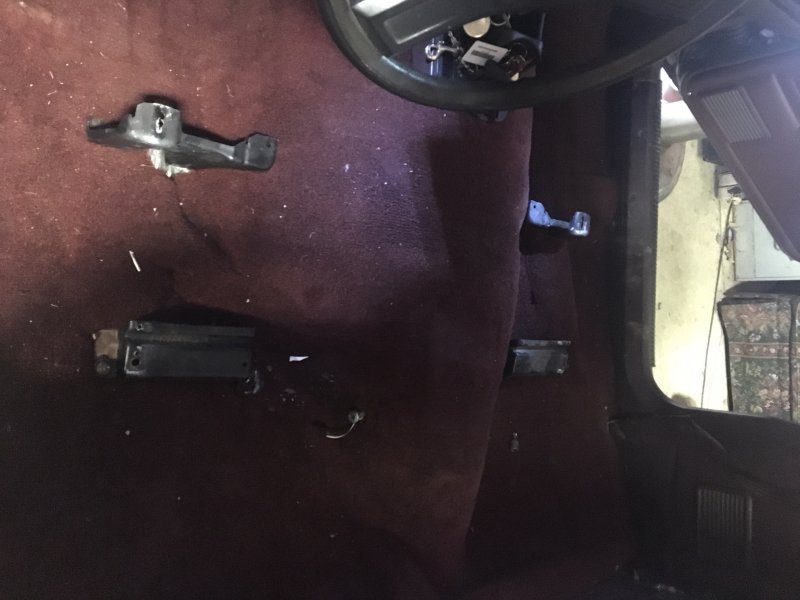
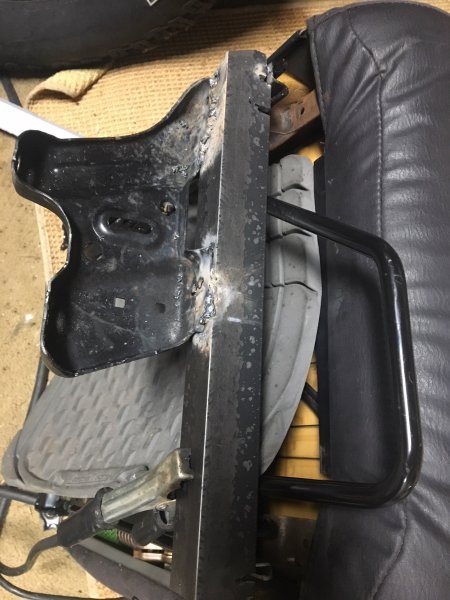
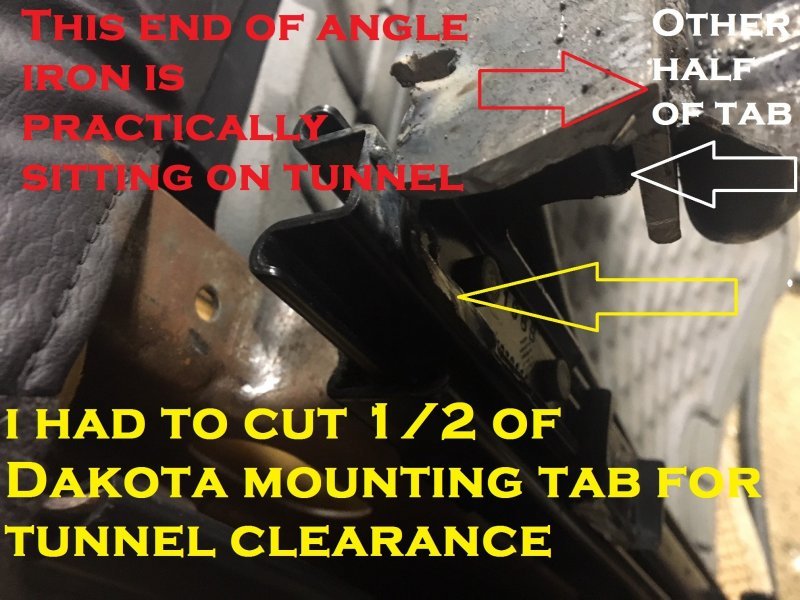
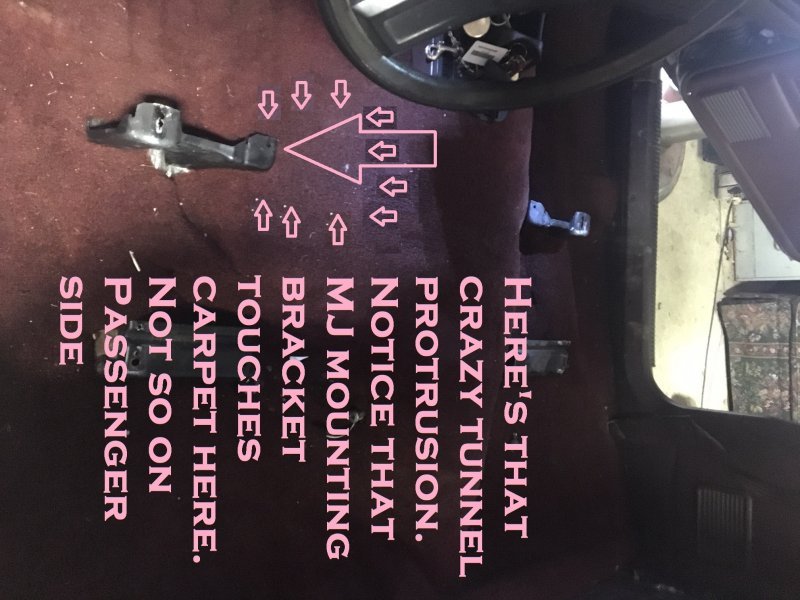
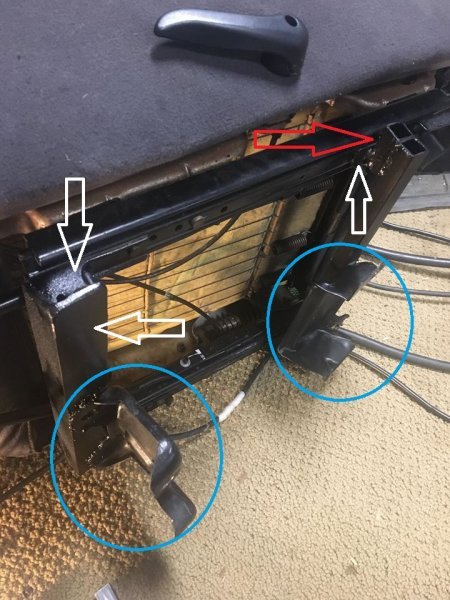
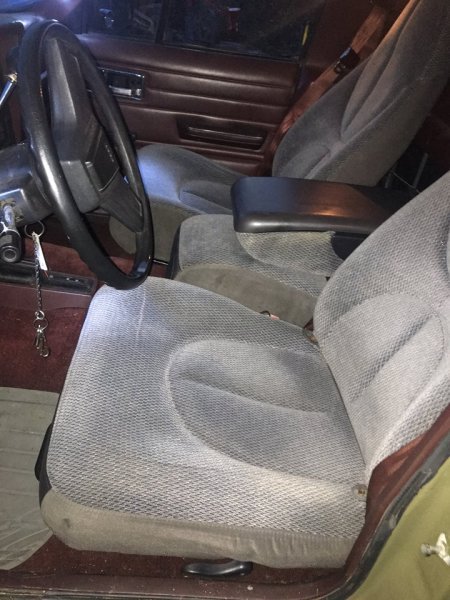
Pete M asked me to post this under the DIY section. I had picked up some Dakota 40-20-40 seats at a JY. While there, I noticed that there are two different seat heights on the late 90s- early 2000 model Dakotas. Most had seats that were shorter than these. Hoping I didn't make a mistake by choosing the taller height style, I hauled these home. They came from a 1999 with extended cab. I've got a cheapo flux core welder, and an angle grinder. The goal is to mount them using the factory mounting studs. The first thing after removing my bench was to cut the flooring mounting brackets from my bench seat and mount them on the floor just to see how i can match them up with the Dakota seats. So here's what they look like re-installed: i bought a piece of 3/16" (I think) angle iron and some 3/4" steel square tubing. I then placed my seats inside the cab and cut a piece of angle iron to see how I could get the front mount positioned. I chose the hardest to work with first: The driver's front bracket. That tunnel sticks out on the driver's side and it really pushes the limits on placement of the Dakota inner rail. Man, what a pain. I was able to tack weld once I found the sweet spot. I then removed and began to weld in earnest. So before I did the weld above, I did "dry fit" my seat and found that I didn't like the height that it would create if I left the two buckets and jump seat bolted together. So scratch to plan to keep them bolted together. The thing is--Dakota seats like to be placed high. The higher you place this driver's seat, the more clearance you'll have from that goofy protrusion of the tunnel. I found the best combination of minimizing seat height and decent slider track placement was when I had my angle iron practically sitting on the tunnel protrusion. If you go back and look at my pic with just the bench seat mounts (minus the bench) secured to the floor, you'll see that that driver's side front bracket is practically sitting on the tunnel as well. I did have to give up one half of my front Dakota mounting tab, however. in this pic, you can see where I had to trim 1/2 of the tab (in YELLOW). You can kinda see the other half of the tab that I'm welding on to the angle iron (WHITE). I also had to cut my angle iron at an angle to better accommodate the protrusion of the tunnel (RED). So far, I'd been able to weld attachments on to the lower glide rail tabs, not the rail itself. that was the plan as I continued to mount these seats. Ok, so here's how my custom driver's side seat brackets came out: 1. Top two white arrows: Show that I used the stock Dakota track/rail attachments (tabs, which i cut down an bit). After modifying them slightly, I simply welded onto them instead of removing them and welding or bolting my metal directly onto the Dakota tracks. 2. Blue circles show my original MJ brackets. Welds look horrible, but hey it's a cheapo flux core welder I have to work with. I got good penetration and the welds are strong. Just looks like hell. 3. I chose to use 3/4 tubing to support the rear, as I felt 1" tubing might be too high. Red arrow shows that I had to stack another piece of 3/4 tubing on one end to get the height of the seat's outboard side correct. 4. The bottom-most arrow shows the 3/16" thick angle iron used for the front of the seat. It's now bolted into my MJ and I LOVE it. Very comfortable. Dakota seats certainly fit tight in there. My door panel touches the seat fabric, but just barely. I then did the passenger side, using same techniques. and here's how it all came out: Final notes on this upgrade project: 1. I initially wanted a jump seat/console the same height as the seats. This would allow for kind of a bench seat if the console is swung up. Well, you're either going to have to lift the buckets way up (in my opinion, too much) or cut into the jump seat--big time. It's probably possible, but not worth my time. As I began thinking more about it, I'm going to use the console 99% of the time. Maybe put a baby carrier seat in if my wife gets pregnant. Or maybe haul a kid, but that jump seat is much too narrow for an adult butt anyow. The height of the jump seat as it is installed on the tunnel is too high for an adult over 5', 8", I'd say. 2. I wanted to install the console/jumpseat even with the front of the buckets "for looks". But if you do that, then you won't be able to use the super cool pull-out drink holder tray. I placed mine far enough back for cup holder access, and it works just fine for my resting elbow. Another thing about this being higher than the buckets that I worried about: Will your right elbow sit too high when rested on it since the buckets are lower. Answer is no. I am completely comfortable. In fact, I love it. Can't see how I did without an arm rest back when I had my bench. It's at a great height for me, awesome comfortable. 3. I bought some 2" flat metal and bolted lengths up under the jumper seat at the factory mounting holes where the buckets normally bolt onto. I placed the jumper, then bent the metal to form around the tunnel and then bolted through it using galvanized 3/8" bolts/washers/nuts. Plenty of room up under your tunnel if your bolts are 2" in length. 4. I could care less that my interior colors don't match. The gray seats actually have some blue and red specks in them, that don't show so much in the picture but the red pops out when you view in person. Again, not a big deal for me. Heck, my truck is OD green (Monstaliner bed coating) with a red interior. I'm more about practical. Looks fine by me. 5. Passenger seat was easier to fab a mount....but not by much. If you're going to do this upgrade in a similar manner as I then you're going to have cut, weld, check fitment. Cut, weld, check fitment. Takes a lot of time. 6. I did final fit and then decided to lift the entire bucket brackets off the floor by about 3/8" after I built up my seat brackets. This allowed closer fitment to the tunnel on both sides--there's a odd bulge on the driver's side of the tunnel due to the transfer case underneither. I did this because it seemed like I was too close to the door and not centered behind the steering wheel. I had some pieces of used metal left over that I placed under the seat brackets to accomplish this small lift. 7. I can still use my door-mounted arm rest, which indicates that my height is pretty close to what I had from the factory seat. Lifting the seats as much as GrayWolf did with his brackets looks like it would make this arm rest too low for use. Check out his thread for a different Dakota seat mount option if you hadn't already. His seats match the height of the jump seat, but I just didn't want to go this route as I started working this project. There's pros and cons to each method, I'm sure. 8. Ceiling height is great. I'm 5, 11" and I weigh 228lbs. I can place my fist above my head as I'm seated. This is good for hat-wearers like me. And I LOVE the adjustability that I now have over my MJ bench. And I also love that I can lean back and my whole head is cushioned behind me. These seats are nice and tall.
-
89 Comanche "Country" LWB restomod project
coolwind57 replied to Airborne Janitor's topic in Member Projects: Your Comanches
Whoa! I need this! I didn't know such a thing existed. I'm on this (just as soon as I can budget for it).