
HOrnbrod
-
Posts
20174 -
Joined
-
Last visited
-
Days Won
28
Content Type
Profiles
Forums
Gallery
Everything posted by HOrnbrod
-

XJ Rear Door Power windows?
HOrnbrod replied to Skorpyo's topic in MJ Tech: Modification and Repairs
Just install XJ power regulators/switches and wire them up. Why replace the doors unless you want/need to replace the doors? Then you have fitment, painting, etc. which will probably end up costing more in both time and money. -
Cracking up...along with my inner fenders!
HOrnbrod replied to coolwind57's topic in MJ Tech: Modification and Repairs
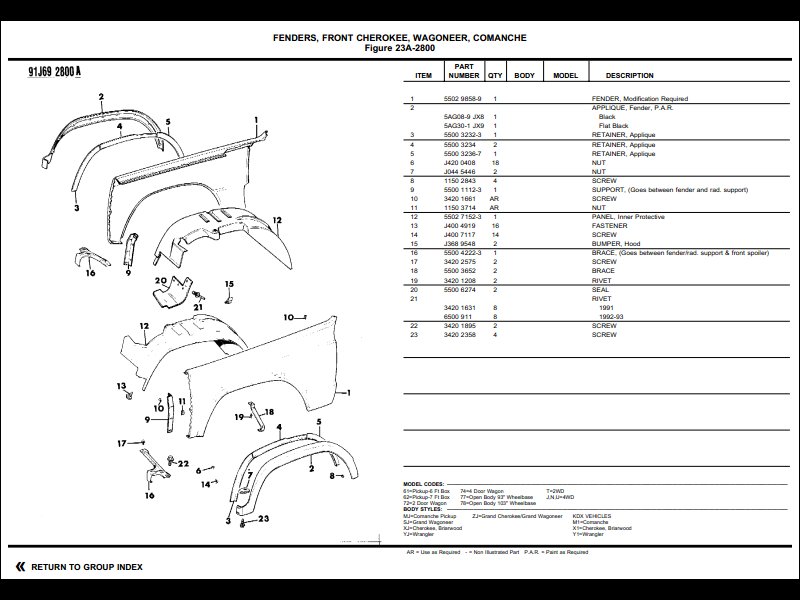
You're correct. Those are the inner flare retainers, #4 on the diagram.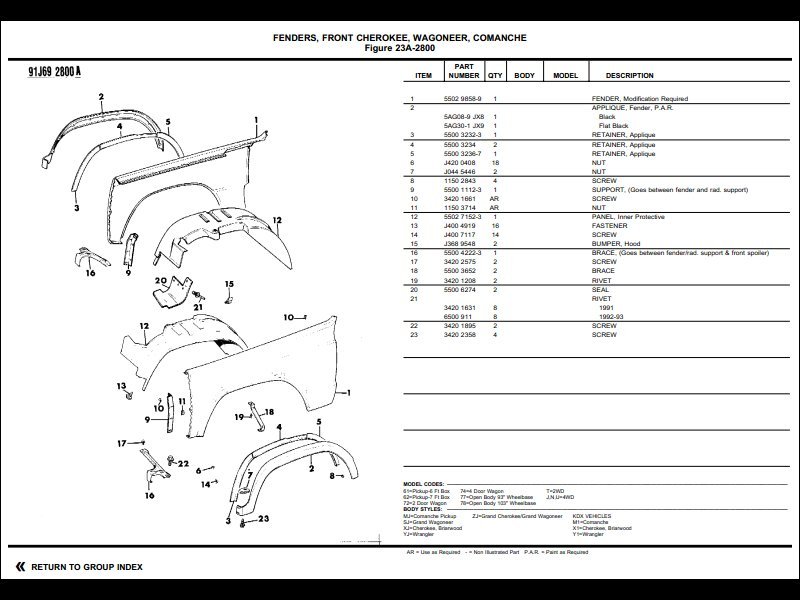
-
Fuel and speedometer problem
HOrnbrod replied to kook911's topic in MJ Tech: Modification and Repairs
Fuel gauge: The potentiometer polarity of your original Renix fuel sender is opposite that of your 91 fuel gauge, thus it reads backwards. The fix is either find an MJ HO fuel sending unit and swap it in (lots of luck finding one), or pull your Renix sender and swap the two wires on the potentiometer by soldering which will change the output polarity to the gauge. I bench tested this a while back and it works, however the Renix and HO potentiometers are of different values, so the gauge won't be very accurate, but will indicate properly. Best advice - live with it. For the speedo, what instrument cluster are you using? An HO cluster? The 91 used a one-off 2-wire VSS sensor. -
4.0 Back of head freeze plug
HOrnbrod replied to 88whitemanche's topic in MJ Tech: Modification and Repairs
Looks like you used a brass plug too. -
These are for the indicator lights in the dash, correct? Like the Check Engine light? If so, don't worry about the sockets; you would have a hard time replacing them. Just get a box of 194 bulbs from the Zone or similar and replace all the missing and/or burned out bulbs. They just plug in, no turning, no polarity. You could use LED 194's but they don't dim. They are either ON or OFF with a very sharp cutoff.
-
Cracking up...along with my inner fenders!
HOrnbrod replied to coolwind57's topic in MJ Tech: Modification and Repairs
Those look like the same liners I've had on for maybe ten years now and they are still fine. Install tip: Pick up some 3/8" fender washers and use new push pins when installing. You can get them at Lowes, etc. The washers provide more surface area and hold the inner fenders on more securely. -
How long did it take to count them all up Pete?
-
The Golden Eagle MJ
HOrnbrod replied to jbain's topic in MJ Hardcore Tech: Epic Journeys to Greatness
'Bout time you came back Chief. Looks like you found a good solid platform for your build. -
Absolutely necessary? Not at all for a simple repaint.
-
Good point. :headslap:
-
New Disc Brakes Squealing...Dumbfounded
HOrnbrod replied to coolwind57's topic in MJ Tech: Modification and Repairs
I went through this years ago on my 2WD front calipers. Your sig doesn't say if you are 2WD or 4WD. The inboard and outboard pads are different, and they will install backwards. I know, I did it, and the squealing drove me nuts until I finally figured out what happened. Don't know if this pertains to the 4WD calipers or not: From 3-30-2010 "Okay, I'm dragging this up yet once more because I FINALLY GOT THE DAMN THING FIXED!! YAAAA! I'm gonna tell you all what it was in the hopes that it will save my 2WD MJ brothers the aggravation I've gone through tracking down the damn brake squeal. :fs1: First off, the inboard and outboard front disk brake pads LOOK identical, but they are not. The inboard pad has the smaller pad liner, about 3/8" difference in length. BUT they will fit on either way. The last brake pad set I got had three outboard pads and one inboard. I missed it and stuck the two inboard pads on the right front wheel. The problem occurs when you mount up the caliper after fitting the pads and anti-rattle clips (more on these later). When you tighten down the two slide pins that the caliper rides on, the top pin bottoms out just enough to C#*@ the caliper so that it will not ride squarely on the caliper bracket sliding surfaces, thus creating squeal. It bottomed out because I had two of the longer outboard pads on and the extra material on the inboard pad causes the caliper pin to bottom out. Of course, there's nothing in the FSM telling you this, just a fuzzy picture that shows the material difference between the inboard and outboard shoes. Second problem was the anti-rattle clips. They are shaped like an elongated "C". The open part of the "C" must face AWAY from the rotor, otherwise the pad will rattle around in the caliper. Of course, these clips will go on 180 degrees out too with the open part of the "C" facing TOWARD the rotor (I installed one of them on each side this way) which causes even more squeal. :fs1: The FSM does say to install the bottom clip with the open end facing away from the rotor, but says nothing about the top clip. Naturally I put them in backwards. :wall: The cause of the squeal was painfully obvious when I pulled everything down to change out the pads yet again with some new ceramic pads. There were bright shiny spots on the caliper and caliper bracket sliding surfaces. Luckily there was no permanent damage done though. Anyhow, hope this helps y'all next time you change front pads on your 2WD. :cheers:"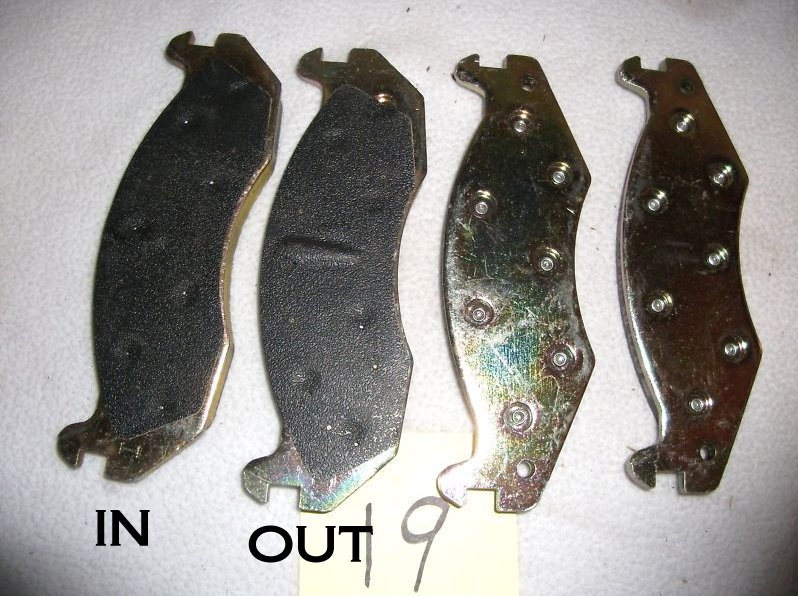
-
Auto or manual trannsmission has nothing to do with the type of cluster. Both transmissions can use either idiot light or full gauge clusters. General cluster rule of thumb is blue case = Renix, white case = HO. The Renix clusters have a manual speedometers and use cables. There are some differences in the cables between the years. HO speedos are all electronic.
-
Another example of LED light marketeering. https://comancheclub.com/forums/topic/51468-light-bar-amp-draw-has-me-stumped/?tab=comments#comment-524080
-
Another mystery problem with the Jeep. Need help
HOrnbrod replied to cjomanche's topic in MJ Tech: Modification and Repairs
https://comancheclub.com/forums/topic/46667-actron-obd1-scanner/?hl=actron -
Another mystery problem with the Jeep. Need help
HOrnbrod replied to cjomanche's topic in MJ Tech: Modification and Repairs
Fix the O2 harness, then get the bulb for the CEL replaced. It's a simple matter of pulling the dash bezel, then the left dash side cover for the indicator light housing and swapping in a new bulb. Does the CEL light come on when you turn the ignition ON before starting during the bulb test? I'll bet you will find the bulb missing. There's no test for the HO CPS, only a continuity test. And if if were open, it would never start. It's basically a useless test. Do get your fault code light working and this fix should be cake. -
Another mystery problem with the Jeep. Need help
HOrnbrod replied to cjomanche's topic in MJ Tech: Modification and Repairs
91's only have one O2 sensor. And yes, a damaged harness could be causing your what sounds like a misfire. -
Another mystery problem with the Jeep. Need help
HOrnbrod replied to cjomanche's topic in MJ Tech: Modification and Repairs
You have a 91? Check for fault codes. https://comancheclub.com/forums/topic/28111-reading-obdi-91-and-92-mj-fault-codes/ -
Download: Lunds SunVisor MoonVisor Database.PDF
-
No idea John. Lund's part numbering system leaves a lot to be desired.....
-
Copy/paste: SOLD NOS MJ-Specific Lund SunVisor P/N 12001 Since I already have one, this one will go. Brand new in-the-original-box Lund MJ fiberglass SunVisor. Never installed, never painted, etc. etc. I placed it on my original Lund visor to show it's identical 100%. This will be packed well and double-boxed for the lucky buyer. Might never see another NOS as not many were produced originally. Self tapping mounting screws included, but recommend using stainless self-tappers with neoprene washers. $300 + shipping (~ $25 - $30). Lund p/n 12001 Comanche-specific: http://www.summitracing.com/parts/LND-12001/ The pics were hosted on a now defunct server, not recoverable. Purchased by club member Lowly Lowly's install: https://comancheclub.com/forums/topic/42460-the-blue-and-black-manche/?page=5&tab=comments#comment-479833
-
Weird - opens fine for me. I edited it, try it now.
-
Tapatalk? Anyone else having trouble viewing this?
-
FYI: NOS 12001 Lund sun visor I sold in 2015: https://comancheclub.com/forums/topic/46861-sold-nos-mj-specific-lund-sunvisor-pn-12001/?tab=comments#comment-478256
-
PM sent.
-
My MJ sun visor is stamped PN A3; same location and format as krusty's above. I bought mine new-in-the-box, was NOS from a Lund dealer in Canada, and was one of the originals. I think the 190xx numbers came later for the lighted moon visors.