
ThatJeepGuy
-
Posts
383 -
Joined
-
Last visited
-
Days Won
2
Content Type
Profiles
Forums
Gallery
Everything posted by ThatJeepGuy
-
Are these Turbines worth it?
ThatJeepGuy replied to robfg67's topic in MJ Tech: Modification and Repairs
Let the seller sit on them, that's an outrageous price. -
export turn signals for under 20$
ThatJeepGuy replied to motownXJdad's topic in MJ Tech: Modification and Repairs
I've been contemplating redoing the smoke on my signal lights but this is interesting. Never thought about essentially color stain in a can? Adding a clear coat after or just the multiple light coats and away you go? -
My shameless build thread plug The 4th post in i go into some details about cutting down a 97+ XJ headliner to fit in my truck. Now granted i went into the task with a very simple level of satisfaction for the outcome But i did learn after the fact if it wanted an even better fit - especially at the back of the cab it wouldn't be very difficult to do soo. The cost of an xj headliner and even the fanciest of fabrics to re-apolster to it beats the pants off what some expect to get out of their factory headliners. With that I have a factory headliner thats solid -no fabric- but as its basically made clear above, the shipping cost and difficult packing/level of Fragile outweighs the price in my opinion.
-
diy rear cab carpet panel
ThatJeepGuy replied to EUREKA's topic in MJ Tech: Modification and Repairs
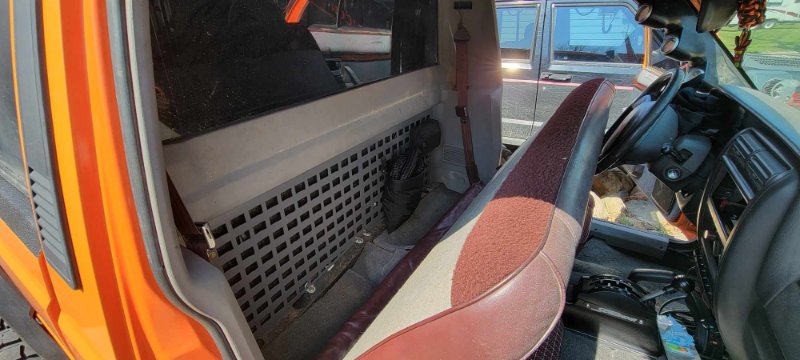
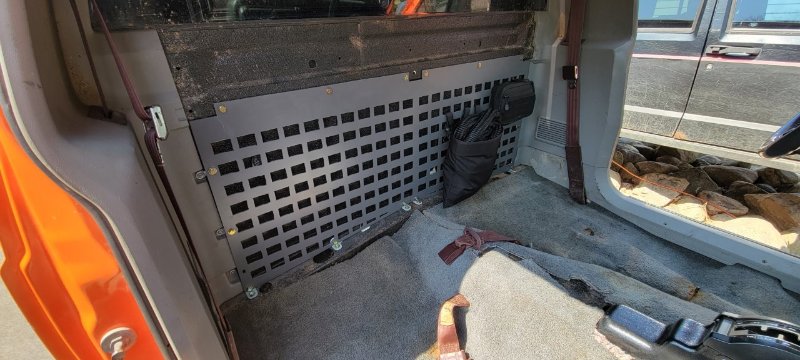
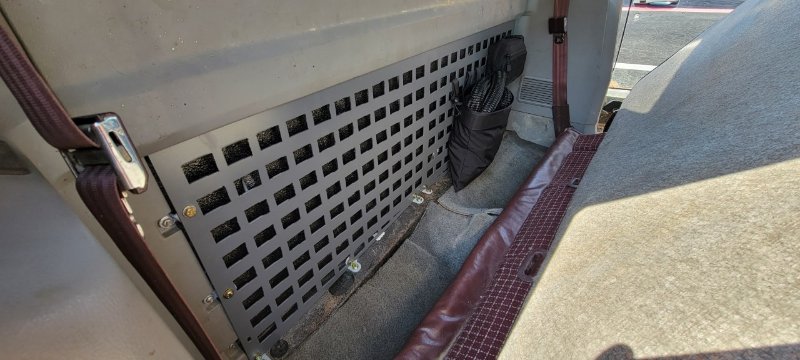
The market for a factory deal was out of reach for me but I also wanted to make use of the space so I designed a molle panel that fits like factory and provides storage options.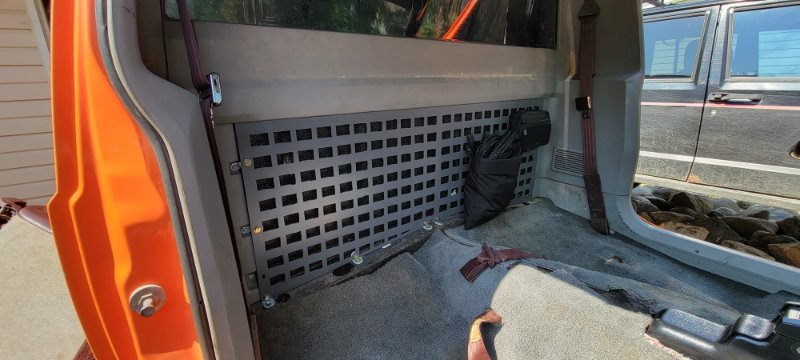
-
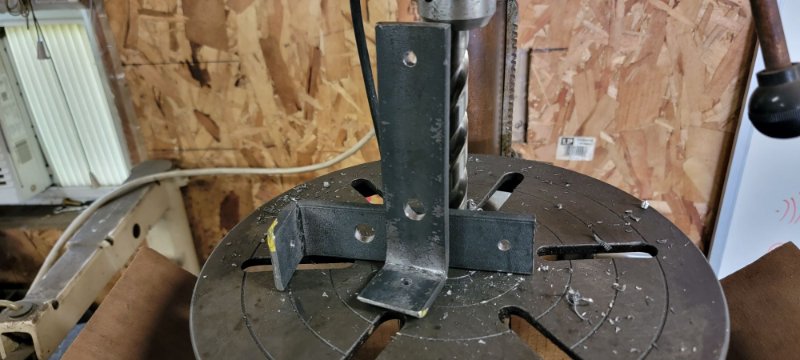
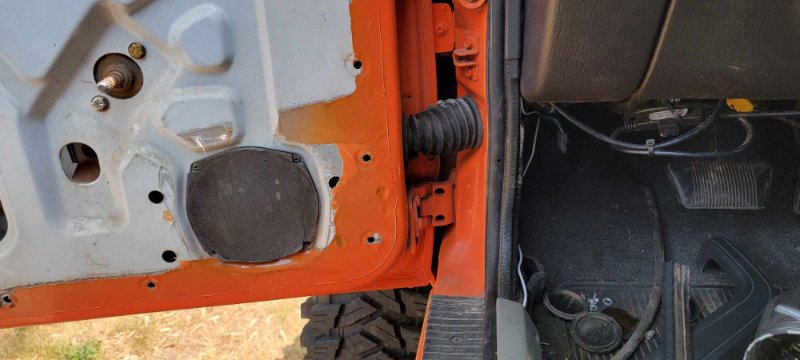
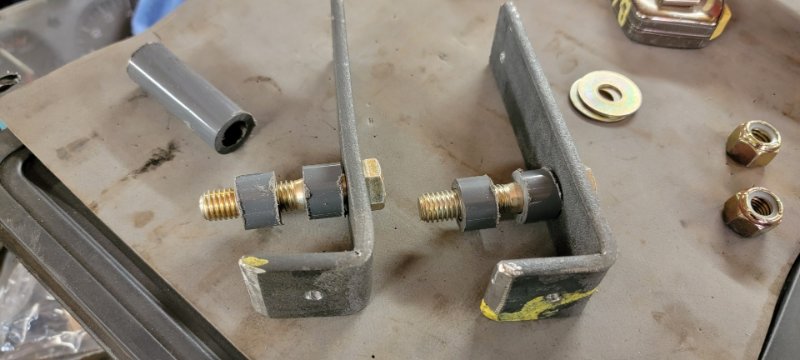
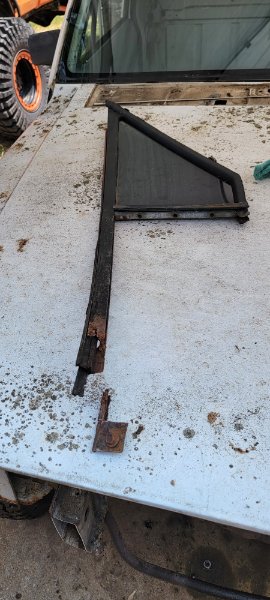
Oh boy we shall see won't we ;) That 90 parts MJ is the rust bucket that just keeps on giving! We planned to do some exploring tomorrow for fathers day and with that i figured i'd button up a couple small things i've had on my mind. Unfortunately not the intake tube just yet (waiting for the right deal on a bandsaw or portaband to do some clean pie cuts). The driver window only goes down till there is just over an inch of glass still exposed and then starts jumping the cable. Surprisingly this parts MJ has great crank windows! Unfortunately while swapping that out i found the bottom section of window track was completely rusted off! Mint vent window for the win! gonna look just a little funny without the tint for the time being but the benefits far outway the out of place appearance! Eventually after i get a new windshield and the sliding rear glass from the parts MJ installed I planned to take this jeep down for a new window tint job. Again the parts MJ just keeps on bleeding those useful little pieces and parts. Currently zero radio or speakers in this jeep, though i have yet to get a radio installed these door speakers sure are encouraging to get something going and see how they sound. Future high-lift jack mount. Simple L bracket pvc spacers L brackets secure to the inner lip of the bed rail and also through the top of the wheel well. This was a $50 marketplace score. High-lift brand jack in basically new condition. Also came across this military E-shovel/pick for a mere $10. Looking forward to some road and forest miles exploring tomorrow for the first time in this truck. Those good-ol-days memories of my early 20's driving my other MJ -now truggy- are something I'm sure this jeep will help me re-live and even more soo Now share with my son (5 yrs old now).
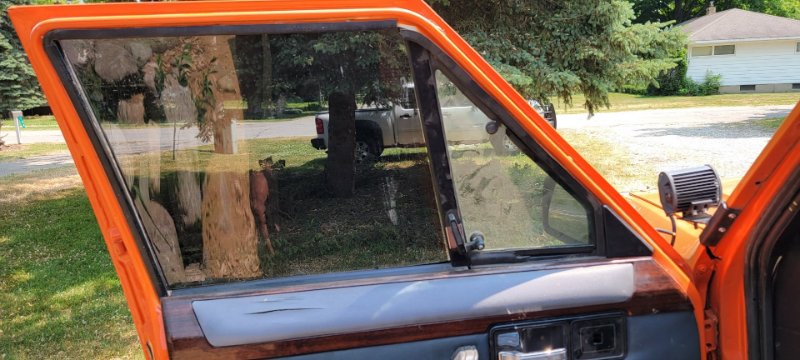
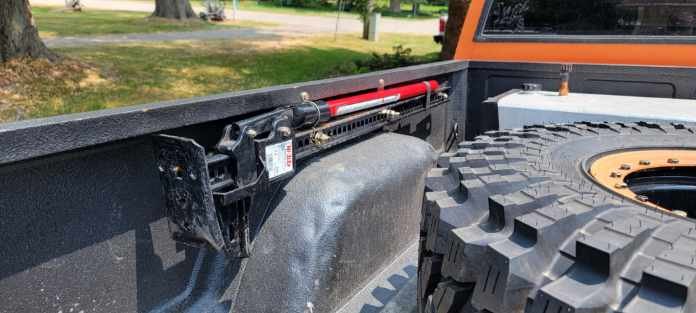
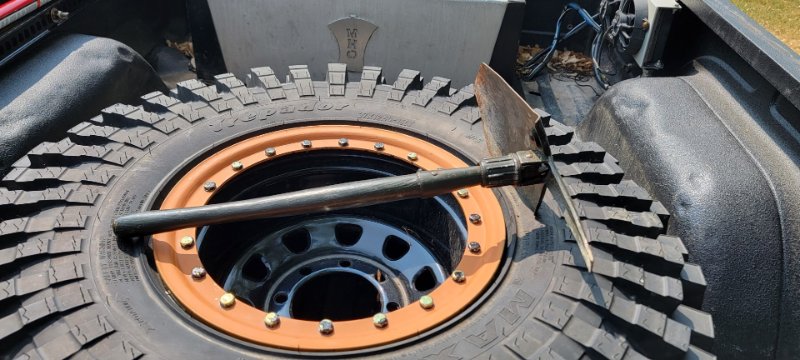
-
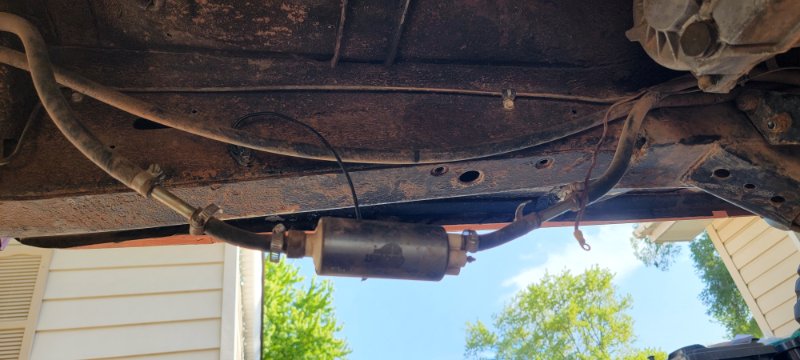
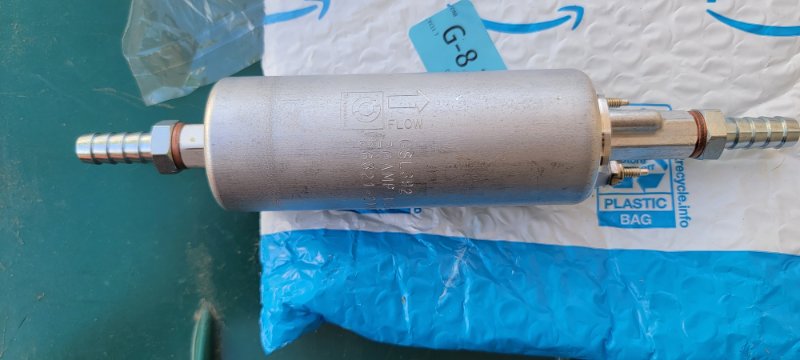
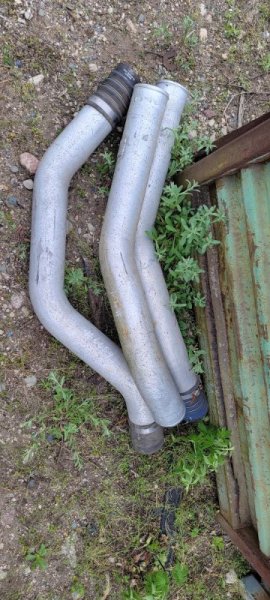
Time for some attention under the hood Again. Haven't been the most satisfied with the battery mounting in itself ( little wobbly as is so it could absolutely be done better) and while discussing other under the hood things with my brother we decided it was time for more change. On my list of want to do's was make a new intake tube, preferably less pieces as a whole. This conversation about routing lead to ditching the older factory style coolant reservoir in the driver front corner. The intake cone filter will stay in the driver side of the engine bay but this will give us a little more room to get the filter farther away from the exhaust header. Utilizing a later factory coolant reservoir in the later factory location proved simple enough and also makes for a much shorter overflow hose. This came with its own little changes because now the coolant hoses for the heater core would need to be re-routed as well. Those needed to be changed and managed a little better anyway so it was basically meant to be. Also wanted a more reliable and universal setup for wiring accesories (lights, elec fans etc) than the previous setup so an amazon special relay box was in store for sure. It was far too late for a finished product photo when all was done but this also came with another issue. The very noisy car quest fuel pump had locked up! Without any idea of its age or even a part number to reference it's capabilities I stuck to the interwebs for a preferred in line ls swap replacement. The walbro 392 pump was $125 and showed up in just a couple days. I didn't realize in-line fuel pumps could be this quiet! All said and done this truck runs and sounds better. Will sneak a few better photos in here for the engine bay once I start playing around with all this tube for the intake. Conveniently enough, semi trucks use 4" aluminum tube for their intercooler systems, just soo happens my truck needs 4" tube as well to match the throttle body and MAF Stay tuned for some potentially cringy aluminum tig work and this will be my first tig job other than messing around with test squares!
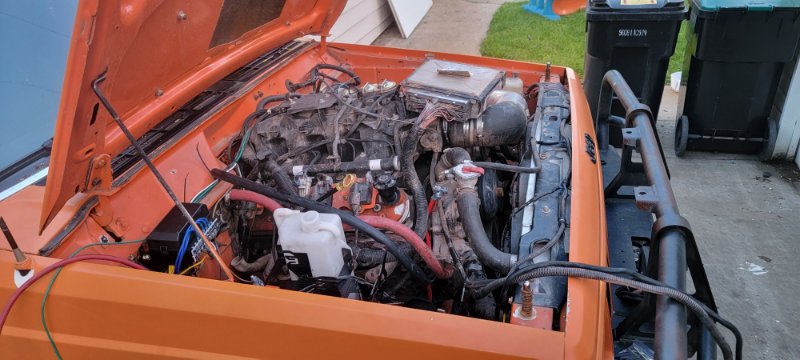
-
Jeep Comanche Behind the seat Molle Panel!
ThatJeepGuy replied to ThatJeepGuy's topic in MJ Tech: DIY Projects and Write-Ups
That's part of the idea 😉. The lack of molle equipped storage cases has me leaning towards a gun rack style setup... We will see what happens with that later -
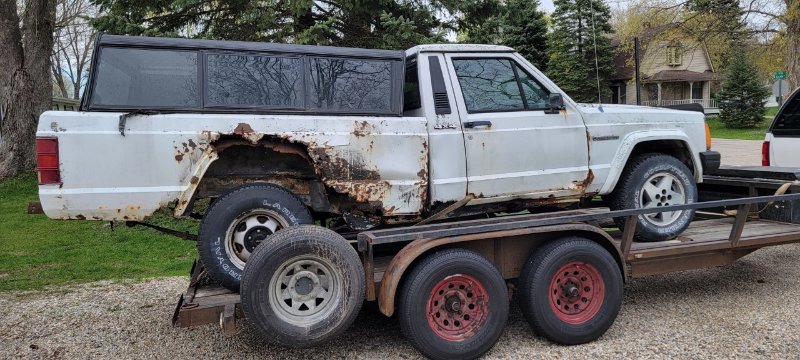
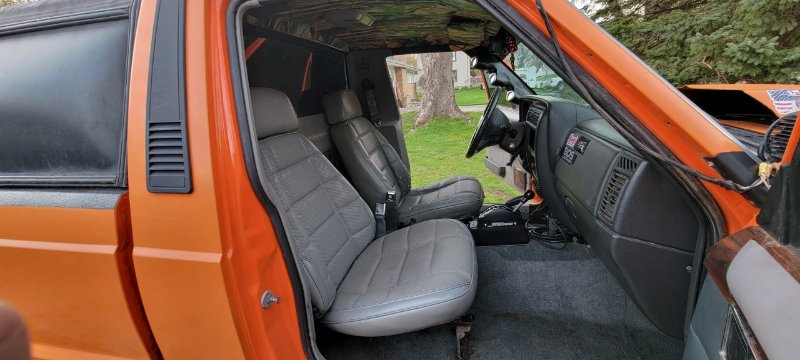
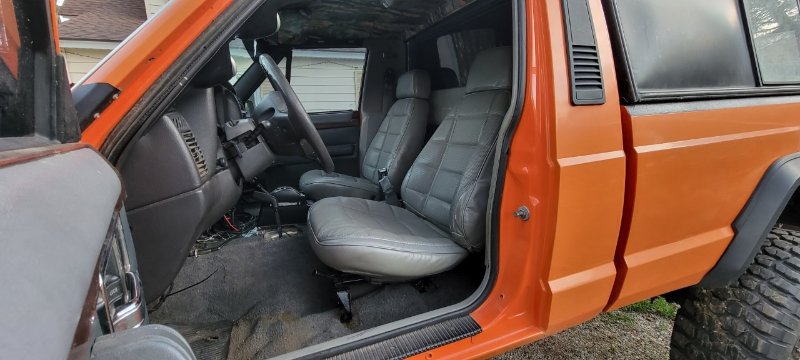
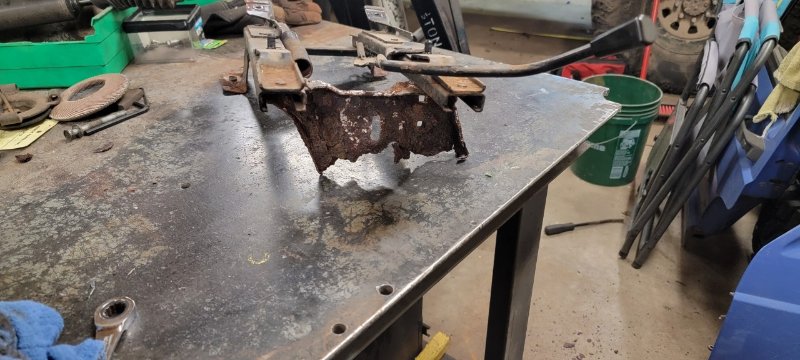
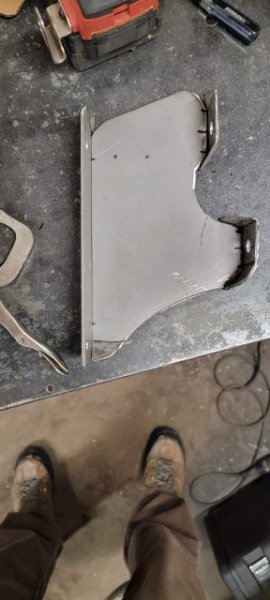
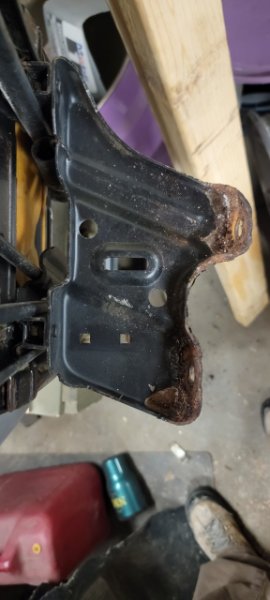
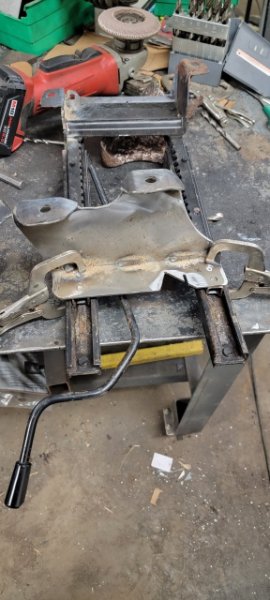
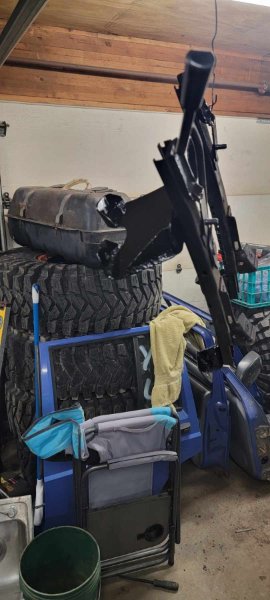
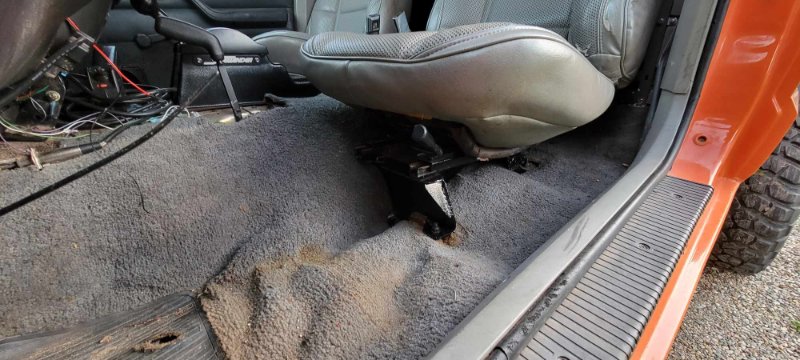
So while flipping through Marketplace i came across this jewel of a farm truck. Worked the deal a bit and landed at $400. 2 words - Bucket Seats! The bonus was the fact that the 4.0 4x4 drivetrain has less than 100k miles! Really though the initial buy was Just for the bucket seats but besides the little things here and there i plan to save for other projects I'm also going to have the factory sliding rear glass pulled out and installed in the orange truck. Topper wasn't part of the original purchase but was on the way so i figured perfect opportunity to travel safely with the topper. Early S10 short bed topper was $50. Forgive me though as i didn't take any pictures of the inside of the truck before removing the seats. It was a complete grey interior though with a felt-less headliner and the rear carpet trim still intact- though i don't have a need for that anymore still a nice find nonetheless. If the broken exterior view didn't make it obvious enough - its pretty rust down there! Driver seat mount was rusting away. Front side has most the damage and one tab on the rear also needed some love. I used the passenger seat bracket as my reference and simply reversed the templates i made to apply in the driver side setup. Passenger pictured Left, mock-up drivers bracket on the right. Almost forgot the notch for the return spring! The bracket originally had compression rivet and a hard to spot rosette weld securing it to the slider base. I ground the heads off the compression rivets but kept the body as an alignment pin for my new bracket. Welded the rivet body flush with the seat bracket and then added a 5/16's hole to either side to rosette weld in place as well. hit it with 2 coats of rustoleum black engine enamel - this has been my go to paint lately. It sticks well and holds its color good enough for my needs. lack of lighting - my apologies! Gonna have to start looking for a center console setup now that its wide open there. Also nabbed the grey seat belts and buckles - Thank goodness no more Red/Burgundy interior!!
-
Project 3rd Time is the Charm
ThatJeepGuy replied to 89eliminator's topic in MJ Hardcore Tech: Epic Journeys to Greatness
Love the sidewinder shifter. There was a ratchet shifter in my orange truck when I got it home, the winters is absolutely preffered. The side to side for each gate takes a little getting used too but no hesitations on going this route again. Are you going to integrate the LS with the factory cluster, custom gauges, dual computer setup and retain factory cluster, holley terminator setup? Also are you going to retain the older body or go to newer body and dash setup? -
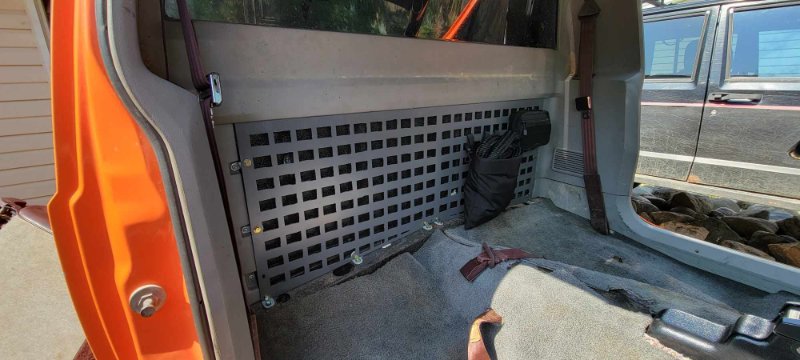
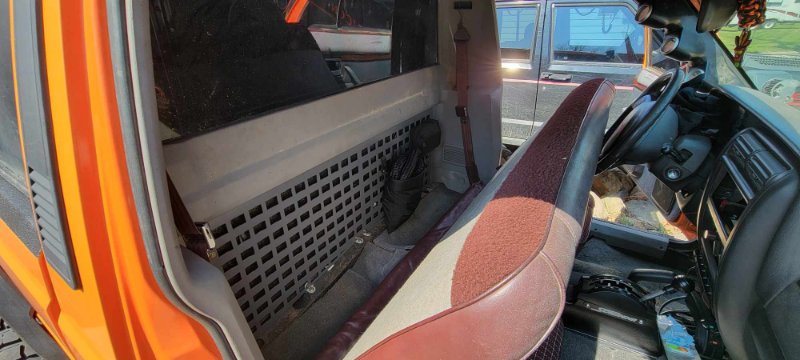
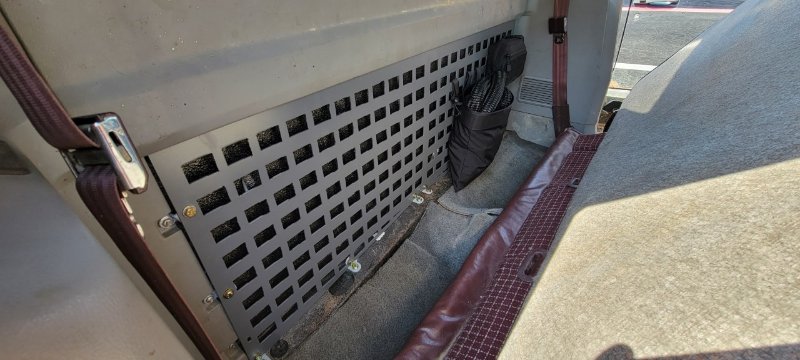
Finally got my molle panel design installed and i'm very happy with the outcome! Kinetic rope in a universal mag pouch and then my soft shackle and snatch block in the small pouch to the right. Plenty of room for more gear etc that i won't have to worry about sliding around under the seat
-
Jeep Comanche Behind the seat Molle Panel!
ThatJeepGuy replied to ThatJeepGuy's topic in MJ Tech: DIY Projects and Write-Ups
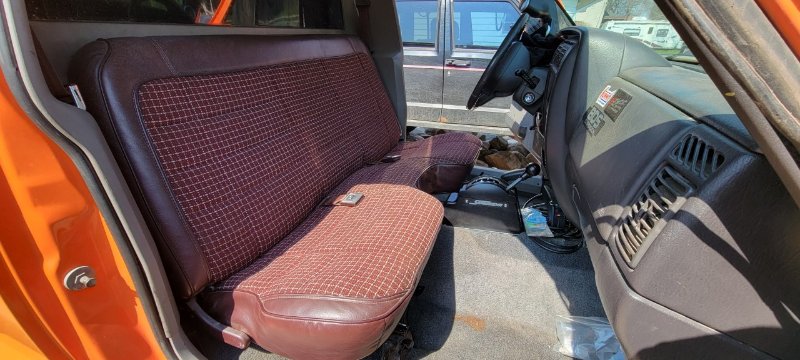
Final install! (12) nutserts used in total and only 4 of the 6 PAL nuts to secure the sides. Top cross trim panel installed over top With the seat installed back in place the access is fair. Wouldn't even know its back there. Final design/cut needs some adjustments but overall i'm very happy with how this turned out!!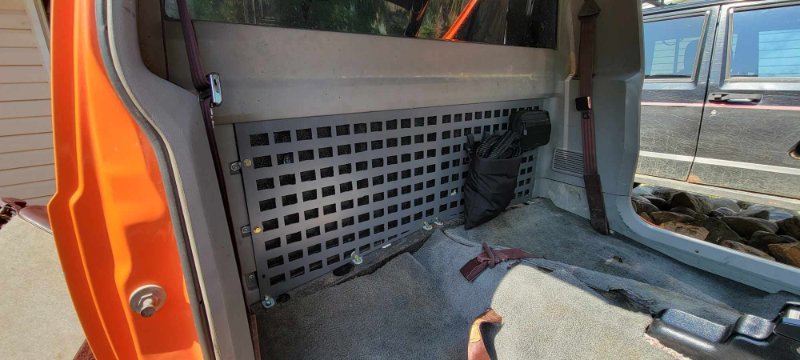
-
I've come to appreciate a topper for my pickup(s). Especially if you get snow where you live. Depending on what your up too, clearing the snow off your vehicle is one thing but then also clearing it from your bed is another, no thanks! I typically remove the topper(s) during the summer and then re-install them for late fall and winter.
-
How did you aquire your Comanche and what is the story behind it?
ThatJeepGuy replied to Classy Comanche's topic in The Pub
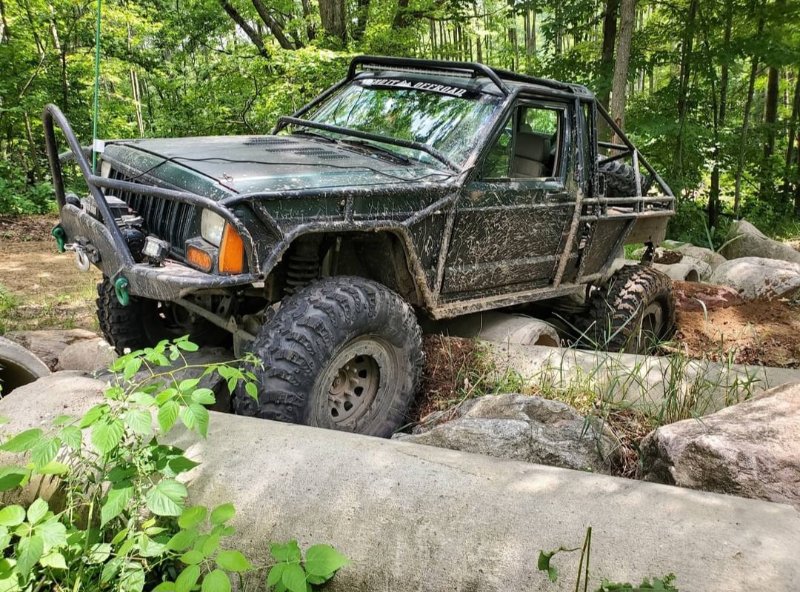
Year 2008. Local guy was going through divorce and wife was gutting him/his belongings. This truck was originally his dad's and only had a sale sign in the window for a short while before it was pulled. Didnt intend on selling but didnt want her to take it. Other people in the group I was hanging out with were talking big games for going and buying it but no one ever made a move. So I stopped by one day after work And left a note in garage door stating I'd like to buy it and my #. Called the next day and we made the deal for $500. Guy was pretty excited to hear I wanted to use it for a wheeling vehicle. This is from early last summer but 15 years later this truck is iconic for me in representing struggle and progression. A lot of life has happened in those years and this truck has always occupied my time in some way and I'm grateful for it. I've had multiple other MJs over the years but none of which can compare to the sentimental value this one holds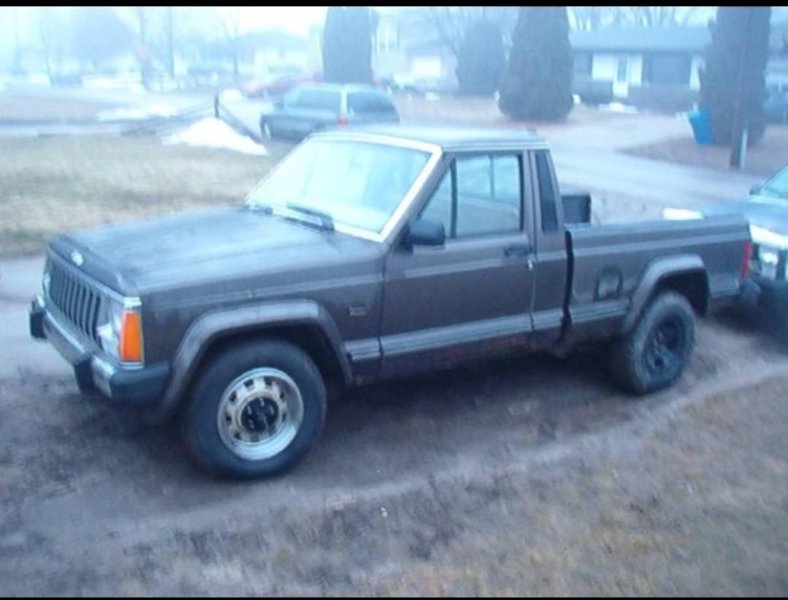
-
Tractor supply is a very good point, the size of those bolts gave me flashbacks to replacing factory control arm bolts with grade 8 hardware from ACE hardware, unfortunately the only place that carried 9/16's bolts long enough for the job charged by the piece. My thoughts exactly as well on why bolts instead of just welds?
-
^^That's a lot of holes and hardware holy smokes! Especially at grade 8, you'd prolly have $100 in hardware there today! Really though there are a number of other vendors with MJ sliders. Google just that "Jeep Comanche rock slider" and ignore the jcwhitney, jeggs, Summit racing links/adds as those are more than likely the side step or running board type. Stinky fab racing I'm pretty sure is still making them?
-
86 2.8L and etc value? Scrap it or hold out
ThatJeepGuy replied to ThatJeepGuy's topic in MJ Tech: Modification and Repairs
Grand Rapids MI area. This being a potential project that won't exactly have a great resale value once it's done, given the amount of work going into it, it's pretty safe to say if it's metal it's gonna be scrapped vs given away. Something in return $ wise towards this project is better than nothing. -
86 2.8L and etc value? Scrap it or hold out
ThatJeepGuy replied to ThatJeepGuy's topic in MJ Tech: Modification and Repairs
This one has an automatic. This is my thoughts but with just about anything, actions speak louder than words and I'm sure there are those out there that might advocate saving some things but unless someone is willing to go out of their own way for it then in my opinion the value really isn't there. -
So I'll be picking up an 86 XJ this weekend. My intention with this one is to 95OBD1/96OBD2 swap it, now I'm not looking for any advice in that dept as I've done this swap before and I'm very well aware of the various body differences and other challenges that come with this endeavor. The thing I'm unsure of is weather or not the engine and Trans are worth selling or not. In the past I've defaulted to removing these old drivetrains as a whole and scrapping it nearly immediately! I'm not a huge fan of the 2.8L at all so I don't care to put any time into making it run. However this 86XJ only has 85k original miles and though it's been sitting for 6+years I'm struck with curiosity if it holds more value than scrap weight for those purists out there. Or even any other part of this jeeps original engine bay, harness or trans/tcase for that matter. Things have absolutely changed in the last 10+ years since I did this last. Soo if you have any suggestions on desirable parts that are key to this 86 feel free to let me know. In no way am I seeking top dollar hoarder pricing on anything; more soo pricing that's worth saving parts from the trash or scrap bin.
-
Jeep TJ gas tank swap? Whodunnit
ThatJeepGuy replied to ThatJeepGuy's topic in MJ Tech: Modification and Repairs
With little success at finding others detailed success I have proceeded with my own approach to making the TJ gas tank fit in place of the spare tire under the bed. I haven't taken any photos yet but what i can say soo far is that this setup is definitely NOT exactly a "meant to be" fitment as much as other will claim it to be. To be clear, JCR offroads approach for their shortbed MJ was to remove the rear half of the factory X-brace between the frame rails. If i remember correctly they shared a "frenched crossmember" to cap the rear most section of the frame rails. What i'm shooting for is to leave the X-brace alone and instead trim away the bed material hidden behind the bumper. If I'm successful i'll share a little more of a how to modification thread on how i pulled it off. Perhaps FINALLY putting the Whodunnit question to bed! -
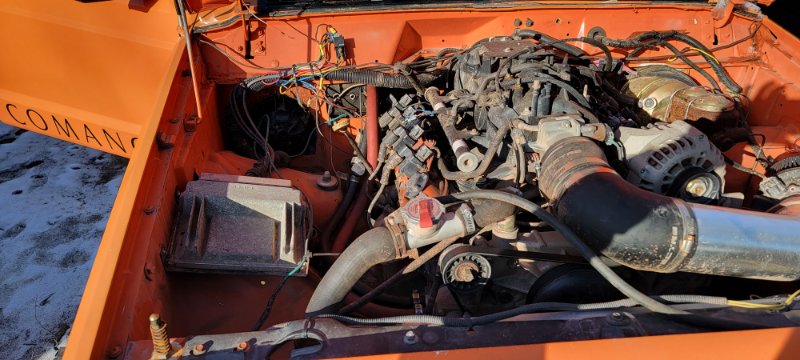
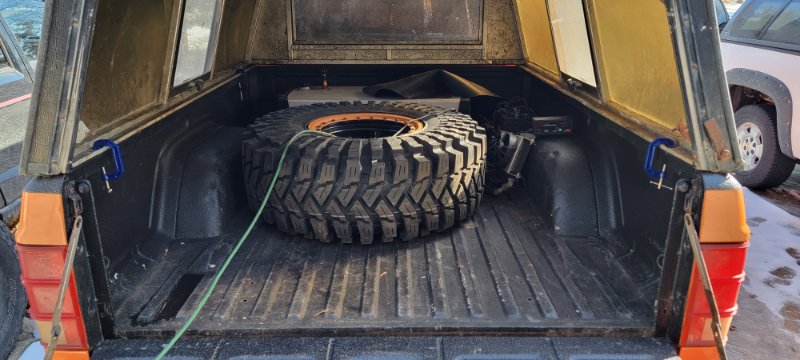
Soo I finally swung into action and moved my battery back up to the engine bay over the weekend. Currently what it setup in the bed of this truck is a fuel cell, the battery which is to the right of the fuel cell at the far side of the bed. Then also the Trans cooler and this massive 37" spare tire! My intentions here is to free up the space and by the end of this ideally only having a spare tire remaining. Engine bay is fairly empty minus the 6.0L engine but there isn't much else for extras. This made this transition soo much easier! Forgive the wire nest over the blower motor, this is old accessory wiring that will also get changed in time! This was only a little tricky, with a barnes4wd optima battery mount I was able to mount the new tray securely to the fenderwell/wheelwell and still clear the coolant hoses and hood. Gm pcm got shifted a bit closer to the blower motor with ease though I need to make another bracket to support the low side but for now this will do. The wiring is still a little bit of a mess but with a new 2 gauge power wire to the starter, 2 gauge ground wire to the engine block and shorter 4 gauge lead to the alternator this truck came right back to life! Still need to rewire a few things like the cooling fans, blower motor and accessory lighting but I was running out of daylight and didn't want to open up too much of the wiring just yet. I also started the process of fitting a TJ gas tank into the rear spare tire area under the bed but managed no pictures to show progress. Removing that fuel cell from the bed is a big goal of mine for this incentive of free bed space. What I can say thus far is the fitment is not as direct as many might think! While I am completely aware of the approach JCR offroad took to their application of the tank, my approach with leaving the factory "X" brace and clearing metal form the rear of the bed is turning into a subtle adventure of how little can I remove and still make for functional fitment! I promise to take pictures and better document the progress as I get a little more into this task. For now though that's what I got to share
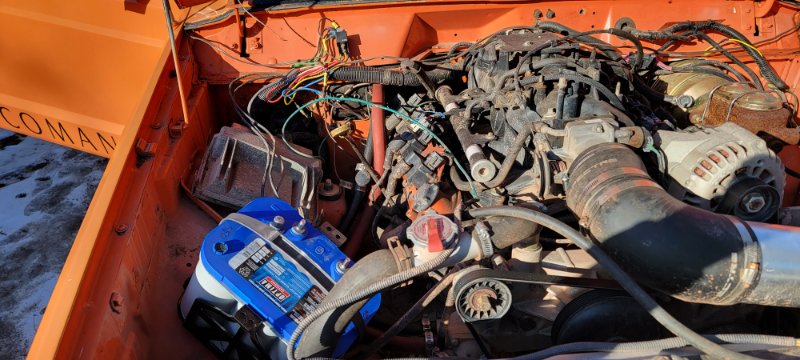
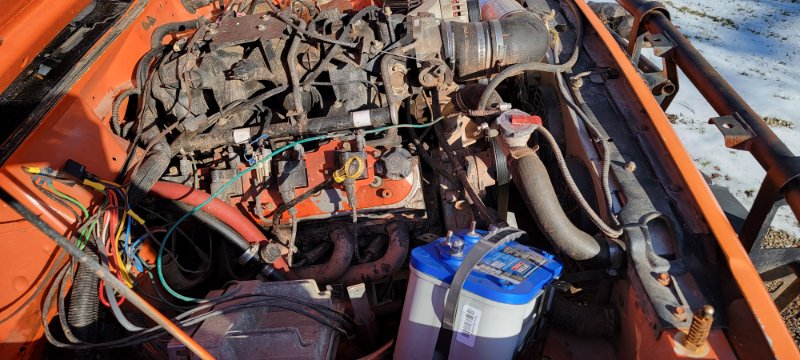
-
Jeep TJ gas tank swap? Whodunnit
ThatJeepGuy replied to ThatJeepGuy's topic in MJ Tech: Modification and Repairs
All good, i forgive you this time Definitely appreciate the link and while the details are very thorough and pictures are fantastic! that was to mount the tank in the factory location and not in place of the factory spare tire location -
Center console question
ThatJeepGuy replied to majastee508's topic in MJ Tech: Modification and Repairs
As far as I know yes absolutely interchangable between manual and auto. Shift indicator will drop and lock right in. -
Jeep TJ gas tank swap? Whodunnit
ThatJeepGuy replied to ThatJeepGuy's topic in MJ Tech: Modification and Repairs
For context, my MJ is LS swapped thus why I already have a fuel cell in the bed. Factory gas tank location with any configuration of tank isn't in my interests. As it stands now, I have the new to me TJ tank setup with a fuel pressure regulator bypass and aftermarket fuel pump retrofitted to the TJ sending unit. I do appreciate the chip ins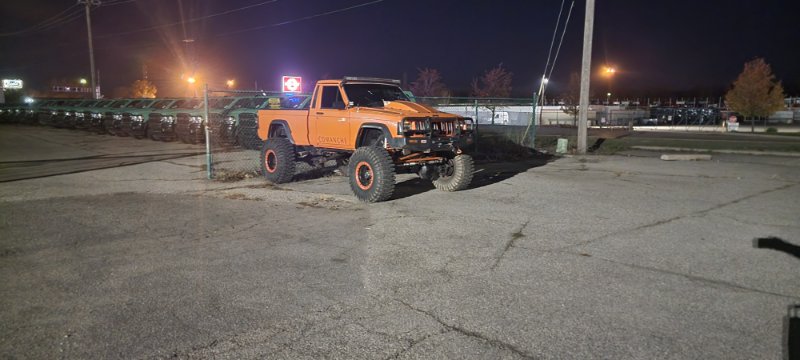
-
Jeep TJ gas tank swap? Whodunnit
ThatJeepGuy replied to ThatJeepGuy's topic in MJ Tech: Modification and Repairs
I'm familiar with both the steel and plastic xj tanks from either year range 96- and 97+. Their overall size alone doesn't work for the area of the factory spare. I'm aware of the level of creativity and options for other setups/locations but for the purpose of my trucks build - specifically the factory spare tire location and also a TJ gas tank is what I'm looking for insight on others potential process of doing so. Currently have a fuel cell in the bed of my truck and while it works as is, I absolutely want an empty pickup bed and this fuel cell takes up too much space for my needs. -
Custom Coolant Reservoir Tank
ThatJeepGuy replied to knuckledragger666's topic in MJ Tech: Modification and Repairs
Fwiw you can use just about any container, size and shape you'd like if the factory one isn't doing it for you athletically- just soo long as it will hold enough coolant to maintain the cooling systems proper level. You can also mount it wherever you'd like too, lengthen or shorten the hose as needed.