howeitsdone Posted August 13, 2021 Author Posted August 13, 2021 It's whatever looked close to me when I was at Oreilly's. I think it's DupliColor, but not make specific. Kinda looks like it though right?
howeitsdone Posted August 23, 2021 Author Posted August 23, 2021 Back to work after taking some time off from the truck. New driver's knuckle installed after I ruined the original. If you saw the thread, you know... Honestly, it does fit better than the other one anyway so I'm happy I had to get another one in the end. Got the front brakes all mounted except for the lines. Still need to buy them. Not too concerned at the moment since the rear is in the process of being torn apart so it's not going anywhere. I'll have to swap out the pitman arm joint because the one in there currently won't accept grease. Tried 2 guns and multiple fittings. Good thing I accidentally bought 2 initially. The rear leaf bolts are quite fun... Got the two bolts that attach each leaf to the shackles, but having a tough time with the front ones. Got the nut off the passenger side after cutting down the bolt itself (too long for my socket to fit over) but now the bolt is stuck. Going to try and use the bj press and see if it'll pop out. Worst case scenario I'll have to take a cutoff to the head. The real challenging one is the driver's side. There is almost no clearance between the bolt and gas tank skid. Even if the skid was off, the tank is still too close to fit an impact up there. VERY cautious to use heat in that area too. Really don't want to drop the tank. Currently brainstorming. Took out the airbox and cleaned out all the squirrel treats. Replaced the "front" and "rear" vacuum lines with the Doorman replacements. The rear came with a hose that is too small for the air box nipple, so I sliced the inner part of the hose a few times to get it to fit. Then I replaced the oil filter and poured in the new oil. Started on the 1st try with a little love! I will need to replace the battery cables as the shielding is gone for the positive to starter. When I changed the filter, I went to wipe off the oil beneath and found a bunch of goo. When I grabbed it to inspect I thought it was red RTV that someone never cleaned up. Nope, that was the plastic shielding of the cable...
MiNi Beast Posted August 23, 2021 Posted August 23, 2021 Saw saw the bolts perhaps. Which ever to get her done. I'm not looking forward to my leaf spring swap but i do have to pull tank for a new one so guess i will plan for that at same time. Thanks for that tid bit. Yeah some parts are just better off replacing for the peace of mind. Glad you handled the knuckle and worked out good. Can you possibly drill a pilot hole in the grease fitting hole itself?
howeitsdone Posted August 24, 2021 Author Posted August 24, 2021 It's a tough one for sure. If the bolts didn't get frozen within the bushings it would be a breeze. I have no problem taking a torch to the nut, but getting a cut-off in there producing tons of spark is scary. I suppose I could go get a welding blanket and stuff it. I'll have to play that one by ear.
howeitsdone Posted August 24, 2021 Author Posted August 24, 2021 21 hours ago, MiNi Beast said: Can you possibly drill a pilot hole in the grease fitting hole itself? Maybe, but since I have the 2nd one I'd rather try that one out. It really only takes 5-10min to replace. Once I replace though I may just experiment and test that theory out.
jeepmjga Posted August 27, 2021 Posted August 27, 2021 Will that front bolt not come out with a BFH and some WD 40 or PB? If I remember right a 3/8" socket extension is about the same diameter as the bolt. I was able to at least break it loose using the breaker bar to turn it if that makes sense.
howeitsdone Posted August 29, 2021 Author Posted August 29, 2021 Replaced the rear brakes today. First time with drums and can easily say I hate 'em. lol The first one took maybe an hour or so to learn what the heck was going on. Then the 2nd side took maybe 5-10 min. Pretty simple once you get it down, but still a PITA either way. I did have a 2nd set of hands though, so I imagine the re-install would have taken a bit longer by myself. I attempted to replace the front lines with some YJ lines, but lucky for me I purchased the early years and it didn't quite work. So those are now returned and I've got some '95s on the way. Not a huge deal again since it's not going anywhere quite yet. An interesting thing happened with the front brake hose that I removed though. I took a torch to the nut to get it nice and hot, then I sprayed with some PB. As soon as I walked over to the toolbox to set the can down I heard a BANG and it didn't smell good. I walked over to see that the hose had blown off of the metal adapter and sprayed any remaining fluid all over the place. Glad I had walked away, and certainly a great thing to be aware of. I'll know for the passenger side and be more cautious. I bet that fluid sitting there was super hot. Anyway, going to try and finish the AAL tomorrow. Still have quite a few things to do other than those brake lines so still plenty of work.
howeitsdone Posted August 29, 2021 Author Posted August 29, 2021 On 8/27/2021 at 3:38 PM, jeepmjga said: Will that front bolt not come out with a BFH and some WD 40 or PB? If I remember right a 3/8" socket extension is about the same diameter as the bolt. I was able to at least break it loose using the breaker bar to turn it if that makes sense. It's loose-ish. Just married to the bushing so doesn't do much to turn it. I've got the exhaust hanging on by a literal thread right there so didn't have the room. I'm going to cut it just after the CAT and I'll have the room for a punch and BFH. I couldn't figure out a good method for the BJ press anyway.
howeitsdone Posted September 12, 2021 Author Posted September 12, 2021 Slow progress recently. Had to have RC send out some new leaf spring center pins since they didn't send the right sized nuts in the kit. My brother took the leaf to the shop and pressed out the old bushings that were seized and put in the new ones for me. Was not really planning on removing the rear axle, but since it was so easy I had to do it. I got it cleaned up and threw down some fresh POR-15. Finally getting to that point where most of the big stuff is out of the way and now it's time to tackle all of the remaining little items before it's drivable. Got 4 of Rusty's D35 U-Bolts and the threads appear to be too short for the AAL, but I won't know until I piece it all together. When I called them they said it would work. I'll also have to flare some brake lines in the rear since one twisted off when trying to remove. If I'm buying the tool might as well replace all the rusted ones. All the rear lines have been replaced at some point except for the ones to the wheels. Whoever did the job probably didn't care much so it's a little mess back there.
89 MJ Posted September 13, 2021 Posted September 13, 2021 It feels good bring that close to having it driveable.
Pete M Posted September 14, 2021 Posted September 14, 2021 I would start from scratch with the brake lines. the nickle lines aren't all that much money and you can then know for sure there aren't any other little surprises from the PO.
howeitsdone Posted September 14, 2021 Author Posted September 14, 2021 6 hours ago, Pete M said: I would start from scratch with the brake lines. the nickle lines aren't all that much money and you can then know for sure there aren't any other little surprises from the PO. I actually received a couple from Ryan that are OE so I may just use those since they aren't damaged. I've traced the lines from the front to the rear and they appear in good shape. Some new fittings are needed though.
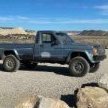
howeitsdone Posted September 27, 2021 Author Posted September 27, 2021 The old tires finally made it to the ground! Rear sitting pretty tired it appears. Will need to address new leaf springs I fear. (Not a cost I was looking forward to) BUT it's honestly my favorite part now of just tearing the insides apart and getting it a little healthier on the inside as well as the engine bay. Certainly a few items to diagnose in the bay as well as a discovered radiator leak showing when I filled it up. Certainly not going to win any beauty contests, but at least I'm 1 step closer!
jeepmjga Posted September 27, 2021 Posted September 27, 2021 Heck yea lookin good man! If you have to go with new rear springs Alcan was expensive but worth it and Lew was very awesome to deal with.
howeitsdone Posted September 28, 2021 Author Posted September 28, 2021 Thanks man! Nowhere near complete but starting to look it at least! Those wheels don’t hurt either! Did you do 4 or 5 leaf? I’ve seen them anywhere between $600-$1100. General is about $560 shipped. I move to Utah in November and I’m thinking of finding a shop out there to avoid the shipping costs.
jeepmjga Posted September 28, 2021 Posted September 28, 2021 14 hours ago, PocketsEmptied said: Thanks man! Nowhere near complete but starting to look it at least! Those wheels don’t hurt either! Did you do 4 or 5 leaf? I’ve seen them anywhere between $600-$1100. General is about $560 shipped. I move to Utah in November and I’m thinking of finding a shop out there to avoid the shipping costs. Theres actually 8 leaves in my pack but its a 4” inch lift with the Rubicon Express .5” shackle. They ran around $750 but shipping was expensive. They are just over the Colorado border in Grand Junction so you could prob make a trip and avoid that cost. It took a while because their steel kept getting back ordered but Lew was real responsive to all my questions.
howeitsdone Posted September 29, 2021 Author Posted September 29, 2021 Drove it around the block yesterday. Brakes just about hit the floor before stopping. I seem to have good pressure, but something in the chain is off. Going to have my brother take a look at them today to diagnose. I also still need to address the cooling system this week or next. I'm going to convert. I found a write-up that was very simple and to the point. Just replaces hoses, radiator, and reservoir. I'll need the pump & housing replaced down the line, but doing this is actually only a little more expensive than replacing a closed-system rad. Forgot to mention the license plate came in! I was very surprised no one had taken this already.
howeitsdone Posted October 3, 2021 Author Posted October 3, 2021 Got some tires today from FB. Went with 31x10.50r15 since I wanted avoid the rubbing on stock wheels. Fits well though. I’ll have mounted to the turbines on Monday. Also removed the radiator. New one should be here tomorrow. Still need the overflow tank to make it complete, but that’ll be here Monday. Tried to replace the rusted out driver door today with one from the JY but didn’t realize whoever took the window regulator had no idea how to remove rivets 🤦🏻♂️ So old door going back on.
howeitsdone Posted October 4, 2021 Author Posted October 4, 2021 Radiator is finally in. Took a lot of convincing for that right side of the support bracket. Something is keeping it from wanting to be there and I'm not sure what. Still need to head to NAPA and grab the hoses that go to the core. Although, since my core is bad and I don't feel like taking the dash apart right now, I'll just jump the two hoses together. Maybe I'll get the urge to do the core in a week or 2. Couldn't really figure out a good mounting point for the 4.0 bottle. It's zip-tied to the pulley where the a/c would be. Could potentially put in spot where the old one was, but unsure what I want to do yet.
89 MJ Posted October 4, 2021 Posted October 4, 2021 I used a Renix 2.5 coolant overflow tank for the open cooling system in my 89 4.0. It goes right next to the air box.
scguy Posted October 4, 2021 Posted October 4, 2021 Liking this build! Love the tag. Have you thought about doing the 97+ XJ washer reservoir mod? It frees up so much room underhood.
howeitsdone Posted October 5, 2021 Author Posted October 5, 2021 20 hours ago, Pete M said: love that plate Why didn't you already have it?? 15 hours ago, 89 MJ said: I used a Renix 2.5 coolant overflow tank for the open cooling system in my 89 4.0. It goes right next to the air box. I should have gone that route instead. Now I'm $25 into the 4.0 tank & it'll be about another $25 with shipping to get the 2.5. Trying not to throw any more $$ than necessary at this point. 14 hours ago, scguy said: Liking this build! Love the tag. Have you thought about doing the 97+ XJ washer reservoir mod? It frees up so much room underhood. Thanks! I thought about it, but I'm not so sure I'm keen on drilling holes out quite yet. Once I get everything running properly that may change, but just trying to get it healthy first.
Pete M Posted October 5, 2021 Posted October 5, 2021 because I would need an MJ registered in GA to be able to get it.
howeitsdone Posted October 6, 2021 Author Posted October 6, 2021 The dusty ole’ girl took her maiden voyage. Probably a whole mile round-trip But I needed gas to keep flushing the coolant rust. I’ve flushed at least 5 times and still looks horrible. The steering is very loose and something in the chain (or multiple items) needs an adjustment. I still have to replace the turn signal module in there too. Also changed the plugs today. Whoever did them previously gapped to .06! Not the end of the world, but certainly contributing to a little rough running. Huge progress nonetheless, even if it is just a half mile up the road to the gas station.

Recommended Posts
Create an account or sign in to comment
You need to be a member in order to leave a comment
Create an account
Sign up for a new account in our community. It's easy!
Register a new accountSign in
Already have an account? Sign in here.
Sign In Now