CGCWO Posted January 12, 2021 Author Posted January 12, 2021 I like the honey on the seats too. Plastics and dash will be a little different, going with SEM palomino vinyl paint/dye to recondition them. Also have a light brown carpet and some close match to the carpet vinyl wrap for the dash and waiting on samples for headliner to pick that color. Exterior color is going to change to white with maroon accents and pioneer hockey stick stripes.
Jmat27 Posted January 12, 2021 Posted January 12, 2021 On 12/24/2020 at 2:24 PM, CGCWO said: Do you happen to know how long the rear driveshaft is? I’m swapping my short bed 4x4 2.5 for a 4.0 HO and ax15 using the same transfer case. All I can find for driveshafts are to the long beds.
CGCWO Posted January 12, 2021 Author Posted January 12, 2021 2 hours ago, Jmat27 said: Do you happen to know how long the rear driveshaft is? I’m swapping my short bed 4x4 2.5 for a 4.0 HO and ax15 using the same transfer case. All I can find for driveshafts are to the long beds. I haven’t measured mine.
CGCWO Posted January 15, 2021 Author Posted January 15, 2021 Was able to get a little work done on the truck today. Replaced the old header panel and put the headlight buckets in along with the new headlights. Also took off the front bumper and put in the new left front fender liner. Need to work on the header/fender/hood alinement a bit. Just stuck the Jeep letters on with out the clip nuts so I don’t misplace them.
CGCWO Posted January 15, 2021 Author Posted January 15, 2021 Not much progress today other than getting a new fuel filter and fuel pump installed. Still have to remount the tank since I had to pull it to get the fuel pump out. No pics since most of you have done this more than once.
CGCWO Posted January 24, 2021 Author Posted January 24, 2021 It been a few days since I’ve updated the thread. Over the past week or so I’ve pulled the 34 year old injectors, cleaned the ports and the fuel rail along with the throttle body. Replaced the power steering pump & pulley. Found both power steering hoses were not much more than finger tight. No photos of these things as they are pretty normal maintenance. Spent some time working on the interior while waiting on the new Bosch injectors to arrive. All the plastic interior pieces and lower parts of the dash have been painted with Krylon Boot Leather Brown. Installed the carpet, headliner, interior trim, center console and the bucket seats. Also received the weather stripping/seals kit I ordered almost a month ago. Put in the new door seals.
CGCWO Posted January 24, 2021 Author Posted January 24, 2021 1 minute ago, CGCWO said: It been a few days since I’ve updated the thread. Over the past week or so I’ve pulled the 34 year old injectors, cleaned the ports and the fuel rail along with the throttle body. Replaced the power steering pump & pulley. Found both power steering hoses were not much more than finger tight. No photos of these things as they are pretty normal maintenance. Spent some time working on the interior while waiting on the new Bosch injectors to arrive. All the plastic interior pieces and lower parts of the dash have been painted with Krylon Boot Leather Brown. Installed the carpet, headliner, interior trim, center console and the bucket seats. Also received the weather stripping/seals kit I ordered almost a month ago. Put in the new door seals. Pics make the Boot Leather Brown look a little red tinted, but it’s actually a good match for the colors in the cloth parts of the seats. Just a little darker than the honey.
eaglescout526 Posted January 24, 2021 Posted January 24, 2021 An oddly satisfying color. Looks very close to the honey color.
CGCWO Posted January 26, 2021 Author Posted January 26, 2021 Got the new Bosch injectors installed today. Then spent most of the rest of the day trying to figure out why I am not getting fuel (have yet to hear the fuel pump run unless I power it directly off battery terminals). I have checked and rechecked everything I can think of and still once I button up the pump in the tank and connect the wiring no fuel. I can add fuel directly to the throttle body and she will fire up for a second. So I know she will run. I also added the additional ground as per cruisers tips. After getting frustrated I decide to work on my exterior lights. Success on that front and now I have all the lights working but the back-up lights (need new bulbs). Still no dash lights yet, but that’s a project for another day.
Ωhm Posted January 26, 2021 Posted January 26, 2021 Using a voltmeter or 12vdc testlight (preferred) check for B+ on the following pins (use battery negative terminal for ground): D1_5: B+ (Hot at all times) D2_4: B+ (Hot during KEY ON/CRANKING). D1_6: KEY ON (B+ (Hot for 2-3 seconds)) or CRANKING (B+ (Hot during CRANK)).
CGCWO Posted January 26, 2021 Author Posted January 26, 2021 5 minutes ago, Ωhm said: Using a voltmeter or 12vdc testlight (preferred) check for B+ on the following pins (use battery negative terminal for ground): D1_5: B+ (Hot at all times) D2_4: B+ (Hot during KEY ON/CRANKING). D1_6: KEY ON (B+ (Hot for 2-3 seconds)) or CRANKING (B+ (Hot during CRANK)). Well take a look at this tomorrow, actually just picked up a voltmeter.
BeatCJ Posted January 26, 2021 Posted January 26, 2021 2 hours ago, Ωhm said: Using a voltmeter or 12vdc testlight (preferred) Why is a test light preferred? I used a multimeter, and got the results I needed. On the other hand, I was pretty sure my fuel pump was bad, and was just seeking confirmation before I bought a replacement and dropped the tank.
CGCWO Posted January 26, 2021 Author Posted January 26, 2021 I’ve verified the fuel pump is good by direct wiring to 12v source. After thinking this through I believe I have a bad fuel pump relay along with a couple others. I am going to replace all four of the relays for piece of mind.
WahooSteeler Posted January 26, 2021 Posted January 26, 2021 Have you checked the fusible links at the starter relay for no power to fuel pump?
CGCWO Posted February 3, 2021 Author Posted February 3, 2021 So got a few more things done on the truck over the past few days. Had All the interior back together but the kick panels. Then decided to pull the gauges to see if I could fix the gear indicator and see if I could find any reason the dash lights don’t work. No luck with the lights and found out I have a broken Speedo cable. I did get the gear indicator working and adjusted correctly. Also installed the euromatic lights (they work) may need to rewire once I get door switches installed though. Assembled and reinstalled the new header panel and grill. All the exterior lights are working now, but I don’t have any brake lights when pushing the brake (that I can tell). I did find a couple wires under the dash that I can’t identify as to where they should go. (Pic 1). Also added an extra ground under the dash near the parking brake mount. Have the new fuel sender and pump from MTS, new CPS, new IAC, new windshield washer pump and waiting on new TPS. Still dealing with a no start issue so hopefully I’ll get that and the dash and brake light issues sorted out. Thinking I may have to call in a professional for the no start at this point if the new sensors don’t help. Here are a few pics of the interior and the front end minus the bumper (waiting on the BadDad hidden winch mount before re-installing).
CGCWO Posted February 5, 2021 Author Posted February 5, 2021 Got the MTS sending unit, CPS, TPS all installed today. The CPS was a pain in the a$$ to say the least. CPS was definitely needed as you can see from the pic the lead wire was rubbing against the exhaust manifold. Also put the new RedRock running boards/steps on the JKU. The factory ones may find their way onto the MJ. It will take some work to make them fit but I’ve got some ideas. If I can get them to work I’ll post a write up in the mods section. Would be nice to have a step to access the front of the bed.
CGCWO Posted February 5, 2021 Author Posted February 5, 2021 Delved into the starting on starter fluid only issues again today. Jumped the fuel pump relay and WOW. The good: Pump is running wide open. The bad: fuel going everywhere, leaking from fuel pressure regulator, feed line (looked like a sun with the hatch open while at depth). Thanks to RockAuto I have new relay connectors, fuel pressure regulator and fuel line repair kit on the way. I’ll also be cleaning up those wires that have seen better days.
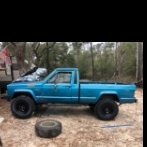
CGCWO Posted February 7, 2021 Author Posted February 7, 2021 34 year old spare looks like it’s never seen the pavement. Will be listing it and the spare tire carrier/winch in classifieds.
CGCWO Posted February 7, 2021 Author Posted February 7, 2021 Maybe... still need do some fabrication. The length is almost perfect. Probably need to come down about a 1/2 inch though.
CGCWO Posted February 11, 2021 Author Posted February 11, 2021 Better interior pics now that it all together. One day I’ll get to drive it around and enjoy it. Still having issues starting and running. New fuel pressure regulator and new fuel line connector fittings (GOOD NEWS NO FUEL LEAKS). Also installed the new rocker switches. Awesome work by @ghetdjc320!
eaglescout526 Posted February 12, 2021 Posted February 12, 2021 Is you interior paying homage to a SJ? Cause I am digging it.
CGCWO Posted February 12, 2021 Author Posted February 12, 2021 Hadn’t thought about it but it does have some resemblance to a SJ. That was a dream rig when I was in my late teens, ended up with a CJ5 that was close to the color of Little Blue.
CGCWO Posted February 12, 2021 Author Posted February 12, 2021 Also uncovered the front dif tag today. Looks as though I ended up with 3:54 gear ratio, so that should mean I have 3:55 on the rear. The rear tag is missing in action.

Recommended Posts
Create an account or sign in to comment
You need to be a member in order to leave a comment
Create an account
Sign up for a new account in our community. It's easy!
Register a new accountSign in
Already have an account? Sign in here.
Sign In Now