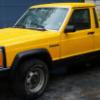
GHayduke Posted May 6, 2013 Author Posted May 6, 2013 So over the last week or so I haven't got as much done because I picked up another project jeep ($1800). I got a 97' TJ I want to use as a daily/summer driver until the Comanche is done. It has some good frame rot and a broken brake line. I'm welding in new SafetyCap frame sections in the rear. Then I'll have a driver for now. The TJ has 6 inches of lift & I plan to take the two inch spacers out so the 4inch shocks etc. work beter. I'll they use the two inch spring spacers in the Comanche (Cherokee) front end. I'll then just need to see what it takes to level the rear end after assembled. Maybe 2-3 inch Shackles? Pics below: Frame Section:
GHayduke Posted May 6, 2013 Author Posted May 6, 2013 I did do some firewall finishing this weekend. I finished the welding and then needed to finish some holes and gaps so I don't leak water through the firewall. I decided to use body filler (bondo) to fill the gaps as I don't have seam sealer. I sealed up the cluch holes and added the filler for the wiring harness....Way more welds than needed: Inside too: I will next sand the bondo down some and paint the firewall. I may POR15 the inside firewall with the floor as well:
GHayduke Posted May 6, 2013 Author Posted May 6, 2013 Anyone have suggestions on what Radiator I should get? I've heard a 95' or before vintage might fit better? Does anyone acually read this thread? :laughin:
Akula69 Posted May 6, 2013 Posted May 6, 2013 Although we are starting our 89-99 conversion end of this week, I went ahead and purchased a one core standard radiator (Spectra pro I believe) from Rockauto. I know, it has the plastic tanks and all, but we believe in starting with that and then going to the two row radiator (all aluminum) if the cooling isn't right. and yes - I read your thread. :yes:
randomguy310 Posted May 7, 2013 Posted May 7, 2013 any more work on the tj? look like a fun project for the money
GHayduke Posted May 7, 2013 Author Posted May 7, 2013 Tj work will continue when the other safetframe patch arrives. Last night I sanded down part of the firewall and primed. What a difference! It almost makes me want to leave the engine bay gray... the plan has been body color (yellow).
Bornindesert Posted May 7, 2013 Posted May 7, 2013 That's the money shot right there! Nice fabrication and attention to detail :thumbsup:
partsmj Posted May 7, 2013 Posted May 7, 2013 I read your build. One Jeep is good. Two Jeeps are better. I have six.
GHayduke Posted May 8, 2013 Author Posted May 8, 2013 I technically have 4 jeeps right now if you include the donor Cherro :brows: 1982 Scrambler 1988 Comanche 1997 TJ Wrangler 1999 Cherokee
GHayduke Posted May 13, 2013 Author Posted May 13, 2013 Another weekend spent wrenching on the TJ, It's almost road ready with new frame sections, a new driveshaft u-joint, and the 2inch spring lift spacers removed. I also found some rough TJ Rubicon "Moab" wheels for the MJ. They will need to be sanded or blasted and repainted. I also then will need tires. It looks like I'll be going to a 2inch lift (complements of the removed TJ lift) So I'm thinking maybe 30 or 31 inch tires? I don't want to put so much tire on that my excelleration suffers? I did find time to finish the MJ engine compartment so it's not McDonalds colors (as the wife called it).
GHayduke Posted May 24, 2013 Author Posted May 24, 2013 Finished wire brushing and cleaning the floor of surface rust & treated the rust areas with Por15 chemical coating. Used a pint of silver. I then painted some of the firewall area just to further seal it up.... I plan to start reassemblly this coming weekend after welding the remaining brackets on.
knever3 Posted May 26, 2013 Posted May 26, 2013 Wow! Great work but the PAC-MAN yellow is truely your preference. :rotf:
GHayduke Posted May 28, 2013 Author Posted May 28, 2013 I made some slow progress on the MJ for a long weekend. I finished the dash upper mounts. My dowel pin brackets were a little off, so I had to drill the plastic mounts on the dash tabs a bit. After fitting and refitting the dash alone many times, which is very akward, I eventually cracked the two center tabs and had to Gorilla tape them to add some strength. I don't know how others added the new dash mounting points, but I ended up cutting steel off the cheroke unibody and welding strips to the existing mounting areas. I then eye balled a quarter inch from the windshield and marked holes. This seems to be functional, but there may be a slight gap between dash top and windshield so I painted that area black. Below are the shots of the dash in place to show the mounting points I added. Passenger side below. I have not decided if I'll swap the Vin tags or have them clash? (outside firewall vs. dash) Here is the Dash test fit, just need to drill the lower support holes: If you do this, another person to help mount and hold the dash in place is highly recomended! Not heavy, but akward.
GHayduke Posted May 28, 2013 Author Posted May 28, 2013 I mounted the steering column bracket and moved the door switches over from the Cherokee as well. I did some trimming and reshaping the bracket to reuse the farthest back existing stud (yellow tip). For two mounting holes I drilled clear through and used bolts and nuts, and the last hole (in the thick doublewall section of unibody, I just used a lag screw. I plan to weld the bolts to the unibody from the outside, so they become "studs". Here is the inside view: Here you see the outside bolt heads, one below the black tape, and the other in the lower hole (not primed like body): I looked at the door switches and found the Chero ones are three wire, and the MJ has two and one wire so I went with the Chero ones. This was a mini project! After removing the larger XJ switches, I had to drill out and tap the smaller MJ mounting holes. I also had to drill new higher holes for the electrical to come into the cab. If you do this leave the old rubber wiring gromets in and cut off the wires. then you won't have holes in the cab. You can see I did this on the passeger side below.
GHayduke Posted May 28, 2013 Author Posted May 28, 2013 I decided to pull the fender off (thou I originally hoped not to) and once off, decided I would use the XJ Washer tank. I drilled the filler hole in the fender and cut the slots free hand with a cut-off wheel in the angle grinder. Not beautiful, but functional. I'm feeling like if I don't pick up the pace, thjis project will take all summer. I then repainted around the "keyhole" and the upper slots I cut in the fenders the same way. I didn't take pictures right after, so you can see the XJ wiring I also laid in place. Top Wow! Great work but the PAC-MAN yellow is truely your preference. :rotf: yea, Occationally I think yellow wasn't the best choice, but I gota run with it now! :laughin: If I do ever change the outside color (again), just think of the suprise when someone opens the hood! ........ Imagine.... Electric Lime Green Comanche,.... open and open the hood to find a Mopar Orange engine in a see of yellow- BOOM! haha :doh:
GHayduke Posted May 28, 2013 Author Posted May 28, 2013 I added the lower dash mounting bolts. I marked where the new holes needed to go in mock-up. Then drilled holes and used bolts with plated nuts inside the unibody. These are like metal plates with nuts welded into the end of them. I had them left over from the factory TJ upper axle links. I guess I like to spread my Jeep parts around... the TJ got a old (but slightly used) Scrambler driveshaft u-joint, so why not TJ bits on the Comanche.. ComanCheroWrangler? I'm sure the MJ will get something CJ8 before it's done. Getting Scramber parts is like a badge of honor in my book! :yes: I then added the steering column gasket and filled the gaps with gorilla tape. You can also see the XJ wiring happily coming through it's new spot. I added the Cherokee insulation and added the Sterring column bracket and the Heater box. I wish I hadn't cut off some of the factory padding bolts! I used a lot of Gorilla tape to adhear insulation. The heater box was much harder to attach with the insulation in place. You can see here where I blacked out the metal along the windshield in case it shows and to retard rust...
GHayduke Posted May 28, 2013 Author Posted May 28, 2013 Would you consider this build write-up a "Blog"? :dunno:
88whitemanche Posted May 28, 2013 Posted May 28, 2013 I consider it both...it's good to see different point of views of people doing the conversions of the newer Cherokees...more insight on the struggles you guys go through that make it easier for others in the long run.
Rymanrph Posted May 29, 2013 Posted May 29, 2013 I actually mounted the bottom of the dash first. That way I could swing it up against the firewall and mark my upper mounting points without having to hold it up on either side. This is a project made much easier by a second set of hands, but having done it by myself I have to give a hand to anyone who does it by themselves. Its good to see the red disappear; It clashed pretty bad with the yellow.
GHayduke Posted June 11, 2013 Author Posted June 11, 2013 I haven't updated in awhile as the TJ etc. have been keeping me busy. The TJ got new ball joints, tie rod ends, upper control arms & a Alighnment. Now it has death wobble.... I determined the track bar is worn out so a new one is on the way. It also got a blower motor resistor, and front exhaust pipe & cat. Soon it will be a nice running jeep I hope.... so my wife can drive it. On the MJ I pulled the heater box out and went through it & replaced the heater core.... below
GHayduke Posted June 11, 2013 Author Posted June 11, 2013 I moved the transfercase shifter and XJ Trans hump plates over to the MJ & I'm trying to figure out how to mount the center consol, I'ts proving tougher than I though with not much to locate it..... I used a little RTV and paint to seal up the plates... I'm thinking I'll put in the auto shifter, then use the mount on the Transfercase & Trans shifters to locate the consol. If I install the back tray and plastic floor mount bracket, maybe I can mark where the bracket should mount? I tried measuring from common points for the bracket but it looks wrong. Anyone have advice on how to locate & make the holes for the consol & related? I took some time to wash the consol & related parts with Purple Power and brushes then hose em off. They look much better now... Likewise I'm considering skipping the parking brake handle as it seems like a pain in the neck to locate and find cables that work....
Rymanrph Posted June 11, 2013 Posted June 11, 2013 I actually didn't use the rear support on my center console (granted the airbag controller is mounted in there so it provides some support), but the front two mounting hole are the only thing locating it. I had planned on using some other mounting solution, but the console is solid and doesn't move up and down or left to right, so I haven't bothered. With the e-brake, you can use your stock cable. You'll need to cut the bottom off of the hand brake assembly and then fabricate a locating mount for the cable, but the actual cable itself will work fine. I went back to look to see if I had a picture of how I mounted my cable but I don't have one. Here are a couple from Bo's truck:
GHayduke Posted June 17, 2013 Author Posted June 17, 2013 I installed the Shifters and figured out where to put the back support for the consol. I screwed the back support to the consol and put RTV on the feet. I then installed the consol using the two front screws the go to the shifters. Let the RTV dry, remove the screws from the top & remove the consol. Then ceter punched the holes and drilled them. I also installed the brake pedal assembly and the wiring harness going along the lower dash front. I transfered the VIN plate from the old dashboard and installed the dash shell. I'm now attaching all the wiring, etc. Image Not Found Before puting the dash together I plan to mock up the new seat mounts etc. I also started attaching the wiring in the engine compartment. I also installed the XJ windshield washer tank & Brake booster I also need to figure out how to integrate the powerseat wiring with the current wiring harness. I don't know where they got the power from...
GHayduke Posted June 24, 2013 Author Posted June 24, 2013 I removed the remaining wiring harness from the rear of the XJ with exception of the fuel tank wiring. I then test fit the new power seats and checked the harness. The seats work with exception of the heaters. It appears I need some relays, etc to make them work, looks like I didn't pull everyting I needed from the donor. maybe it's still in the boneyard.... :dunno: I made new mounts for the inner front seat feet. The outers I could bolt through the body & the rears just had to drill new holes and use bolts and Big washers to spread the load on the floor. I forgot to take pictures but they sit high and seem very big. I sit high in the cab... I used gorilla (duct) tape to then fasten the wiring for the center consol and power seats to the floor. Any unused holes, like old seat belt mounts, I gorilla taped the underside, filled the hole with RTV, and after a little dry time taped over the top. That way I could still use the holes if I wanted them in the future. I ran the wiring for the tail up the side walls for now as I need to research how to splice this to the existing taillight wiring. I kept the rear door wiring but taped the ends and the harness and stuck the wiring in the body side panel for now. I also added the new dome light wiring along the roof. After that I added the steering column, gas pedal, and firewall insulation. I drilled holes through double thick areas, ground off the paint, and used self-taper screws for the grounds. Then painted the spots with blue engine paint casue it dries really fast. I also mounted the hood release pull, It has to be moved down lower per the bigger XJ dash. I'll use the XJ kick plates. I haven't decided how to tackle the tail-light wiring- splice in or run new... For the fuel pump, I think I'll us the XJ wiring. Anyone have good ideas on how to do the tail light wiring?
phenryiv1 Posted June 25, 2013 Posted June 25, 2013 Liking this so far. I painted a project car yellow and still like it, but matching ANYTHING with yellow is always tough.

Recommended Posts
Create an account or sign in to comment
You need to be a member in order to leave a comment
Create an account
Sign up for a new account in our community. It's easy!
Register a new accountSign in
Already have an account? Sign in here.
Sign In Now