Alexia Posted August 27, 2013 Posted August 27, 2013 For the back brake rear center hose check out Alexia's budget lift DIY thread. I am using the Dorman H38636 from a 1989-1996 Dodge Dakota from the part list in his thread (thanks!). It's like 5 in longer than the stock Comanche. You can also relocate or fab a different bracket to get a little more length. Excellent, Thanks for the info.A quick note on that hose, maybe try to find a name brand or do the bracket relocation. The one I received was about one inch shorter than advertised which has made for a slightly taunt line at full flex.
GHayduke Posted September 1, 2013 Author Posted September 1, 2013 I got a Rock Auto closeout Dakota/1500 hose & the length is good as I'm only lifting 2-3" right now. However, I cross-threaded the fitting and destroyed the first few brass threads. I ordered another one for attempt two.... Tales of (Axle) Whoa.... I decided to do new front brakes (rotors, pads, lines) on the Dana 30, while at it thought I should change the axle shaft u-joints and unit bearings. The passenger side came apart fine, but the driver side stub axle retaining nut cover was gone. The nut was exposed and is rusted to the point it's hard to make out threads. The shaft & nut seem to have bonded together... Not sure how best to attack this... I think the stub axle is done for sure though... I tried PB Blaster and a map gas torch, then used a lot of breaker bar to no avail.... Thinking of plasma cutting the nut on both sides. Actually a friend pointed out I could remove it all as a unit, but don't know if I could get the axle shaft in a press to separate the two sides then? Any ideas? I also went to do new rear brakes on the C8.25 axle, Decided to do the axle seals, went to pull the carrier center pin retaining bolt and the bolt came almost out, then broke off in the carrier... a first for me, but I hear it's fairly common.... :mad: On a good note I went to the Boneyard to get a fender and maybe a hood. No decent fenders, but I did get a new dash airbag cover, fuel sender unit plug :banana: , and a teal hood, along with some other odds and ends.
Bornindesert Posted September 1, 2013 Posted September 1, 2013 I had to put heat to both sides to crack that nut free, and used a 1" drive breaker bar with a pipe extension. Another consideration, I had it on tires still not on jack stands. Would say, be patient with the heat, I have acetylene but a MAP torch should get it ready. With enough heat, it's coming off no doubt. If your already planning on new unit bearings then its no big deal to scorch the grease. Basically, big breaker and plenty of heat. As they say, it's a tuff nut to crack!
87Warrior Posted September 1, 2013 Posted September 1, 2013 I really like the repurposing of the XJ speaker headliner/sound pods as the carpeted back panel. I am going to borrow that idea for sure. A lot of heat and a big breaker bar or impact should pull that axle nut off.
GHayduke Posted September 3, 2013 Author Posted September 3, 2013 I ended up just pulling the whole thing- unit bearing attached. I then just cut the u-joint to keep the good half of the shaft. I'll go get a another shaft from a u-pull-it yard. Thanks for the ideas, but I don't have a big enough breaker bar to fight it. My half inch bars were bending just shy of breaking & I wouldn't re-use that stub shaft without threads even if I got it apart. My front driveshaft and axle shafts were quite crusty from salt and sitting so I soaked them all in bucket filled with a mixture of PB Blaster & Biodiesel overnight..... Biodiesel is acidic and a great lubricant all in one.
GHayduke Posted September 23, 2013 Author Posted September 23, 2013 Hi Guys, I've been sick so haven't posted in awhile & progress has been slow. I did get the Axles closer to done though. The rear Axle is now done. I got a kit to drill out the broken carrier center pin bolt in the diff. In the end, heat from a map gas torch was a big help. I then changed the axle seals, and refreshed the rear brakes, using new brake & parking brake hardware kits, new brake cylinders, the bearings looked good, the axle shafts were cleaned and painted and installed. New flex line and hard brakelines are installed. The axle is bolted in and ready to go now. I do still plan to add new rear shackles to level or give the truck some rake to the front.
GHayduke Posted September 23, 2013 Author Posted September 23, 2013 For the front axles I got a new side for the frozen drivers side with about 5000 miles on the ujoint, Front axle now has new unit bearings, rotors, pads, & a brakeline. The whole thing is back together with fresh oil, but after a few days the driver side developed a bad axle leak.... Looks like everything will need to come off again to do seals... boo. It was looking so ready...
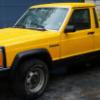
GHayduke Posted September 23, 2013 Author Posted September 23, 2013 I bought the axle shaft from a guy doing a 95' Chero part out, I also got a new passenger fender & hood. I painted the fender to match for now (As I think a paint job will wait till next season. I'm eager to start puting the nose back together tonight.... New (to me) Fender!
Akula69 Posted September 24, 2013 Posted September 24, 2013 Glad you are feeling better. The front axle U-joints and seals are the one thing we did not do yet on Ryan's. I have the parts...hopefully we will get to it this fall during the holiday break. Yours looks great!
GHayduke Posted September 25, 2013 Author Posted September 25, 2013 Added the fan, A/C drier and lines & lower radiator hose in preparation for the nose install.... It took awhile to figure out the new aftermarket radiator and condenser mating, the fit in not the best with two different aftermarket pieces, but should work ok. The new set-up looks like it will take up most of the nose interior space where before it was largely empty with the 2.5L set-up. Connected the A/C lines with new gaskets & Trans lines, but the new Trans line to radiator line won't clip in. The metal retainer clip tangs inside the metal fitting bent and won't 'click' or catch the flange. I found them online Dorman 800-025 "Fuel Line Retaining Clips". I'll be stopping at Advanced Auto to see if they have these tonight. You can see the line in center circle below. The line that connects to it is partially hidden by the front clip. Annoying when a tiny part stops the build progress........ Hopfully I'll get the clip and can finish the front end assembly tomorrow night... Then I need to figure out the nose wiring & I plan the do the Headlight power upgrade at the same time........
GHayduke Posted September 30, 2013 Author Posted September 30, 2013 Update: I searched for the needed clip but no one local has it, so I ordered two packs of them from RockAuto. That will give me two more chances at getting it right as a pack it one 3/8 and one 5/16 clip.... I'm also waiting for a new set of headlight plugs I ordered to do the headlight upgrade. Gas Tank: Friday, I didn't have the parts so decided to switch gears and work on the gas tank some more. I straightened the XJ gas tank straps and hung them from the frame. I used two sissor jacks to hold the gas tank in place, too figure out the location and gas tank straps. I ended up using dense foam insulation board to space the tank down from the bed. Then happy where the tank was, I bent the first bend in the tank strap. Its hard to get a 90 degree ish bend so I then moved the jacks under the straps and pushed it up tight to the tank & made the next bend up toward the bed. This worked quite well, I then was able to use the MJ factory bolts/rod to bolt up the straps... Thats it! I did one strap at a time. I didn't have to bust out the welder & fabricate anything! I can use the factory vent hose, but need a new 1-5/8 fuel filler hose. I tried making the stock one fit, but it's just too small & after 25 years does not want to stretch without cracking. I ordered a "1-5/8" inch (SOFT WALL) Rubber Fuel Filler Neck Hose (SOLD PER INCH)" made by Thermoid / HBD from Filler Hose Supply Co. This is a marine & automotive quality hose. 1-5/8 looks like it will stretch a little to fit the 95 Dakota filler neck and crush a bit to fit the smaller MJ filler neck. I didn't yet try to heat and compress the tank in to be farther away from the driveshaft. As I don't yet have a driveshaft, I don't know how much clearance I'll have. It's not a good place to try to compress. I drew a silver square on the tank indicated by the blue arrow. Thats were the tank would need to be pushed in.... So it looks like the tank may be done once the filler neck hose comes in & I install it.... We'll see how the driveshaft fits!
GHayduke Posted September 30, 2013 Author Posted September 30, 2013 Saturday I found shackles and some other stuff at the Jefferson Wi auto swap meet. When I got home some small treasures had arrived! :banana: Let the front end reconstruction commence!!! Sunday I went back to work and mostly (less front lighting) completed putting the nose back on. Part of the struggle with the trans line install was the proximity of the aftermarket radiator adapter line to the body. I ended up removing the line and adding some additional bend to it so the connector could click on all the way. I installed the remaining lines and electrical, and filled or topped off all the fluids. Filling the cooling system is very slow and annoying unlike old school top fill CJ radiators. Next I will spice the old XJ and MJ front lighting harnesses. I'll also do the headlight wiring upgrade (more power) and putting in new Halogen Conversion headlights! I'm excited to see it going together. So far some electric accessories are not working (horn & wipers), but I have not checked fuses or done troubleshooting yet.... maybe grounds???
GHayduke Posted September 30, 2013 Author Posted September 30, 2013 Shackle Time ! Sunday night I decided to see if I could get the shackle lift done. The springs didn't want to move down away from the frame with shackles removed and the truck jacked up. In hindsight I should have tried loosening the front spring mounts and lubing them.... What I did was used small sissor jacks to push the springs way from the frame. Then I installed the bottom shackle mounts & swung the top end up into the frame mount & tapped them into place with a small hammer and put the bolts in and snugged them a little. Once the jeep was back on the ground (and bounced/jostled a bit), I torqed the bolts to spec (109 ft pds). Now I'm wondering if the spring main eye ever even moved & if thats a issue. Do you think I should loosen the front spring bolts and shoot some lube in there and see If they move at all? and see if I can get them to move a bit... :dunno: Here are the shackles installed and torqed after completion. Eye to eye the new shackes measure 6-1/2 inches. I gained two inches of lift at the rear bumper and about a inch of rake overall. I'm happy with the lift now. You can also see one of the JK shocks I installed. Here's the lift seen at the rear bumper.
Alexia Posted October 1, 2013 Posted October 1, 2013 Everyone has the same problem with the Dakota tank in the same spot and some do the heat warping trick. If I mounted mine without warping the tank there would have been about one inch of clearance.
GHayduke Posted October 1, 2013 Author Posted October 1, 2013 Last night I PB Blastered the rear spring main eyes & loosened the bolts & spun them. I also put a prybar in between the springeye and hanger and moved it. I now know the springes are not stuck and under tension. Re-torqued to spec. :thumbsup: The rear end overall seems much stiffer and less sloppy. It will be interesting to see how it feels with a load of wood, or towing a trailer now.
GHayduke Posted October 4, 2013 Author Posted October 4, 2013 Fuel Tank Time! I recieved the ordered fuel filler tube and got a compression fitting for the hard fuel line so decided to install the dakota tank. I decided to do some mild heat warping / clearancing of the tank for the frame member. I figured this will be a daily driver so getting the tank another inch away from the driveshaft would be acceptable to me. I used a heat gun, compressed air gun, and a small sledgehammer to try pushing the heated tank in some. It worked but didn't give me the depth I wanted.. So then I decided to use one of the old rear shackles to uniformly push in the tank (at the same time). I put the shackle above the spot I was heating (seen above) so it would get heated some too. Then I circled the whole area, and pushed the rounded end in & blew compressed air on it for awhile. I think this will give me the wanted clearance. The rear driveshaft has not arrived so I can't check yet... I installed the tank & the Comanche breather hose was not long enough. I used the XJ hose & gained two inches (about 12 total) after cutting off the flaired end. Installed the tank and plumbing & tested. The fuel tank would prime, but we didn't get good pressure at the fuel rail? I did a visual of the whole line & found when installing the tank the fuel line got pushed forward. There is a short plastic section by the firewall that pushed forward and put two kinks in the plastic line closing it off. I flexed it back round with pliers and shortened the line to prevent that & the problem was solved. Jeep starts & runs now! Another related & weird issue is the jeep does not prime the fuel pump/run, if the drivers door is closed. (works fine opened). & if the door is closed while running- the engine runs poorly or dies.... I'm assuming the door switch must be bad & creating a short or ground to something..???? Ever heard of this?
RyanL Posted October 4, 2013 Posted October 4, 2013 Good job with the tank! The shackle was a great idea! Be sure on your first fill up that it does not leak! If so it will need to be filled with scrap plastic (plastic welder kit). As for the no start problem remove the door switch and try again. The lights will stay on but it should not affect performance if it was indeed the problem. It could also be a wire on the loom being moved onto metal when the switch is depressed. Your build is coming along great! Ryan Fuel Tank Time! I recieved the ordered fuel filler tube and got a compression fitting for the hard fuel line so decided to install the dakota tank. I decided to do some mild heat warping / clearancing of the tank for the frame member. I figured this will be a daily driver so getting the tank another inch away from the driveshaft would be acceptable to me. I used a heat gun, compressed air gun, and a small sledgehammer to try pushing the heated tank in some. It worked but didn't give me the depth I wanted.. So then I decided to use one of the old rear shackles to uniformly push in the tank (at the same time). I put the shackle above the spot I was heating (seen above) so it would get heated some too. Then I circled the whole area, and pushed the rounded end in & blew compressed air on it for awhile. I think this will give me the wanted clearance. The rear driveshaft has not arrived so I can't check yet... I installed the tank & the Comanche breather hose was not long enough. I used the XJ hose & gained two inches (about 12 total) after cutting off the flaired end. Installed the tank and plumbing & tested. The fuel tank would prime, but we didn't get good pressure at the fuel rail? I did a visual of the whole line & found when installing the tank the fuel line got pushed forward. There is a short plastic section by the firewall that pushed forward and put two kinks in the plastic line closing it off. I flexed it back round with pliers and shortened the line to prevent that & the problem was solved. Jeep starts & runs now! Another related & weird issue is the jeep does not prime the fuel pump/run, if the drivers door is closed. (works fine opened). & if the door is closed while running- the engine runs poorly or dies.... I'm assuming the door switch must be bad & creating a short or ground to something..???? Ever heard of this?
Akula69 Posted October 4, 2013 Posted October 4, 2013 Ah yes...the famous problem with the door plungers! When we swapped the interior harness, we installed the "new" interior dome light plungers as well. We quickly found several problems, (minor ones but still): (1) The dome light switches (plungers) are not grounded to the body but have the typical two-wire (+ and -) setup. If for some reason the rubber boot on the switch has been damaged it will ground out against the frame. (2) These plugs are prone to internal failure, especially in the rust belt. Good thing is, the XJ came with 4 (if its the 4-door model). (3) If there are any grounds 'loose' in the cab, for some unknown reason the dome lights glow dimly (even with the doors closed) and the tail/turn lights work erratically. Any of these problems will cause the ground for the fuel pump circuit to freak out, as it is part of the interior harness ground circuit. However, the fix is easy: If you swapped these XJ door plungers over with the interior harness, there is a plug on the harness near the kick panel on each side that you can disconnect (assuming the carpet is still out). Do them one at a time and you will isolate the faulty switch. If you did not swap them over, but used the older, body grounded switches you might have to change them. If these items are not your issue, check the PDC in the engine compartment. The fuel pump relay is there, as well as one of the fuses for the interior lighting circuit. Try swapping an existing relay with the one for the fuel pump (they are all the same). Let us know how things went! Edit: Oops! My son posts quicker!
GHayduke Posted October 4, 2013 Author Posted October 4, 2013 Ok, for $3.66 a peice I just bought two new ones. When I got the XJ the dome light stayed on with the doors closed so one or both may be bad.... I think the XJ ones have three wires going to them....
GHayduke Posted October 7, 2013 Author Posted October 7, 2013 Emmisions / Evap Canister box installed: I installed the Evap box directly in front of the gas tank & cut down the XJ vent lines to connect to it. It's mounting now shares a bolt with the drivers seat. Starting to look much tighter underneth with everything installed. The box is red (below). Doors: I then switched gears and aligned the doors as best I could and installed the latches. The doors are now working ok but when pushing the outside button to open the doors, I have to depress it way in & sometimes push it twice. It seems tight or bound? It kind of pops when opening the latch. I tried adjusting the latch & even tried adding a shim but nothing seems to improve it? Any advice on what would help? I'm not a auto body guy. Adjusting the doors myself was interesting, especially moving them up. I ended up having to hold them open, push up from the bottom with a jack, and tap the bottom with a deadblow hammer to get them to move up. Here's a picture of my technical door alignment tools! :laughin: But in the end it worked out ok...
GHayduke Posted October 7, 2013 Author Posted October 7, 2013 I then pluged in the door wiring, and tested the doors. The electric windows work from both sides, but the power locks on the drivers door don't work? Next I wired up the fuel pump and started the wiring for the fuel level sender as I don't know which wire is which. once connected I tried the ignition to see if it was reading. It's not reading hooked up with wires either way? But then i realized none of the (needle) guages were working on the dash. Not sure if this could be a ground or door issue? Note: I still haven't recieved the new door jam switches and installed them, but the temp & oil pressure gauges worked before...Would it help to just run a ground wire from the battery into the cab and connect to the body like the grounds on the floor harness if grounds are touchy on MJs? So last night I went through both fuse boxes to rule them out. The fuses and relays were tight and didn't want to come out, so every one was pulled, cleaned, checked and reinstalled with a tiny skim of grease on the blades. The only fuse blown was in the interior fuse box, a regular (not mini or maxi) 25amp fuse second down in the top middle of the fuse box. I haven't looked up what this it too yet?
Alexia Posted October 8, 2013 Posted October 8, 2013 I grounded my fuel pump to the body inside the cab B pillar after it came in through the floor plug. The fuel level sender wires both need to go back to the PCM for an accurate reading. http://comancheclub.com/topic/38375-1997-cherokee-fuel-pump-to-1997-2004-dakota-fuel-pump/ The PCM applies a smoothing algorithm to the fuel level except during initial start up. The initial key turn sets the gauge immediately to the correct level. However, if the wires were to be removed or the float manually moved with the key turned on it can take over a minute for the gauge to move across the extreme change that was sensed.
Akula69 Posted October 8, 2013 Posted October 8, 2013 The rod that attaches the inside 'slide' lock on the door panel to the lock unit binds when bent on the 1997-01 XJ doors. Try unfastening the panel and then using the electric lock button. If the doors lock, its the rod. I worked Ryan's for about an hour without success...his still won't lock electrically with the interior door panels on.

Recommended Posts
Create an account or sign in to comment
You need to be a member in order to leave a comment
Create an account
Sign up for a new account in our community. It's easy!
Register a new accountSign in
Already have an account? Sign in here.
Sign In Now