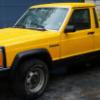
GHayduke Posted February 25, 2013 Posted February 25, 2013 I have a barebones 88 MJ - 2wd, 2.5L, 4speed, that got one option... power steering. After 204K the engine is done, I'm going to swap the entire driveline from a 1998 Cherokee Classic. Thanks to Alexia's 97-98 swap project for insparation! I'll post pictures along the way and am interested in your tips and feed back. As you can see Cherro was in a front end accident, but the engine seems ok accept for the idler pully etc......
GHayduke Posted February 25, 2013 Author Posted February 25, 2013 I replaced to idler pully bracket and belt. I got the engine running before pulling it from the Chero to make sure it all worked. The Alternator is ticking but the engine runs fine. I'll need to figure out a fan solution for cooling. replace factory? or all electric?.... Thoughts (there is a budget sadly)...
GHayduke Posted March 7, 2013 Author Posted March 7, 2013 I found out more parts are broken and need to be replaced than expected (exhaust, Alternator, lines) So It looks like I have more time than money. Not one to be idle, I decided to clean up the engine and sell Cherrokee parts for cash.... So one the engine stand to 4.0 goes...
GHayduke Posted March 7, 2013 Author Posted March 7, 2013 The engine was leaking in a lot of places, and the more I tear down, the more I find needs to be cleaned and resealed (new gaskets, etc) So I ended up taking it down to the long block I decided to do all the gaskets to the long block and the mainseal etc. The engine internals look good after 143K. I decided to paint the block and some rust parts replacing stuff that looks bad. Here's how the block looks now after cleaning and painting.... Mmmmmm.. Chrysler Hemi Orange
GHayduke Posted March 11, 2013 Author Posted March 11, 2013 I started to reassemble the engine this weekend. I found out I need a new distributor because a ear broke off. It had a bolt broken off in it. Then someone tried to drill it out crooked. When I tried to tap it out for the correct bolt again the whole ear sheered off. Add it to the growing list of new parts. I have a system, when I replace a part on a engine I paint it blue. That way I can see what I've replaced when looking at my engines. Here's a before & after pic of how it's coming along.
GHayduke Posted March 11, 2013 Author Posted March 11, 2013 Except for motor mounts the driver side is about complete. Does anyone know if they sell replacement trans lines for the AW4? I'm also trying to decide what color to paint the engine compartment? I plan to pull the 2.5l out next weekend and then start preping for the 4.0 associated hardware, wiring etc....
GHayduke Posted March 13, 2013 Author Posted March 13, 2013 I need to get together some money to purchase more 4.0 parts, so the engine build has stalled for awhile. So my plan is to remove the 2.5L engine from the MJ this Saturday. So I've started taking the nose apart and diconnecting the engine. As the old engine was a 4 banger, I'm guessing I'll need different front support metal to hang the 4.0 radiator (much wider), condenser, etc. Anyone know what I need? Unfortunatlly these parts were crushed on the donor Chero so I don't have a referance. I may have to find a 90's Chero in a local Boneyard to rough this out. Here's the noseless wonder at the moment. And
GHayduke Posted March 13, 2013 Author Posted March 13, 2013 I'll post more 4.0 pictures after I get a distributor, starter, alternator, and engin mount bolts...... Here's the front so far:
codymanche Posted March 14, 2013 Posted March 14, 2013 Got the rainbow going on there lol. As far as the crossmember goes the one u have looks right. But the radiator has those mounts that connect to it I would try and see if it fits. But the upper and lower radiatior hose electric fan transmission hose connections will go on the driver side that's what I can remember.
GHayduke Posted March 14, 2013 Author Posted March 14, 2013 The stock 2.5L Comanche radiator was narrow and mounted on plates/brackets closer to the engine. I watched some youtube videos on radiator replacement and it looks like there may be some sort of pads or mounts the lower radiator sits on. I'm not sure what those are. I get how you mount the top in the top plate. Are there also condenser mounts it sits on? or does it just hang of the radiator?
GHayduke Posted March 19, 2013 Author Posted March 19, 2013 Pulled and sold the 2.5L engine this past weekend. ( There goes my membership to The Brotherhood of the 4 Angery Squirrels ) now I need to remove the remaining stuff and clean the engine compartment to recieve the 98' 4.0 related goodies.....
Wrz Posted March 20, 2013 Posted March 20, 2013 Hey it's coming along good, ill see if I can dig up the links for the transmission lines as I just bought mine new recently
GHayduke Posted March 26, 2013 Author Posted March 26, 2013 I Just read on another thread the Chero gas tank will not work per the filler neck issue...... I need a gas tank. Does anyone know what years Dakota would have the correct fuel pump and sender to work with a 98 4.0? Any insight would be appreciated!!! Here's a pic after some more powerwashing: Interior is almost out too!
GHayduke Posted April 1, 2013 Author Posted April 1, 2013 In the last week I finished pulling the dash wiring,computer & ducting and removed the doors for easy access. The bolts were a bit sticky after 25 years, a little heat helps a lot. I also finnished the engine and connected it to the trans and set those aside for more room. Next I'll pull the Chero doors and put the jeeps side by side to start pulling 98 dash and interior. I plan to move the wiring and heater / dash first. I currently think I've decided to not cut up the center console, but go back to single seats. I have the old seats & brackets, but I'd like to find heated leather seats. Any good ideas for bondyard seats? I don't have a final pic of the engine a together, but here's's one just before....
GHayduke Posted April 17, 2013 Author Posted April 17, 2013 I've now removed both Dashboards and I'm getting ready to move the dash brackets, wiring, heater box, etc. I also got some nice seats in the boneyard out of a 01' Cherrokee Classic Limited. Nice Pleather, electric, heated seats complete with the wireing harness and the switches and switch panel to replace my stinky Chero ashtray! Bringing them home in my tow-rig (temp daily driver) I created some nice additonal " fresh air seating " ... well fresh air and diesel smoke that is :yes: (below)
Minuit Posted April 17, 2013 Posted April 17, 2013 Great looking work! That system of painting stuff you replaced blue is genius, I wish I would have thought of that :D This thing's going to be great when it's done.
Wrz Posted April 18, 2013 Posted April 18, 2013 Nice find on those seats, if you go back to the boneyard let me know I could use a we parts from a limited Keep up the progress, :)
GHayduke Posted April 19, 2013 Author Posted April 19, 2013 I started removing the uneeded 88' steel firewall brakets with a spot weld drill. I drilled too deep in a spot or too. It really helps to drill a small pilot hole first. I Just need to remove the computer bracket and then I can start fitting the XJ steering bracket etc. Here's the MJ firewall pics: I started spot weld drilling the XJ steering bracket & dash dowel pin sheet metal bracket to remove it but didn't finish. I'm really tempted to break out the plasma cutter to speed up the process... this picture shows the bracket with just the pilot holes drilled in it.... I'm going back and forth on the Suspension plan. I had thought stock, followed by 3", then decided to just go spring-under in the rear and 4.5" lift up front. But in researching lift kits, I'm not seeing grand reviews on anything nice to my wallet.... So I'm not sure. I sold the 3" front springs cause it's cheaper to by a kit than peice it together with good shocks. Part of the issue is (this is my daily driver to work) with so little cab space, I plan to use a bed box to carry most things: If I lift the truck too high like my tow rig, I'll have to climb to the bed just to access the box... Fundage wise, I'm considering just finishing the swap at stock XJ hight for now so I can drive it.. then lifting it later. I'd just have to fugure out the rear axle pinion angle knowing it may get lifted.... Thoughts? I want my daily driver back!!
GHayduke Posted April 23, 2013 Author Posted April 23, 2013 I worked on the dash and firewall this weekend, I also removed the old MJ computer bracket, and pulled up my carpet to check my floors which will get cleaned and coated in POR15. The gray areas clearly show where brackets were on both Jeeps. I Then removed the XJ dash mount brackets and trans computer/connector bracket from the firewall. I went through two Harbor Freight spot weld drill bits & should have bought more. I used old screw drivers as wedges to pop the brackets off, One the MJ its clear where spot welds are, on the XJ I sometimes missed one until I started prying and found additional welds. The Computer bracket was actually rivited on and srewed on with two fasteners each... Grinder time!
GHayduke Posted April 23, 2013 Author Posted April 23, 2013 I also started my firewall modification. I realized the steering colum hole and gas pedal mount bolts (spacing Is different) are actually fastened to a plate thats spot welded to the firewall. I decided to remove the XJ plate and move it to the MJ. I also cut out the oval main wireharness pass through to cover my square fuse box hole. I traced the new steering column hole and cut out the MJ firewall peice not needed. I'm using the brake booster to line up the new plates and confirm location. I couldn't get the spot weld (rosette) drill in to remove some of the firewall welds so I used a Plasma Cutter. The only issue with this is it will remove both layers of firewall... I suggest first removing the XJ peice (try not to bend it). I used a cut-off wheel in a grinder for the bottom cuts. The wiring cut out is shown too... Next I removed the MJ peice & removed the rust. Had to drill new holes for the gas pedal mount. Here are the two plates.... The plate is not aligned in the picture, I'll weld it in later when I do the dash brackets. And the wiring plate.
Bornindesert Posted April 24, 2013 Posted April 24, 2013 Great work and effort documenting this conversion. So far, looks like you're taking a little bit of a different approach than other swaps at the firewall. Can't wait to see more progress - spot weld drill master, Rock on!
GHayduke Posted April 30, 2013 Author Posted April 30, 2013 Thanks! I'm quite tired of the Spot weld drill! I welded in most of the firewall plate and the Steering wheel side dash mount this weekend but forgot to take pictures. I'll take some pics next time I work on it.

Recommended Posts
Create an account or sign in to comment
You need to be a member in order to leave a comment
Create an account
Sign up for a new account in our community. It's easy!
Register a new accountSign in
Already have an account? Sign in here.
Sign In Now