

DirtyComanche
-
Posts
7933 -
Joined
-
Last visited
-
Days Won
11
Content Type
Profiles
Forums
Gallery
Everything posted by DirtyComanche
-
Check the MAP and the IAT, And I hope you've cleaned your grounds and replaced the stupid bonding braid. Otherwise you're going to need to diagnose it when it isn't running.
-
Only the rear. They're IFS garbage in the front. If you want to swap both axles it becomes much more involved and there winds up being many more options as you don't need to match the width or bolt pattern.
-
The 8.8 out of the Explorer is a bit narrower, 58.5" vs 60" sort of thing. Depending what wheels you run you might want a set of spacers, the front axle is wider than the rear anyways (61") so you can run a set of 1.25" spacers and it winds up bang on with the front. Later Explorer axles (94+ IIRC) are disk brake.
-
The Ford 8.8 is quite common, along with the later Chrysler 8.25 out of the XJ, and the XJ/MJ D44 is also a good choice but they're harder to find. Or if you're willing to pay you can have something built by any of the axle shops (Currie, Strange, Dynatrac).
-
It's handy for advanced troubleshooting providing you know what to do with it. IE, with an alternator you could diagnose if it has a bad diode, or if there is damage to the windings, simply based on how the ripple DC output looks. Or you can see if a crank, cam, speed, etc sensor is produce a good output, providing you have a known comparison. Or you could look at injector firing in regards to timing and duration. Older vehicles they tend to be less useful on, but on a newer stuff somebody who knows what they're doing with it can solve many problems that would make others (including high end shops and dealers) give up. Something as simple as an alternator with ugly output can actually cause all sorts of phantom issues, everything from misfires to CELs without a code, on a newer vehicle. A Renix is naturally pretty much hardened against this, along with an OBD-I HO setup, so the applicability in that regards to a MJ is minimal. Also, you can see other electrical noise and potentially narrow it down and eliminate it. Bad shielding and suspect grounds can cause all sorts of mysteries on unrelated circuits. In the analog world it is something that audiophiles tend to understand, but in the modern digital world it could affect almost any system. Like I said, I'd love to have one around to play with, there is a lot of times when things happen that 'don't make sense' where some time with a silly-scope could probably shed some light.
-
I made an AX-15 mount out of an AW4 mount, because I didn't have an AX-15 mount here. Not super pretty... Probably should have just gone to the junkyard. Image Not Found But now at least I can get the trans and tcase positioned correctly so I can measure for rear pinion angle, well, assumed rear pinion angle, but less of a guess than before. Also found that my tcase shifter linkage is binding on everything and totally wrong. I will have to dig through the stuff removed from The Blue Pill and see if I saved that crap and if it can be used on a AX-15. And I've decided I will be lazy and split the tcase under the truck to do the SYE. Or at least that's my plan right now.
-
Yes, it will, it doesn't know any better. Likewise, you can drop a HEI in a Renix and leave it to only control the injectors. Edit, the timing curve will be way less than ideal. At the very least get a high altitude CPS or mod the one you have.
-
Group 34 Battery
DirtyComanche replied to DirtyComanche's topic in MJ Tech: Modification and Repairs
Pretty much. But now if anyone searches for a group 34 swap they should find this thread and conclude that as long as you actually have a group 34 battery that it will bolt in. I'm still confused about the other battery I have. Whatever, it will probably fit in the plow truck when the battery in it gets toasted or frozen. -
Renix upgraded alternator
DirtyComanche replied to Knucklehead97's topic in MJ Tech: Modification and Repairs
Being CS-130 internals you can rewind them for upwards of 200A, more if you're ballsy. I wouldn't go anywhere near that, and personally feel even the 'stockish' 100A is plenty fine for most uses. A 130-150A rewind is probably a reasonable number to shoot for as it should be plenty without pushing things. A manual high idle feature (IE, a pull cable) will do you way more favours than rewinding the alternator, as you need about 1900RPM (engine speed) to get rated output from the 100A alternator, and the alternator needs speed in order to stay cool anyways. -
Group 34 Battery
DirtyComanche replied to DirtyComanche's topic in MJ Tech: Modification and Repairs
Soooo, to finish this off. A group 34 is a direct bolt in. Your hold down will fit fine, the cables reach, etc, etc. Good upgrade if your battery dies since they're more common than the 58 anyways. The '34R' battery I had isn't even the same size as a normal 34, so I have no idea what it is, it actually looks like it has the wrong label on it. :rotf: I bought a new 34 today and it bolted in with zero issues. -
Damn, that's a lot of bodywork, but it looks like it has paid off!
-
Group 34 Battery
DirtyComanche replied to DirtyComanche's topic in MJ Tech: Modification and Repairs
All the hold down bolts I've looked at have been the same length, 1987-2001. Odd. I'm not sure what's up then. Now that you mention it, I'm rather certain I used a stock hold down for the group 34 in my XJ and it was plenty long. I'm guessing I've got more random parts. I'll have to look in the shed and see what I have. -
Group 34 Battery
DirtyComanche replied to DirtyComanche's topic in MJ Tech: Modification and Repairs
I'll pick up the right battery next time I go into town. I might look for the HO hold downs the next time I hit the wrecker, the Renix ones aren't long enough. Modding them isn't hard, but why waste the time when the rest of the truck isn't together anyways. -
Renix upgraded alternator
DirtyComanche replied to Knucklehead97's topic in MJ Tech: Modification and Repairs
The Renix isn't actually a 1 wire setup, not that it really matters since it isn't doing anything more than a 1 wire. You can wire a Renix alt to function as a 1 wire, and a 1 wire would function the same in a Renix. That alternator is the same mount pattern BUT it won't technically bolt in since the small ear is threaded for oh, I dunno, some sort of M8 thread probably. The Renix one is just an 8mm straight hole and the bracket is threaded. You can just blow the threads out of that alternator with a drill bit if you want to though. Also, the housing on the back might be clocked differently. Typically GM alternators are something like 180* out of what the Renix one is. This should not matter as the Renix brackets do not pick up on the rear mount hole anyways. Cliff notes is it will fit and work but it might be a bit of screwing around. -
Sometimes the shuttle valve in the distribution block will shuttle one way or another and then fail to reset when you go to bleed it. Smack it with a screwdriver handle and see if it helps.
-
Does this school have a name? I'm all for buying random junk because I can. :rotf:
-
My 88 Comanche Restoration and Modification
DirtyComanche replied to RustInMyEye's topic in Member Projects: Your Comanches
You've made a ton more progress since I last checked this. :thumbsup: -
Group 34 Battery
DirtyComanche replied to DirtyComanche's topic in MJ Tech: Modification and Repairs
Sorry, I always assume everyone uses the 4.0L and forget the 2.5L exists. I should have specified it is a 4.0L application. Strokermjcomanche wins the cookie, this is a 34R battery. Conveniently the label does not indicate this, but comparing it to the 'exact' same battery in my JK and the posts are backwards. This is extremely annoying as I was hoping to use this battery since I already had it (came with a truck I bought), and it is the same the one in my JK and XJ (XJ has a totally different tray/battery location and stretched fenders, so I could not use it to compare to the MJ) other than the posts are reversed and it isn't going to fit any of the vehicles I own. Yay! I guess I better go buy another battery with my Cambodian Tire money. -
Group 34 Battery
DirtyComanche replied to DirtyComanche's topic in MJ Tech: Modification and Repairs
Looking at random interweb pictures leads me to believe that the later tray probably moves the battery towards the engine a bit, thus getting a little extra room for the posts. That said, I'm not sure. -
Odd brake light triggering?
DirtyComanche replied to That_Creepy_Guy_In_The_MJ's topic in MJ Tech: Modification and Repairs
Clean everything up and chase it down. Start with the easy stuff. -
Has anyone swapped to the larger group 34 battery? Apparently they are the factory size battery in 98+? XJs, and there is some straggler posts on the internet about trimming the earlier tray a bit and installing it. It fits in my tray okay, but the posts are switched vs the stock sized battery. So I can either run it with the posts forward, which means the negative looks like it is very close to the hood latch release, or I can run it with the posts back, which puts the positive very close to the internal structure in the hood. There is already a hole burned in the hood where the positive post would be, I'm guessing from somebody doing something similar before...? So I don't think that's a good idea. Anyone know what it looked like from the factory? Is the factory tray much different?
-
MJ revving too high on the highway ?
DirtyComanche replied to big66440's topic in MJ Tech: Modification and Repairs
In 1989? -
Odd brake light triggering?
DirtyComanche replied to That_Creepy_Guy_In_The_MJ's topic in MJ Tech: Modification and Repairs
IMHO, it's probably not the headgasket. I would check that there isn't any weeping of coolant from the usual suspects (radiator/heater hoses, freeze plugs, water pump, radiator, heater core, expansion bottle) and just clean the engine and change the valve cover gasket first. A cork gasket can be had for under $10, so it's a cheapy to try that. -
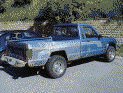
So I figured I better work on this since I don't have a truck to drive. Well, I bought a J-10 hoping it would be roadworthy with a week of evenings on it, and that turned out to not be the case... :rotf: So back to this. Anyways, I had to steal the A/C delete idler off this thing for my XJ because the A/C clutch seized up. It's getting hard to find Renix brackets at this point, and I couldn't find a HO with the A/C delete either. Also, the little idler had a bad bearing, and was not very trustworthy. So, gotta make something instead, which meant moving the alternator made more sense. Started by cutting out the one notched mount so bolts could be put in it from both sides: Image Not Found Then I made some brackets out of steel and slapped some paint on them: Image Not Found The smaller one is 1/8", and has a 1" standoff (1-1/8" total thickness). The larger is 3/16". That was more convenience in regards to material on hand than necessity. Rear bracket: Image Not Found The front 'ear' on the alternator takes a different sized bolt (I believe it is a M8, slightly smaller than the 3/8" hardware that normally bolts the A/C compressor on), so the existing hole had to be bushed. To do it over again I wouldn't cut out the bracket or bush the hole, I'd just drill the hole in the alternator out to 3/8" and use a single long bolt like the A/C compressor did. There needed to be a 3/8" spacer also, so that nut was used, which is kinda hack but this is revision 1. Front bracket: Image Not Found The stock A/C compressor bolt was used on the A/C mount. The bolt through the alternator is the stock attachment bolt for it, I just had to dig through my stuff to find a nut as it goes into a threaded bracket in the stock configuration. Blurry picture of belt routing: Image Not Found Sorry the picture sucks, my fone does that... Downside to this belt routing is there isn't a lot of contact on the fan pulley, I'm not worried about it right now but will keep an eye on it. I may go to electric fans down the road so it really won't matter if that is the case. Another slight issue is one of the bolt heads in the P/S pump bracket needed to be filed a little bit to ensure it didn't rub on the belt. Belt: Image Not Found 71" 6 rib. Truck in my shop, if you don't believe me: Image Not Found Of course the battery was completely dead from sitting. Actually, it was leaking too. So I baking soda'd everything and cleaned it up. The only other good batteries I had were larger, so I threw a group 34 in it. I didn't try to close the hood. Will it fit without shorting out or rubbing on stuff? It's too tall for the hold-down, but that's easy to fix...
-
Odd brake light triggering?
DirtyComanche replied to That_Creepy_Guy_In_The_MJ's topic in MJ Tech: Modification and Repairs
For the fuse issue you might be able to get a small pair of needlenose pliers into the receptacle to crimp the contacts a little tighter. Or try another brand of fuse, some have a bit thicker blades than others. Does it smell like burning antifreeze from the tailpipe then, or just sweet in the engine bay? If it's white smoke and burning out the tailpipe, might as well just order up a headgasket, intake gasket, valve cover gasket, tstat/gasket...