
Gojira94
-
Posts
677 -
Joined
-
Last visited
Content Type
Profiles
Forums
Gallery
Everything posted by Gojira94
-
From what I've been able to learn about the Renix ECU, it does have a static 'fuel map' based on stock 4.0 pumping characteristics. This is essentially a table of RPM vs manifold pressure (MAP), with a matching injector pulsewidth. That can't be changed by any known means in the Renix ECU. So if we change the displacement upwards, for a given RPM vs MAP, more fuel is required. The ECU will fire the injectors for the length of time in this table. The O2 feedback will show lean so the short-term fuel trims will add additional pulsewidth (injector open longer) to try to correct it until it gets it right. With stock injectors, the percentage of time the injector spends open ("duty cycle") increases. Generally we don't want to exceed 90% duty cycle, with 80-85% probably ideal. So we look at either bumping fuel pressure a bit (returns diminish more quickly for an injector this way, as it begins to affect the spray pattern) or going to a larger injector (delivers more fuel at same pulsewidth). Sizing a larger injector can be tricky. You'd want one with a good spray pattern at the chosen or stock fuel pressure without being too rich at idle. Ohms resistance determines how long the injector takes to open and begin delivering fuel. Renix expects to deal with injectors at 12 ohms. Higher ohms, say like 16, would take longer to open and begin delivering fuel, so the programmed pulsewidth wouldn't result in a cylinder starting to get fuel until later in the injector open/ close cycle. And then close before the expected amount of fuel is actually delivered. Or worse, still be closing but not closed, and sending a small remainder of fuel toward the intake valve after it's closed during the compression stroke (wasted fuel/ excess fuel for the next intake stroke). This is seen as a 'still lean' condition so even more fuel is commanded, arriving late, compounding the issue (shows lean, smells hella rich, poor fuel economy, compromised power). Guys do Renix strokers without problems, but there's a LOT to think about to get it just right. Switching to the 91-95 7120 head is popular, and so is adding a mild cam, though not necessary. But the 'whole hog' effort delivers the benefits guys are really after.
-

Experimental options for washer tank
Gojira94 replied to Gojira94's topic in MJ Tech: DIY Projects and Write-Ups
A wealth of good information here. Thanks for taking to time to record all the part number details. I was fortunate enough to harvest about 4’ of all the wiring for both pumps and the low washer sensor. @Airborne Janitor has a write-up on how he added wiring to that without having to add pins to C100, which I think will be the route I take as well. -
Looking for bolt-on gains on the Renix system has diminishing returns with a stock engine, but it's true that a few bolt-on mods can yield an additional 8-12 HP and 12-18 TQ. It can deal with more airflow and corresponding fuel via injector pulsewidth and O2 feedback. I see numerous internet threads that indicate Renix can deal with larger displacement strokers as well, as long as airflow in/out ("VE") and fuel are matched well enough for Renix to make it stoich. My own engine is an HO from a 93 YJ and will be running on Renix with all the required sensor substitutions for it. I'm also going to be running a 99-01 intake because it came with the drivetrain and it matches the PS pulley setup I snagged from the boneyard for $8. Also going to have a CAI, bored TB and full 2.5" exhaust. I snagged some good Bosch 228cc/min injectors to try on the cheap, to see how well it matches the VE requirement of this particular arrangement. Not looking for significant gains, I expect a good-mannered engine with approximate mild gains stated above.
-
Saying this may make me sound like the annoying kid in The Polar Express... TB spacers only really have any benefit in systems that either introduce fuel above the plenum (carb, TBI) or early per-bank batch-fire systems like the 92-93 GM 5.7L LT1 ('fogged plenum'). No help whatsoever in systems where fuel is introduced just above the intake runner of the head, especially really short head intake runners like the I-6 heads. An engine is a pump, and at maximum it'll only draw air through itself at the velocity dictated by the head/ cam(s)/ valvetrain, barring restriction at the throttle plate and exhaust. A great flowing intake won't help a restrictive exhaust, and vice-versa. Minimal restriction at both ends allows the heads/ cam(s)/ valvetrain to operate unimpeded at their inherent volumetric efficiency, as good or as bad as that might be. Swirling air in the plenum won't change the nature of what's going on at the intake valve on the 4.0. A spacer on a TBI 2.5L with good flowing exhaust and a cool air charge would see a slight improvement though. Engines make peak torque where volumetric efficiency peaks and, coincidentally, where the least amount of timing advance is needed to meet the point of MBT (maximum brake torque). Nothing changes that, short of changing characteristics of heads/ cam/ displacement or forced induction. And then, adding more fuel via bigger injectors, less restrictive induction and freer flowing exhaust are 'supporting mods.' A taper at the inlet might increase velocity and turbulence in the plenum. However, valve events control the pressure waves produced backward into the intake runner and outward into the exhaust runner, and pressure waves are more pronounced during intake/ exhaust overlap. In short, any swirl/ velocity are of no use if they're halted in the manifold runner/ head intake runner, as air there moves at a rate dictated by the valves. At that point, velocity and swirl are governed by the combustion chamber design, and how efficiently the charge moves out of the exhaust valve after combustion. At which point the exhaust system becomes an important consideration to keep the exhaust pressure wave/ exhaust gasses moving. Needing some amount of "backpressure" is a myth. You can restrict the exhaust a bit to band-aid poor velocity upstream (think cam and heads too big with too little dynamic compression/ "lazy ports") but an efficiently designed engine doesn't need it. Longer intake runners do make more low RPM torque because of consistency of volume and momentum of incoming air, at low RPMs. A spacer only increases the effective plenum/ runners' length by a neglible amount, anyway. None of the Jeep/ AMC/ Chrysler I-6 heads have a very efficient, fast-burning head. This means more timing advance is needed to complete combustion by 12* - 14* ATDC (where MBT lives), as compared to a more efficient chamber design. The Edelbrock head has that more efficient, faster-burning chamber, but it's for a completely different build than stock with some bolt-ons like we're talking here.
-
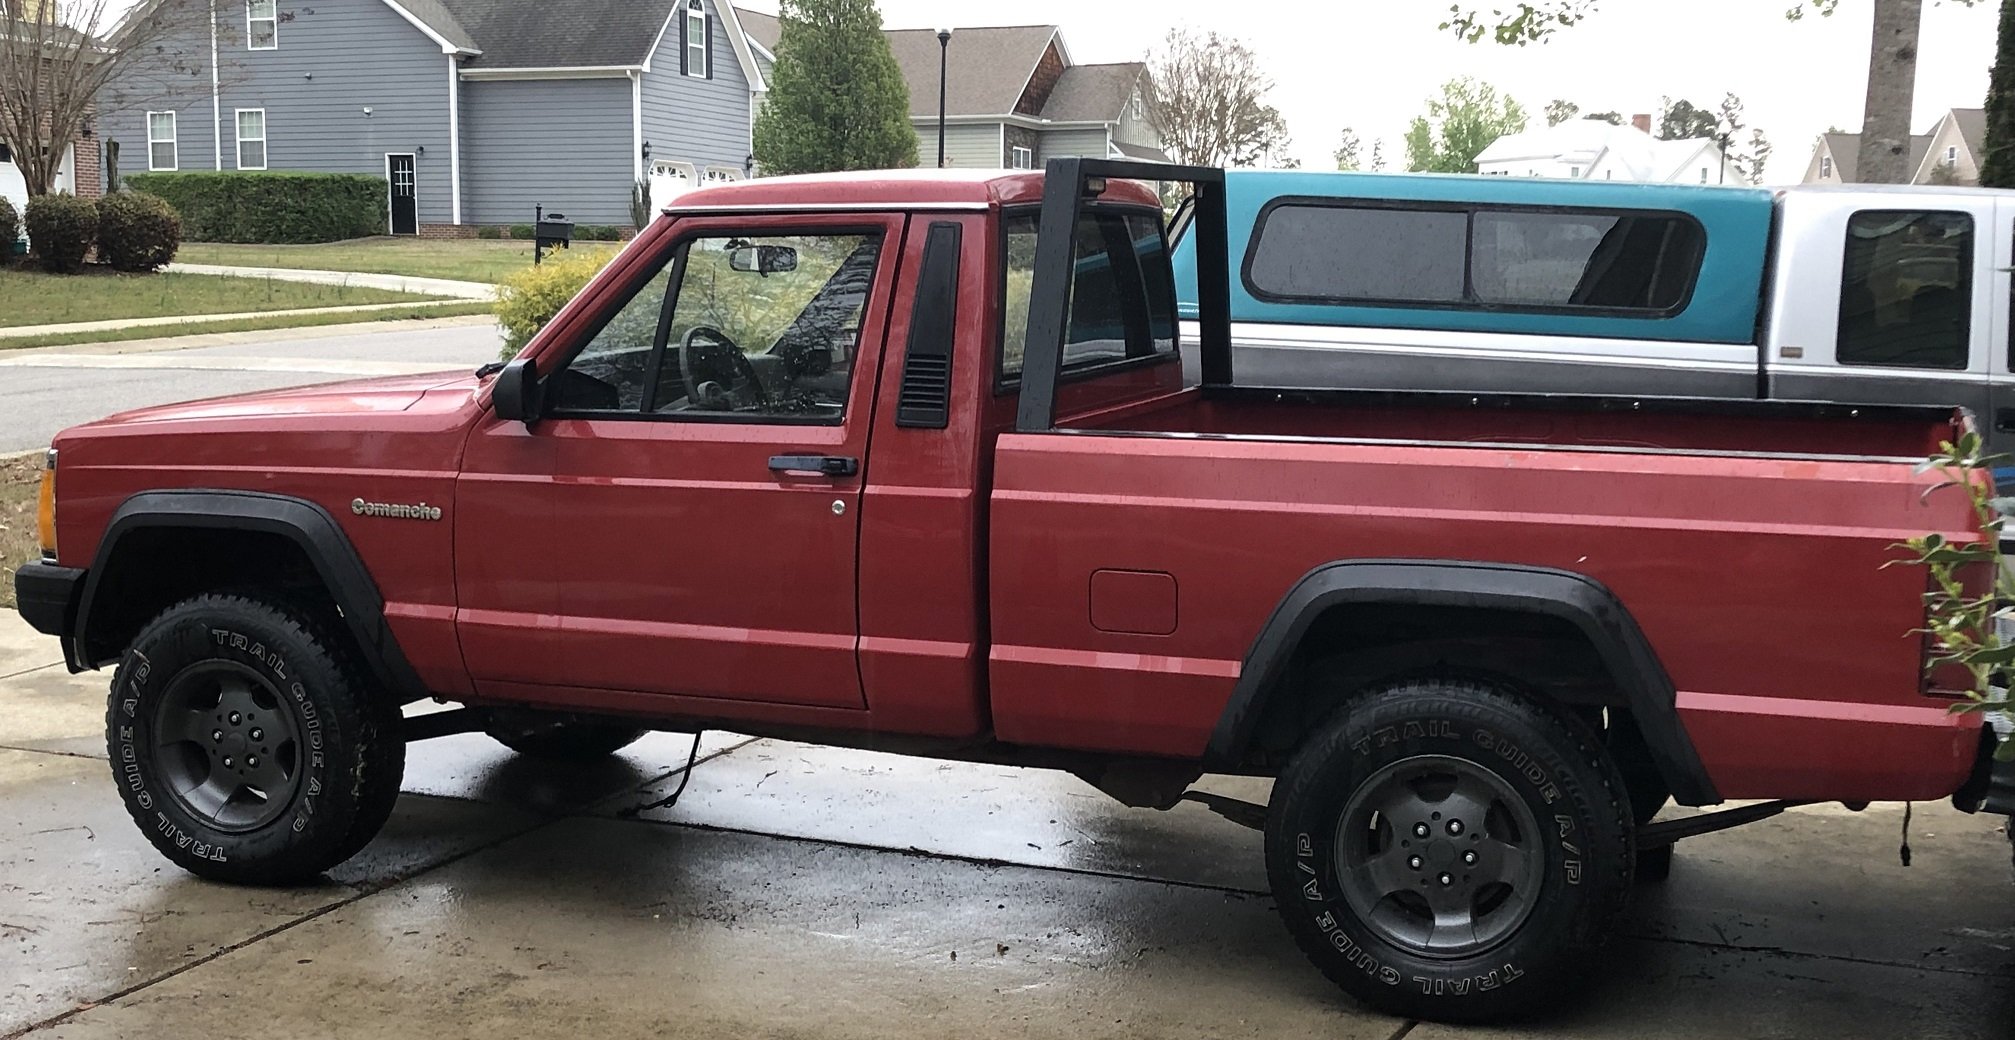
And it's official... going 6 - 6.5" lift. OME 2934, ACOS, SOA with new leafs, 15x8 -19mm offset black wheels wearing 33s. RRO CA drop brackets are on the way. Everything else is in hand and ready except tires and wheels. I saw a member on here who used a wooden jig and engine hoist to lift off the bed- don't remember who you are but thank you for the idea!
-
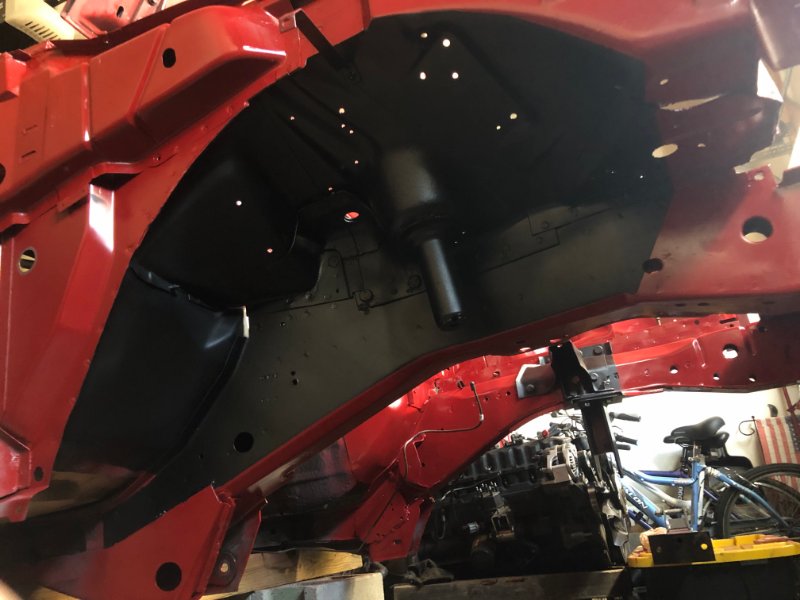
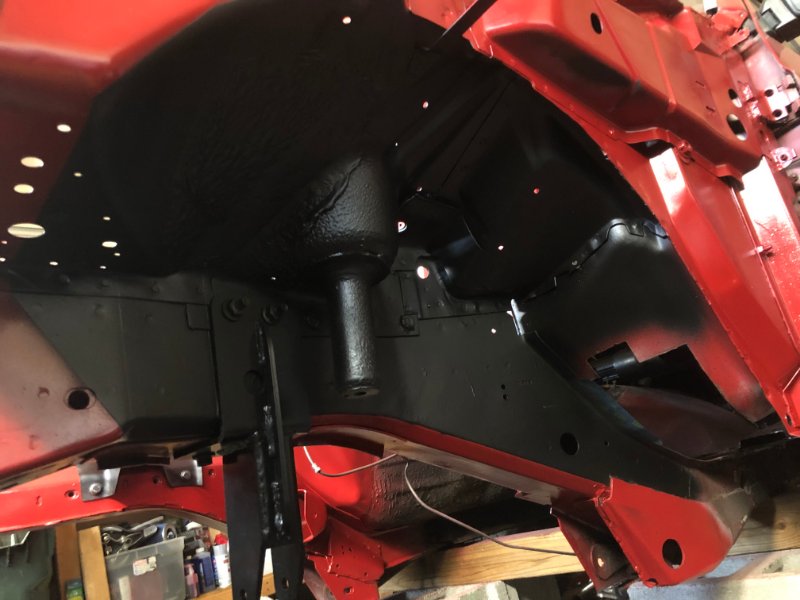
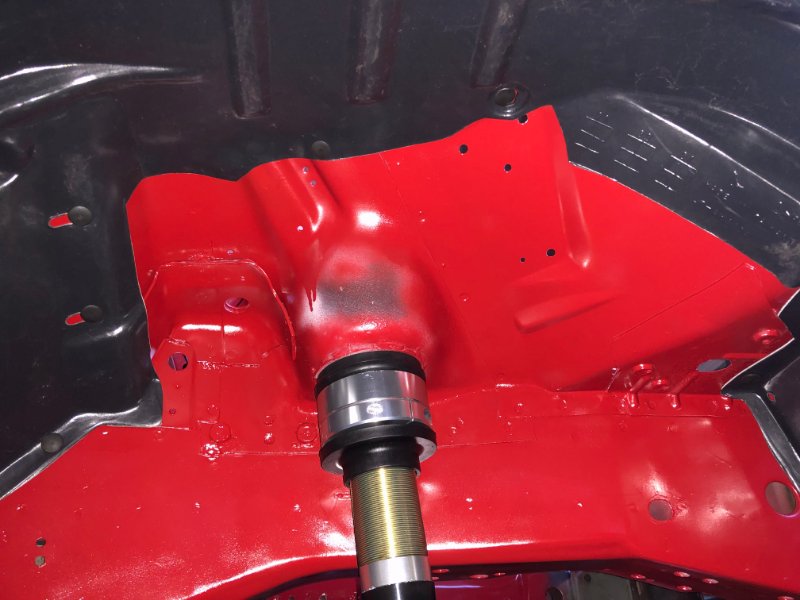
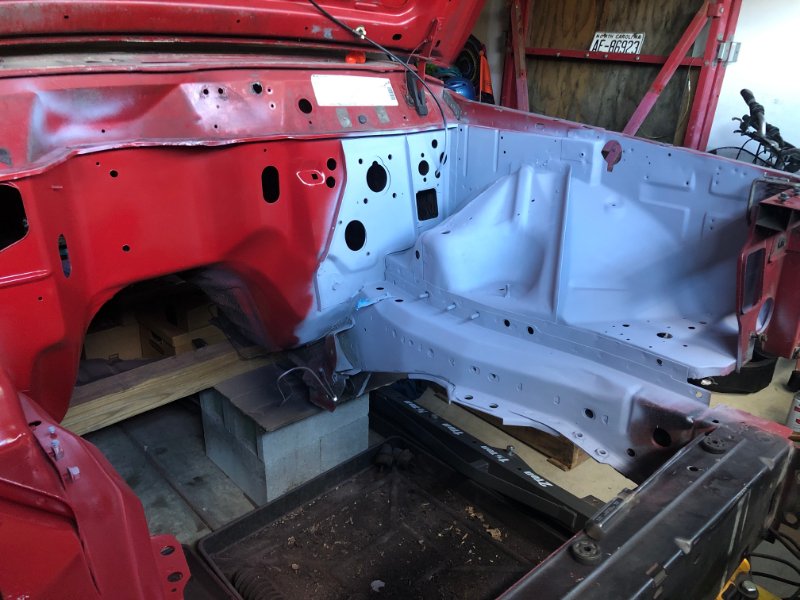
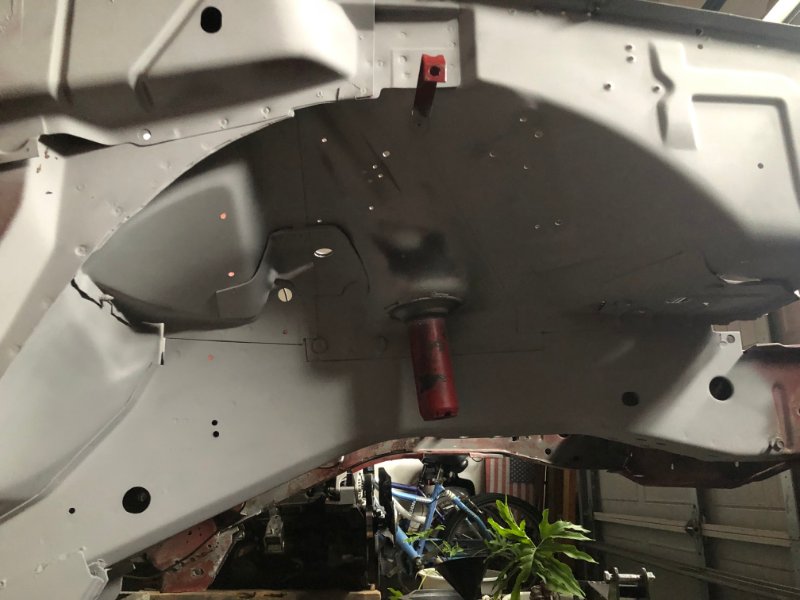
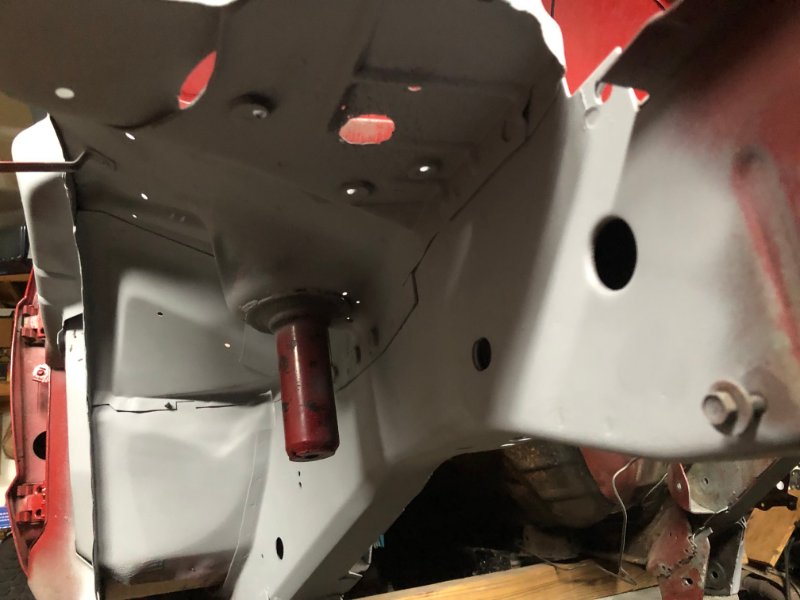
Undercoating done in the fender wells. I left the bottoms of the frame rails uncoated. I figure it's easier to deal with scuffs/ scratches/ scrapes in paint rather than a rubberized coating. If I change my mind about that, it's easily done. Frame horns painted up to the front plate, inside and outside. All that remains of paint on the front third of the rig is DE1635 on the front crossmember. (And the lower cowl...)
-
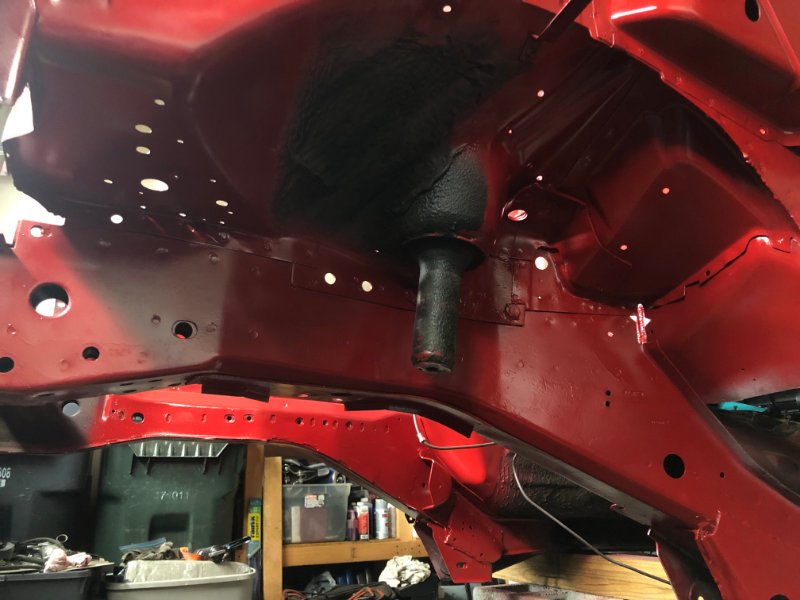
If the other end goes to the blower motor it's the blower's cooling tube. Older years have the blower cooling tube drawing air from the interior very close to the motor. That line looks to be just above and inboard of the evaporator drain line. Decently cool air there.
-
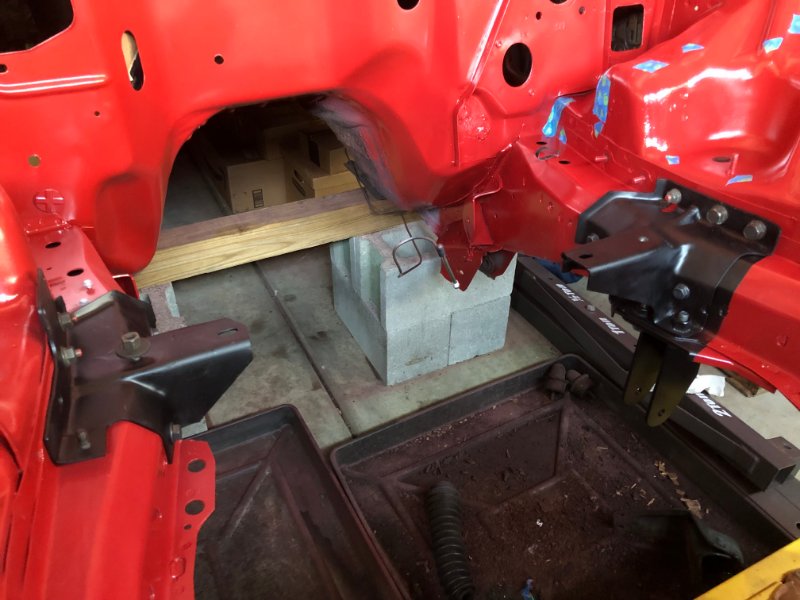
One fender splash shield mocked up for fitment, fairly decent. Deciding where to draw the line on the frame for the supplemental undercoat. I think I know how I want that... Engine mount brackets and track bar brace are in...
-
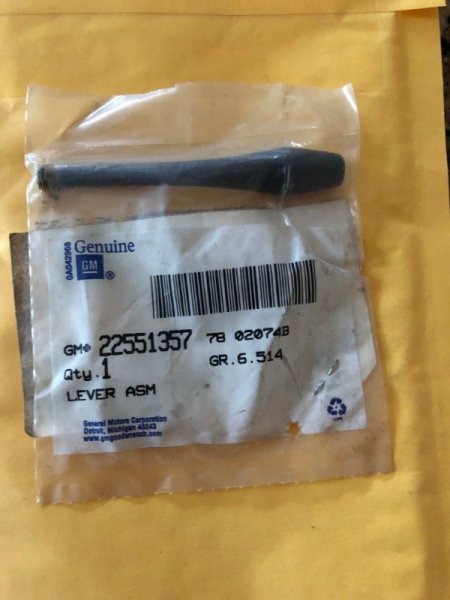
Thanks guys for the links- I do have one from my non-tilt black column like the one GrandBoost98 linked. I really like the faux cap screw style from whatever years that is/ are on the gray column I picked up.
-
Thanks! This project is about to get a lot more enjoyable!
-
I haven't seen an equivalent electrical manual for 89-90 yet, but the 88 manual is virtually the same. The big 2 plug connector on the cowl above the brake booster was done away with in 89, so you're fortunate in that regard. Mine's an 87 but it had an 89-90 harness in it. The 88 manual will pretty much cover everything you're trying to do, just ignore any instance of "C101" you see. And... welcome to the forum.
-
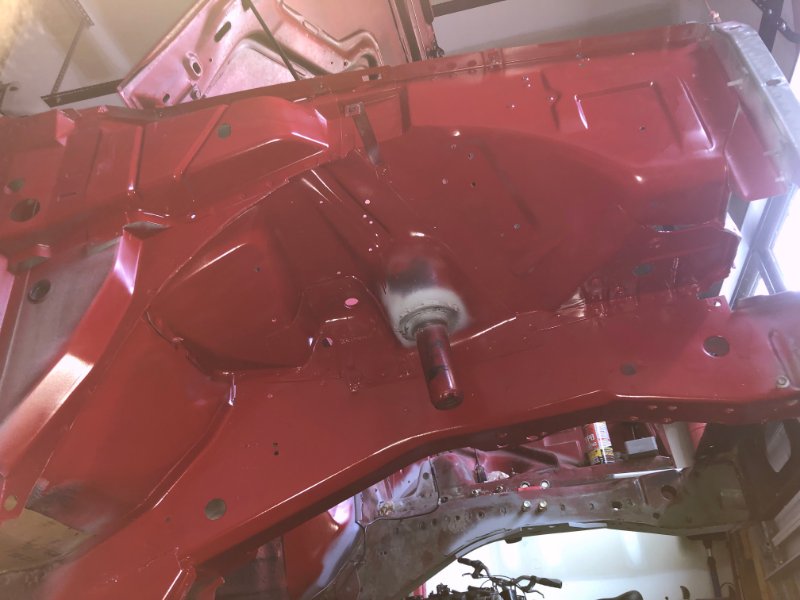
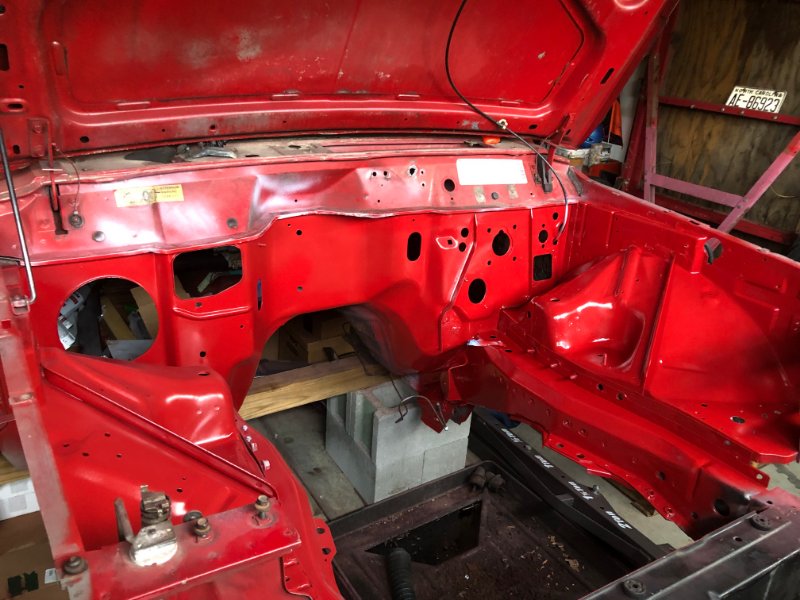
OMFG I've gotten so sick of endless scraping and wire wheeling and acetone baths... I'm within a hair of being able to slip the D30 under it in the next week. Then I can work on my back scraping all the crud from under the floor pan, prep for welding and get the floor patches in. Heck, I might be ready to start it by the end of May... After I do the lower cowl, my new labels from BoxyJeep are going on. One more little thing, but it'll be awesome.
-
...and black lock cylinder. Just need to paint it black, wrap the wheel and keep an eye out for a black horn pad (that'll take forever).
-
Typo there in your year - 1988? Here's the Electrical manual, that'll be of endless assistance to you. 20473025_1988MJElectricalManual.pdf
-
Searching for the elusive unicorn.
Gojira94 replied to Dandxj's topic in MJ Tech: Modification and Repairs
Yeah, my LC-2 in my other truck can do one of its 2 outputs to 0-1V narrowband emulation for a factory ECU that uses a 0-1V signal. Or you can have 2x 0-5V signal wires (ostensibly one for a gauge and one for an ECU to use to control fuel trims in the 0-5V range). If the WB controller firmware is set properly for the fuel type and what voltage = 14.62-14.7 AFR then all should be good. I thought the pulldown resistor would somehow interfere with a direct 0-5V input, since the OE design does not generate its own voltage and relies on the ECU to provide it at the input pin. I'd love to have a REM but my timing is off with Nick's production, as he's just had a baby and stock of some of the stuff he needs to make the REM is in short supply (or was). Innovate LC-2 is a VERY nice controller, selling for $169 these days. I've sent a message to NGK/NTK support. If that goes nowhere I'll look into a standalone unit like the LC-2. But that's not a solution for everybody who just wants a plug in sensor that works like OE. -
Searching for the elusive unicorn.
Gojira94 replied to Dandxj's topic in MJ Tech: Modification and Repairs
That's the way I'm reading it for grounds, thanks for clearing it up on how the fixed resistor in the ECU works. I'm very familiar with GM stuff's "5V reference" but Renix is still a black box to me for the most part. So even a standalone wideband controller supplying a 0-5V signal would be out of the question. I recalled I ordered my sensor direct from NTK, not Autozone. I'm going to request product support and see where it goes. At least see if I can have a conversation with them about it. Wish me luck. -
Searching for the elusive unicorn.
Gojira94 replied to Dandxj's topic in MJ Tech: Modification and Repairs
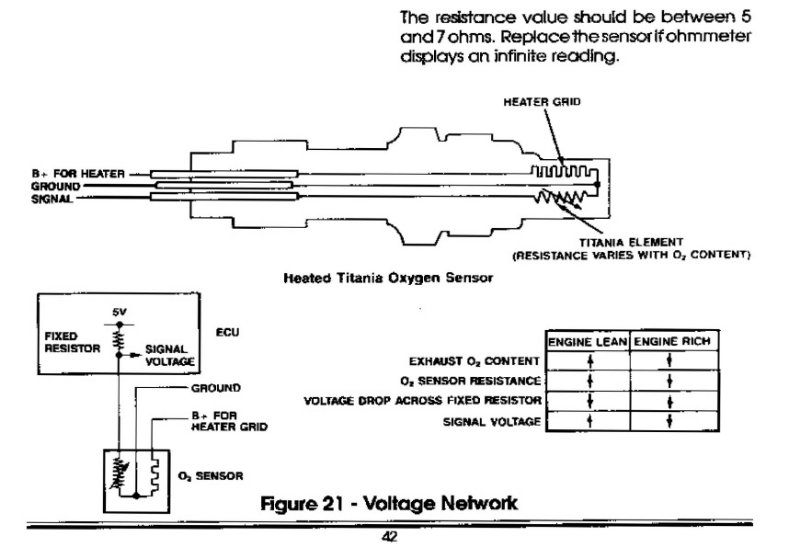
I purchased an NTK a while back through a Local Autozone, thinking I'd be good when it all comes together. The picture showed a ceramic body, got one with a metal body. Saw recent chatter about NTKs no longer being any good. I pulled it out of the box and poked my meter leads through the bag and got 4.7-4.8 ohms. Manuals call for 6, I think with 5-7 being acceptable. Great... So... theoretically, if there was a sensor out there that was known to reliably have a heater grid circuit resistance of 6 ohms with a 0-5V range output, it could be adapted. I think even a 4 wire could have its signal ground wire joined to the heater circuit ground, since there is a fixed resistor in the ECU behind the pin that receives signal voltage from the sensor. LSU 4.2 and 4.9 are out of the question, as typical universal 6-pin, 0-5V output "wideband" sensors require a standalone controller. I run an Innovate LC-2 controller in my 92 C1500. It has 2 output wires with a 0-5V signal and uses a relay (not included, you must install) to control the heater circuit and controller power. I'd like to think a 0-5V signal direct to the ECU would work but I don't know the signal voltage characteristics coming straight off the signal wire from the Renix O2 sensor. If the fixed resistor in the Renix ECU in some way shapes or regulates the incoming O2 signal for use as an input, I have no idea what the nature of that is. Wish I did.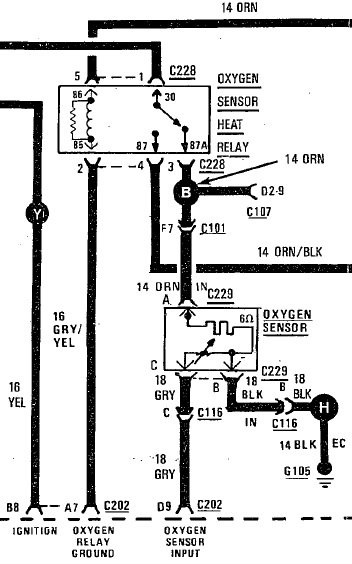
-
Experimental options for washer tank
Gojira94 replied to Gojira94's topic in MJ Tech: DIY Projects and Write-Ups
I bagged the idea of finding something else that would fit. A used 97-01 tank at my local yard is like $13 so I grabbed one. Poked 2 holes to mount it and made the filler neck hole free-hand with a Dremel. For those that have done this on MJ that had the old style tank, what did you do about the 97-01 tank being equipped with 2 pumps? Cap one hole, or power both pumps, connect the tubes with a Y for monsoon level spray, or what? I grabbed about 4 feet of the wiring for both pumps and the level sensor while I was at it to extend the reach and at least tie into C169 for a single pump setup. Being that my cluster and engine harness came from an unknown 89 or 90 XJ or MJ, the engine harness also has connectors C168 and C195 for level sensor and rear pump. However, the original 87 IP harness is missing the pin(s) between engine harness and cluster for 'Low Washer.' That's an easy one to add though. I think common sense says to cap one hole, run a single pump, and add the low washer pin, just as a nice to have?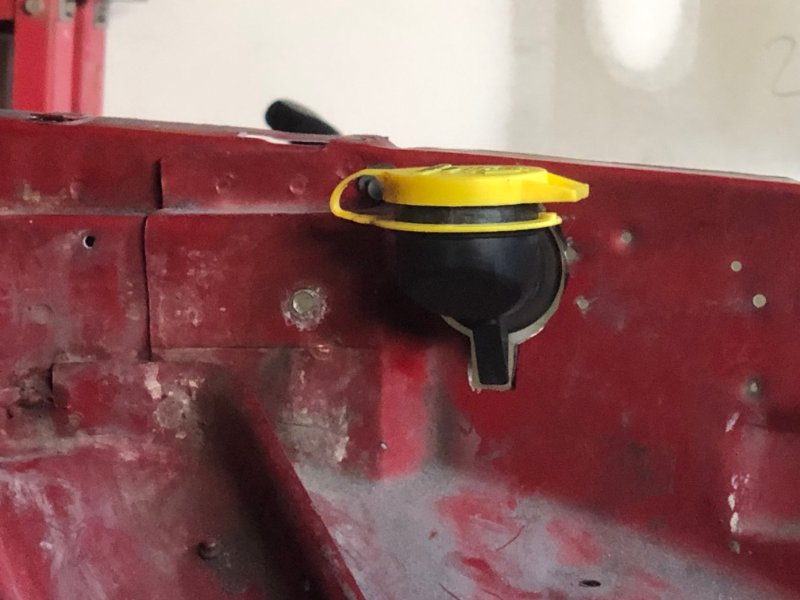

-
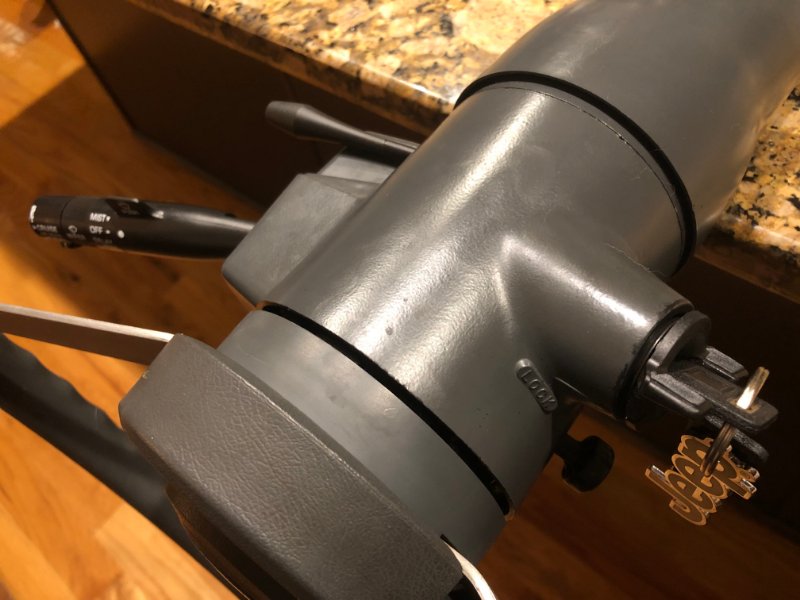
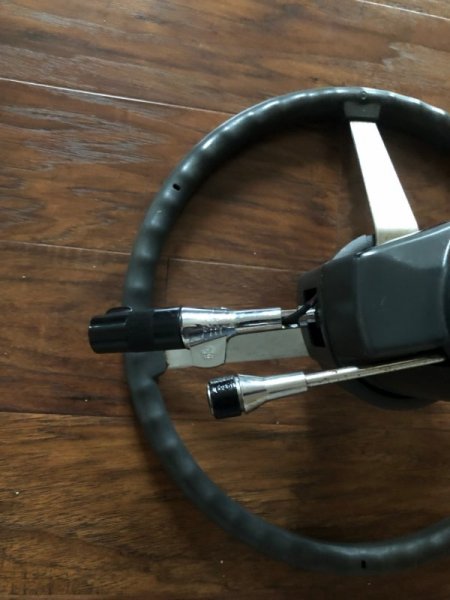
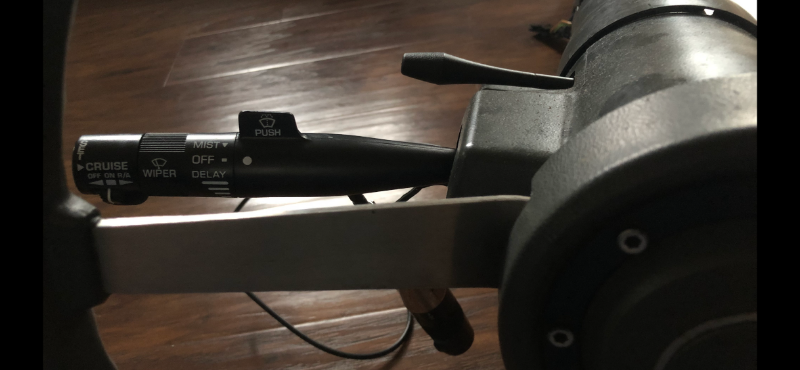
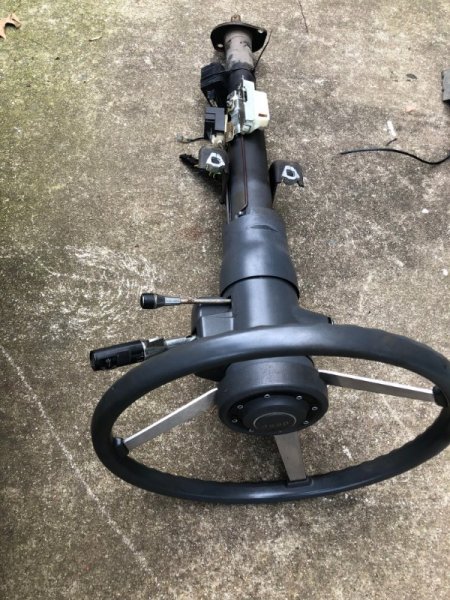
This steering column has been rolling around in the trunk of my Accord for almost 2 weeks, getting a chance to play with it. First, I don't like chrome (blasphemy/ sacrilege, I know). Just like the one in my 94 Firebird Formula- I like a shorter tilt lever, in black: Same for the turn signal lever/ cruise switch:
-
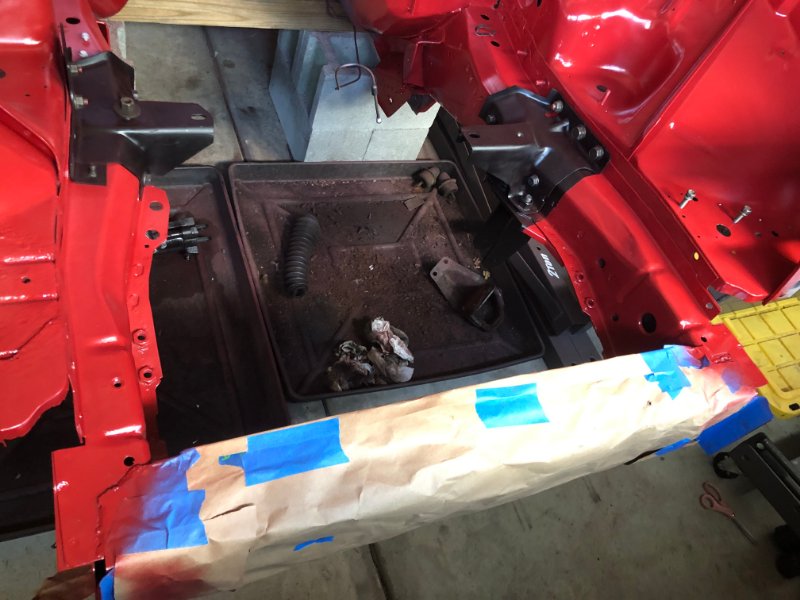
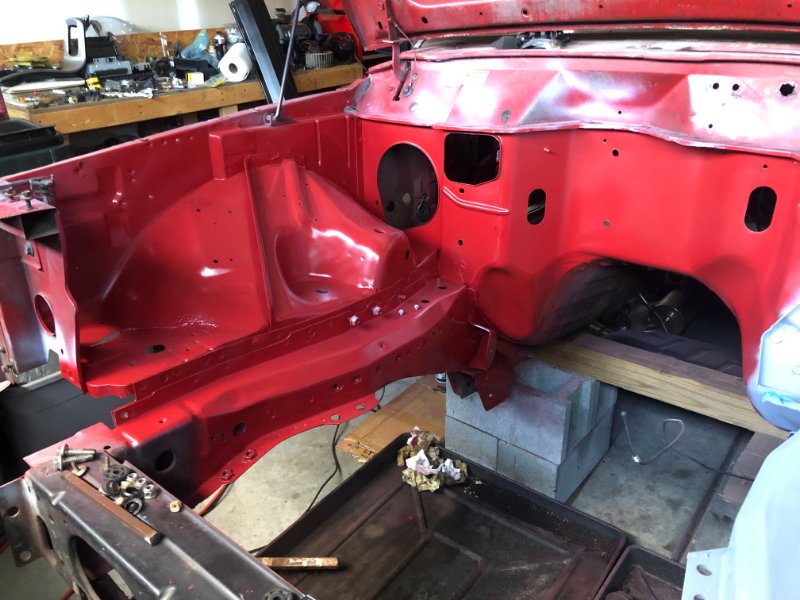
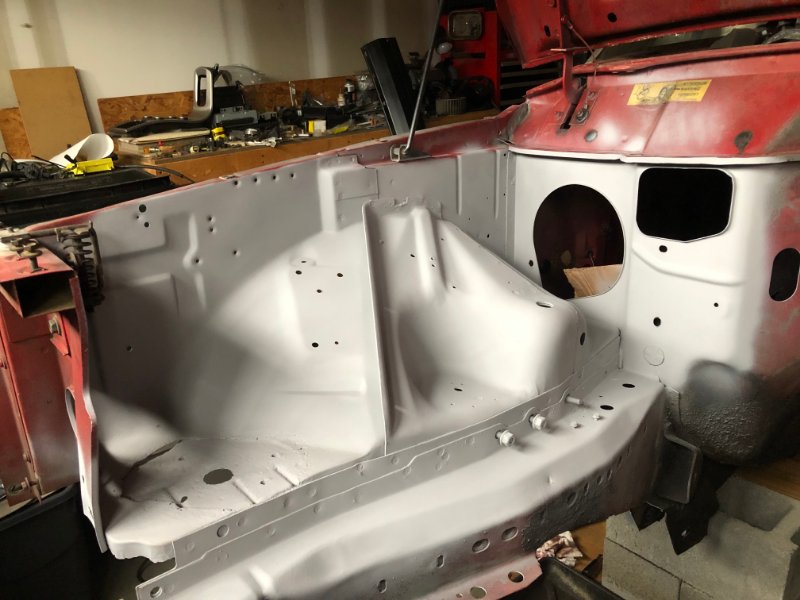
Section by section, bit by bit. Cleaning off a ton of welding boogers from the assembly line as I go. Passenger side lower wheel house: Upper side: Got all the cancer out of the battery tray mount for now, I'll want to revisit and replace both layers of metal. Top layer is pretty much gone altogether.
-
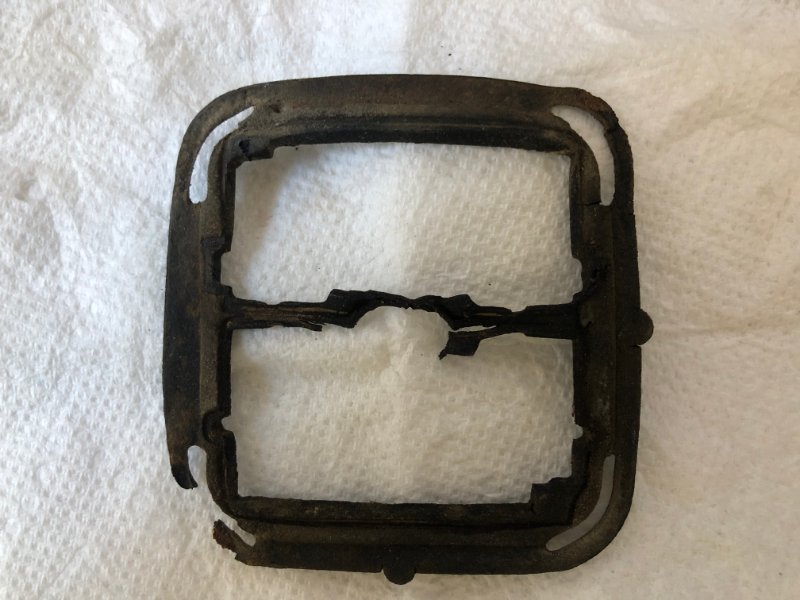
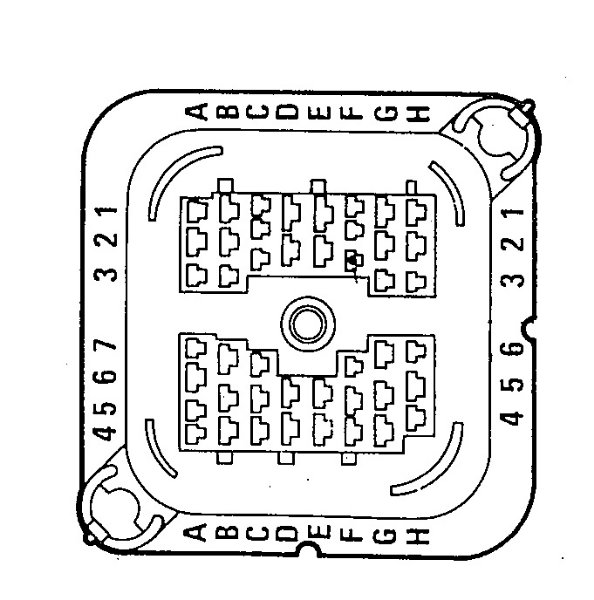
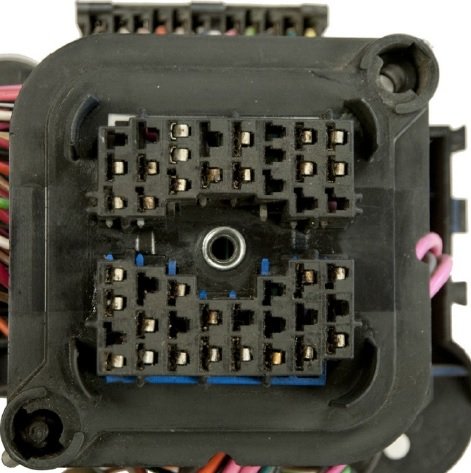
Here's what's left of my old one, compared to the one from Casper's. Looks like an (almost) perfect match. Ordering now lol. GM and AMC both referred to the connector as "C100." AMC C100 vs GM C100 (88 Electrical Manual image vs the one in the Casper's 107149 install instructions)

-
Injector loom rebuild
Gojira94 replied to dreaminbohemian's topic in MJ Tech: Modification and Repairs
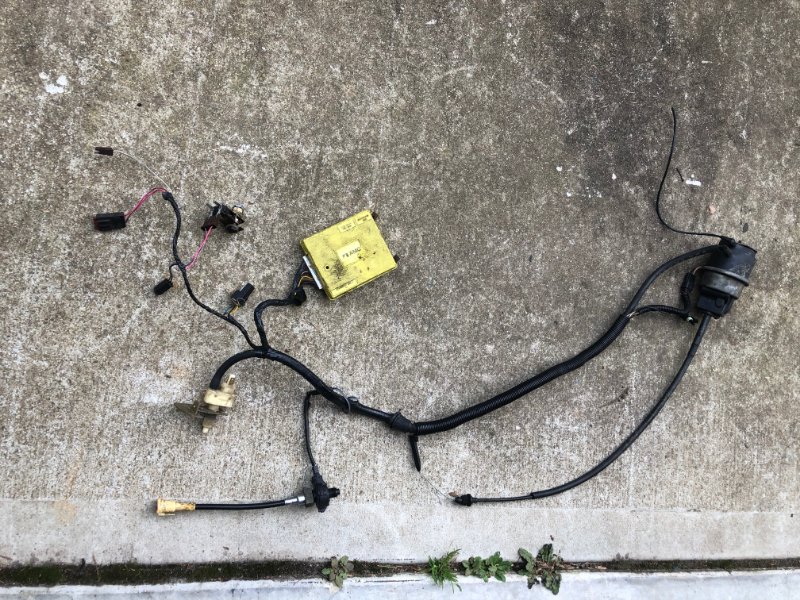
REM Codes: A) Baro Pressure Low - probably expected with low RPM idle and running rough B) Bat Voltage Low - not sure, but maybe from sitting since the night the incident occurred. Charge batt before next attempt. C) Distributr Sync - also not sure, maybe because the low RPMs are below what the ECU uses to confirm distributor sync signal (out of range to be useful) ECU Codes - 1 through 7 below suggest the ground wires got tugged pretty hard and taking the corrugated loom off the harness up as far as just past the engine speed sensor and posting some pics might help us spot some damage not seen before. 1) Injector 3 Short 2) Injector 4 Short 3) Injector 6 Short 4) Injector 2 Open 5) Injector 3 Open 6) Injector 4 Open 7) Injector 5 Open 8) Fuel Not Primed 9) ICM Signal Open 8-9 above not sure, possibly #8 related to low batt voltage at start, #9 due to lack of signal as a result of distributor sync signal not valid/ available due to C) above. -
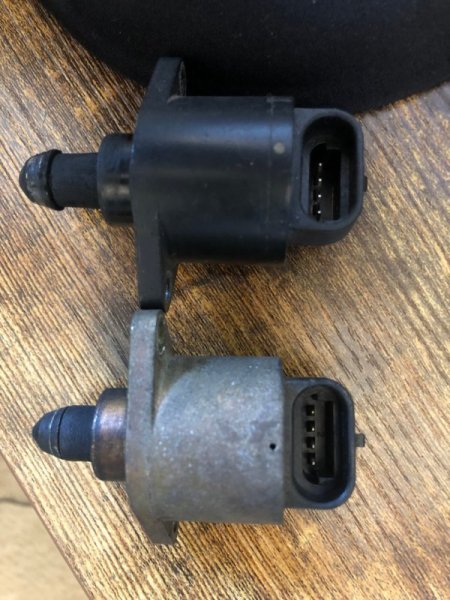
Finally going to get the questions answered about the IAC wiring differences between the Renix and HO IAC. I've seen everything with diagrams and ECU pins but the question remains which pair moves the pintle in vs out, regardless of whether the wires are paired inside/ outside or left pair/ right pair etc. Just move my harness pins to get the desired behavior from the HO IAC motor, according to the Renix computer. I hope this boneyard Renix IAC (bottom) works... looks like a Duralast unit.
-
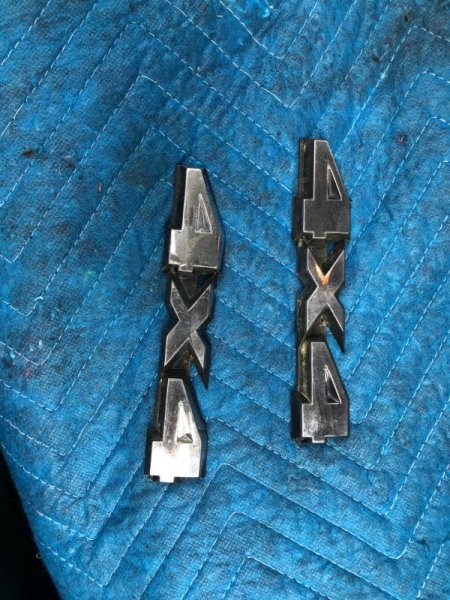
A big thank you to @Airborne Janitor and @eaglescout526. My rig will be getting cruise control! This thread convinced me to add it to my shopping list when an 89 XJ showed up at my local LKQ. My current column is non-tilt, no intermittent wipers and no cruise. I told myself I could live without these things but over time I wasn't convinced. Pulling all the parts together for cruise control online seemed a daunting task, and I'd missed the fact that eaglescout526 was selling kits. My current wheel is very noticeably bent, and has other issues, though it would work. Duplicolor 1634 is almost perfect for the lower collar and bowl, and I'll probably live with a grey wheel for a while, and swap the horn pad and have the wheel wrapped in black at some point. Also grabbed the pitted 4x4 emblems off the rear quarters. I'll probably black those out to match the rest of the truck and do the recesses in (Rustoleum) Colonial Red. Open to suggestions for black 4x4 emblems.
-
Thank you for sharing! I've been considering trimming a GM bulkhead variant that was close-ish. An exact part is beyond what I'd hoped, look forward to your conclusions.