ghetdjc320
-
Posts
5079 -
Joined
-
Last visited
-
Days Won
1
Content Type
Profiles
Forums
Gallery
Everything posted by ghetdjc320
-

Project “Tomahawk”
ghetdjc320 replied to ghetdjc320's topic in MJ Hardcore Tech: Epic Journeys to Greatness
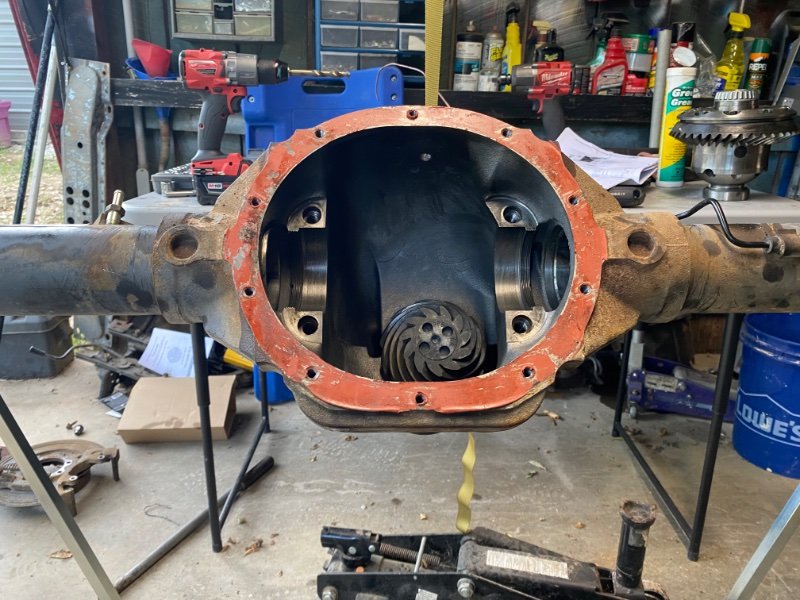
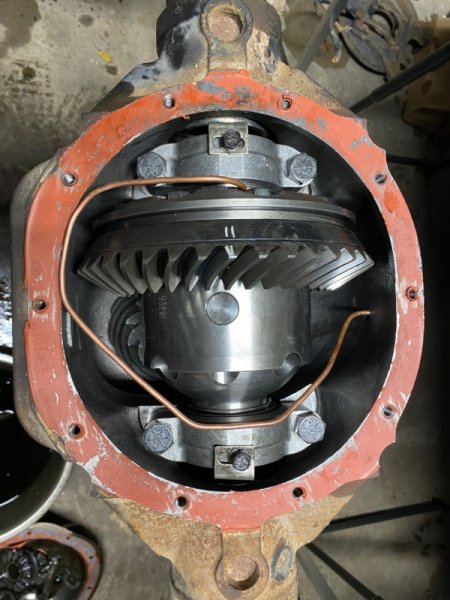
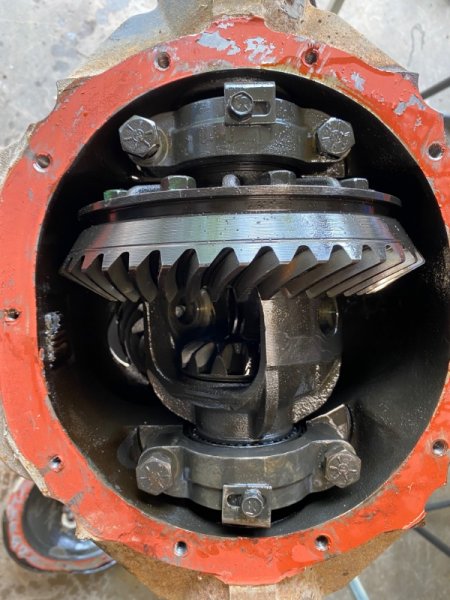
Backlash set to .008 carrier bearing preload adjusters set to 70lbft each. Air locker installed. Ring gear bolts set to 55lbft with blue loctite after removing all oil from threads and bolts. Bulkhead fitting tapped and air line routed.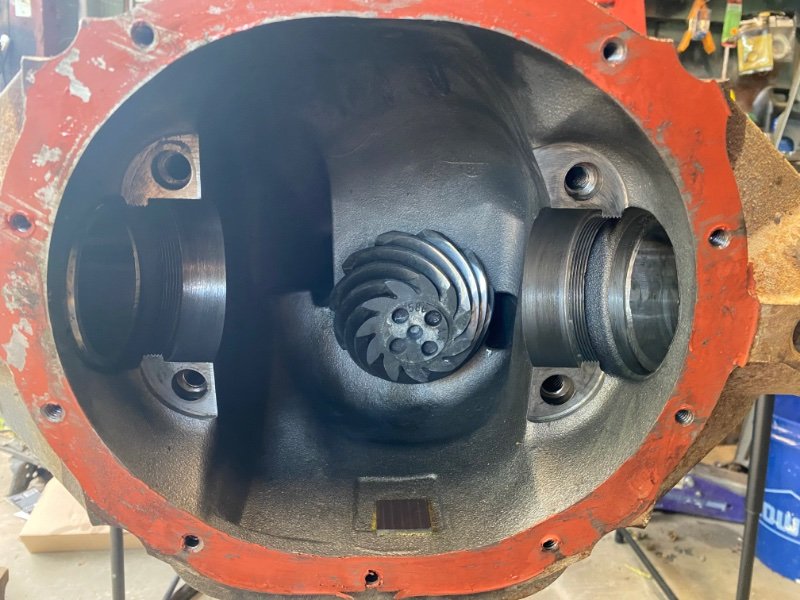
-
Project “Tomahawk”
ghetdjc320 replied to ghetdjc320's topic in MJ Hardcore Tech: Epic Journeys to Greatness
Most definitely! I have set up a great many diffs though. I think this will be about my 20th -
Project “Tomahawk”
ghetdjc320 replied to ghetdjc320's topic in MJ Hardcore Tech: Epic Journeys to Greatness
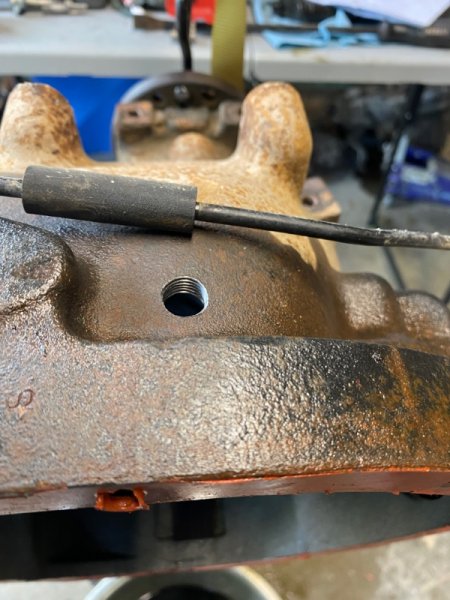
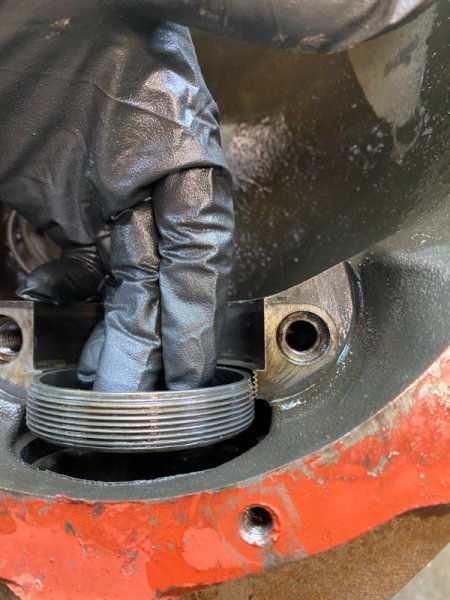
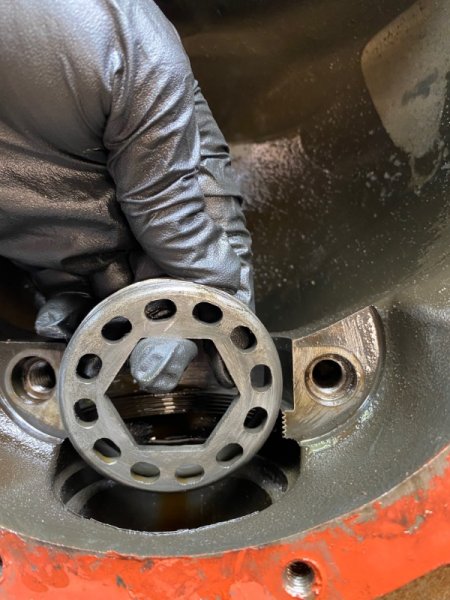
I know some have asked about how to setup gears on an 8.25. Here are some pics of the adjusters that screw into the carrier bearing journal. You use a long wrench through the axle tube and use them to set your backlash then preload. A very simple and effective design. As I was going through the shop, I also realized I had an extra D30 ARB clone locker (made in China). It’s in the classifieds now if anyone is interested.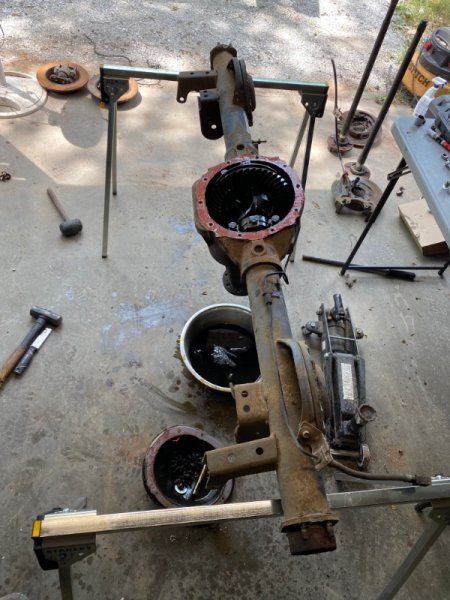
-
Project “Tomahawk”
ghetdjc320 replied to ghetdjc320's topic in MJ Hardcore Tech: Epic Journeys to Greatness
Axle building time -
Have you had a chance to pull that firewall pad? You’re probably just going to have to tear things apart and see how far the damage goes to get a game plan. Iirc key parts was going to repop the floor brace as well. A quality spot weld cutter is priceless for getting things apart cleanly. This thread has some fantastic detailed information and pictures on the overall design and some ideas on how to repair various degrees of rust damage:
-
Volvo G80 diff locker Dana 30
ghetdjc320 replied to jeeptec1's topic in MJ Tech: Modification and Repairs
That’s settles it then . Let us know how it works out for you -
31 inch tires rubbing on lower control arms
ghetdjc320 replied to sergiorod1987's topic in MJ Tech: Modification and Repairs
As an alternative, you could return them and go with some aftermarket control arms. A high quality wheel spacer properly installed is an option as well. Just some alternatives if you don’t want to cut the bushings. Core4x4 makes some nice control arm sets along with many other manufacturers. You could also adjust the steering stops on the knuckles but will obviously loose turning radius. -
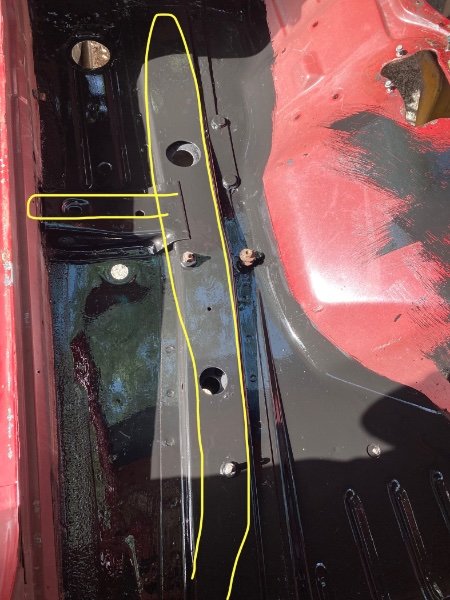
I haven’t found too many places on these MJ’s that were “over engineered” from the factory. That being said, there are a few that have removed the bracing. I personally wouldn’t remove it without installing some alternate bracing
-
This is what’s unique about the MJ floor pan. This bracing is installed on top of the floor pan and is supposed to act as reinforcement to the bed frame which is sandwiched inside.
-
Volvo G80 diff locker Dana 30
ghetdjc320 replied to jeeptec1's topic in MJ Tech: Modification and Repairs
Hear many a horror story about the gov-lok lockers in those Volvos but no first hand experience. The pins engagement design seems like it could sheer off though or at least give a lot of trouble. Seems we had a thread going about these recently -
ASD relay? Not sure if Renix had that or not
-
I’d love to see a new tailgate.
-
General engine question
ghetdjc320 replied to Whitaker717's topic in MJ Tech: Modification and Repairs
Very true. Even on open systems, a leak prevents pressure buildup which is essential to a properly functioning cooling system. So a leak in any part of the pressurized side of an open loop cooling system will cause on overheat as well -
This kk02108@gmail.com
-
General engine question
ghetdjc320 replied to Whitaker717's topic in MJ Tech: Modification and Repairs
I think you’ve found your heating problem or at least a major contributor. If you can smell coolant, you need to track down where that is coming from. If the system can’t build pressure, it won’t effectively cool. Even a tiny leak can keep you running hot -
Project “Tomahawk”
ghetdjc320 replied to ghetdjc320's topic in MJ Hardcore Tech: Epic Journeys to Greatness
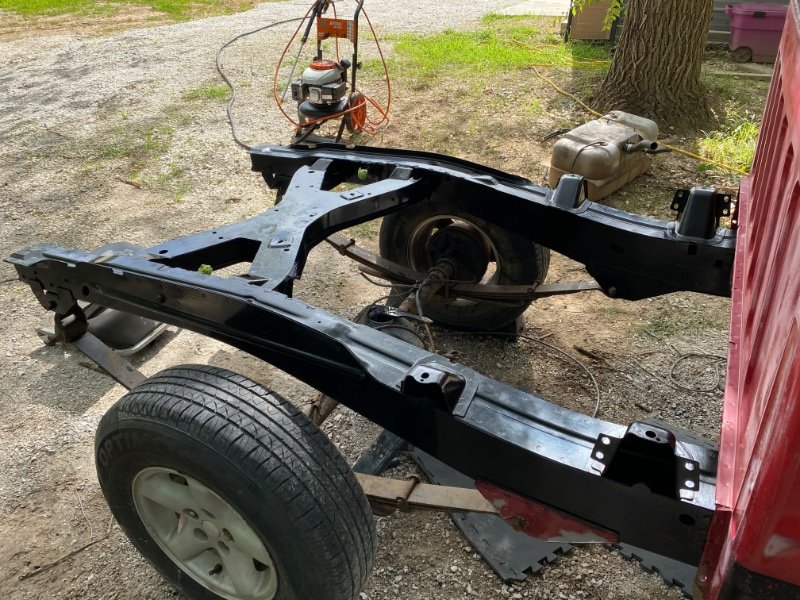
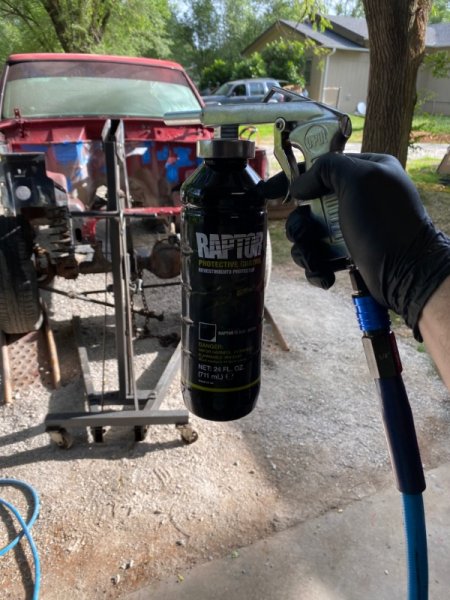
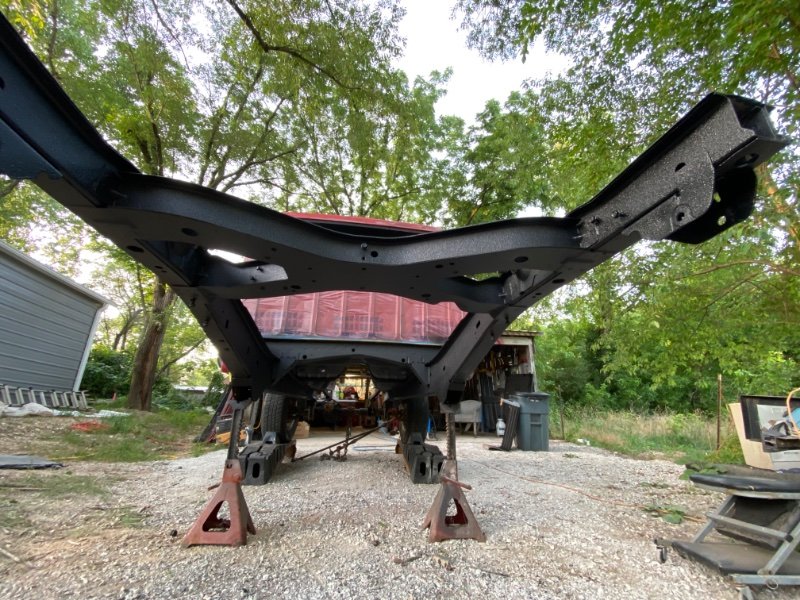
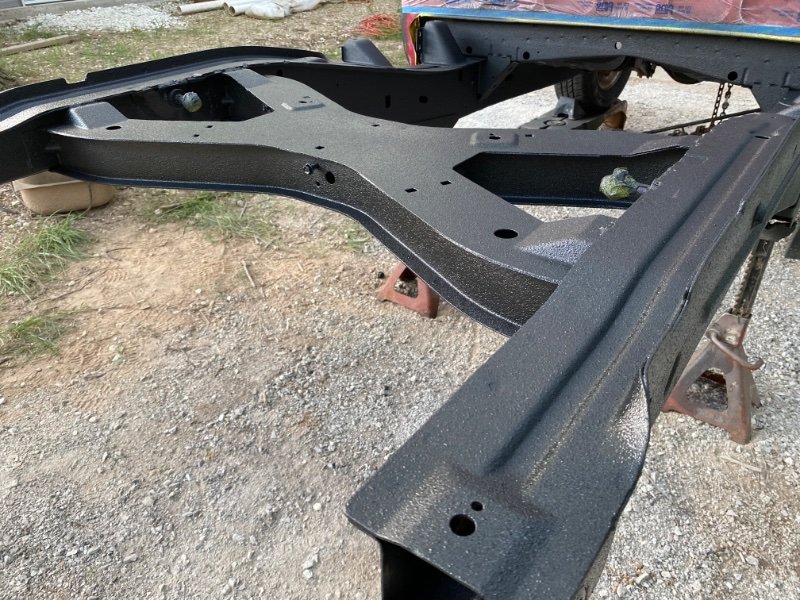
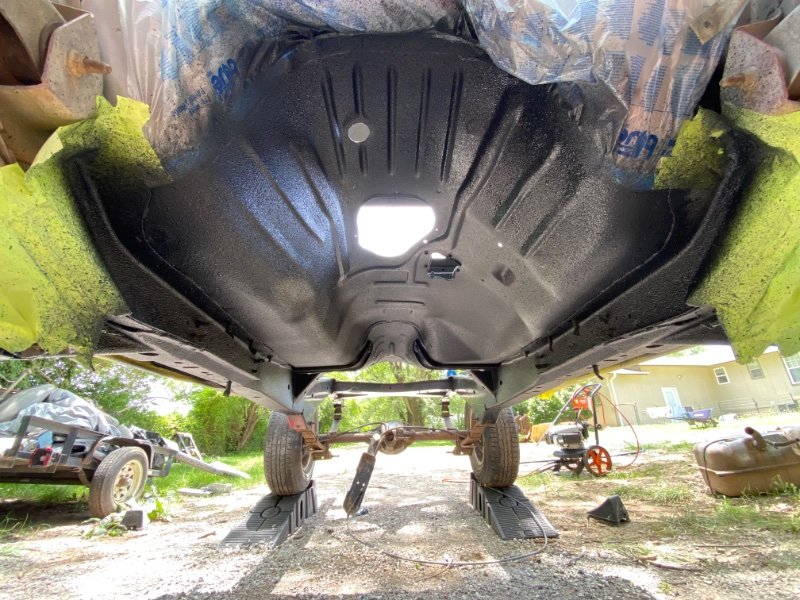
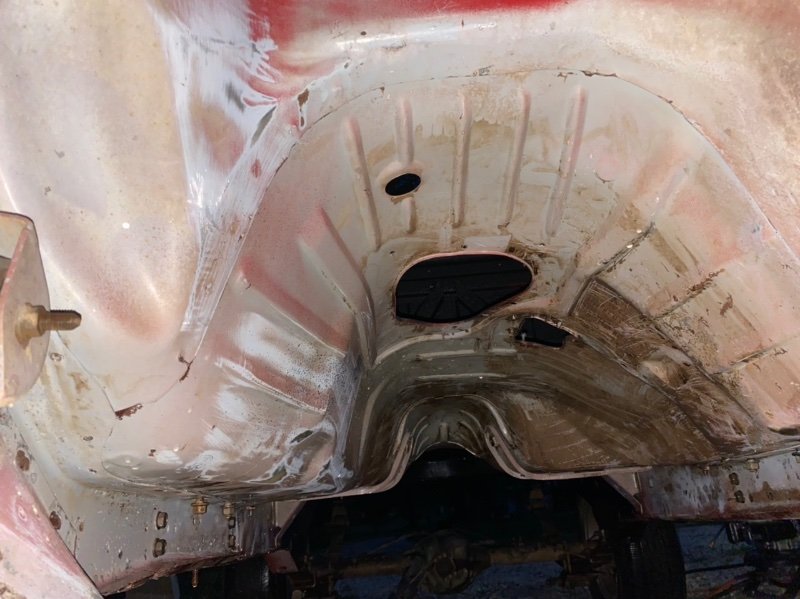
All raptor liner up to the firewall is complete. The only items left to coat are the front wheel wells and the underside and inside of the bed. Was going to work on the front end next but the rear leaf spring bolts were completely seized in the spring. So I’ll have to work on the springs and might as well do the rear axle since there’s no reason not to at this point. Rear axle is a KJ 8.25 with disks and 3.55’s. Will remove all the bracketry and install the ARB along with new brakes and bearing/seals. Also have a non disco HP30 front along with bracket gussets and another ARB. Might just do both at the same time. Give the raptor liner plenty of time to fully cure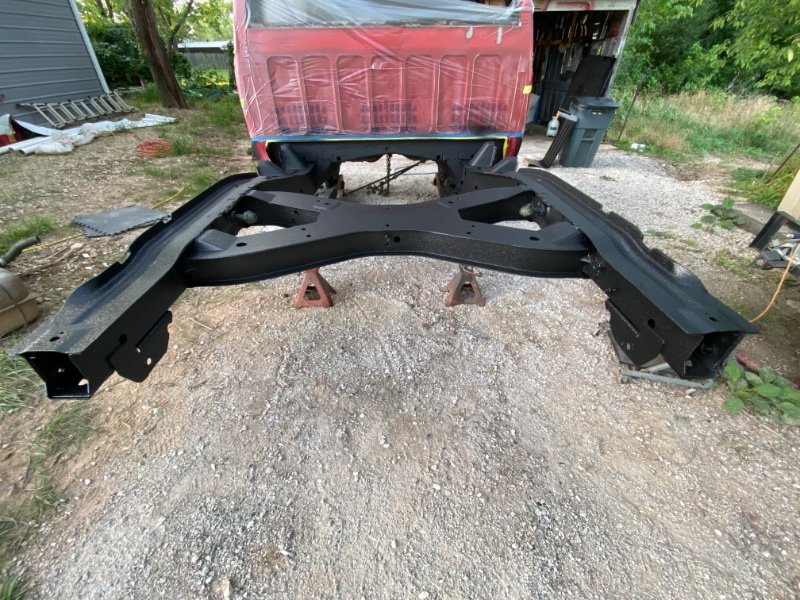
-
Project “Tomahawk”
ghetdjc320 replied to ghetdjc320's topic in MJ Hardcore Tech: Epic Journeys to Greatness
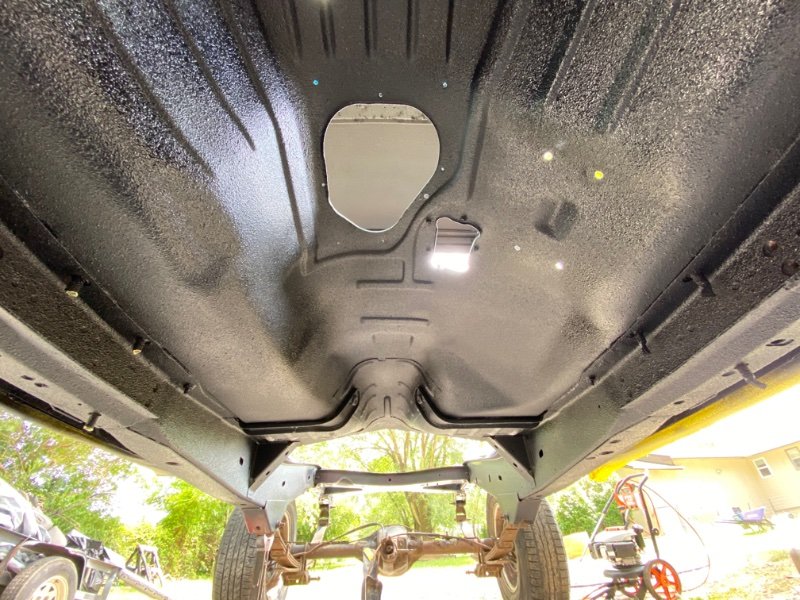
Second coat complete. Under cab is finished.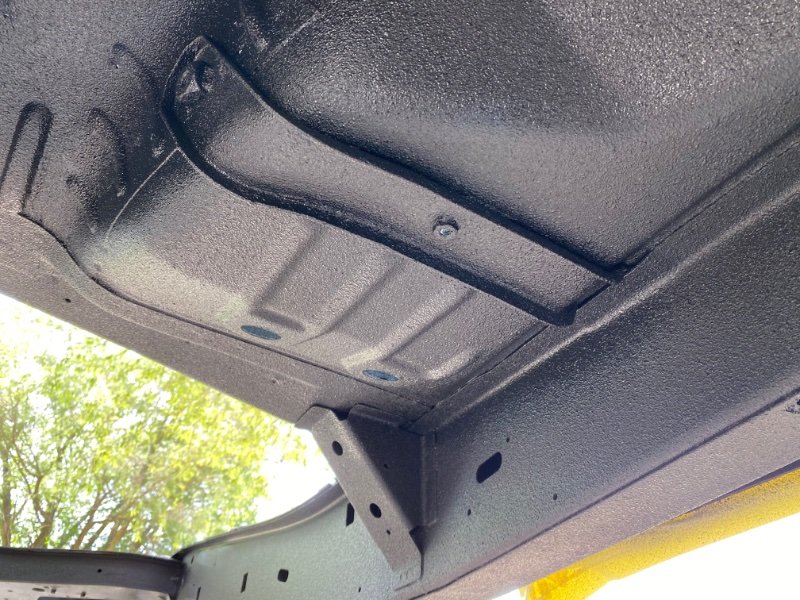
-
Project “Tomahawk”
ghetdjc320 replied to ghetdjc320's topic in MJ Hardcore Tech: Epic Journeys to Greatness
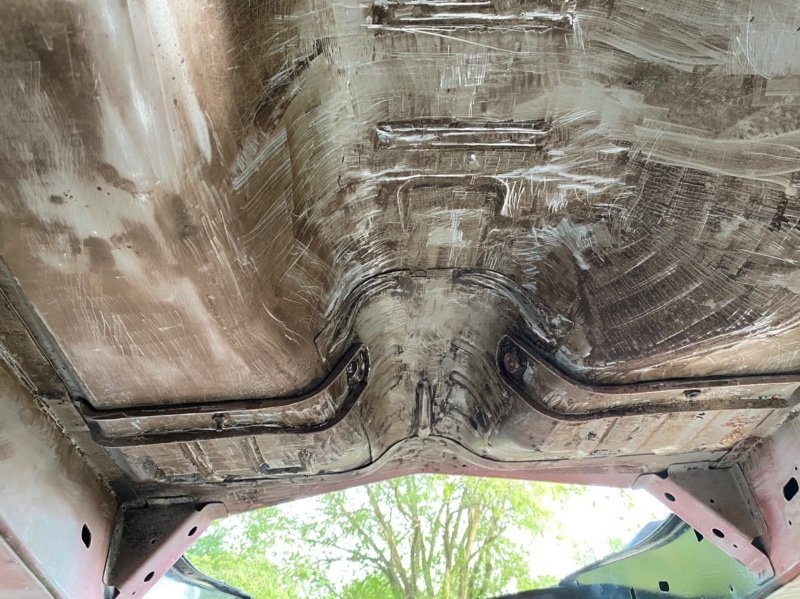
Underside just received the first coat of Raptor Liner. 60 mins to recoat time. I didn’t want any black liner under the hood as I’m going to do full body work under the hood and paint it the same as the exterior. The wheel wells will be Raptored as well. Getting ready to drop the rear axle to shoot back there then I’ll put it back in place so I can roll it around, I’m shooting the Raptor outside and will move to the paint booth once I finish with the liner.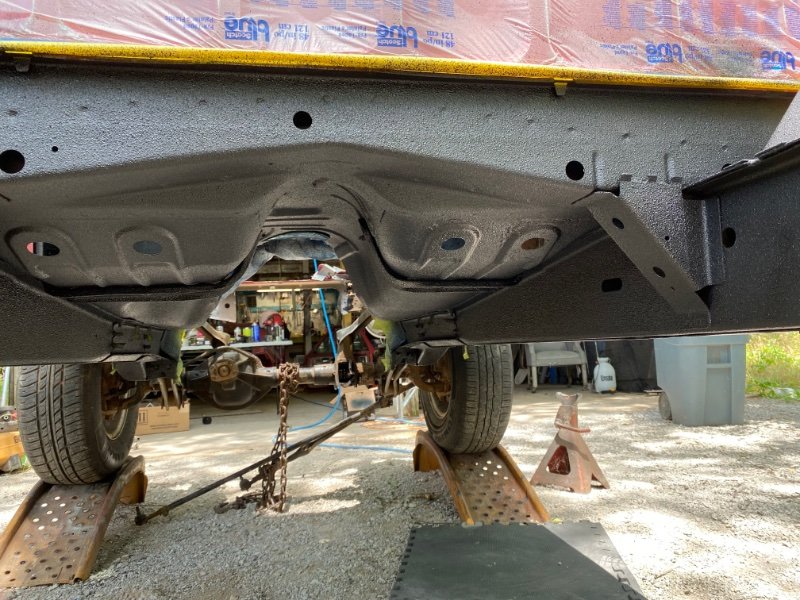
-
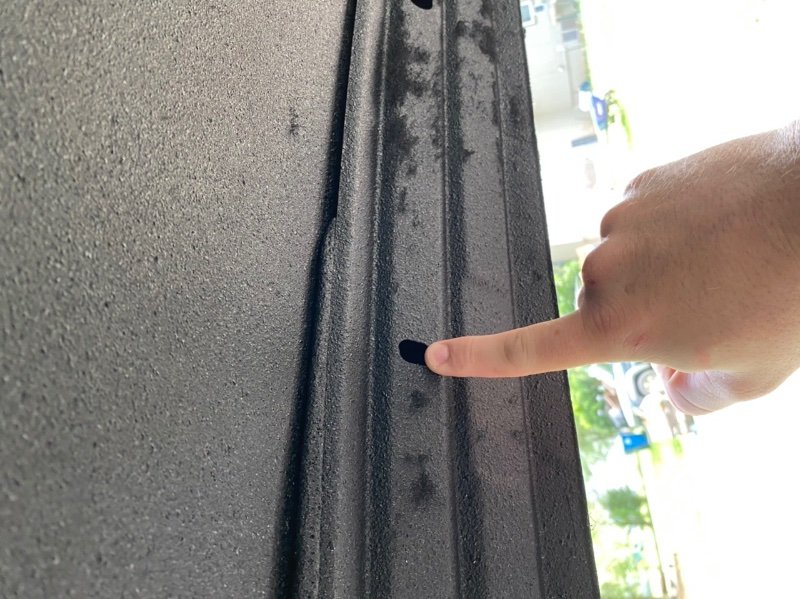
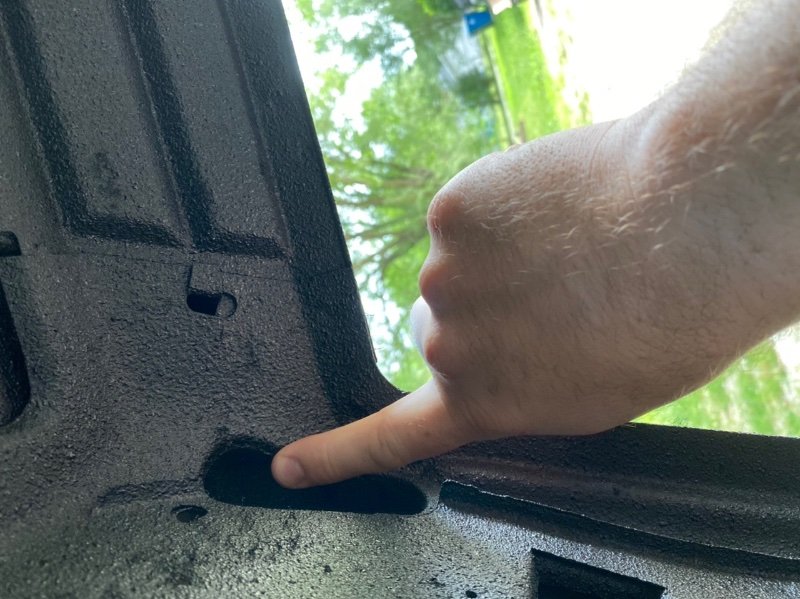
Project “Tomahawk”
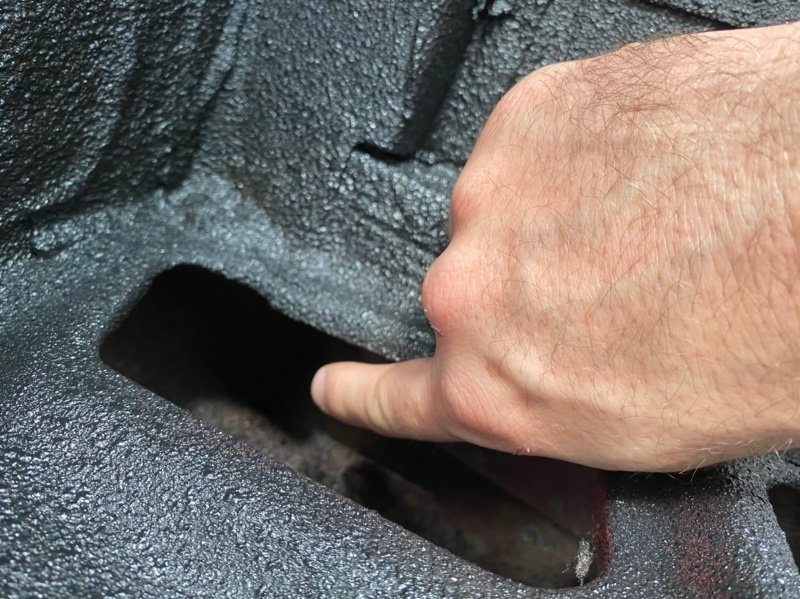
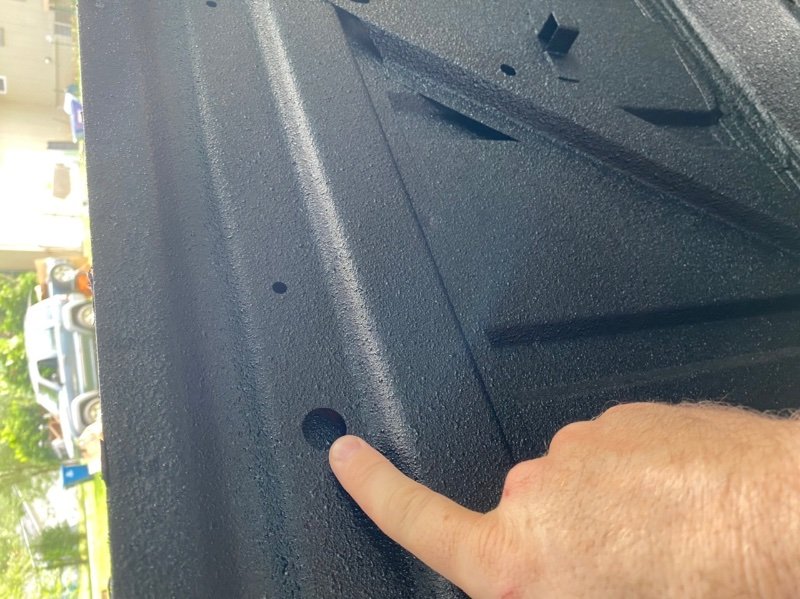
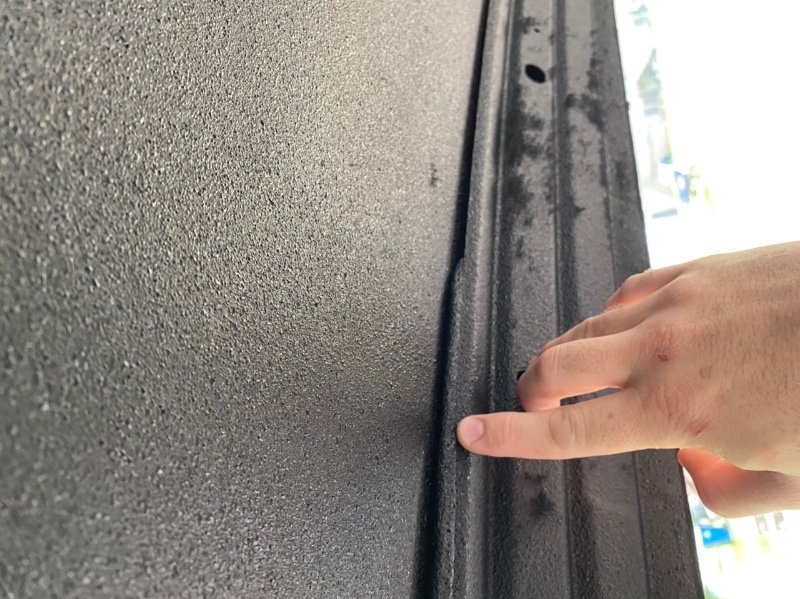
ghetdjc320 replied to ghetdjc320's topic in MJ Hardcore Tech: Epic Journeys to Greatness
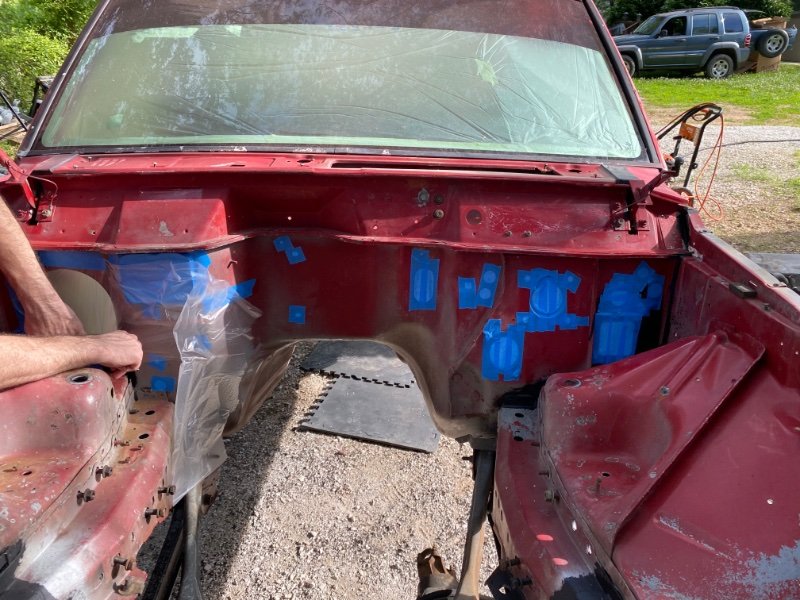
Thanks! Started on pillar foam today. I’ve pointed out some strategic areas for pillar foam. Been spending a huge amount of time on the bottom of the truck. I hand scraped every square inch under the truck and removed every drop of undercoating/grease/dirt. Then I degreased and blasted it all twice. Used compressed air and blew out anywhere water can pool up. Will let it thoroughly dry overnight then scuff it all up, touch up any bare metal, seam seal any vulnerable areas, POR-15 then raptor line the bottom.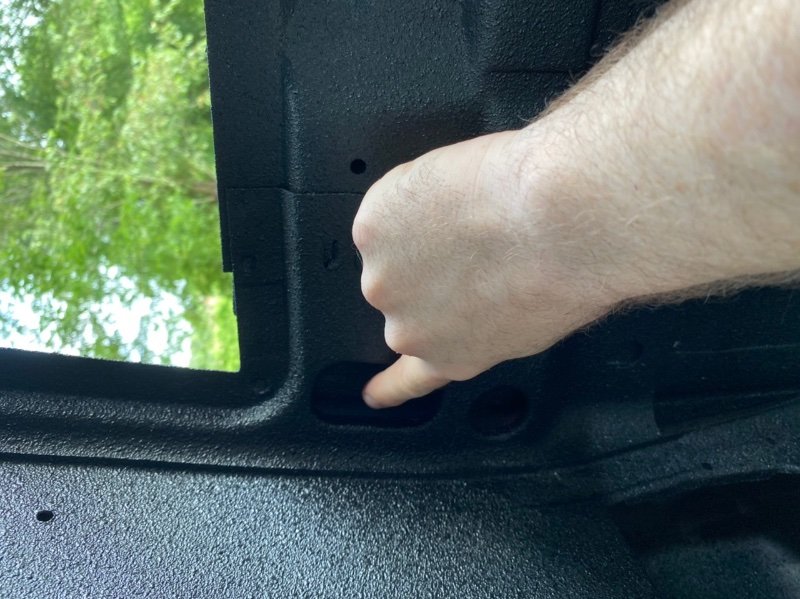

-
Project “Tomahawk”
ghetdjc320 replied to ghetdjc320's topic in MJ Hardcore Tech: Epic Journeys to Greatness
The paint is being mixed up now. Going with AkzoNobel base and clear. -
Project “Tomahawk”
ghetdjc320 replied to ghetdjc320's topic in MJ Hardcore Tech: Epic Journeys to Greatness
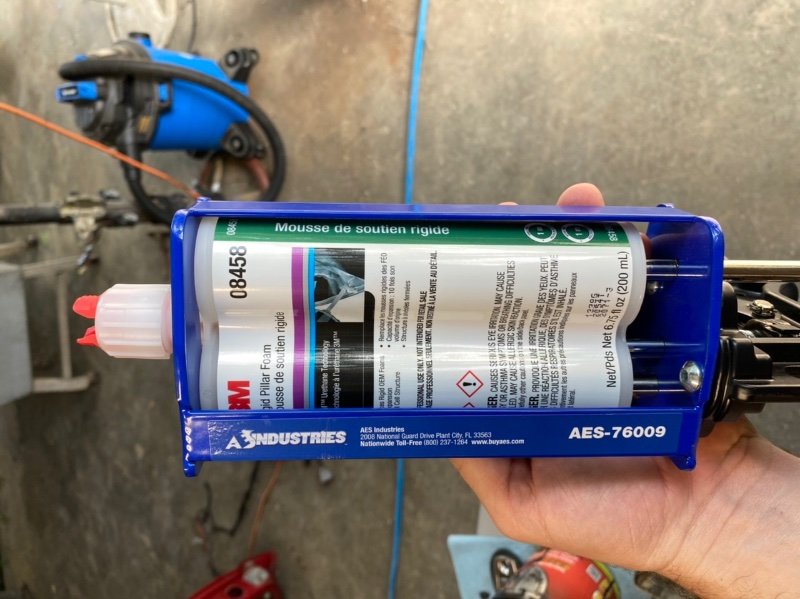
I’ll be using dynamat in the doors, roof and back of cab. I won’t use any on the floor. Will be using dynapad on the firewall and top of trans tunnel. Also using 3m pillar foam in b pillars and rear cab braces along with the roof bracing. -
For the tunnel, you could just cut some 20awg sheet metal and patch it. It’s important to remove the firewall pad as well as it tends to have a lot more rust back there. Also look carefully for any seam sealer that may be hiding rust. You’ve got quite a few areas to repair but it’s doable. Key parts has great replacement panels but their floor pan is not Comanche specific and it may not actually be long enough to replace rust through going up the firewall. Personally, I’d be inclined to replace the entire floor with another one from and MJ if possible.
-
Project “Tomahawk”
ghetdjc320 replied to ghetdjc320's topic in MJ Hardcore Tech: Epic Journeys to Greatness
Yes -
Project “Tomahawk”
ghetdjc320 replied to ghetdjc320's topic in MJ Hardcore Tech: Epic Journeys to Greatness
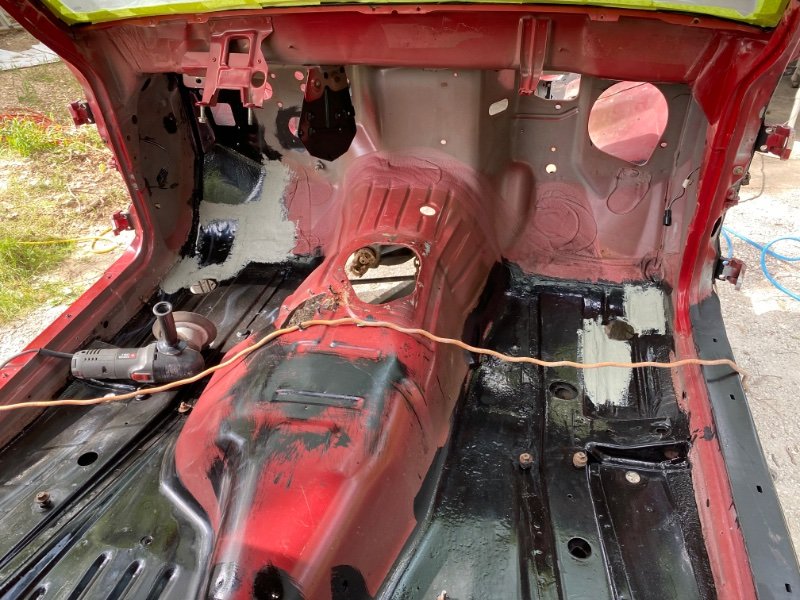
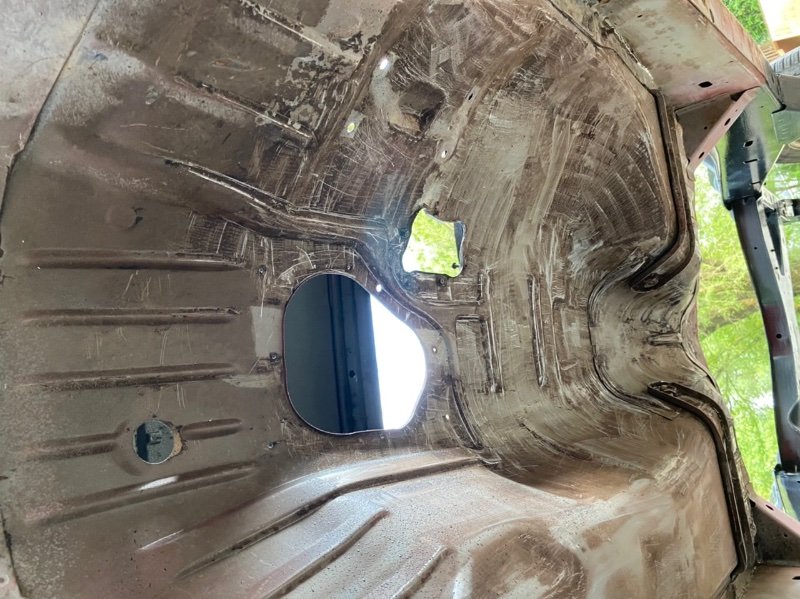
Entire interior has been coated in raptor liner from the headliner to the floor. Every single nook and cranny has been thoroughly cleaned, repaired and coated. 3m 2 part seam sealer installed in key areas. Going to be using some 3m pillar foam in a few strategic areas to reduce panel resonance and quiet the cab.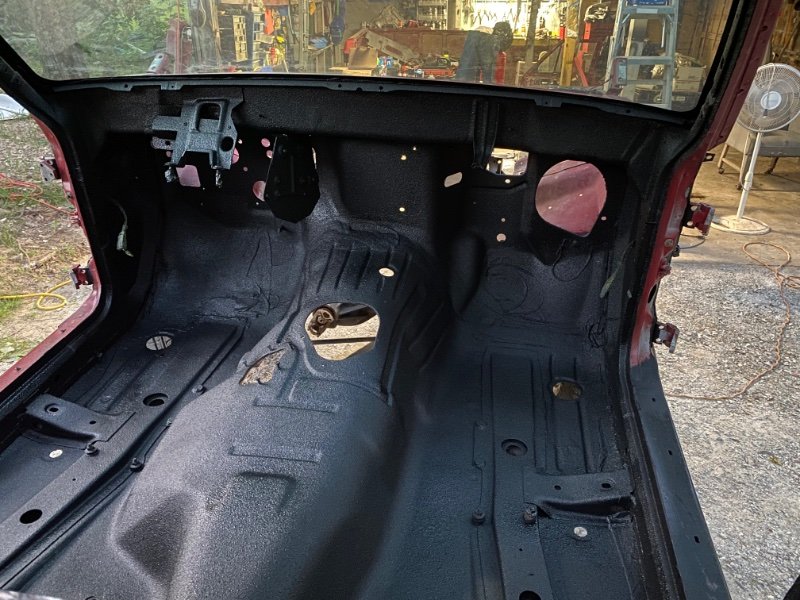
-
Project “Tomahawk”
ghetdjc320 replied to ghetdjc320's topic in MJ Hardcore Tech: Epic Journeys to Greatness
More progress