


ghetdjc320
-
Posts
5079 -
Joined
-
Last visited
-
Days Won
1
Content Type
Profiles
Forums
Gallery
Everything posted by ghetdjc320
-
Could also use a universal gps unit from Dakota digital and just program it to the 91+ electric speedo
-
 Very practical advise there. When researching what lift your want to run down the road, keep in mind that 3” is about the max you can go for a reasonable price (~1k-1.5k) on a decent lift. Above that amount of lift and a lot of factory suspension geometry will need to be corrected which is where the prices do really add up. It can definitely be done, but the costs to do a good quality lift that right way increase exponentially over around the 3” mark. Tires sizes over about 31-32 will also need extra $$$$ to upgrade the associated components such as axles and gears.
 -
Another source for rear bumpers and suspension
ghetdjc320 replied to ghetdjc320's topic in MJ Tech: Modification and Repairs
They said the Amazon listing is an old one but yes it’s about $600 which is not bad for a solid piece of fabrication all powder coated. He mentioned how they tied together the mounting brackets inside the bumper with a cross brace to provide a true class 2 receiver hitch. Ties in the back of the d rings as well. On the suspension side he has a 3.5 and 6” bolt on full 4 link MJ specific lift kit. -
Some of you probably knew this but it was news to me. I came across an old Hanson rear bumper design for the MJ and reached out to them. Just had a long conversation with the owner and it turns out they still have all the parts and even have a couple leftover in stock. He has a 91 and has designed a few products for his personal rig. Said he could also do an overland style rear bumper for the MJ similar to their XJ unit. He’s going to send me an email with pictures and info of what they have and what they can make. I like their rear bumper design as it is a good compliment to my warrior front setup with the hidden winch. Good to know there is another source though of anything MJ related. I’ll add the info that I get from him here.
-
There are 3 drain holes in the front of the bed. Check and see if they are open and allowing water to drain
-
Thanks for making these available!
-
The replacement bedside panels will need to solid metal to weld to. It does not look like that would be a good option for you rig. I would be curious to know how the underside looks as well and in how many places the rust has eaten clear through the metal. Having a shop weld on new metal will probably cost you more than a decent replacement bed. @Pete M is our Comanche bed got to. Now I don’t recommend this as it’s not a permanent nor a structural way to repair things but you could also sand everything down with 80 grit (using a da sander or similar) to remove all loose scale and paint. You could then use the whole por15 treatment process which starts with an acid based rust killer. I have seen people even use a mesh backer along with several coats of por15 to create an almost fiberglass-like structure to bridge holes in sheet metal. That stuff is quite the product with proper prep work.
-
I’ve talked about the quality of welds in my build thread a few times. Having owned a 90 and 91 I can tell you there is zero consistency in factory welds. The 91 I had the welds looked very clean like someone knew what they were doing. I’m not referring to the spot welds mind you. It’s the hand welding that was done all over the Jeep. My 90 looks like yours. Utter crap welds with spatter all over the place. Also looks like they probably used a flux core wire as the spatter was epic. I’ve cleaned off sooo much spatter. Any welds that looked questionable I just went over with my mig setup then cleaned them up. It does have me wondering though if there are welding quality differences between the amc and Chrysler gears though.
-
Project “Tomahawk”
ghetdjc320 replied to ghetdjc320's topic in MJ Hardcore Tech: Epic Journeys to Greatness
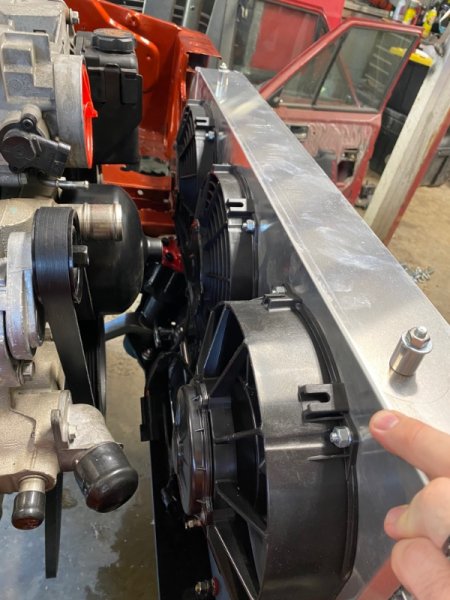
For reference, all the fans on the Novak unit are Spal units. The shroud covers practically every square inch of that radiator. I do plan on adding a condenser fan as well for the ac as that can make a huge difference when idling or in traffic. -
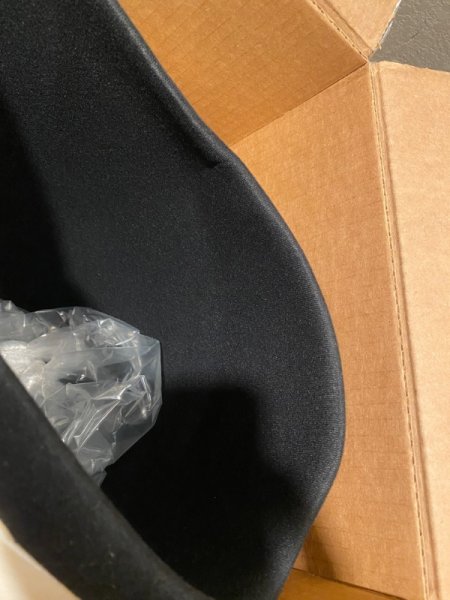
I like straight black if it’s consistently used in the whole interior along with some nice accent pieces like dash/door and seat trim. I actually have the black headliner from SMS in a box waiting to be installed. I attached a pic for reference. Granted it’s always hard to tel from a pic but helps to get an idea on actual color. It’s definitely a dark charcoal color but I wouldn’t call it true black. Imo it looks excellent.
-
Project “Tomahawk”
ghetdjc320 replied to ghetdjc320's topic in MJ Hardcore Tech: Epic Journeys to Greatness
If you decide to run your quick draw bellhousing you will probably have to move it forward for clearance. I’m in the middle point now but I think I may move it forward all the way when it’s all said and done. Not too challenging to make that change with the engine mounted at this point. I think those holes are only about a 1/2” difference iirc. Thanks a ton for you input and help! -
Project “Tomahawk”
ghetdjc320 replied to ghetdjc320's topic in MJ Hardcore Tech: Epic Journeys to Greatness
Perfect, thanks for that. That should be a relatively easy fit. Iirc you installed your mounts to position the engine as far back as it goes. So your compressor should be closer to the frame side mount than mine. It should clear without a hitch if yours did I would assume. -
Project “Tomahawk”
ghetdjc320 replied to ghetdjc320's topic in MJ Hardcore Tech: Epic Journeys to Greatness
Had to add one last pic for now. Here is the Novak Radiator with their fan setup. I set this in the stock radiator support holes. Nice clearance even with that long nose ls1 water pump. I just noticed how the e fan on the hot side (passenger side) of the radiator is much larger than the rest. That’s a very good idea if one has the room.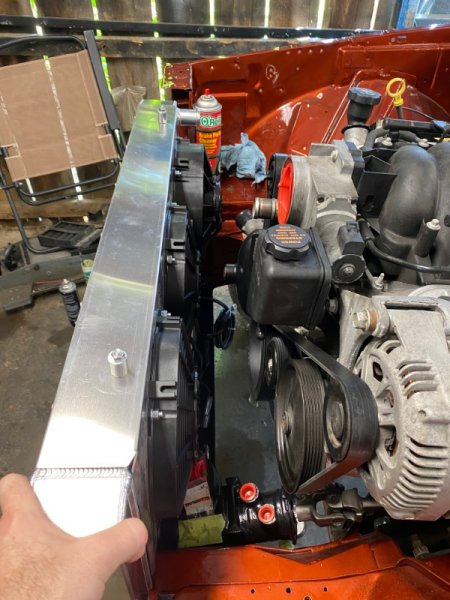
-
Project “Tomahawk”
ghetdjc320 replied to ghetdjc320's topic in MJ Hardcore Tech: Epic Journeys to Greatness
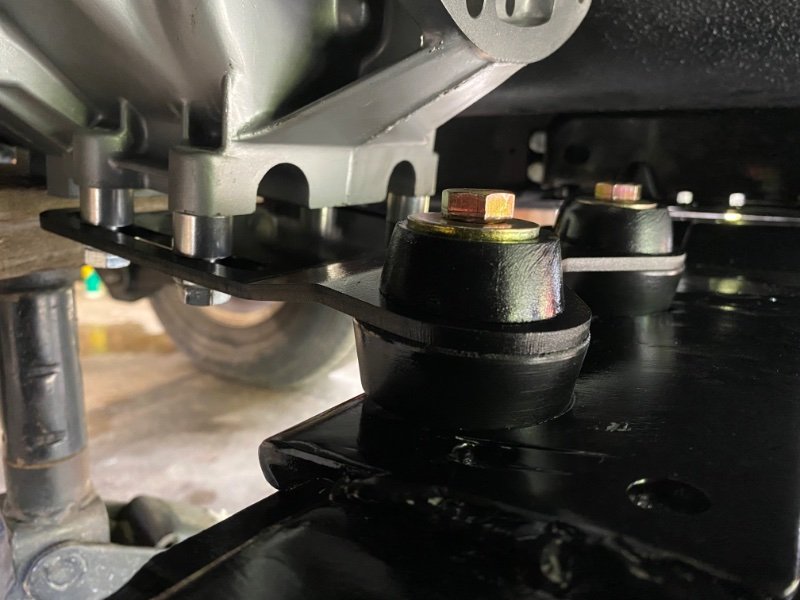
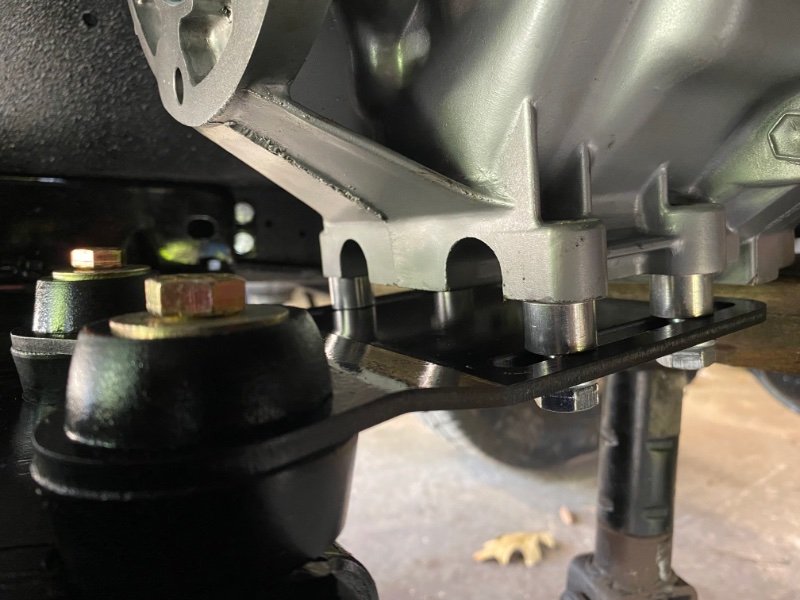
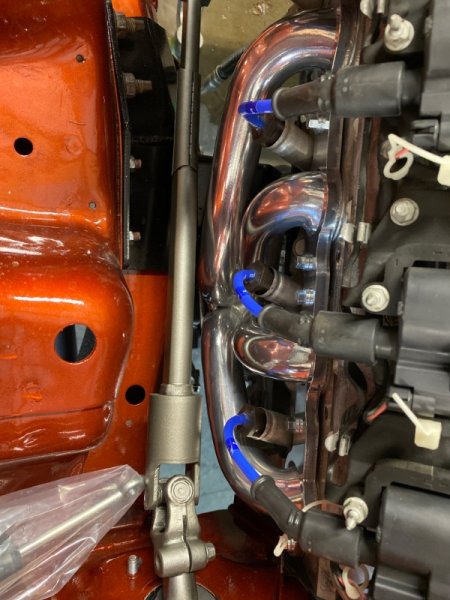
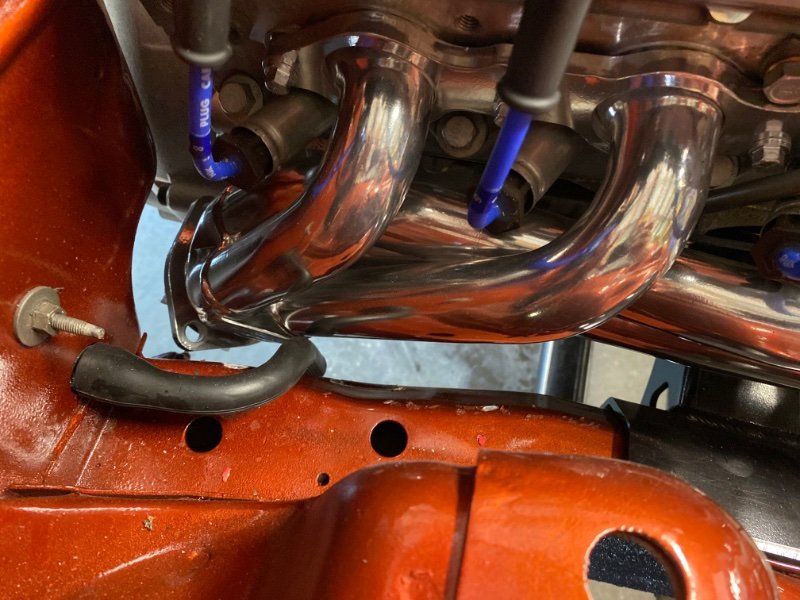
Getting the motor mounting position and crossmember/tranny mount configured has been a chore. Lots of measuring and adjusting to fit. Here is my final configuration for the mounting points. It should be noted that not all ls engine swaps are the same. I’ve run into this a few times now. This particular engine is a 2003 C5 corvette LS1 with LS6 intake which is a 5.7 all aluminum engine. The stock accessory configuration actually fits the Comanche quite well as it is made to fit the low hood clearance of a corvette. The exception being the AC compressor which @Limeyjeeper has been helping me sort out. It is true though that there are so many fitment options available for these engines to fit in almost anything. Those using the truck based LQ engines will have a different accessory configuration that will require some different conversion parts. Here is my final configuration for the mounts Novak Engine mounts: center position Novak universal ax15 mount: see pics for bracket orientation and spacer configuration. Keep in mind that I welded on a 1/4” steel plate on the top of the cross member to provide a clean and strong mounting surface. I wanted to run the stock cross member as I’m still planning to run the oem tcase skid if at all possible. Had to make a small notch on the passenger side coil bracket. Bellhousing to firewall clearance is 1/4”. I reached out to Chad with QuickDraw where I got the ls to ax bellhousing from and suggested they make a divot or flat top on the top of the bellhousing for additional firewall clearance. He said the next batch will have some more clearance. It’s not a problem but for some rigs it may be easier to fit different drivetrain angles. Currently on level ground I have 5.5* slant to the rear on the engine and 3* up on the pinion. That difference of 2.5* is right where i wanted to be and will ensure there is some movement in the u joint needle bearings. I don’t plan to run a double cardan shaft as it’s just not needed with the correct angles at this lift height. For those that are interested though, there is a full sye kit from Tom woods for the NP242. With these Novak headers (Made by Sanderson), the fit in the engine bay is good but I’ll have to reroute the ac evaporator drip line. That’s it for now. Will be picking this project back up mid September.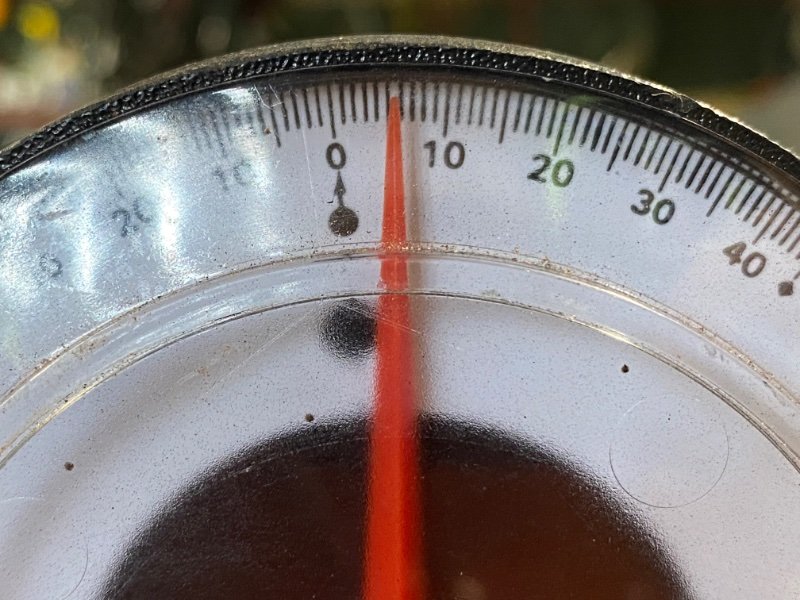
-
Project “Tomahawk”
ghetdjc320 replied to ghetdjc320's topic in MJ Hardcore Tech: Epic Journeys to Greatness
Got it! Which hole did you end up using for the offset on the bracket? I assume you run the 4 groove belt on the 6 rib compressor pulley? Thanks! -
Project “Tomahawk”
ghetdjc320 replied to ghetdjc320's topic in MJ Hardcore Tech: Epic Journeys to Greatness
I may have to go with Holley for that setup with the sd7 compressor. Can’t seem to find the dirty dingo model for the -1 corvette belt offset spacing. Can only seem to find Camaro and truck spacing. -
As far as I know, all of the first gen gauge sets were made by VDO in Japan
-
There is a husky liner for the xj that fits the MJ floor very nicely. I think they come in 3 colors too. They are slush/all weather style mats.
-
They pop up used sometimes also. FB and the classifieds here. Could also put it in the wanted section.
-
As far as I know, all the first gen XJ police package models were electric speedos. Want to say somewhere around 92-94 or so.
-
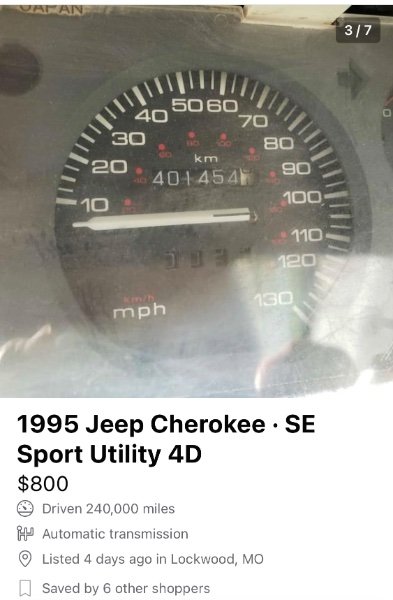
Very well could be. You know, it reminds me of the 200kph export speedo I’ve seen for sale plenty of times. Perhaps there was just an overlay for the speedometer in mph they used for those exports that got used domestically. That would have left the odometer in kph Edit: this has got to be it with just a different overlay for the speedometer portion: https://teamcherokee.com/speedometer-assembly-kilometers-per-hour-rhd-oem-cherokee-1995-1996/
-
I’m not positive that the odometer is in kilometers though it’s possible. Looks like a postal xj to me. I wonder if he would part with the speedo???
-
Just came across an interesting find on a RHD xj from 95. Has anyone seen one of these before? I’m familiar with the police XJ 125 “certified calibration” and the euro spec 125 also. Never seen this one though
-
That’s a metra part number. Let me dig that one up for you
-
Project “Tomahawk”
ghetdjc320 replied to ghetdjc320's topic in MJ Hardcore Tech: Epic Journeys to Greatness
Apologies, I meant to tag @70barracuda Thank you for your input though. The cam is a stock LS1 cam. The AX15 could probably take 400lbft max torque from the engine and I’m already pretty close. At some point in the future If there is another good tranny option I may go that route but I’m sticking with the Ax15 for now. I presume it’s already going to be a handful with this setup. Steering and brakes have been the priority along with keeping the lift mild to get good geometry from short arms.