


ghetdjc320
-
Posts
5212 -
Joined
-
Last visited
-
Days Won
1
Content Type
Profiles
Forums
Gallery
Everything posted by ghetdjc320
-
 ^^ This is what i still see as the problem. You did not have this issue earlier. You need to find the root cause of this change. What eagle is describing is what he sees as characteristic of this transmission not the sudden onset of a problem. Personally I have never had any issues shifting into second or any other gear with the ba10/5. But putting all that aside, any sort of “sudden” onset of a problem is likely to have a root cause. Chocking up a sudden onset problem to something that you’ve been told is a problem you should be having is going to invite further issues. You’ve identified a leak of hydraulic fluid at the bellhousing. You’ve also stated that it’s not shifting as smoothly overall as when you got it. You recently had clutch work as well as a fluid change. You could first of all verify that there is indeed plenty of tranny oil in it by opening the fill plug and checking. A leaking slave cylinder or loose hydraulic fitting will only get worse. Keep hunting down the issue. I suspect you will indeed find the problem one way or another.
 -
Project “Tomahawk”
ghetdjc320 replied to ghetdjc320's topic in MJ Hardcore Tech: Epic Journeys to Greatness
Akzo Nobel Lesonal clear -
Project “Tomahawk”
ghetdjc320 replied to ghetdjc320's topic in MJ Hardcore Tech: Epic Journeys to Greatness
Time for some updates! Cab is now fully prepped and all body work complete. Ready for sealer. Had som “oil canning” in a damaged b pillar that took a lot of work. The metal had been stretched and did not want to cooperate. Learned how to use heat and controlled cooling to strategically shrink the panel back into place. Worked perfectly and eliminated the panel flop. Had to reconstruct the compound corner though which was a task and a half. Did one final retouch of all the critical seams in the window frames along with the firewall seams and windshield drain. Finished by skimming the panels in glaze to get them perfect. Will be sealing and painting in the next day or two. Just a few more small body panels to be completed before reassembly. Bed and glass can be installed and electrical can start.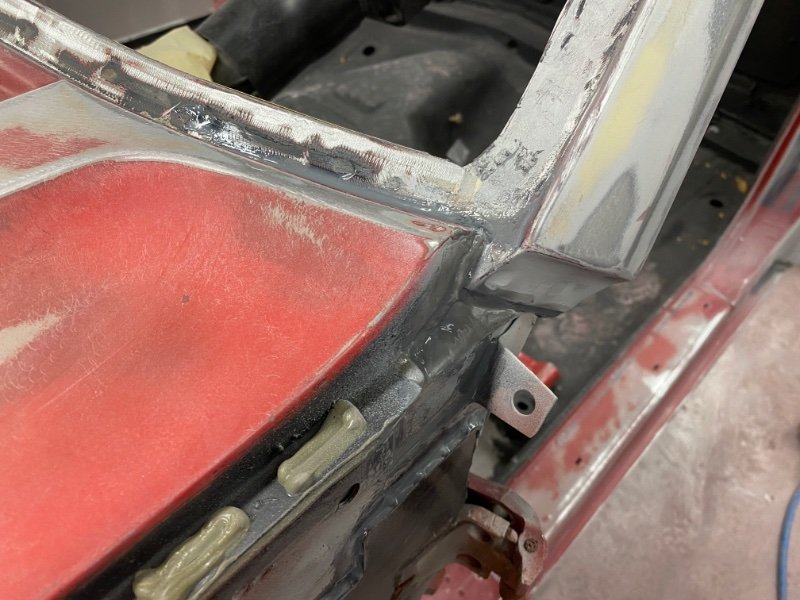
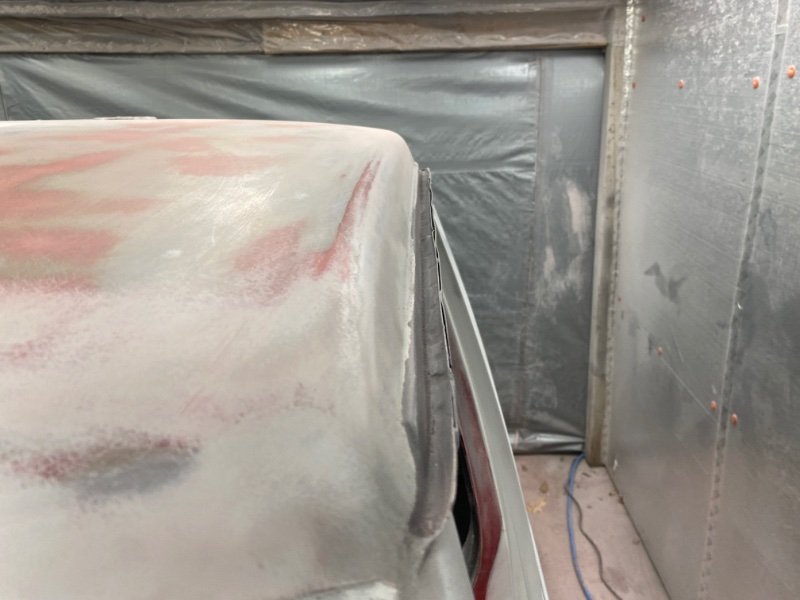
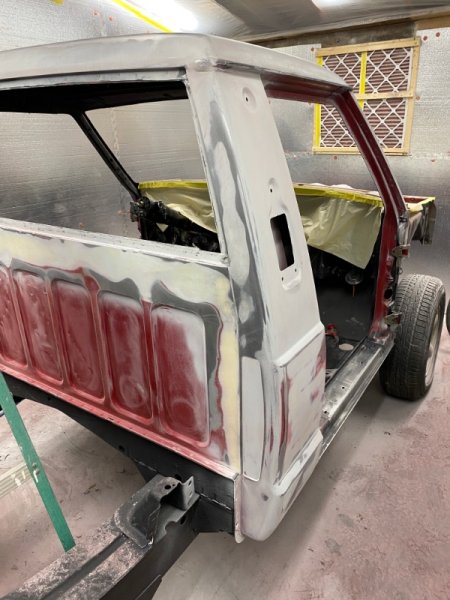

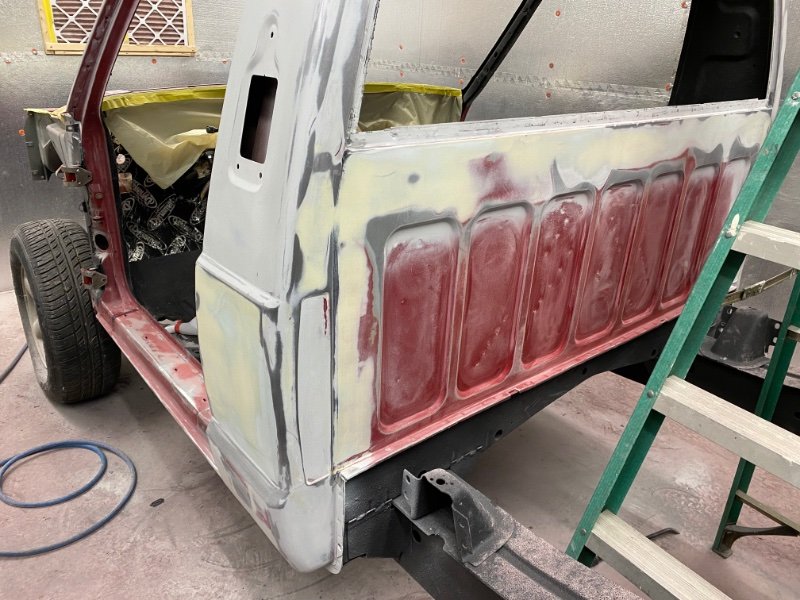
-
Rotors and Pads recommendations
ghetdjc320 replied to NC Tom's topic in MJ Tech: Modification and Repairs
Centric Posi-Quiet are the next best when it comes to parts store options. -
Rotors and Pads recommendations
ghetdjc320 replied to NC Tom's topic in MJ Tech: Modification and Repairs
Here is some info regarding brakes. General info on pads and rotors is covered in one of the paragraphs: -
Comanche Interior scew list
ghetdjc320 replied to Blazer25l0's topic in MJ Tech: Modification and Repairs
Very good info. Just remember that there is no place for a drywall screw on an MJ! Most of the plastic mounting tabs for interior trim are getting a bit brittle depending on where it was being stored. Pay close attention to the actual screw head. The link above is great. Get a good handful of those screws. Even if factory didn’t originally use that screw, use it if the application would benefit from it. -
I’ll throw this out there for what it’s worth. I also have a great a many miles on the BA10, AX15 and NSG370. None of them are really truck trannys. The old 3 on the tree trannys and sm465’s were “truck” trannys. The BA10 was designed for a car and is a light duty but smooth shifting piece of junk. The AX15 saw life as the R151 behind turbo sports car application. All I’m saying is, don’t chock up bad shifts to a “truck” transmission. I’ve had problems with them all but they also shifted very well and didn’t require some special finessed technique to go in gear. The issues you are having do not sound normal. If I may make a suggestion; put aside the fluid or “truck” tranny debate for a bit and focus on that clutch. Try what cruiser said. We need to know if the clutch is fully disengaging before any more theories can be advanced.
-
Comanche Interior scew list
ghetdjc320 replied to Blazer25l0's topic in MJ Tech: Modification and Repairs
I could snap some pics later. I saved all the factory hardware that was still good and labeled it. It’s primarily the head sizes that vary depending on application. They screw head design also prevents cracked plastic for many parts -
Project “Tomahawk”
ghetdjc320 replied to ghetdjc320's topic in MJ Hardcore Tech: Epic Journeys to Greatness
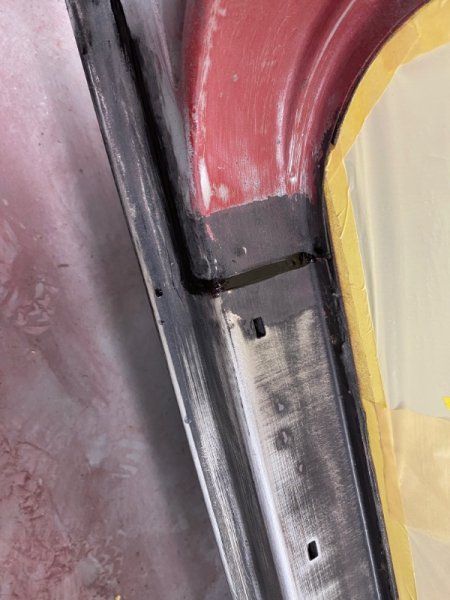
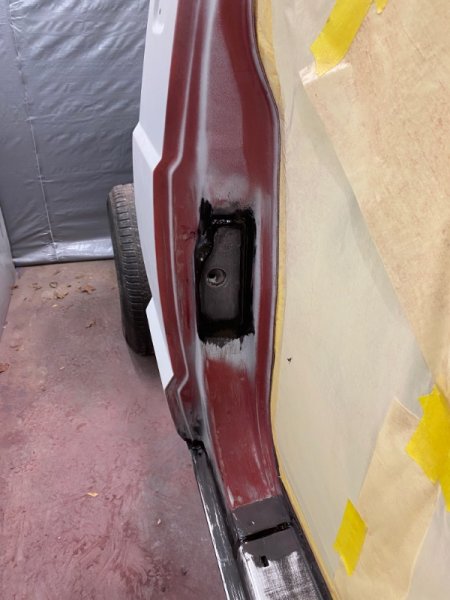
Prepping the cab. Stripped down the problem areas I had on my old MJ along the back cab seams. Sprayed some epoxy down any place I got down to bare metal then replaced all the seam sealer. FYI, a great tool to remove the factory seam sealer is an oscilating tool with a scraper blade on it. The factory seam sealer was a very cheap one part sealer that has a tendency to crack. Poor application made the mater even worse. Fixing all the seams in both window frames is critical to keeping water out permanently. Also sealed all the joints from the new rocker panel and the striker reinforcement plates.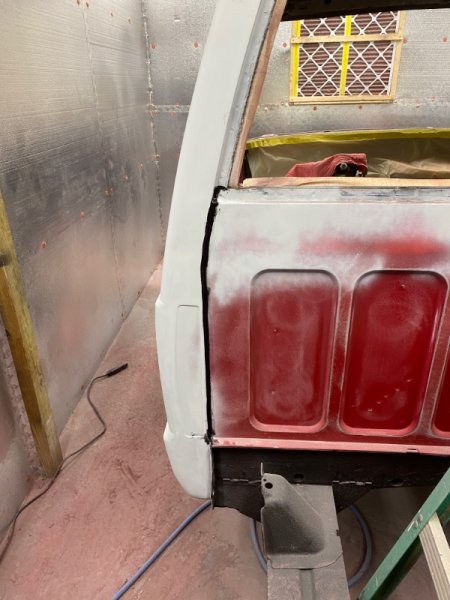
-
Need Help with XJ "SKIM" Security System.
ghetdjc320 replied to AZJeff's topic in MJ Tech: Modification and Repairs
Once you activate the skim I don’t believe it can be deactivated on that PCM even with the factory scan tool. As mentioned above, program the keys to it. It’s actually a pretty nice imobilizer. I added one to my TJ and it worked great. -
I ran the precision for a few years. Good pump overall. I’d recheck all the grounds though and check the quality of the wiring and connectors to the sending unit. Cruiser has some grounding tips for the fuel pump iirc.
-
So true, give it a try!
-
Being physically hard to shift could very well be the clutch. You mentioned they changed fluid around the time the clutch was changed which was about 200 miles ago?
-
That’s the Nick referred to above. He’s gone farther than anyone I know into the bendix systems.
-
Your switching from an AT to an MT? An AT doesn’t have a pilot bearing. The flex plate bolts directly to the torque converter.
-
If you’re going to have it all apart for a conversion, might as well replace it.
-
I may still have mine. I’ll check and see if no one else chimes in
-
Should be fine but you’ll need to re-bleed the system.
-
4 nos XJ "Jeep" mudflaps
ghetdjc320 replied to Pete M's topic in Craigslist/Marketplace/eBay... i.e. Not Your Stuff
Sounds good -
I believe that’s backwards. The larger outlet is usually the front. It’s the port closest to the front of the bore
-
I had the NSG370 in my 05 Rubi. Lots of trouble.
-
4 nos XJ "Jeep" mudflaps
ghetdjc320 replied to Pete M's topic in Craigslist/Marketplace/eBay... i.e. Not Your Stuff
Those are what I’m looking for. -
That’s a good possibility. Keep in mind too that there is some confusion about what an actual proportioning valve is and how it works. From what I’ve been able to gather the Wilwood is not a true proportioning valve unlike say the oem ZJ/XJ/YJ valve. A true “proportioning” valve should maintain equal brake line psi percentages. In other words, say 60/40% split regardless of input pressure. The Wilwood adjustment valve caps the max pressure for the regulated side (the rear) so it’s not truly maintaining proportional fluid pressure at all times. At least, that’s what Wilwood described a few years back. That’s why it has an adjuster on it.
-
That would be neat I suppose if there was some simple way to reprogram to a specific tuning spec (what Nick has been working on). The OP has some good leads but, I’m just saying that I don’t see where this is going yet. Interested to find out though. But unless someone here has pulled the raw hex data from a bendix ecu… There have been aftermarket and even oem ecu’s that have been programmed to run the 4.0 that allow for far more customization as many more fields and parameters are adjustable. You can program EPROMs setup latch boards and ostriches, get you UV eprom erasers out but your still stuck with an old ecu that has limited IO and tuning ability. If you could rewrite sensor scaling to eliminate some of those hard to find oem sensors, that would be awesome. But I seriously doubt that those scales could be edited.
-
Reach out to Nick. The bendix ecu is speed density. He has pulled some of the hex data. Otherwise I’m just going to say imo your asking for a lot of data to simply fine tune fueling that will have little effect on performance. I can understand if this is just a research project and purely academic. I don’t believe Trevor has ever dove that deep into the Renix/bendix system but maybe he has. He normally just makes adapters to swap to OBD2 and plays with HP tuners. I know Chris @christuned has the hex data for the 91+. He *may* have the bendix info as well.