


ghetdjc320
-
Posts
5212 -
Joined
-
Last visited
-
Days Won
1
Content Type
Profiles
Forums
Gallery
Everything posted by ghetdjc320
-
 I like straight black if it’s consistently used in the whole interior along with some nice accent pieces like dash/door and seat trim. I actually have the black headliner from SMS in a box waiting to be installed. I attached a pic for reference. Granted it’s always hard to tel from a pic but helps to get an idea on actual color. It’s definitely a dark charcoal color but I wouldn’t call it true black. Imo it looks excellent.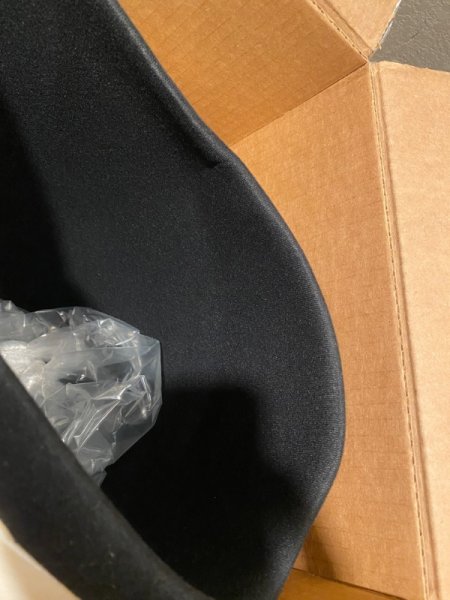
-
Project “Tomahawk”
ghetdjc320 replied to ghetdjc320's topic in MJ Hardcore Tech: Epic Journeys to Greatness
If you decide to run your quick draw bellhousing you will probably have to move it forward for clearance. I’m in the middle point now but I think I may move it forward all the way when it’s all said and done. Not too challenging to make that change with the engine mounted at this point. I think those holes are only about a 1/2” difference iirc. Thanks a ton for you input and help! -
Project “Tomahawk”
ghetdjc320 replied to ghetdjc320's topic in MJ Hardcore Tech: Epic Journeys to Greatness
Perfect, thanks for that. That should be a relatively easy fit. Iirc you installed your mounts to position the engine as far back as it goes. So your compressor should be closer to the frame side mount than mine. It should clear without a hitch if yours did I would assume. -
Project “Tomahawk”
ghetdjc320 replied to ghetdjc320's topic in MJ Hardcore Tech: Epic Journeys to Greatness
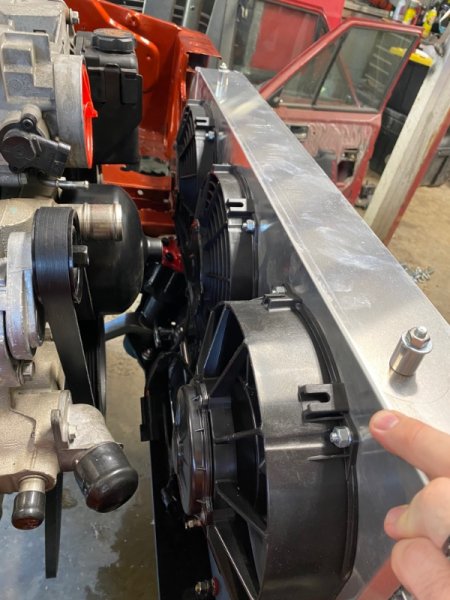
Had to add one last pic for now. Here is the Novak Radiator with their fan setup. I set this in the stock radiator support holes. Nice clearance even with that long nose ls1 water pump. I just noticed how the e fan on the hot side (passenger side) of the radiator is much larger than the rest. That’s a very good idea if one has the room.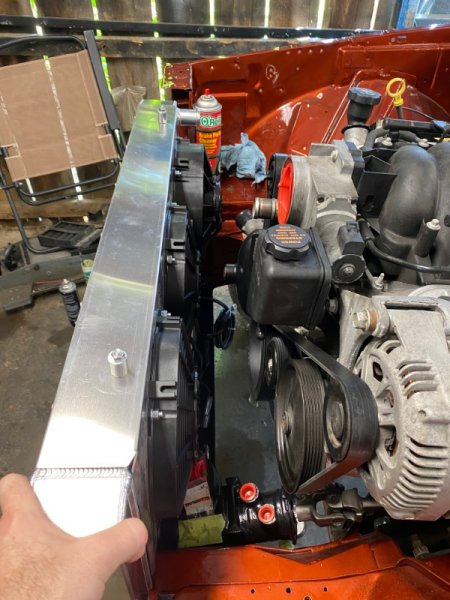
-
Project “Tomahawk”
ghetdjc320 replied to ghetdjc320's topic in MJ Hardcore Tech: Epic Journeys to Greatness
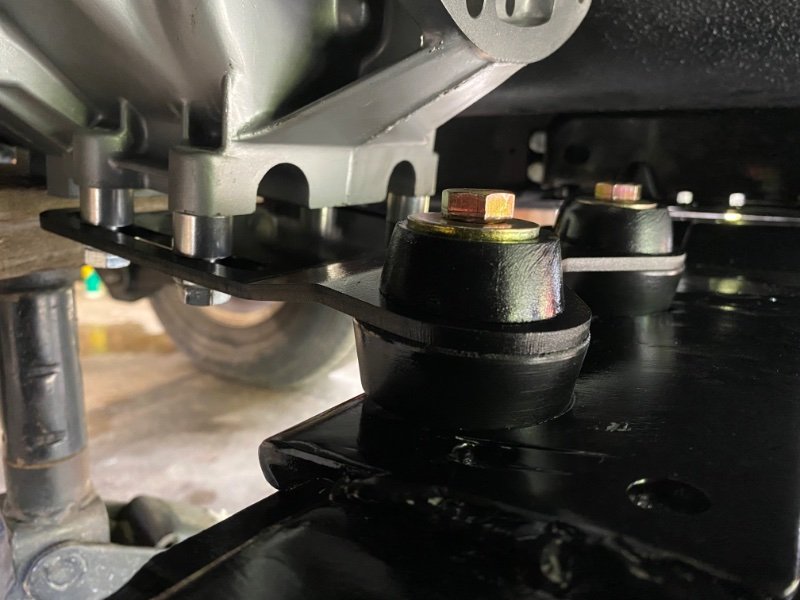
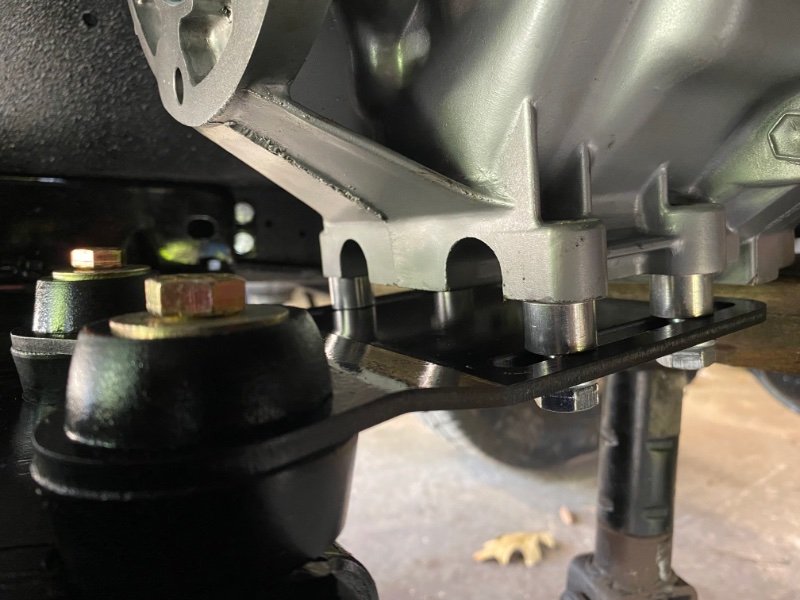
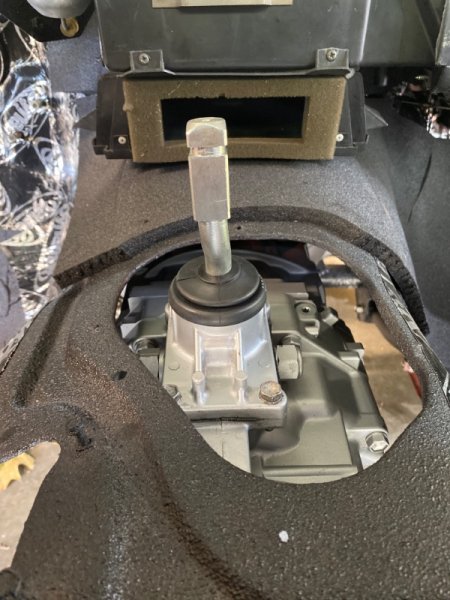
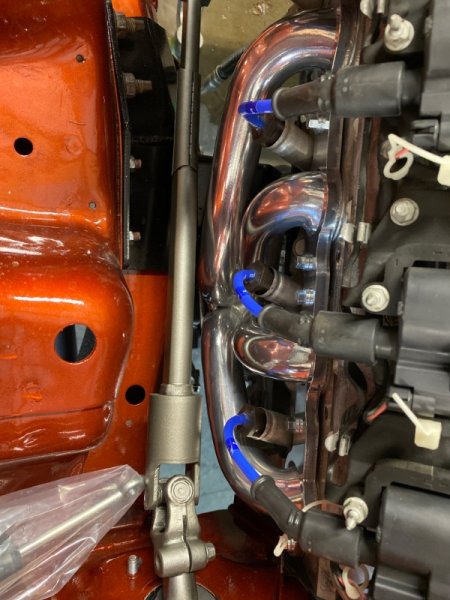
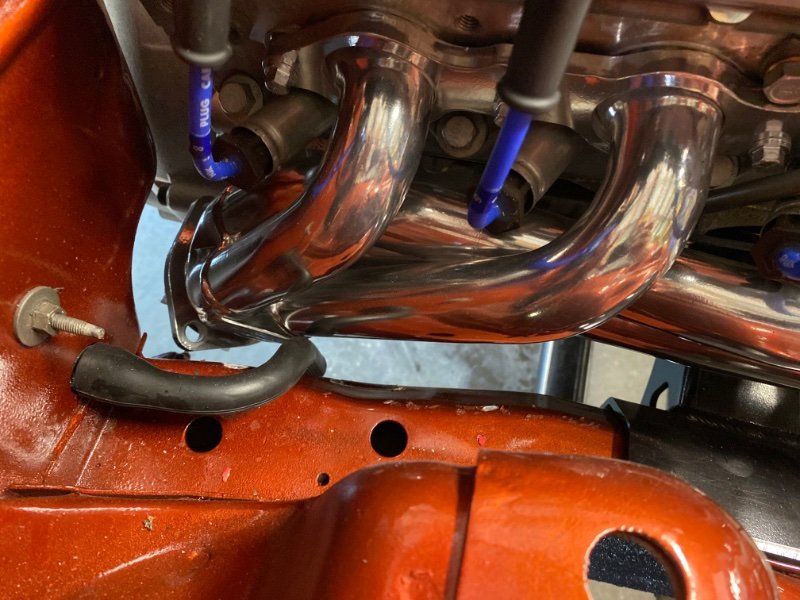
Getting the motor mounting position and crossmember/tranny mount configured has been a chore. Lots of measuring and adjusting to fit. Here is my final configuration for the mounting points. It should be noted that not all ls engine swaps are the same. I’ve run into this a few times now. This particular engine is a 2003 C5 corvette LS1 with LS6 intake which is a 5.7 all aluminum engine. The stock accessory configuration actually fits the Comanche quite well as it is made to fit the low hood clearance of a corvette. The exception being the AC compressor which @Limeyjeeper has been helping me sort out. It is true though that there are so many fitment options available for these engines to fit in almost anything. Those using the truck based LQ engines will have a different accessory configuration that will require some different conversion parts. Here is my final configuration for the mounts Novak Engine mounts: center position Novak universal ax15 mount: see pics for bracket orientation and spacer configuration. Keep in mind that I welded on a 1/4” steel plate on the top of the cross member to provide a clean and strong mounting surface. I wanted to run the stock cross member as I’m still planning to run the oem tcase skid if at all possible. Had to make a small notch on the passenger side coil bracket. Bellhousing to firewall clearance is 1/4”. I reached out to Chad with QuickDraw where I got the ls to ax bellhousing from and suggested they make a divot or flat top on the top of the bellhousing for additional firewall clearance. He said the next batch will have some more clearance. It’s not a problem but for some rigs it may be easier to fit different drivetrain angles. Currently on level ground I have 5.5* slant to the rear on the engine and 3* up on the pinion. That difference of 2.5* is right where i wanted to be and will ensure there is some movement in the u joint needle bearings. I don’t plan to run a double cardan shaft as it’s just not needed with the correct angles at this lift height. For those that are interested though, there is a full sye kit from Tom woods for the NP242. With these Novak headers (Made by Sanderson), the fit in the engine bay is good but I’ll have to reroute the ac evaporator drip line. That’s it for now. Will be picking this project back up mid September.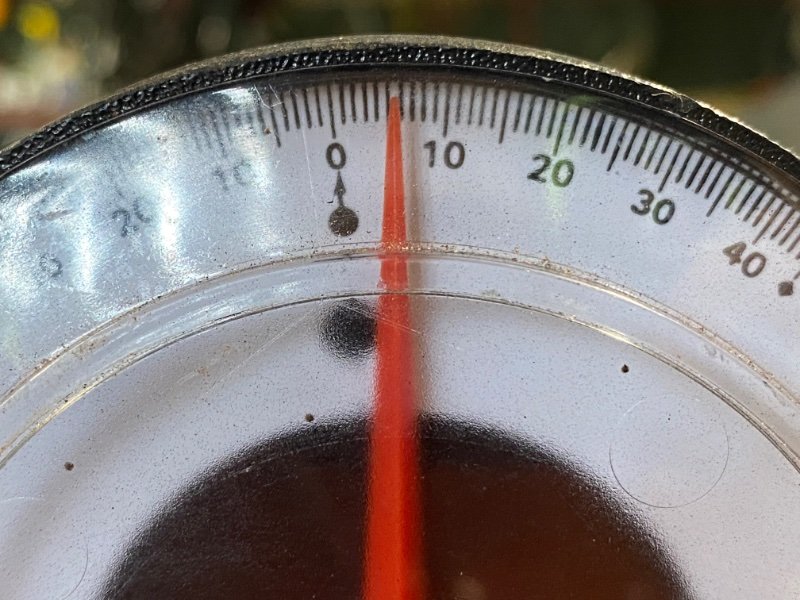
-
Project “Tomahawk”
ghetdjc320 replied to ghetdjc320's topic in MJ Hardcore Tech: Epic Journeys to Greatness
Got it! Which hole did you end up using for the offset on the bracket? I assume you run the 4 groove belt on the 6 rib compressor pulley? Thanks! -
Project “Tomahawk”
ghetdjc320 replied to ghetdjc320's topic in MJ Hardcore Tech: Epic Journeys to Greatness
I may have to go with Holley for that setup with the sd7 compressor. Can’t seem to find the dirty dingo model for the -1 corvette belt offset spacing. Can only seem to find Camaro and truck spacing. -
As far as I know, all of the first gen gauge sets were made by VDO in Japan
-
There is a husky liner for the xj that fits the MJ floor very nicely. I think they come in 3 colors too. They are slush/all weather style mats.
-
They pop up used sometimes also. FB and the classifieds here. Could also put it in the wanted section.
-
As far as I know, all the first gen XJ police package models were electric speedos. Want to say somewhere around 92-94 or so.
-
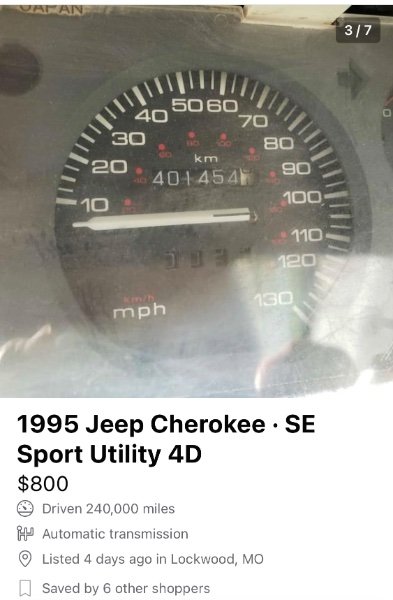
Very well could be. You know, it reminds me of the 200kph export speedo I’ve seen for sale plenty of times. Perhaps there was just an overlay for the speedometer in mph they used for those exports that got used domestically. That would have left the odometer in kph Edit: this has got to be it with just a different overlay for the speedometer portion: https://teamcherokee.com/speedometer-assembly-kilometers-per-hour-rhd-oem-cherokee-1995-1996/
-
I’m not positive that the odometer is in kilometers though it’s possible. Looks like a postal xj to me. I wonder if he would part with the speedo???
-
Just came across an interesting find on a RHD xj from 95. Has anyone seen one of these before? I’m familiar with the police XJ 125 “certified calibration” and the euro spec 125 also. Never seen this one though
-
That’s a metra part number. Let me dig that one up for you
-
Project “Tomahawk”
ghetdjc320 replied to ghetdjc320's topic in MJ Hardcore Tech: Epic Journeys to Greatness
Apologies, I meant to tag @70barracuda Thank you for your input though. The cam is a stock LS1 cam. The AX15 could probably take 400lbft max torque from the engine and I’m already pretty close. At some point in the future If there is another good tranny option I may go that route but I’m sticking with the Ax15 for now. I presume it’s already going to be a handful with this setup. Steering and brakes have been the priority along with keeping the lift mild to get good geometry from short arms. -
Project “Tomahawk”
ghetdjc320 replied to ghetdjc320's topic in MJ Hardcore Tech: Epic Journeys to Greatness
Sounds good, thanks -
Project “Tomahawk”
ghetdjc320 replied to ghetdjc320's topic in MJ Hardcore Tech: Epic Journeys to Greatness
That’s the dampener I have on it right now. I think perhaps the stock corvette compressor is too large. Going to checkout those part number and see what the dimensions are on the compressor and bracket. Thanks! -
Project “Tomahawk”
ghetdjc320 replied to ghetdjc320's topic in MJ Hardcore Tech: Epic Journeys to Greatness
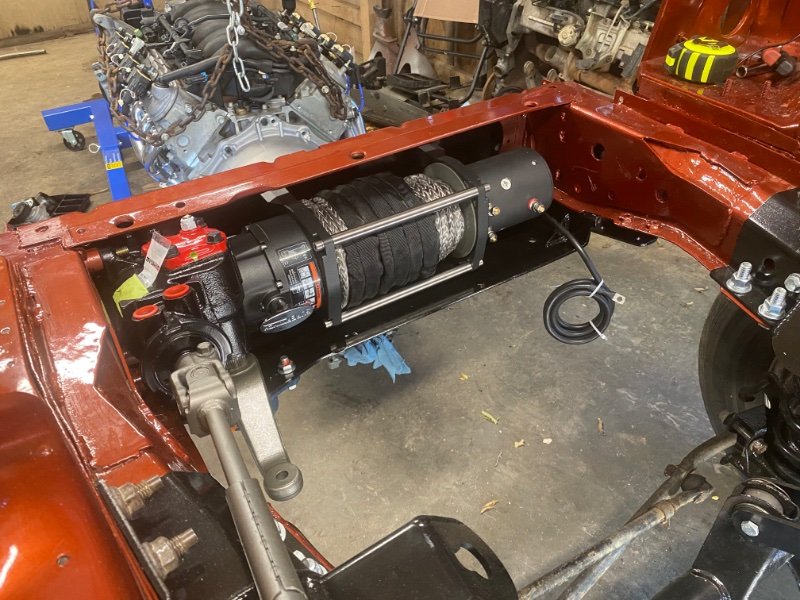
Engine is in along with Superwinch TS9500SR. Perfect fit with the winch. Took a lot of maneuvering on the engine especially with the quick draw bellhousing. Had to use the center hole in the Novak engine mounts. It’s lined up perfectly now though. I could not get the stock corvette ac compressor to fit with the mounts. Going to tag @Limeyjeeper & @75sv1 to provide any insight as to how to get the ac to fit down in that area. Perhaps a smaller compressor? Pictures attached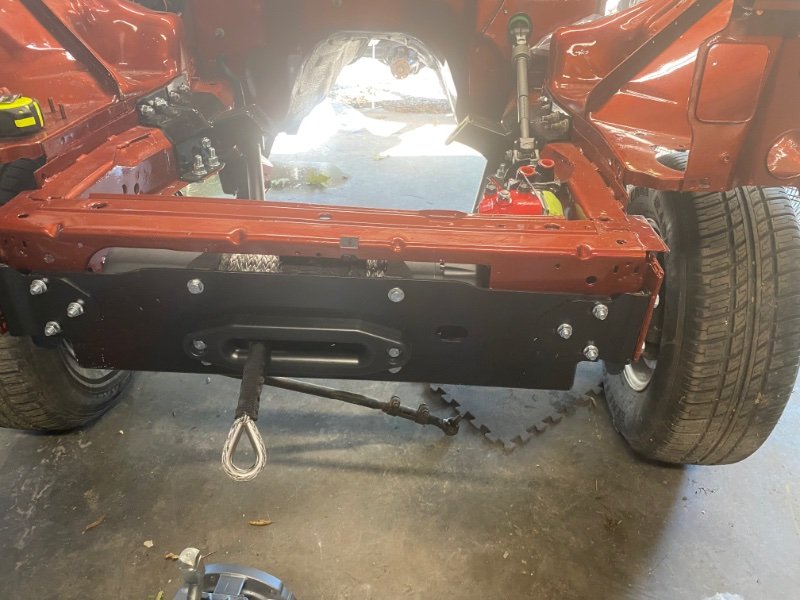
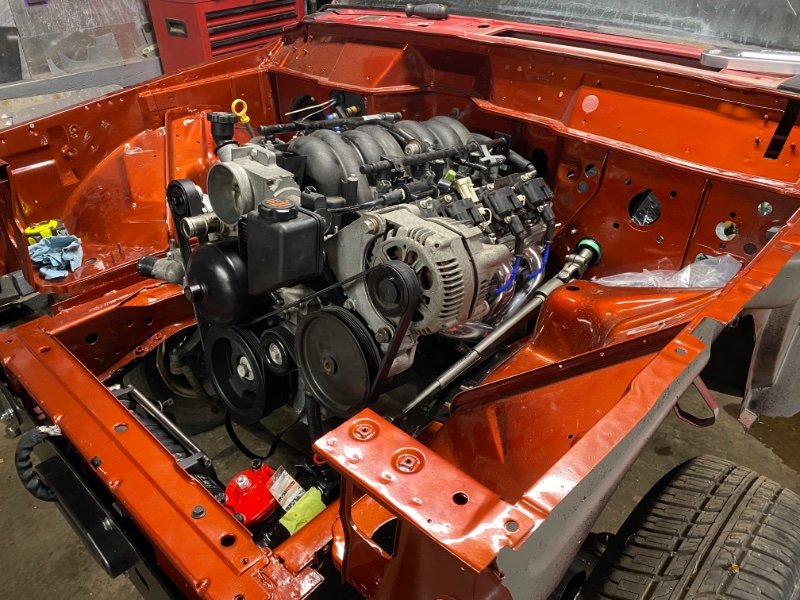
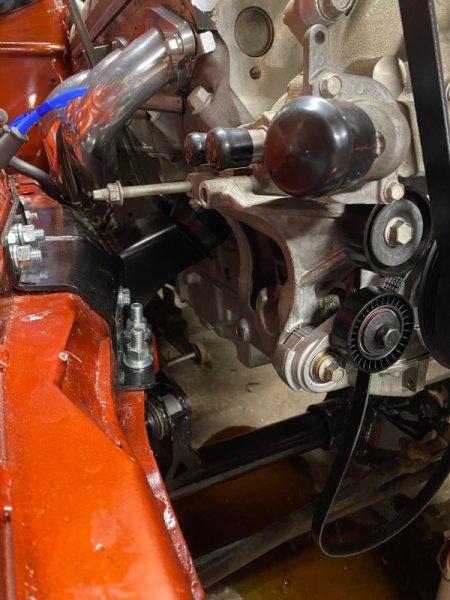
-
Project “Tomahawk”
ghetdjc320 replied to ghetdjc320's topic in MJ Hardcore Tech: Epic Journeys to Greatness
Haven’t gotten around to much since but rebuilt the shifter with nice kit from Allstate gear. Changed plugs and wires also. I had a Superwinch Talon 9.5sr I had planned on installing but it would not fit (dumb mistake ). After measuring thoroughly, went with a Superwinch TS9.5SR. I’ve run this winch in the past in it’s a beast. Build quality Is very high, brake is in the gear box and it uses a series wound motor. Compared it thoroughly to an M8000 (which is backorded until October). They are very comparable but the Superwinch saves a bit of space on the clutch side of the housing. Probond dampener, new belt drive with pulley and tensioners and a few odds and ends will be in tomorrow. Hope to intall the engine tomorrow.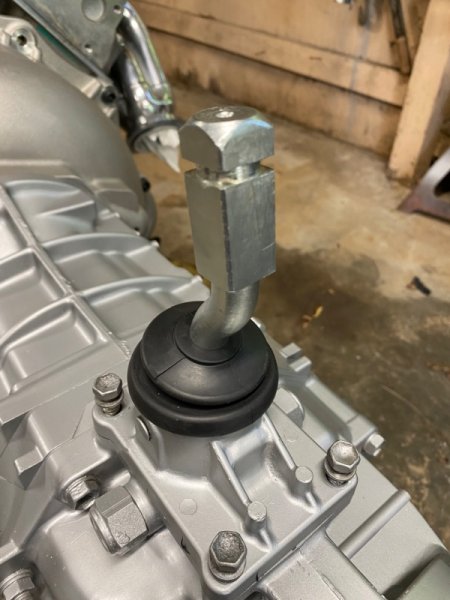
-
Which harness are you looking for? An aux input or the wiring plug for the radio side?
-
Camper Shell mounting rubber source?
ghetdjc320 replied to pago cruiser's topic in MJ Tech: Modification and Repairs
Looks like that should work. You can also checkout foamfactory.com they have pretty much any type of seal material imaginable. -
And once the above are all done, store the vehicle indoors as much as possible or at least under a carport/canopy, I personally used Fluid Film Black and coated all the insides of the frame rails and crevices once they were clean and dry. The factory application of seam sealer was also quite poor. If you ever do a full tear down of your rig, be sure to replace and add seam sealer as appropriate. On my current build I have por-15’d the entire fram and underside of the cab the coated with raptor liner. This was a lot of work… The insides of my frame have been thoroughly cleaned. I will use Eastwood internal frame coating followed by cavity wax/fluid film black.
-
Project “Tomahawk”
ghetdjc320 replied to ghetdjc320's topic in MJ Hardcore Tech: Epic Journeys to Greatness
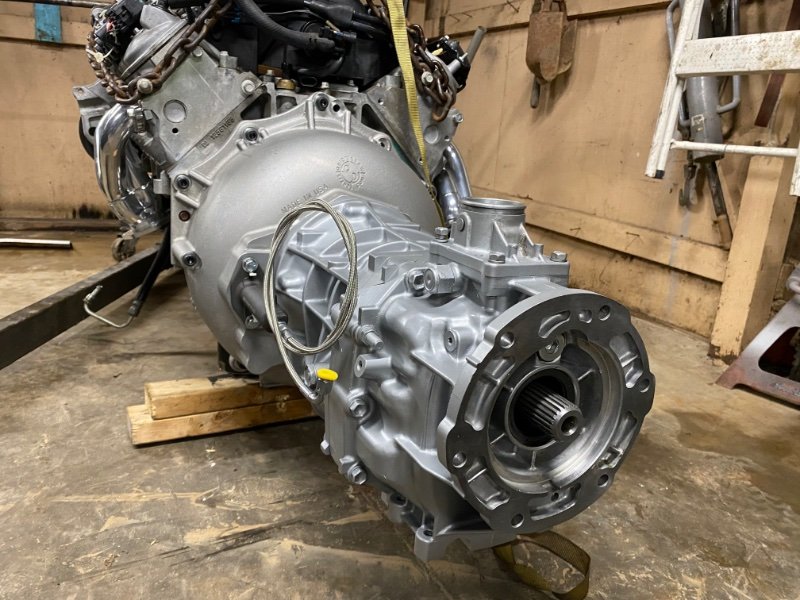
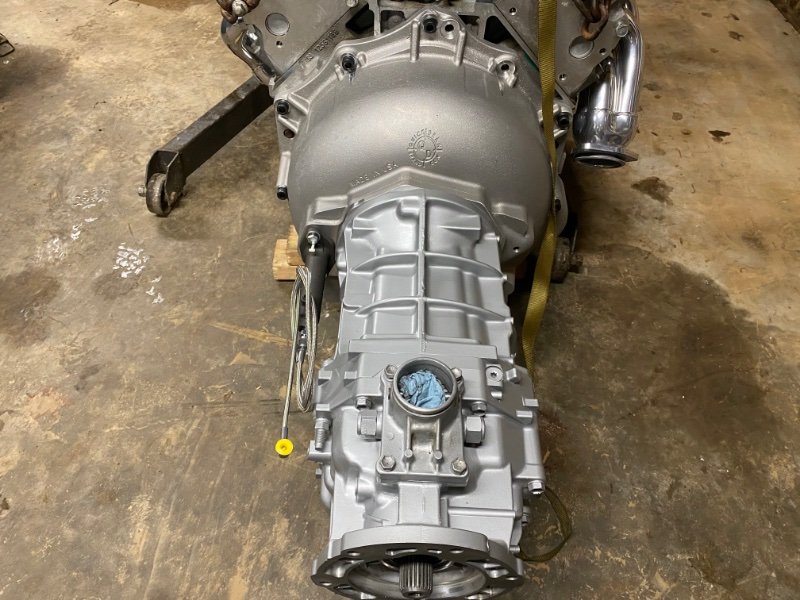
New pan, dipstick and headers installed. Flywheel and clutch are from a 6.0 based gmc truck. Using the quick draw bellhousing which uses the 94+ Jeep external slave, fork and throw out bearing. Slave has been adapted to -3 an fitting as has the clutch master. This is a Luk rep-set clutch. The whole assembly is now ready to be installed in the engine bay. Just need to prep the cross member and the brackets I restored previously. On another not, I confirmed that this is a rebuilt tranny. Every single synchro, bearing, gear and seal I could inspect are pristine. New belts, tensioners, idlers, plugs and plug wires will be in shortly. My winch didn’t fit so I have to go with a slightly smaller unit. Settled in the Superwinch TS9500SR. They are witching about 1/4” of an M8000 but have a gear box brake vs having it in the drum. I’ve had great success with them in the past. I may hold on to this Talon 9.5SR for future use. It’s a beast of a winch. On the engine: I replaced the rear main and rear access plat gaskets just to have that covered. Even though this is a very low mile engine and was super clean inside, the rear main seal was updated and is better than the one it came with now. Also going to upgrade the dampener.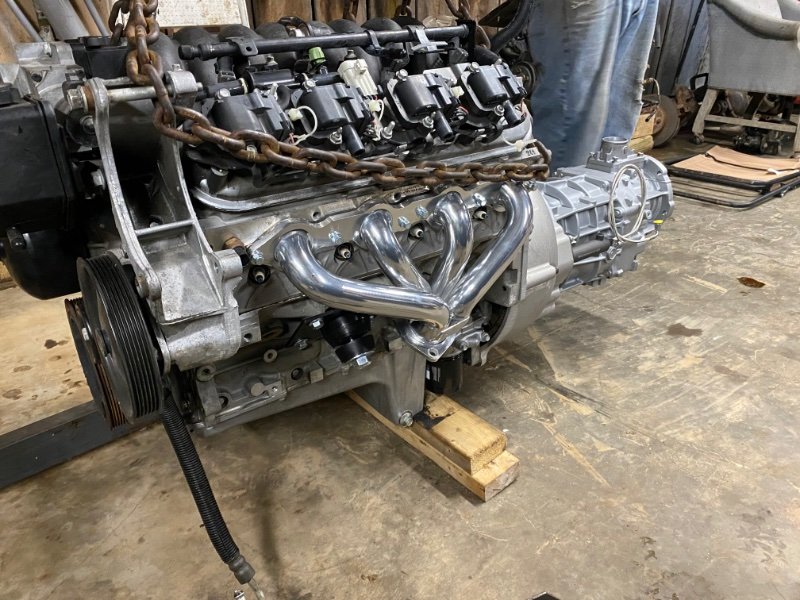
-
Power Rear Window Slider - PWR Slider
ghetdjc320 replied to Big_Mark's topic in MJ Tech: Modification and Repairs
That link is for the duo pane sliding window. The unit the OP has is the powered unit. Don’t see too many of those.