


ghetdjc320
-
Posts
5079 -
Joined
-
Last visited
-
Days Won
1
Content Type
Profiles
Forums
Gallery
Everything posted by ghetdjc320
-
Did you use justdashes? There is extra material usually in the radio opening on a stock dash. The OP could probably trim a little piece of that and get it matched.
-
 You can swap the housings. You can also just drill and tap for a 3/8 npt bung. Very easy in the soft aluminum tstat housing.
 -
Like I said, the 4 leafs have more free arch. About 1” higher than the standard 5 leaf pack.
-
The dash has a metal frame but is mostly plastic duct work. @Limeyjeeper I believe had his dash refinished. I managed to find an original in perfect condition. Plenty of conditioner and it is nice and soft vinyl again.
-
Project “Tomahawk”
ghetdjc320 replied to ghetdjc320's topic in MJ Hardcore Tech: Epic Journeys to Greatness
Good reminder. Mine was set correctly for basically “zero lash” out of the box fortunately. I was really thinking of going hydroboost with this truck and may still in the near future. This build is going to slow down here for the next few months as work picks up and the weather is uncooperative -
Rear Shocks recommendation
ghetdjc320 replied to Whitaker717's topic in MJ Tech: Modification and Repairs
I believe it’s just the compression that is adjustable on the 9000 correct? Or can you adjust the rebound too? I’ll let everyone know when I can get back to making those. I’m just slammed right now. -
Changing front coils is easy. Just set the back and adjust the front
-
I can’t speak in regards to the military wrap springs as I don’t know if they are using 2 overload springs in that pack or just one. I’m just referring to the standard off the shelf 4 leaf vs 5 leaf pack from GS. The 4 leafs nets more lift than the regular 5 leaf. The 4 leaf pack should level you out pretty well and they hardly squat with a bed load of concrete. You can always do a mild shackle lift to dial it in from there. The RE will probably give you about 3.5” once they settle depending on your bumper, winch, engine combo
-
Project “Tomahawk”
ghetdjc320 replied to ghetdjc320's topic in MJ Hardcore Tech: Epic Journeys to Greatness
LS ecu mounted in old Renix location. Has to be clocked pretty much in this exact position to not interfere with anything.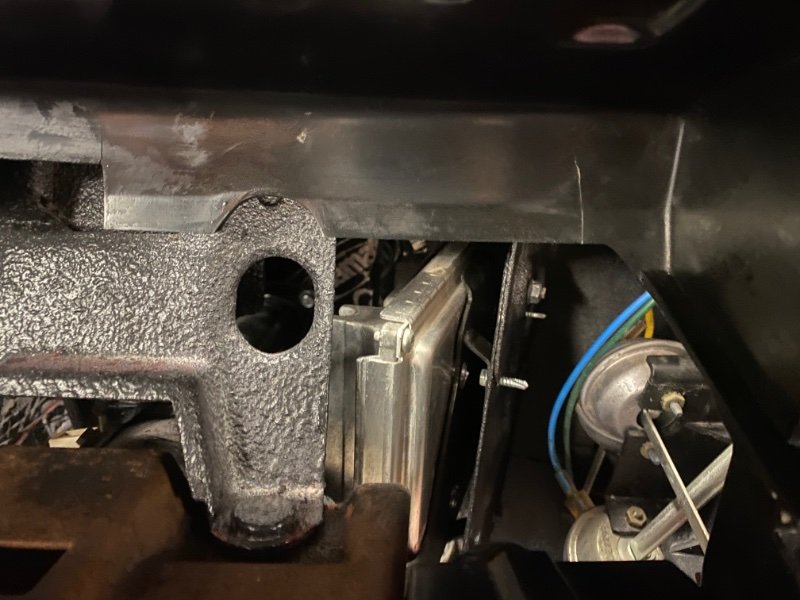

-
I can say that the 4 leaf will net you a but more than the 5 leaf pack. The 5 leaf has double overload springs but about 1” less free arch than the 4 leaf pack. On the 4 leaf pack I netted 2.25 over stock 4wd leafs after maybe 1/4” or settling. These springs are stiff and really don’t settle with the loads our truck typically see.
-
Project “Tomahawk”
ghetdjc320 replied to ghetdjc320's topic in MJ Hardcore Tech: Epic Journeys to Greatness
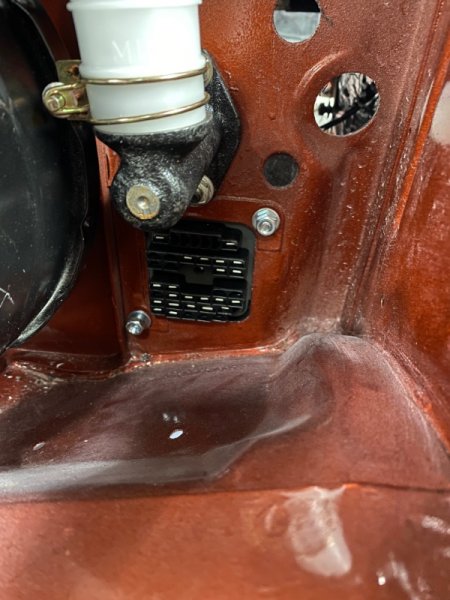
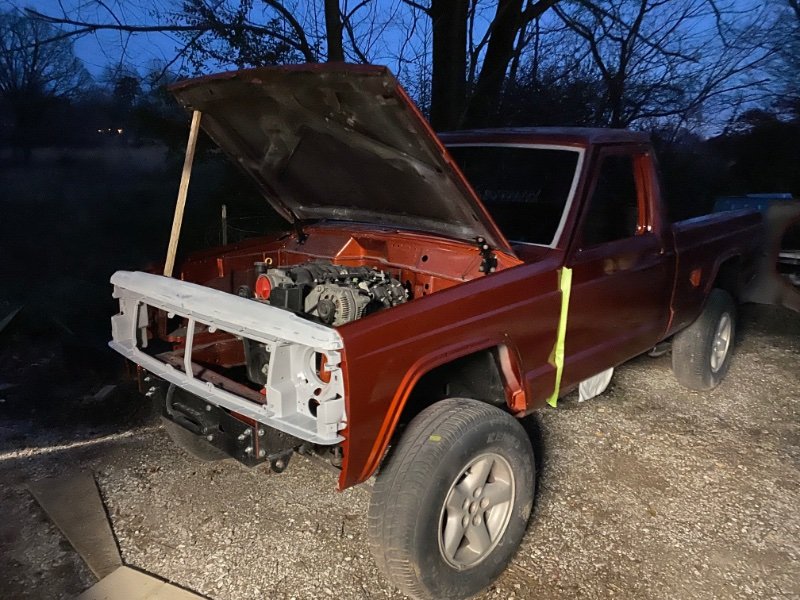
Electrical started. The ecu is going to be mounted in the old Renix location and the tcu (drive by wire controller) will go where the aw4 tranny controller is mounted on autos. new bulkhead fuse block mounted.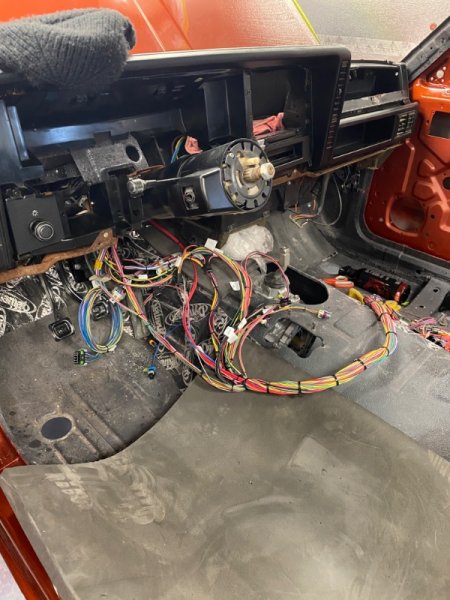
-
Project “Tomahawk”
ghetdjc320 replied to ghetdjc320's topic in MJ Hardcore Tech: Epic Journeys to Greatness
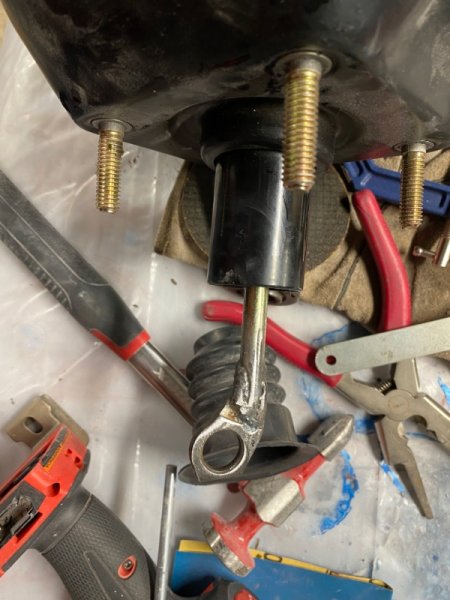
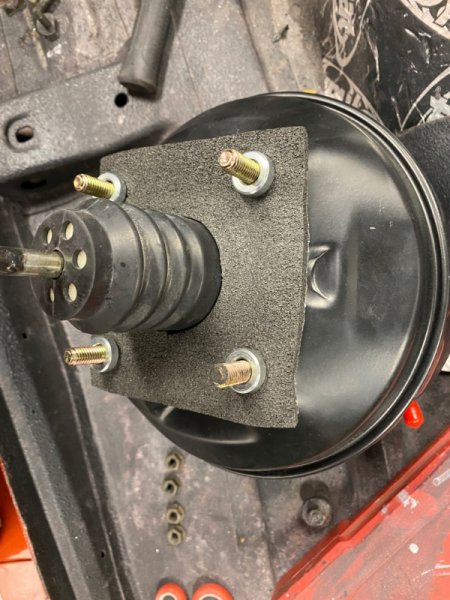
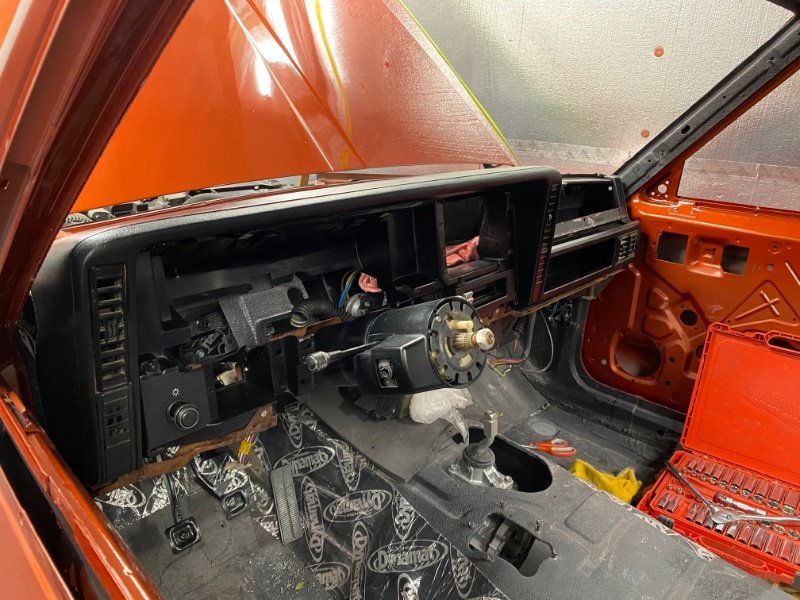
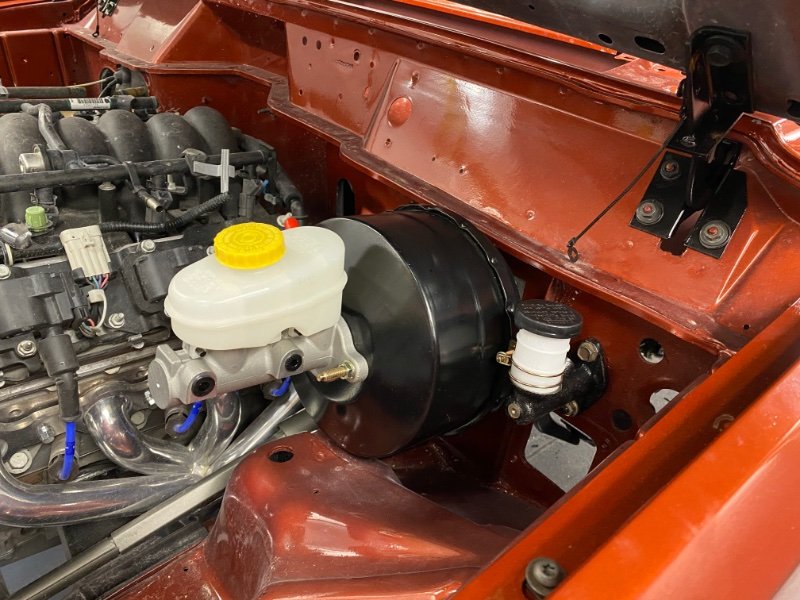
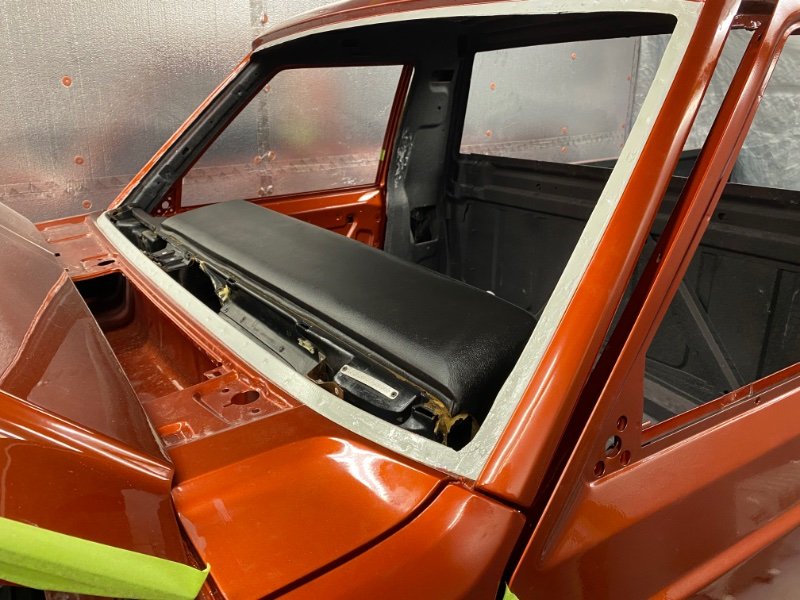
Custom bracket made for the corvette throttle pedal since I’m runny a drive by wire setup. Also removed the pedal connection from the only brake booster and welded it to my 2001 XJ booster and replicated the factory 5 3/8 brake booster rod length. The stock 01 XJ booster will push your brake pedal out about another 1.25”. Mounted the booster using a trimmed piece of dynaliner along with 1/4 spacers. Sits perfectly with about 1/8” clearance to the pinch seam. Master cylinder and clutch mc also mounted up. Dash frame is in place as well. I have never seen an original black dash in this hood of shape.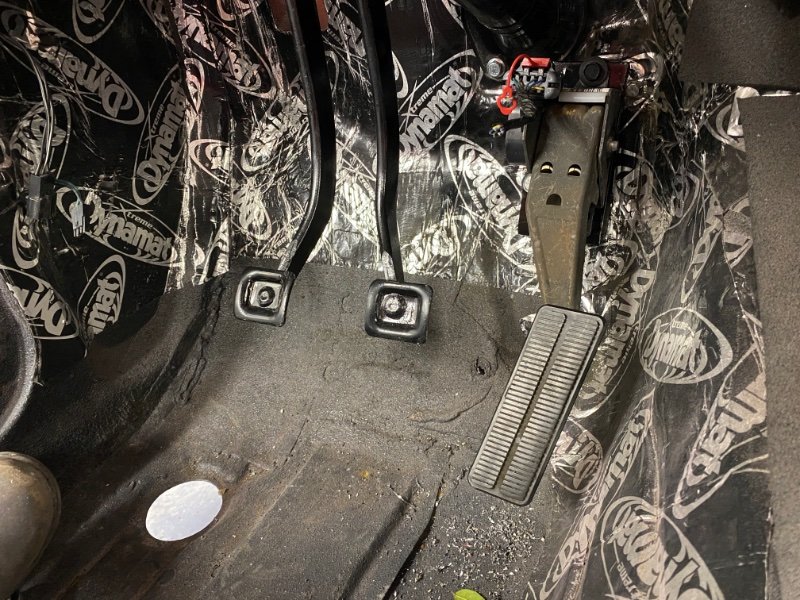
-
Project “Tomahawk”
ghetdjc320 replied to ghetdjc320's topic in MJ Hardcore Tech: Epic Journeys to Greatness

-
This is a frequent subject… but it’s worth whatever you can sell it for. That being said, before the accident, there probably would have been several buyers in the 15k range.
-
Project “Tomahawk”
ghetdjc320 replied to ghetdjc320's topic in MJ Hardcore Tech: Epic Journeys to Greatness
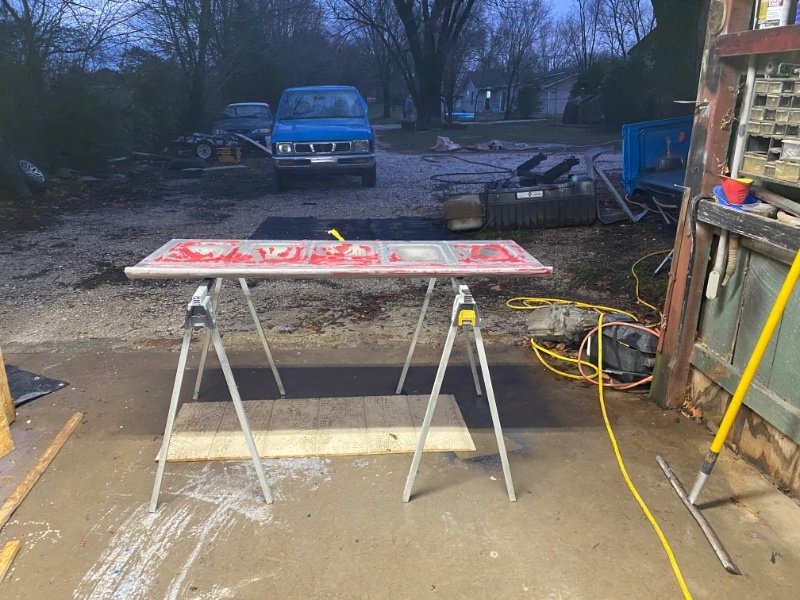
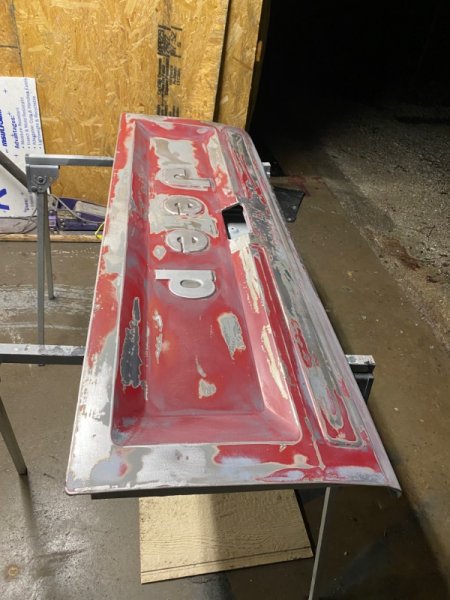
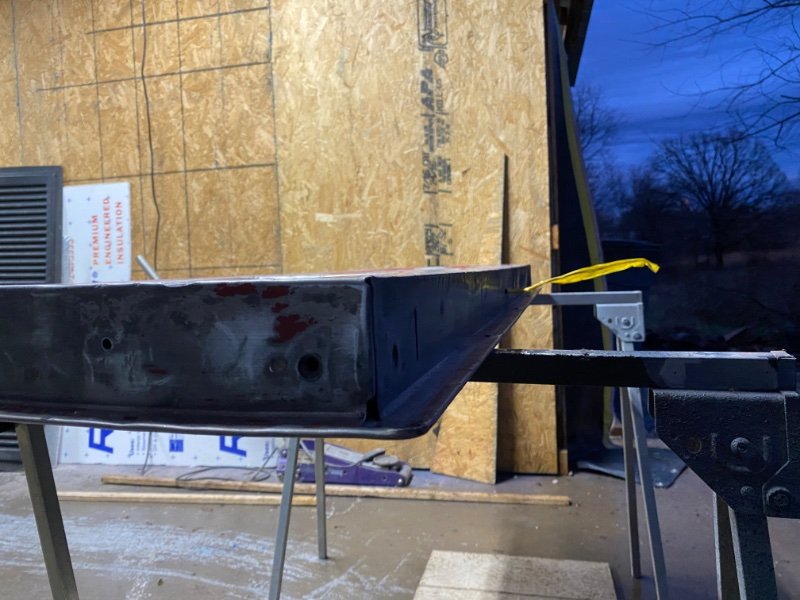
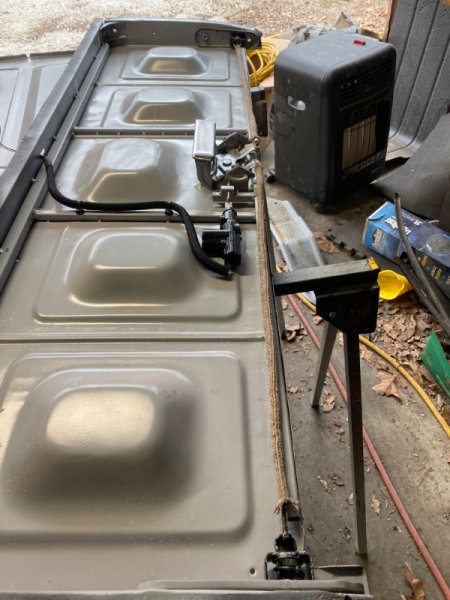
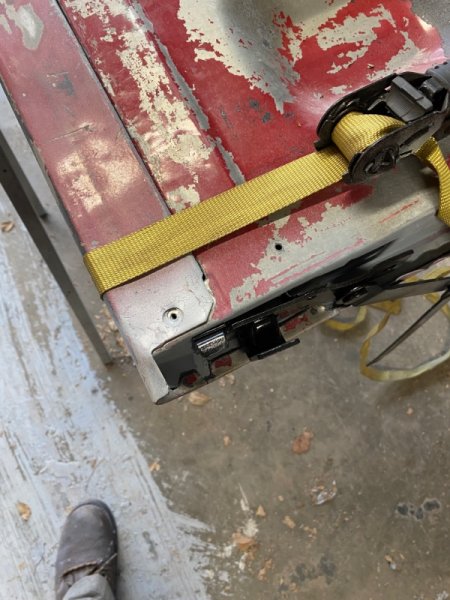
Tailgate reassembly started. It’s best to use a ratchet strap to keep the panels together for welding once they are aligned. Keep an eye on how the handle fits in the opening to know when your alignment is correct.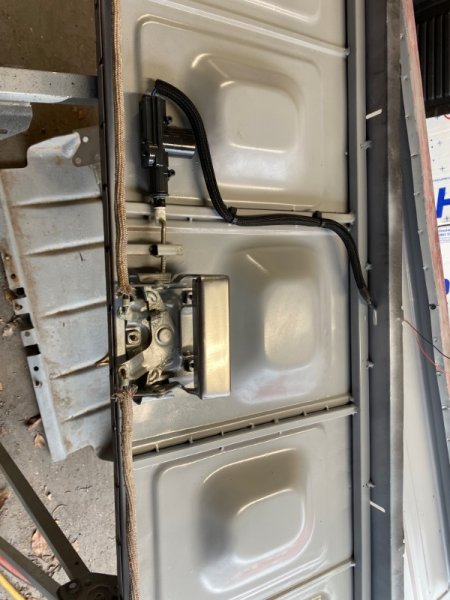
-
Project “Tomahawk”
ghetdjc320 replied to ghetdjc320's topic in MJ Hardcore Tech: Epic Journeys to Greatness
Tailgate straps were all straightened and refinished. Also repaired the e brake. I’ve rebuilt 3 of these now and can say that the easiest thing to do is to just put those two pressed in pins into a hydraulic press and carefully apply pressure until most of the play is removed. I’ve also found that the side to side play in the pedal (from the main large center pin being loose) is not what causes the gear from popping looses. All the ones I’ve restored needed the “guide” area where the gear latch pivots tightened (pressed). In the absence of a press, some strategic work with an air hammer will also do the trick. The goal though is to eliminate all side to side play from the gear “latch”. You’ll also want to replace the spring with something heavier duty. I took a picture of the spring and part number I used for reference.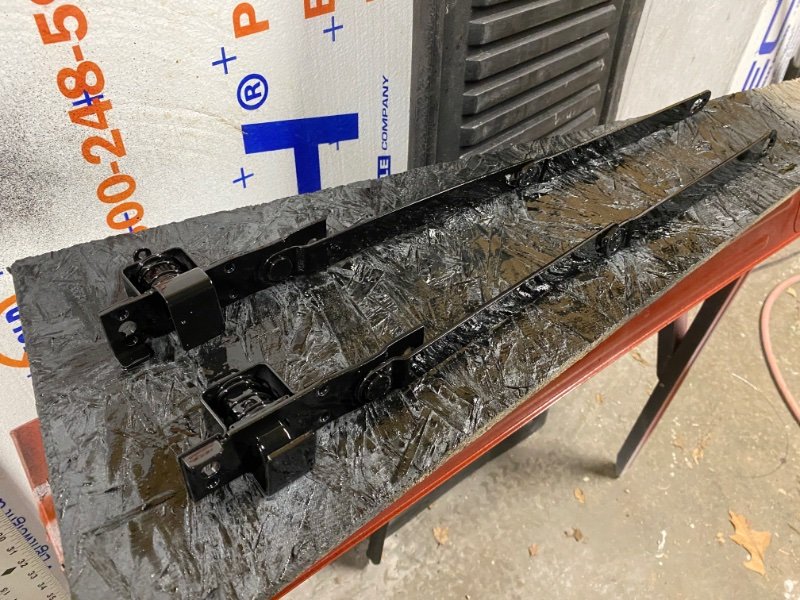
-
Project “Tomahawk”
ghetdjc320 replied to ghetdjc320's topic in MJ Hardcore Tech: Epic Journeys to Greatness
Fenders finished up and mounting (alignment) is underway. Nice fit overall. Had to do some minor modifications on a couple of areas to accommodate the door hinge reinforcement plates I added. They are lining up perfectly now. Once I get the cowl painted and cleared, I’ll do final fitment adjustments and line it all up. On another note hood clears all the accessories with room to spare. notice on the last picture how I reverse the gravity in the paint booth. Works better than any down-draft paint booth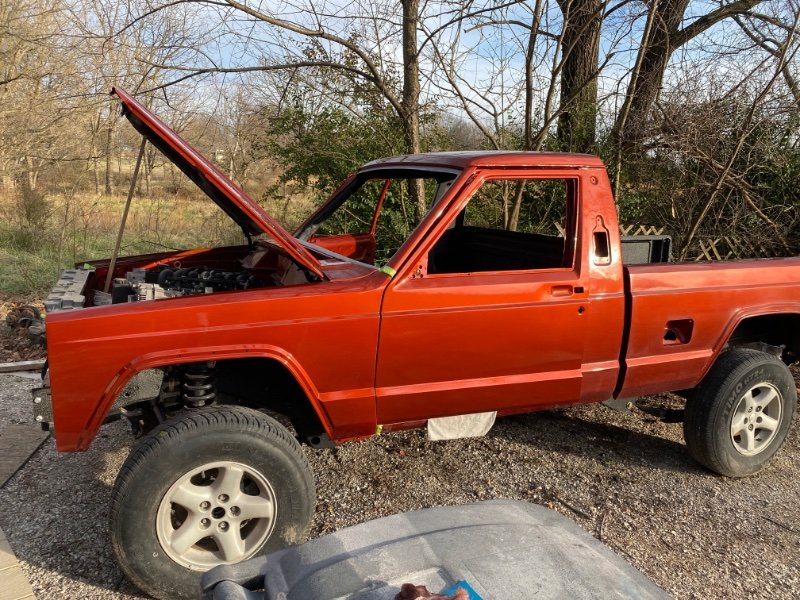


-
Rear Shocks recommendation
ghetdjc320 replied to Whitaker717's topic in MJ Tech: Modification and Repairs
Man apologies , but I'm absolutely slammed right now with the build . I had an unexpected deadline pop up to finish it and am in a mad dash to get it done. Everything else is in the back burner. I have several switch trim covers made but they are incomplete (need to be bonded and finished with matte texture). I’ll see if I can knock a couple out over the weekend. If I don’t send you a message by Monday, shoot me a PM (or two lol) and I’ll let you know if I was able to get them finished. -
Project “Tomahawk”
ghetdjc320 replied to ghetdjc320's topic in MJ Hardcore Tech: Epic Journeys to Greatness
Chrome tailgate handle??? Saw the one and only on eBay for $1k. Figured, what the heck I’ll try to see what I can do with my old one. Polished it with progressively finer grit (80-5000) then polished it and clear coated with 3 coats. Looks like nice chrome from about 3’ away. Looks like polished steel upon closer inspection.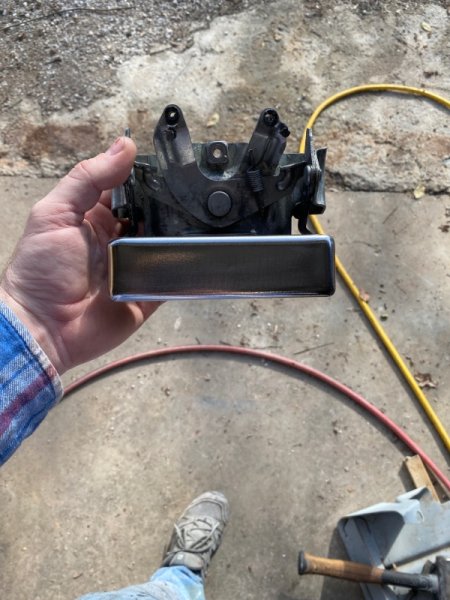
-
91 Eliminator 83K miles refresh with NOS parts
ghetdjc320 replied to Red Mistress's topic in Member Projects: Your Comanches
I agree with just getting a built axle. 1k is an awful lot for an old Dana 44 rear that, aside from being a factory original option, is not a massive upgrade. Kind of like the Jensen accussound speakers vs the plain ones (rarer and little better quality but there are much better components available now). The D44 can be a great upgrade in certain situations though. But now days, go for the D44 HD (read: 98+ Honda/Isuzu or JK and later wrangler) with the 8.9” ring gear and 3”+ tubes. Those are a much better upgrade than a stock xj/mj 44 imo. ECGS Can set you up with a bolt in axle using the HD44 center and larger tubes with the same 5x4.5 wheel pattern. I’d personally opt for 63” wms but that’s just me after seeing how that width looks on my rig. In regards to the drums vs disks, it depends what it’s used for. There is no doubt that full size drum brakes have significantly more shoe to drum contact area vs the tiny shoes in the drum inside the rotor hat. I hadn’t noticed the difference as much until I started launching heavy watercraft from steep ramps. The full sized drum brakes definitely have an advantage in this regard. Due to the pad contact area, it is harder to break the friction of a full size drum brake while used as a parking brake. One could also probably argue that it could serve as a better emergency brake in certain scenarios (though at a possible trade off of premature wheel lock). There are obvious drawbacks to drums though also, they do not disípate heat nearly as well, they have many small mechanical parts which can deteriorate quite quickly, they can trap moisture and debris easier as well. The transfer case mounted parking brakes are a neat option that will leverage the diff ratio in your favor but will technically only really lock one wheel with open diffs. -
Rear Shocks recommendation
ghetdjc320 replied to Whitaker717's topic in MJ Tech: Modification and Repairs
The airbag kit is nice. Wondering the max travel on those bags though. It would seem like it might limit suspension travel?? -
Thanks for all your help Jeremy!
-
Wheel cap center logos
ghetdjc320 replied to ghetdjc320's topic in MJ Tech: Modification and Repairs
I’d love too. I have everything sourced, I’m just on a full on marathon build at the moment. These side projects have really gotten pushed to the back burner. Been trying to knock out some switch trim covers also. It will happen eventually though. I’m guessing maybe 2-3 months?? -
Project “Tomahawk”
ghetdjc320 replied to ghetdjc320's topic in MJ Hardcore Tech: Epic Journeys to Greatness
Doors and hood have been loosely remounted. Will shim and adjust once fenders are loosely installed. Also worked on restoring the oem receiver hitch. Added quite a bit of weld to the factory setup. Also added a drain hole (why does the factory always miss this??) and reinforced a couple of spots. POR15’d the whole thing and will let that cure overnight. Will use some filler to smooth out the metal before raptor lining.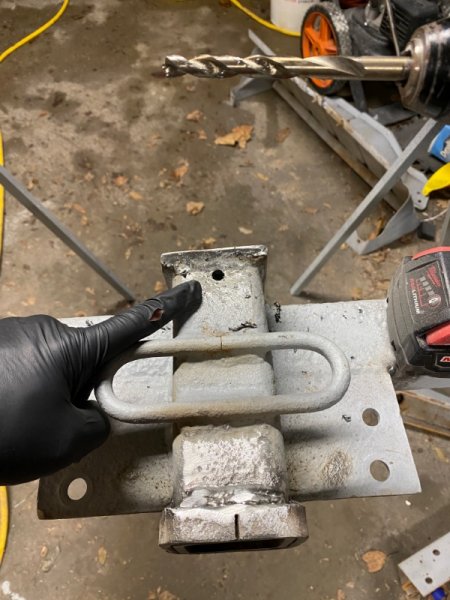
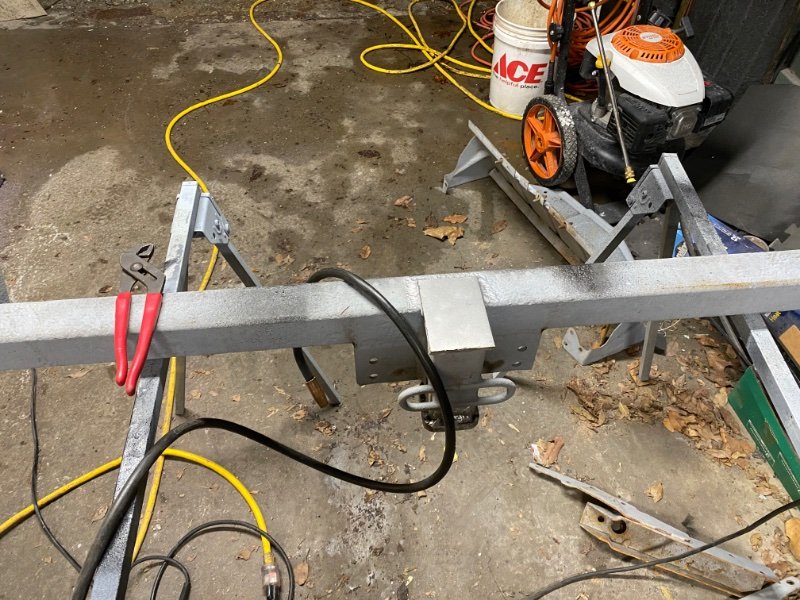
-
Project “Tomahawk”
ghetdjc320 replied to ghetdjc320's topic in MJ Hardcore Tech: Epic Journeys to Greatness
Y’all’s comments are much appreciated. Was able to clean up and refinish all the door hardware. Had 4 bolts for the door hinges I wasn’t to sure about so replaced them with some 10.9 button head bolts. The rest I was able to extract nicely with zero damage to the torx head. Cranked up the shop heat to about 90* overnight to help everything cure. Once the hood and doors are on, I’ll shoot the fenders and cowl. Also working on restoring the oem receiver hitch and skid plates. Spare tire winch resto also coming up. Been contemplating a great variety of audio configurations. One concept I’ve always wanted to do is a center console sub. Had one in my TJ and it was nice since it didn’t take up any extra space and added just the right amount of low end filler for the small cab. I’d like to keep 5.25 components on all 4 corners and build a custom box for the JL 6.5 w3 sub. I’d prefer 6.5” but I’d like to keep the factory speaker grills in tact and the 6.5’s will be just too shrouded by the interior panels.