


ghetdjc320
-
Posts
5212 -
Joined
-
Last visited
-
Days Won
1
Content Type
Profiles
Forums
Gallery
Everything posted by ghetdjc320
-

Mystery Sudden Death & Resurrection
ghetdjc320 replied to BizarroStormy's topic in MJ Tech: Modification and Repairs
Still sounds like bad fuel pump to me. Install your old cps back on. If the new one is giving you issues. -
Mystery Sudden Death & Resurrection
ghetdjc320 replied to BizarroStormy's topic in MJ Tech: Modification and Repairs
The pump is very easy to replace finding a good replacement pump, on the other hand, can be more difficult -
Check your temperature with an ir gauge or similar at the thermostat housing just to verify the reading at the dash. The 4.0 fuel map is tuned for a 195 thermostat.
-
I haven’t seen the actual urethane seal surface leak, but practically every seam on MJ’s is a leak spot with horrendously poor application of sub standard seam sealer. The harder you look the more issues you’ll find. If the glass shop removes the glass, take a look for yourself at all the body seams in and around those frames. The glass shops I’ve dealt with only concerned themselves with the pinch seam where the glass adheres for the most part.
-
Mystery Sudden Death & Resurrection
ghetdjc320 replied to BizarroStormy's topic in MJ Tech: Modification and Repairs
Your idle fuel pressure sounds good. As mentioned above, 39psi should be the pressure with no vacuum attached/engine not running or WOT situations. -
Mystery Sudden Death & Resurrection
ghetdjc320 replied to BizarroStormy's topic in MJ Tech: Modification and Repairs
My vote would be dying pump. Very typical symptoms. Fuel pumps can just go out completely but I’ve noticed most that I’ve had go out in the last 10-15 years do so sporadically -
91 2wd MJ - D35 to 8.25 swap Qs
ghetdjc320 replied to Misfit_MJ's topic in MJ Tech: Modification and Repairs
The 8.25 pinion is also offset iirc to the passenger side -
Gladiator Rear Bumper on a Comanche
ghetdjc320 replied to JackD's topic in MJ Tech: DIY Projects and Write-Ups
Going to bump this question again as I’d also like to know the answer -
Tailgate Straightening
ghetdjc320 replied to ghetdjc320's topic in MJ Tech: DIY Projects and Write-Ups
I built a frame inside my tailgate. It’s in my tomahawk build in epic tech -
Caliper mount to knuckle bolts
ghetdjc320 replied to fisher's topic in MJ Tech: Modification and Repairs
Thats why I asked if you had 89 knuckles. Can you snap a picture of the knuckles? -
Caliper mount to knuckle bolts
ghetdjc320 replied to fisher's topic in MJ Tech: Modification and Repairs
Do you have 89 knuckles? New bolts normally come with the calipers. 89 was the last year for the old style. -
They normally just cut through the bearing retainer then break it off. The non c clip D35 uses the same bearings as the D44 of that era.
-
Yes, please repop the actual flaps!!! I have a lot of info on them if you need detailed drawings. Great to have the hardware though too. i don’t need them yet, but save me a set for tomahawk
-
That turned out awesome!
-
Not likely. The MJ will be over here next year also once I get a place setup for it over here. will be back early 2024 to finish it up hopefully by spring. Plan on staying here indefinitely though, just trying to pickup the pieces after this nasty typhoon. Really hoping power comes back one of these days. Two weeks with no power is rough when it’s hot and humid.
-
As it currently sits. Started with some new 30x9.5 (original Sahara size) and some 316 replacement hardware to take care of a few rusty bolts.
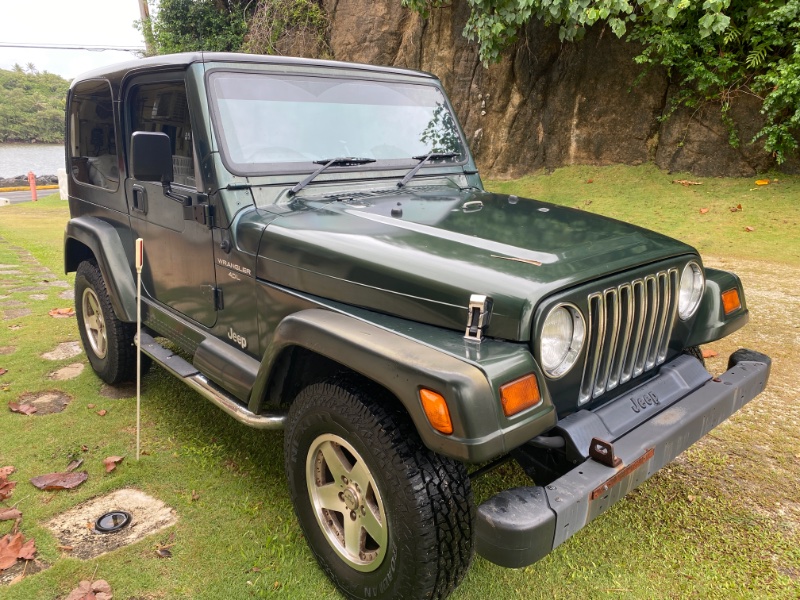
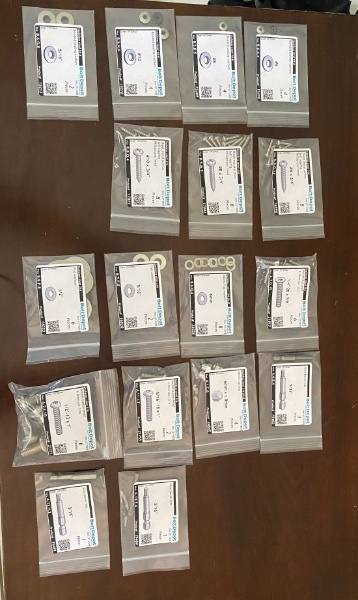
-
Jeep Comanche Tailgate Wall Mount Kit
ghetdjc320 replied to boxyjeep's topic in Vendors- members making products for MJs
Now you just need to make one that’s U shaped for all those beat up gates out there -
Wheel Center Cap Emblems
ghetdjc320 replied to ghetdjc320's topic in Vendors- members making products for MJs
I’d like it to happen soon but just went through a huge move followed by a massive typhoon. Haven’t had power, water, or cell service for days. Food, water and fuel are top priorities atm. I’m running a battery backup to turn on my modem every 8 hours or so. But when things return back to normal this project will be back up and running. -
Since @boxyjeep is making the speaker brackets, these would be very easy to reproduce. Make it from 18g stainless or galvanized. Only has a couple of simple bends.
-
Wiring pigtail for bulb 37 that plugs into back of bezel (See Pic)
ghetdjc320 replied to robfg67's topic in Wanted
Indeed I do but they are all packed away atm. There are some aftermarket ones that will fit (albeit not as good as oem). Search Amazon for a “74 bulb socket” unless you need oem -
Picking up a JDM TJ Sahara tomorrow. Pretty neat find. 56k original miles and an absolutely pristine interior and undercarriage. Hardtop with a D44. Will post up more info later.
-
Holy thread resurrection! The 4Runner rears are close in width but many have the 6 lug patter depending on year. I might suggest just browsing your local junk yards and see what they have. Look under some of the foreign SUV’s in the 90’s. Many used some pretty tough axles (Isuzu trooper comes to mind). Several also had drop out 3rd members if that’s what you’re looking for.
-
Key Parts full taillights
ghetdjc320 replied to fiatslug87's topic in Craigslist/Marketplace/eBay... i.e. Not Your Stuff
MYUS is the one I use for smaller parts. They are in Florida so no state sales tax. -
Key Parts full taillights
ghetdjc320 replied to fiatslug87's topic in Craigslist/Marketplace/eBay... i.e. Not Your Stuff
Use a shipping forwarder. They are all over the states and can ship to you lo problem. -
Project “Tomahawk”
ghetdjc320 replied to ghetdjc320's topic in MJ Hardcore Tech: Epic Journeys to Greatness
Thanks! It’s all covered and stored away for now. 2024 will be the year of the Tomahawk Edit: correction, 2025 will be the year