


ghetdjc320
-
Posts
5079 -
Joined
-
Last visited
-
Days Won
1
Content Type
Profiles
Forums
Gallery
Everything posted by ghetdjc320
-

HVAC Control Panels, Finally!
ghetdjc320 replied to ghetdjc320's topic in Vendors- members making products for MJs
Hey there, apologies for the delayed response. I’ve been super swamped and haven’t been working on these in a while. I do have all the parts to assemble a complete refurbished unit with new fan control switch, bezel, and all controls refurbished. I just don’t have the time to put one all together at the moment. I’ll update this thread as soon as I get moving on these. -
It really is a nice all around stroker setup. I ,regrettably, never had it dynoed as I didn’t have one available at the time. I can say though that the power band seemed to be in a very sweet spot between a 4.0 and a 258 based stroker.
-
I’ve built 3 strokers to varying degrees. My favorite was the mini stroker with amc 232 crank, bored 60 over with a nice comp 235 cam. It was very efficient and ran on 87 all day long with a tight quench. I ran a Holley sniper efi on it and tuned it up nicely. That being said, although I have a soft spot for the 4.0 I’ve had my fill of building them. I’m thinking the Cummins 2.8 for the next build. Something that has more torque than most stroked 4.0’s and way better fuel economy. Just a thought.
-
1991 Eliminator Resto-Mod
ghetdjc320 replied to ghetdjc320's topic in Member Projects: Your Comanches
All finished and back on the road. Handling is the best I’ve ever felt in a truck. -
The cheapest effective one I’ve used for 3/16 line: https://www.summitracing.com/parts/sum-900318 If you can swing it, something like this is awesome for flaring: https://www.summitracing.com/parts/kti-70081 Many more options out there and I’m sure other will chime in.
-
get a good flare tool and you’ll absolutely love it. Well worth it.
-
New Cargo Light Option
ghetdjc320 replied to ghetdjc320's topic in MJ Tech: Modification and Repairs
-
1991 Eliminator Resto-Mod
ghetdjc320 replied to ghetdjc320's topic in Member Projects: Your Comanches
And the bed is back on. Gas tank strapped in also. Just need to get all the bolts back in. -
New Cargo Light Option
ghetdjc320 replied to ghetdjc320's topic in MJ Tech: Modification and Repairs
I’ve seen several of those brake/cargo light setups. They seem to be standard issue on most truck these days. Baja designs makes a nice looking unit that is a combo light like that also. -
1991 Eliminator Resto-Mod
ghetdjc320 replied to ghetdjc320's topic in Member Projects: Your Comanches
Some pics of the bottom of the bed all prepped. Going back on today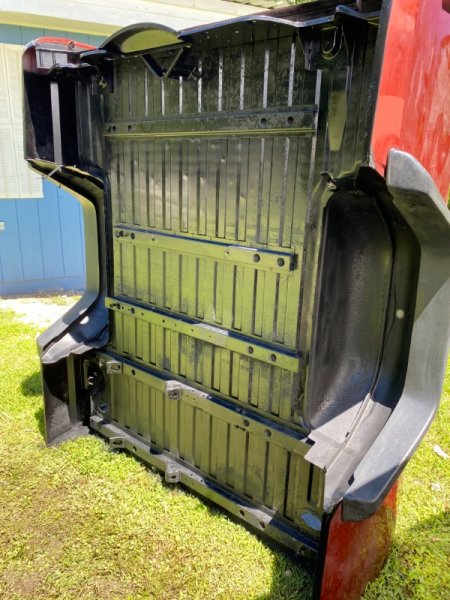
-
New Cargo Light Option
ghetdjc320 replied to ghetdjc320's topic in MJ Tech: Modification and Repairs
Some additional pics for reference.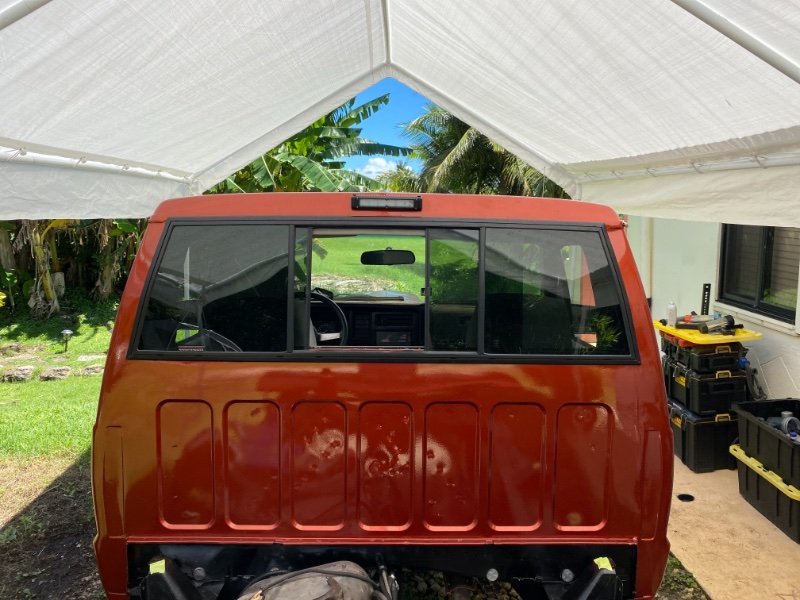
-
New Cargo Light Option
ghetdjc320 replied to ghetdjc320's topic in MJ Tech: Modification and Repairs
Yep as @PocketsEmptied mentioned, just grab some gasket material about 1/16-1/8” thick and trim it out to size. The oem gasket will not work with these since the oem gasket is actually a rounded wedge. The top edge is thick and the bottom is thin. They did this because the cargo light they used had a flat back but was too tall to sit squarely on the rounded edge of that part of the cab without leaving a gap. I still kept the oem gasket to make a mold of it someday but scrapped that idea when I found this light. It is simply far better than what the factory made. I know I’m not the purest restorer here but trust me, it looks very clean on the truck. -
New Cargo Light Option
ghetdjc320 replied to ghetdjc320's topic in MJ Tech: Modification and Repairs
Could be the relentless battering of the elements here??? I’m sure you’ve seen how the factory constructed the cargo lights. It was one complete cast piece of transparent lens material similar to the tail lights. The black portion was just painted and the “lens” area was left natural. It may be the heat from the cargo lamp bulbs also that causes issues. Maybe some LED’s would help. The tabs were always coming loose in mine and eventually the entire hosing just kept cracking. The rivets wouldn’t hold anymore. I tried a lot of plastic work to salvage them but they used that brittle lens plastic on the whole unit vs actual trim quality plastic with a hard lens. If they had built it out of a more maleable plastic it probably would have helped. But no doubt it was cheaper this way. Riveting into that lens material was a bad idea imho. -
New Cargo Light Option
ghetdjc320 replied to ghetdjc320's topic in MJ Tech: Modification and Repairs
Yeah I got so sick of the stock cargo light with its wonky rivets stuck in brittle plastic. After the 10th time repairing it, I threw it out. This one actually is lower profile than the factory unit. I also like the factory look but I’d only install a NOS oem cargo light. Used ones are just in not good enough shape after years of sitting in the elements. -
1991 Eliminator Resto-Mod
ghetdjc320 replied to ghetdjc320's topic in Member Projects: Your Comanches
Got some more accomplished. Started working on the front suspension and replaced the drivers side coils with some metal cloak 6” springs. Also replaced the coil isolators with new Moog rubber ones. Next I tackled the track bar and found quite a problem. I indeed had the same issue I have talked about on many occasions, wallowed out track bar axle side bolt hole. It’s seriously wallowed out. I’d say this accounts for a slight clunk I’d hear at times and some funky tire wear patterns up front. This is one of the ugly sides of extra unsprung weight (heavier axles, tires etc) So, out with the old setup. I had a new Iron Man Fab track bar system which has a double shear mount, adjustable bar with enduro joint and a frame cross brace to tie in the passenger frame rail. This is a massive improvement over the stock system. Also had the metal cloak dual rate springs and the Iron Man Fab steering system brace which ads a great deal of support to the steering system by bracing the steering box both above and below the pitman arm. It ties in both frame rails also and uses a pillow bearing for a super solid fit. My steering box is a stock unit that was rebuilt by PSC. It’s a very nice box and now with this setup it’s like rack and pinion steering, seriously, it’s super slick. Also nice change of pace to bolt on some mods vs all the restoration work. Unbelievably wallowed out track bar bolt hole. You can see the rear one is the correct size still. More weld work Nice new powder coated steel mod parts!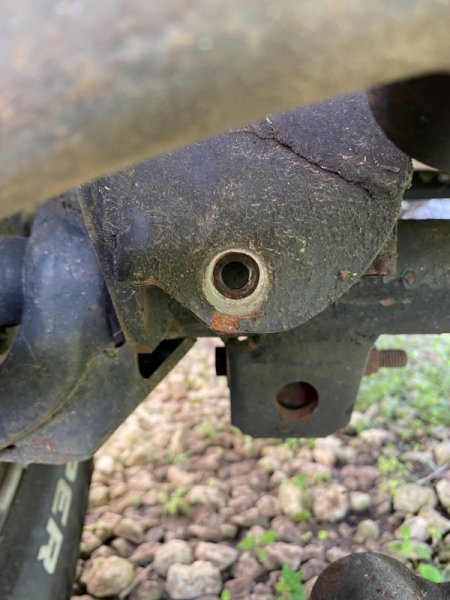

-
New Cargo Light Option
ghetdjc320 replied to ghetdjc320's topic in MJ Tech: Modification and Repairs
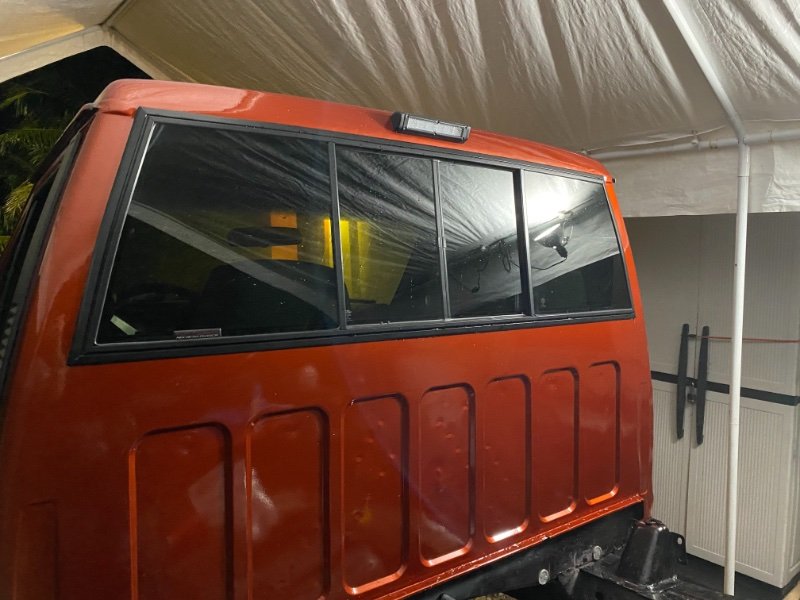
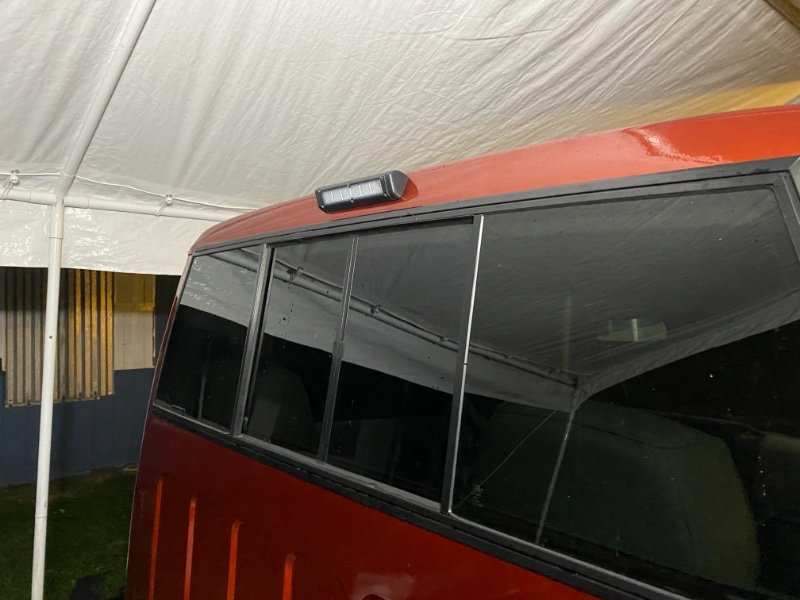
This is open source as I don’t have the time right now to work on modifying the housings to fit our trucks but here goes: the light you will need is this one: https://www.amazon.com/Dream-Lighting-Outdoor-Exterior-lumens-Black/dp/B07H93WGZ4/ref=mp_s_a_1_2?dchild=1&keywords=dream+lighting+awning&qid=1634026745&sr=8-2 Note that you will need to wire the white wire to ground and the black to power. If you are installing a cargo light for the first time than just run a 2 conductor wire to it for power and ground. If you’re swapping out an existing cargo light, you can just put a ring terminal on the ground wire and use a self-tapper to get ground right behind the light. These lights are a bit wider than an oem light. They also provide significantly more lighting at just over 700 lumens. The housing is powder coated aluminum and comes in 3 colors. Although the powder coating is uv resistant I would still ceramic coat it or apply some extra uv protection of some sort. Now onto the fitment. The back of the housing will need to be sanded or filed smooth as some casting marks remain and this may prevent having a good seal if not smoothed out. I used some 80 grit on a sanding block for this. There are 2 screw holes that will need to be marked and drilled. There is no gasket that comes with it. Ideally someone could fab or print a nice little gasket for it (I’m thinking @Dzimm). That top of the cab has a slight curve to it that the oem cargo light gasket accounts for. Since this light is not as tall, it doesn’t require that curved gasket so a simple cork/rubber gasket would also work. At the moment I am using a thin bead of marine through-hull sealer (3m 5200 black) with no gasket and I have zero leaks (and we get tons of rain almost every day). You can also use Permatex Mega Black automotive sealant (found at almost any auto parts store but make sure it’s specifically the Mega Black). That stuff is actually oem Sea-Doo sealant for through hull fittings and works remarkably well. I would also recommend filling the screw holes in your new light with some mega black. The screw hole may collect just a bit of water since they are pretty level with the ground. One last thing i did was to notch a small “vent” hole on the bottom center of the housing. This can act as a drain for moisture or condensation on this area. It is very small but just ads a bit of longevity to the new setup. This light looks oem when installed right. And it provides far more light in a rugged and sealed housing. The light is rated for 50,000 hrs so no worries about having to replace a bulb anytime soon. My plan was to modify the housings, fabricate the gasket and even a drill template and sell these as a kit along with a new oem switch setup and wiring for a complete oem install. I may do that down the road but I’m just too swamped to take that project on at the moment. If you have any questions, I’ll do my best to answer them. -
another 8.25 swap conundrum
ghetdjc320 replied to luckycamper's topic in MJ Tech: Modification and Repairs
3.73 is a doable ratio for your tire size. -
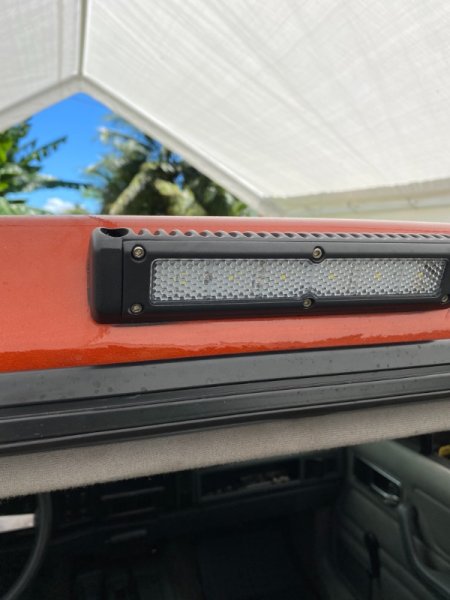
I’ll post up some more info in a bit. Just finished the install yesterday. Much better than the stock plastic unit. It’s an aluminum housing with a sealed led strip in it.
-
Waggy F44, Isuzu R44
ghetdjc320 replied to WVpioneer_88's topic in MJ Tech: Modification and Repairs
Only real reason I’d spring for a truss up front on an axle swap is because the tabs and link brackets are all aligned for the vehicle so it takes out all the geometry work. Otherwise you can just get the right brackets and tabs and weld them in place. No need for a truss -
1991 Eliminator Resto-Mod
ghetdjc320 replied to ghetdjc320's topic in Member Projects: Your Comanches
Completed a lot of odds and ends today. Added an additional ground and replaced the splice near the tail light harness. Added my new cargo light setup. It’s absolutely awesome and super bright. Also looks very sleek. Has more light dispersion than the original cargo light did but that really comes in handy when using it more like a work light.


-
Waggy F44, Isuzu R44
ghetdjc320 replied to WVpioneer_88's topic in MJ Tech: Modification and Repairs
I’ve used TNT and Artec trusses and brackets to build axles with. Artec quality is my favorite but tnt isn’t too bad. Problem is I don’t believe there is anything for the passenger drop waggy axle. You would have to use generic link brackets and shock tabs. -
Waggy F44, Isuzu R44
ghetdjc320 replied to WVpioneer_88's topic in MJ Tech: Modification and Repairs
Does Barnes make the swap truss for a passenger side drop? -
1991 Eliminator Resto-Mod
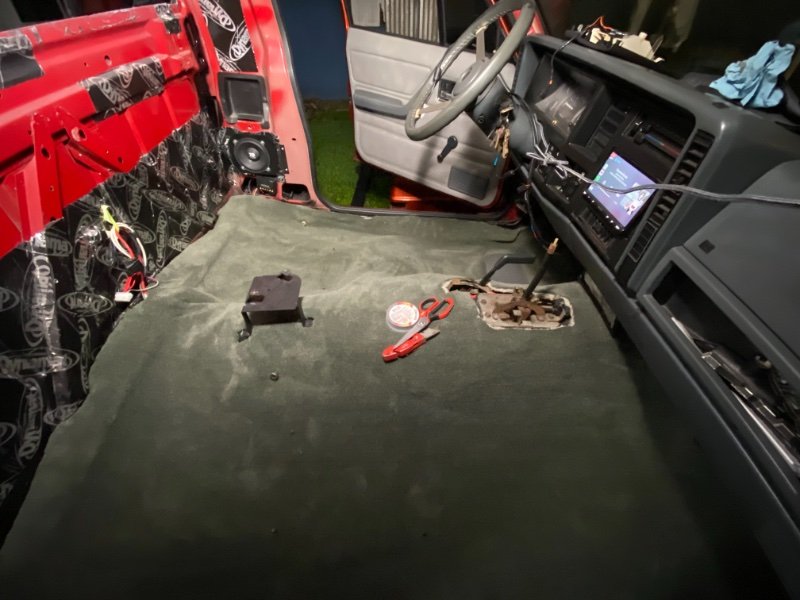
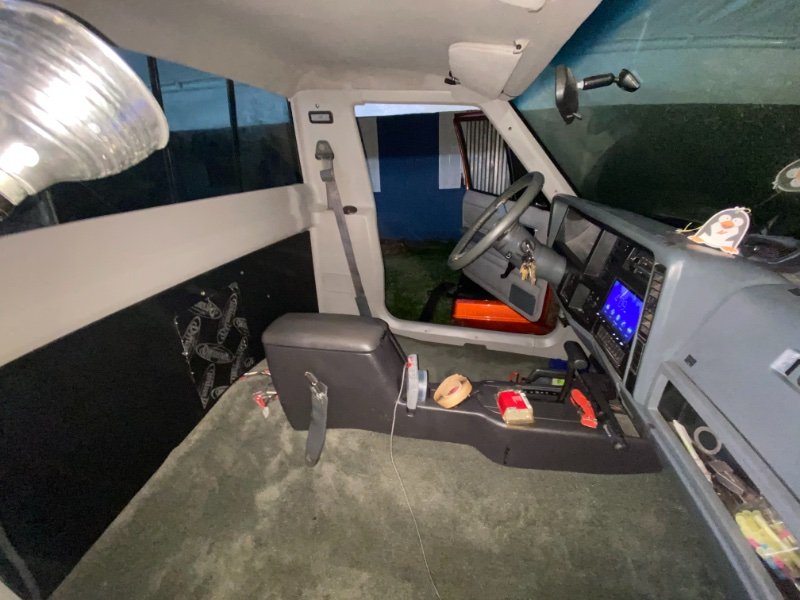
ghetdjc320 replied to ghetdjc320's topic in Member Projects: Your Comanches
New carpet all trimmed. Interior all buttoned up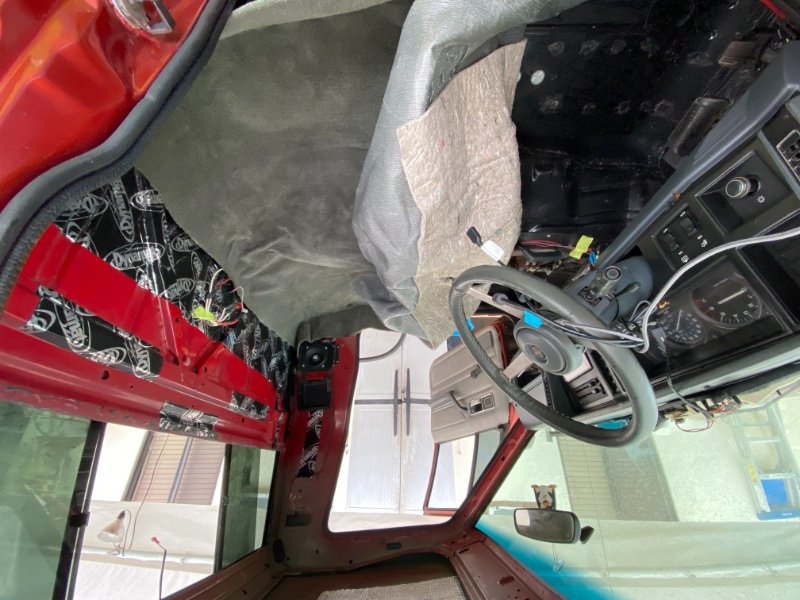
-
1991 Eliminator Resto-Mod
ghetdjc320 replied to ghetdjc320's topic in Member Projects: Your Comanches
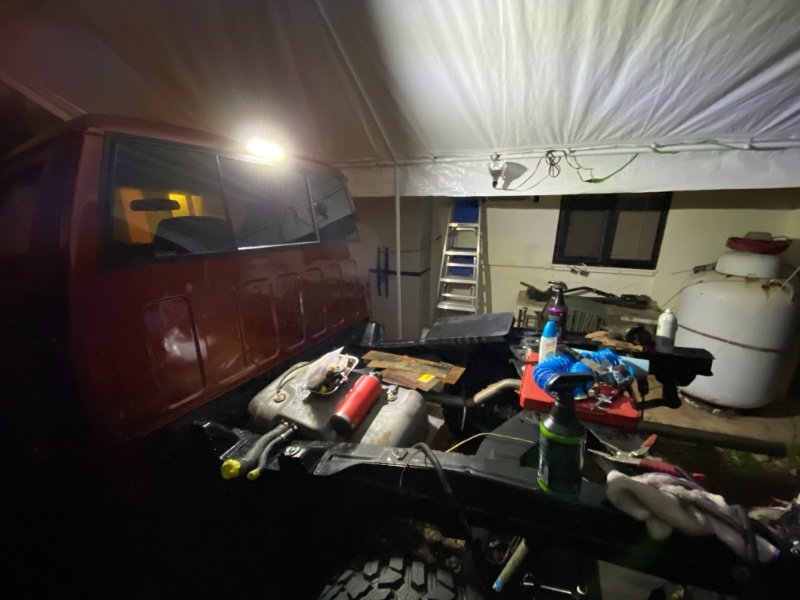
Been doing this work under a 10x20 canopy during monsoon season with tropical depressions every few days. Been slow going but I need to get it finished in a couple of days. -
1991 Eliminator Resto-Mod
ghetdjc320 replied to ghetdjc320's topic in Member Projects: Your Comanches
Thanks. Yeah definitely worth taking the time to do it right. The color is Aston Martin Cinnabar Orange. It has a tiny bit of fine metallic flake but is mostly a pearl.