

Strokermjcomanche
-
Posts
3251 -
Joined
-
Last visited
-
Days Won
6
Content Type
Profiles
Forums
Gallery
Everything posted by Strokermjcomanche
-
 Next on the list was to was to install the engine / trans in the truck , this is where I'm at now . I'm done working on this for a couple weeks because I need to focus on working on the house and other non automotive projects while I'm looking for a new job as well .
 -
Thanks for all the help Yellaheep , would have never been able to get the truck if you didn't go the extra mile by helping the shippers .
-
So now that enough of the interior was in to get it running when the time comes I started working on the engine . I started out by trying to turn the engine over while it was still in the truck with a 1/2 inch breaker bar and a 3/4 socket but it wouldn't budge . I then pulled the spark plugs out and poured marvel mystery oil down all the cylinders and let it soak in the next couple days... Still wouldn't budge . It was only 11 more bolts to pull the head so that's what I did . The cylinder walls were rusted pretty bad and I didn't plan on having to replace the engine . Luckily I had this , but it was intended for another project .. It's a brand new 4.7 stroker that was going to go in my 99 XJ but it still runs good so that's a plus . So it was time to put all the correct Era pieces parts on the engine . And then the nv3550 trans with 89k on it . New clutch kit , trans mount etc .
-
Thanks !!
-
Thanks !!
-
You are correct, but I wonder...is the diameter of the cap the same regardless of the tank size? This one is a great price but lists for the 13 gallon tank (which I have never even heard of let alone seen) Good question , the part number is 5252048 . I bet if you look up the part numbers of the lock ring and if they are the same the diameter will be the same .
-
So then it was back to the interior . The truck originally had a bench seat but was badly damaged , it wasn't included with the truck but the brackets were . I originally picked these seats out of a 92 2 door xj for my black 88 pioneer but they've been sitting around for a couple years and figured that they could be put to good use on this truck . The dash , gauge cluster , harness and all had some damage from the fire . I had an extra dash with harness , radio , cluster and HVAC out of my 2.5 std 89 Mj that was converted to a 95 xj 4.0 .The ignition switch and turn signal switch were replaced from a spare column I had . The front emergency brake cable was broken so that was replaced . Here is where I'm at with the interior right now .
-
Thanks Minuit. Next I sanded,primed and painted the firewall ... The carpet was dirty and needed to be cleaned , and the jute padding was removed .i think it came out good and it smells good too . Then it was time to start bolting everything back into the engine compartment . I used nothing that was in the fire , not that any of it was good anyhow lol. The wiring harness and ECU came out of a 90 XJ so there is no C101 connector . The rest of the parts were from either the dealership that I was able to clean out or from past projects that were scrapped .
-
Thanks , it won't be 100% but I do want to make it as nice as I can with the parts that I have currently have on hand .
-
So the first thing I wanted to tackle was fixing the firewall , both inside and out . I removed the whole interior ,Heater box , everything on the firewall and the inner fenders and also the engine , trans and transfer case . I had a little more sanding to do but this is the last pic I took before I primed / painted the engine compartment . And here it is painted .. I used PPG single stage paint and primer because it holds up well and lays down nice with no buffing .
-
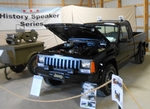
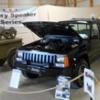
Well this is my first build thread so I'm sorry if it's not like all the other well written ones on here . Anyhow,I've always been keeping an eye out for a good solid rust free truck that I could use for a DD and not worry about it getting scratched or dented if I decided to take it on some light off-roading . I've accumulated parts over the years but just never found a good solid base to build off of until now . About a month or so ago a fellow cc member (yellaheep) posted this truck for sale . It's an 88 SWB Olympic edition 4x4 with 191k on it . It has all 3 factory skids and is rust free . It has the BA10 trans with 3.07 gears which eventually will be changed to a nv3550 and a better gear ratio . Yellaheep was kind enough to help it get loaded on the car carrier to get shipped up to me in Ohio . For some reason the two engine pics that I have when I first got the truck will not load on photobucket . Everything plastic rubber etc was melted beyond recognition . The paint was gone off of the metal on the front part of the firewall .. The floor boards on this truck are perfect ..
-
This is good for the price , can't get a better piece to start with .. http://m.ebay.com/itm/MOPAR-FUELTANK-SENDING-UNIT-N-O-S-5252048-86-89-VARIOUS-JEEP-MODELS-/400976014975?nav=WATCHING_ACTIVE
-
Comanche windshield
Strokermjcomanche replied to ridenlow12's topic in MJ Tech: Modification and Repairs
If you want to do it right weld in new metal where the rust is . -
Eagle posted first haha .
-
The line going in is the hose that comes from the clutch master cylinder and goes to the clutch slave cylinder . The "plug" is actually the bleeder to get air out of the clutch system .
-
C brings out the chrome better IMO . A prevents a lot of money being spent on paint if the swooshes don't come off properly . Or there's still option D ...
-
I could straighten that by using the jeeps bottle jack pressing against the leaf spring shackle a 4x4 piece of pressure treated wood and a sledge hammer . You'd never know it was bent . Where was this bent ?
-
Missing intake manifold bolt stud/bolt?
Strokermjcomanche replied to dkmcgowan's topic in MJ Tech: Modification and Repairs
You can use a bolt instead of the stud without removing anything as long as the stud is not broken off in the head . Use something to stick inside the hole or a mirror on a stick to see if it's missing or broke . -
These are a couple options http://m.ebay.com/itm/Dorman-Help-76935-Gear-Shift-Knob-And-Bushing-/151758788521?nav=SEARCH http://m.ebay.com/itm/Dorman-76937-Gear-Shift-Knob-/141728280307?nav=SEARCH
-
New front brakes, inner and outer pad?
Strokermjcomanche replied to airspeed's topic in MJ Tech: Modification and Repairs
MOST pads are stamped I or O on the backing plate of the pads but not all . I keep track of where the pads are when I remove them but if someone put the pads on wrong before you then I guess you have to do what you did . -
Need a pipe adapter
Strokermjcomanche replied to Strokermjcomanche's topic in MJ Tech: Modification and Repairs
It will be a week or two until I have the engine running to make sure it won't leak . Thanks for all the replies/ help . -
Need a pipe adapter
Strokermjcomanche replied to Strokermjcomanche's topic in MJ Tech: Modification and Repairs
So I then thought maybe this will work ? I have extras to try other options too , if not it looks like I'll be drilling and tapping the head . -
Need a pipe adapter
Strokermjcomanche replied to Strokermjcomanche's topic in MJ Tech: Modification and Repairs
Well here's what I've come up with today and I mean ALL day of running around . I found this bushing and the sensor won't even go in because the bottom of the sensor hits the tapered threads ... Then I found this one where it threads in but doesn't look like it will give an accurate reading .. -
Need a pipe adapter
Strokermjcomanche replied to Strokermjcomanche's topic in MJ Tech: Modification and Repairs
Thanks Cruiser none of the local parts stores have the bushing and there are no Napa's close so it looks like I'll have to order one . Thanks again -
I have a newer 4.0 with the 0630 head that is not drilled for the coolant temp sender in the back of the head and need to relocate the sender to the thermostat housing . From what I've found out so far is the sender is 1/8 x27 thread and the hole in the thermostat housing is 3/8 pipe thread .The 1/8 X27 has proven to be the difficult thread to find . I need an adapter to mate the two together unless it would not read correctly because not enough of the sensor is in the coolant . I seen where Cruiser said to relocate to the thermostat but I'm open to other ideas and would rather not try my luck at drilling / tapping the head . Thanks in advance . Btw it's an 88 renix 4.0 that I'm working on .