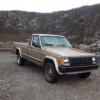
TuckerTJ Posted March 26, 2016 Posted March 26, 2016 I purchased this MJ in October of 2015.. Got it ready for the road and inspection and parked it in November. I will be away from December until April so nothing was being done except lots of comanche club reading! Pictures from the kijiji ad: It's about time to actually start working on the jeep so I will try and keep this build page updated. Mostly with pictures. I live on the Island of Newfoundland, Canada. Saw the ad posting for the Mj in PEI (Prince Edward Island), so that means two ferries and a small road trip to go check it out. Loaded up in a Ford windstar mini van and off I went. Looked at the Jeep, hooked it up to a set of tow dollies, unhooked the rear driveshaft (which to my surprise came off easy) and headed home. Got it home and really sized it up, more rust than I initially thought. So this is going to be a faily big project that I got to "sleep on" all winter. I did however fix the floor rust and few other things that it would need to be inspected and registered. I'm the second owner of this Jeep, I bought it off the original owner who picked it up in '89. Nice older gentleman who said the truck as been sitting in his shop for the past couple years. It only has 155,000kms on it. I was expecting it to have some maintenance needed. I didn't get pictures of the actual nest in the intake box.. One thing I did learn from here is to pull your carpets.. I was kind of nervous about it, seeing as the Jeep came from a Island on the east coast. I shouldn't have been too shocked but I was kind of taken back when I seen the carpet was half the floor Passenger side wasn't as bad Never having done body work before I was kind of discouraged but in the end I think the floor turned out ok. Patch work done and passenger side sealed I did put down some rubber water seal but I'm not too sure if I like it. It doesn't stick as good as I was hoping, but it was colder when I installed it. Looking underneath it was certain rust was going to be my biggest issue with this build I'm planning on a front and rear axle swap, XJ front and the Explorer 8.8 so I'm not too concerned with the axle rust. The frame and body are in overall decent condition. It looks as though the bottom of the doors and the box have been redone before. I did get it inspected, insured and registered before I parked it for the winter. First actual drive.. Can see where the fender meets the door area that it doesn't look factory/lined up properly. It will most likely be cut out for rock rails anyway.
Jeep_Comanche17 Posted March 28, 2016 Posted March 28, 2016 i don't see a whole lot of rust, less than mine had! can't wait to see how this comes along! . :MJ 1: .
TuckerTJ Posted March 31, 2016 Author Posted March 31, 2016 I'm building this Jeep to be a daily driver/camping/overland vehicle. It'll get the SOA in the rear, lift the front to match, didn't want to go as high as the 5.5" I've read I'll gain but I think after looking at some (a lot) of the Jeeps on this site, 5.5" lift and 33" or 35" tires will work out ok for my intended purpose and look good in the process. I will be building a bed rack to hold the Roof Top Tent and the rack will extend over the cab. I'm still undecided if I'll build the rack on the stock bed or remove the bed and build a custom bed. I had a JK with an off-road trailer I built for the same purpose as this MJ will be. I'm thinking of building the custom bed the same style as the trailer. I'm thinking it could look something like this (rough sketch below) For now I just built a basic rack to mock up the RTT on the MJ and to have a place to store the tent for the winter.
TuckerTJ Posted March 31, 2016 Author Posted March 31, 2016 Since I'll be using this for camping and will just about everything, I will be adding on board air, driving lights and camp lights, water pump and other electrical and auxiliary batteries in the back. For that I'll need a few extra switches and gauges. My MJ didn't come with any factory options so all the blank switch panels are there, the clock didn't work so I made a blank plate to go there for possible air gauge, 12volt meter, or switches. Plus I deleted the cigerate lighter for a regular 12v outlet. And of course since this thing as the factory tape deck I had to dust off the old tape collection. I drove the Jeep around for a couple of weeks as is. The bench seat is in good condition and comfortable but the lack of arm rest and centre console got me thinking about a set of buckets with a console. I did mock up a set of buckets from a '01 Chevy Astro van, they are comfy and fit pretty good (would need custom brackets welded up) but I realized I would need the 3rd seat option so I've settled on a set of Dakota seats or similar style with the middle seat/console setup. Settled on this mini console out of a Ford Ranger for a temporary situation to hold the snacks and drinks. Also out of the same ranger i got the headliner, to see what kind of fit it was or if I could make something work. Overall the size is pretty close. It could possible work with some minor modifications or if you aren't that particular. It's just held in place now with the lips where the roof meets the door area. The rear shocks are basically new, the fronts were absolutely garbage. The MJ had a very bad lean to the driver side. I had some stock rubicon shocks and springs lying around from my buddies JK. The shocks are a tad longer or at least stiffer, so I tried them both out to see what it would fit like. Both the shock and spring went in without issue (other than the coil mount being rusted away to next to nothing). Rubicon spring on the left (first pic) and the top (second pic) The shocks made a big difference in ride, seeing as the others had no fluid at all I wasn't surprised. As you can see from the pictures the springs are actually shorter from the JK, these are off a 4dr Rubicon. I drove it like this for a week until I left for work in December. Parked it in the garage and covered it up where it's waiting for me to get home and start the fun again. Will be a few weeks before I'm actually home working on it so no updates for awhile but I will update as I go fairly regular and hopefully lots of pictures.
Wiggilez Posted April 1, 2016 Posted April 1, 2016 what year of ranger did you nab that headliner from?
TuckerTJ Posted April 2, 2016 Author Posted April 2, 2016 I want to say the headliner is from a 2001 single cab Ford Ranger but maybe a 1999.
Megadan Posted April 2, 2016 Posted April 2, 2016 I really like those Astro seats. A little bit tall, but I'm a tall dude, so having that head rest covering the glass would be reassuring in case someone hits me from behind. You kind of have build goals similar to mine (eventually). I'm trying to avoid a SOA on mine though and aiming for about 4" front and 3" rear total, some flares or fender trimming and 33's.I like that bed rack and tent combo. I may have to steal your idea :thumbsup:
TuckerTJ Posted April 3, 2016 Author Posted April 3, 2016 Steal away! I was aiming for around 4.5" of lift but SOA and 5.5" seems to be the best compromise of lift and price. Especially with my location and cost of shipping. Hoping in a couple of weeks I'll get back at the build with some updates.
Mattman6 Posted April 5, 2016 Posted April 5, 2016 Nice work to the floors. I'll be tackling those pretty soon myself. Also good call on that Ranger headliner, I'll be sure to be on the lookout the next time I'm at the pull a part.
TuckerTJ Posted June 7, 2016 Author Posted June 7, 2016 Long over due update. I live in Newfoundland but work in Alberta. I also have friends and family in Fort McMurray Alberta. I was driving home and about half way home I got the call that Fort McMurray was being evacuated for the wild fires. I have a bunch of friends there, and more importantly my kids live there. So I headed for home and was home for 3-4 days and flew back to Edmonton to pick up my kids who were now evacuated from Fort McMurray. Now I'm home again and getting the kids settled into a new school, I can get back at the Jeep and get it back on the road. While I was away I orded a bunch of parts, they arrived before I even got home. Ordered 4.5" RE coils, rough country adjustable arms (upper and lower), Rock kralwer track bar. Also in the box on the left is a JCR Offroad DIY winch bumper
TuckerTJ Posted June 7, 2016 Author Posted June 7, 2016 Before I left Alberta to drive home (Newfoundland). I went to 4wheel Parts, truck and Jeep expo in Edmonton. Went to the pro comp booth, saw their tires with a "sale" sticker on them. 33x12.50x15 Procomp ATs, $99 each. Decision was made that I'll be running 33s. Got some black D window steeleies for $49 each. Ordered up 5, mounted and balanced and shipped to my door for around $1100. Pretty good deal for around my parts.
Megadan Posted June 7, 2016 Posted June 7, 2016 99 ea was a screaming deal for those tires. Looking forward to seeing all of those goodies mounted up.
TuckerTJ Posted June 7, 2016 Author Posted June 7, 2016 Yeh, I jumped on the deal for sure. Will be a little bit before everything is bolted up. Front axle is out and being replaced for a TJ Dana 30. Not much upgrade, maybe a down grade with the low pinion but with the shape my stock axle was in it will be a upgrade in that sense. Also before I put the Jeep away the clutch would only engage (disengage?) right at the floor, or basically no clutch. I checked the master, no leaks, no real noticeable wetness around the bellhoushing. Decided to drop the transmission and check out the clutch assembly and since I picked up a TJ bellhoushing/NV3550/transfer case combo, a swap was and still is on the table. Thanks to one of these 2 lovely bolts, it was a struggle! Even with the right socket and this extension contraption. Driver side one came out, was in there tight but came out just fine... Passenger side one... Not so fun.
Rockfrog Posted June 9, 2016 Posted June 9, 2016 I had my clutch do the same thing a few months back, only engaged/disengaged at the floor. A new Luk Master was only $50 at Lordco. When I pulled the old master apart the return spring inside had snapped in half and was jamming the mix. Sent from my SGH-I337M using Tapatalk
TuckerTJ Posted June 13, 2016 Author Posted June 13, 2016 I'll look into the master, although I have a "new" transmission that will need a new master and slave cylinder (external). It's a NV3550, transfer case and bellhoushing from an 04 TJ. The original transmission (Peugeot) mount is separated and will need to be replaced and I have a TJ mount on hand so I'm thinking I will go ahead or at least attempt the swap instead of spending any money on the current setup. I got the transmission out. That one e12 torx was a pain. Actually ended up cutting the floor and got a grinder in there to grind off the bolt head. Once the bell housing was separated and the transmission was on the floor, I reached up and unscrewed the bolt with my fingers. I did do that bolt first too. Hole in the floor, I figured with the condition the floor was in when I picked up the jeep, what's one more hole?! Ha Donor to go back in.
TuckerTJ Posted June 13, 2016 Author Posted June 13, 2016 Right now I'm just waiting on parts, ball joints and axle side control arm bushings, master/slave cylcinder. My wheels and tires came in. Had to mock them up. Next to the Jeep on stock tires : 33x12.5x15 vs 205/75/15 (27") Under the jeep with the the axle removed. Changes the look completely that's for sure. Rear mounted at stock height Hopefully parts will be in soon and I'll actually get the Jeep lifted and driving again
TuckerTJ Posted June 27, 2016 Author Posted June 27, 2016 Not working at the Jeep as much as I'd like, but that's how it goes sometimes. Small update, but progress is progress I guess. Bushings and ball joints showed up Got the old bushing sleeves out, passenger side came out fairly easy Driver side needed a bit more coaxing Axle primed up, still needs ball joints replaced, new hub assembly/wheel bearings and brakes. Also removed the stock sway bar, it will be replaced or at the least new bushings. Plus stock control arms and washer bottle, more room for working at the master cylinder and to clean up in the engine bay. Waiting on some parts from Novak , pilot bushing, new slave and hose from slave to master for the TJ NV3550 transmission. The hose was back ordered for 2-3 weeks so I'm hoping I can find a different solution for that.
TuckerTJ Posted August 23, 2016 Author Posted August 23, 2016 Long over due update. Got the parts from Novak. No pics of the pilot bushing and hose. But I did get the bushing installed. Removed the stock pilot bearing with wet paper and a dowel, was pretty sceptical but I was pleasantly surprised that it came out effortlessly. Installed the mechanical speedo gear from the MJ transfer case into the TJ t-case. Got the TJ transmission and bell housing bolted to the engine, everything went fairly smooth there. Had to redrill the stock MJ crossmember for thr TJ trans mount but the crossmember is bolted to the original mounting holes on the frame. With the trans/tcase in and held up with the crossmember, adjusted the slave cylinder, bled the clutch and fired up the jeep. It was the first time it was started in months, fired up fine. It's still sitting on jack stands cause it has no front axle still but I did shift through the the gears and everything sounded and felt good. It was time to get the front axle in and actually drive it to get a better feel for the new swap, the transmission was told to have less than 100,000km on it but it wasn't from a jeep I knew. Nice to be putting new things back on the jeep.
TuckerTJ Posted August 23, 2016 Author Posted August 23, 2016 With the front lifted and the rear stock, it had a big rake and the rear tires rubbed just sitting on flat ground. A lift in the rear was needed and I was planning it anyway of course. I had the perches and U bolts ordered in anticipation. Rubicon Express ubolts and MORE spring perches from 4wheel parts. For the TJ Dana 35. Was hoping to go with something other than a 35 in the rear but the TJ F/R axles , transmission/tcase deal was good and easily accessible, it'll do for now. Also ordered a air gauge and check valve for my Viair compressor for future on board air. Had a trip "planned" and didn't think I had time to do the axle swap and spring over so I decided to make a spacer for the shackle mount and new shackle. Stock shackle removed, bolt was seized in the bushing. Grinder with cut off wheel was a very common tool on this thing so far. Made a new shackle from a stock JK control arm and some square tubing New shackle mount made and tacked in. Not overly happy with this but it'll get the tires clear of the fenders for the up coming trip. After a long time sitting on jack stands in the garage... It rolled out, under its own power, still sitting lower in the rear, no sway bar installed and holes in the floor, but it was still a good day after nearly 9 months to be able to drive it again. Loaded up for an over night camping trip. Being the first time I ever dealt with leaf springs, I think I made the shackle holes to far towards the rear and in a sense "stretched" the springs when mounted. Stock with the same weight aboard the rear didn't settle much, if at all. Now with weight in the box it settles down a fair bit. Will be doing the spring over soon. But it did make it out for its first trip, some rubbing in the front and a lot in the rear, taking my time and trimming a bit more of the fenders. Few pics from the trip... Tightening the drag link Other than the rubbing of the tires and swaying due to lack of sway bar, it made it there and back, about 120km of pavement and 12km of dirt trail. Only thing that fell off was the windshield mounted rear view mirror, which is useless with my tent mounted. Overall it was a successful trip. Spring over and axle swap next.
88whitemanche Posted August 24, 2016 Posted August 24, 2016 Looking good! Got anymore details on that tent set up?
TuckerTJ Posted August 28, 2016 Author Posted August 28, 2016 It's a Tepui , kukenam sky is the model name. Pretty basic mounting. Two cross bars on the side rails. In these pics the tent is mounted forward, I've since moved the tent towards the rear and added a truck box up front (next update). I'm redoing the rack after I get the rear axle swapped in. Will be taking more pictures then.

Recommended Posts
Create an account or sign in to comment
You need to be a member in order to leave a comment
Create an account
Sign up for a new account in our community. It's easy!
Register a new accountSign in
Already have an account? Sign in here.
Sign In Now