
Eagle_SX4
-
Posts
1217 -
Joined
-
Last visited
Content Type
Profiles
Forums
Gallery
Everything posted by Eagle_SX4
-
Are my synchronizers toast?!
Eagle_SX4 replied to InTacosWeTrust's topic in MJ Tech: Modification and Repairs
I changed to the later master cylinder and the only thing you need to do is to drill out the mounting hole for the pedal. It does have a different style of fitting which would require a new line. I also used the Advance Adapters hose. I used the 716130-60 hose, and 716130, 716130TJ adapters. To go to the 91+ master and slave cylinders. -
Defiantly replace your front turn signal sockets. I had to do that when I bought my truck and have not had an issue since. Here is a good video showing how to do it.
-
Are my synchronizers toast?!
Eagle_SX4 replied to InTacosWeTrust's topic in MJ Tech: Modification and Repairs
Also sometimes air will be pulled in to the system with out leaking anything. I had that happen with a brand new brake master cylinder. -
Replacing 37 year old exhaust (front pipe)
Eagle_SX4 replied to EdJarHead's topic in MJ Tech: Modification and Repairs
Those studs are pressed into the manifold and are not meant to be removed. If you need to remove them and air hammer would probably be the best option. -
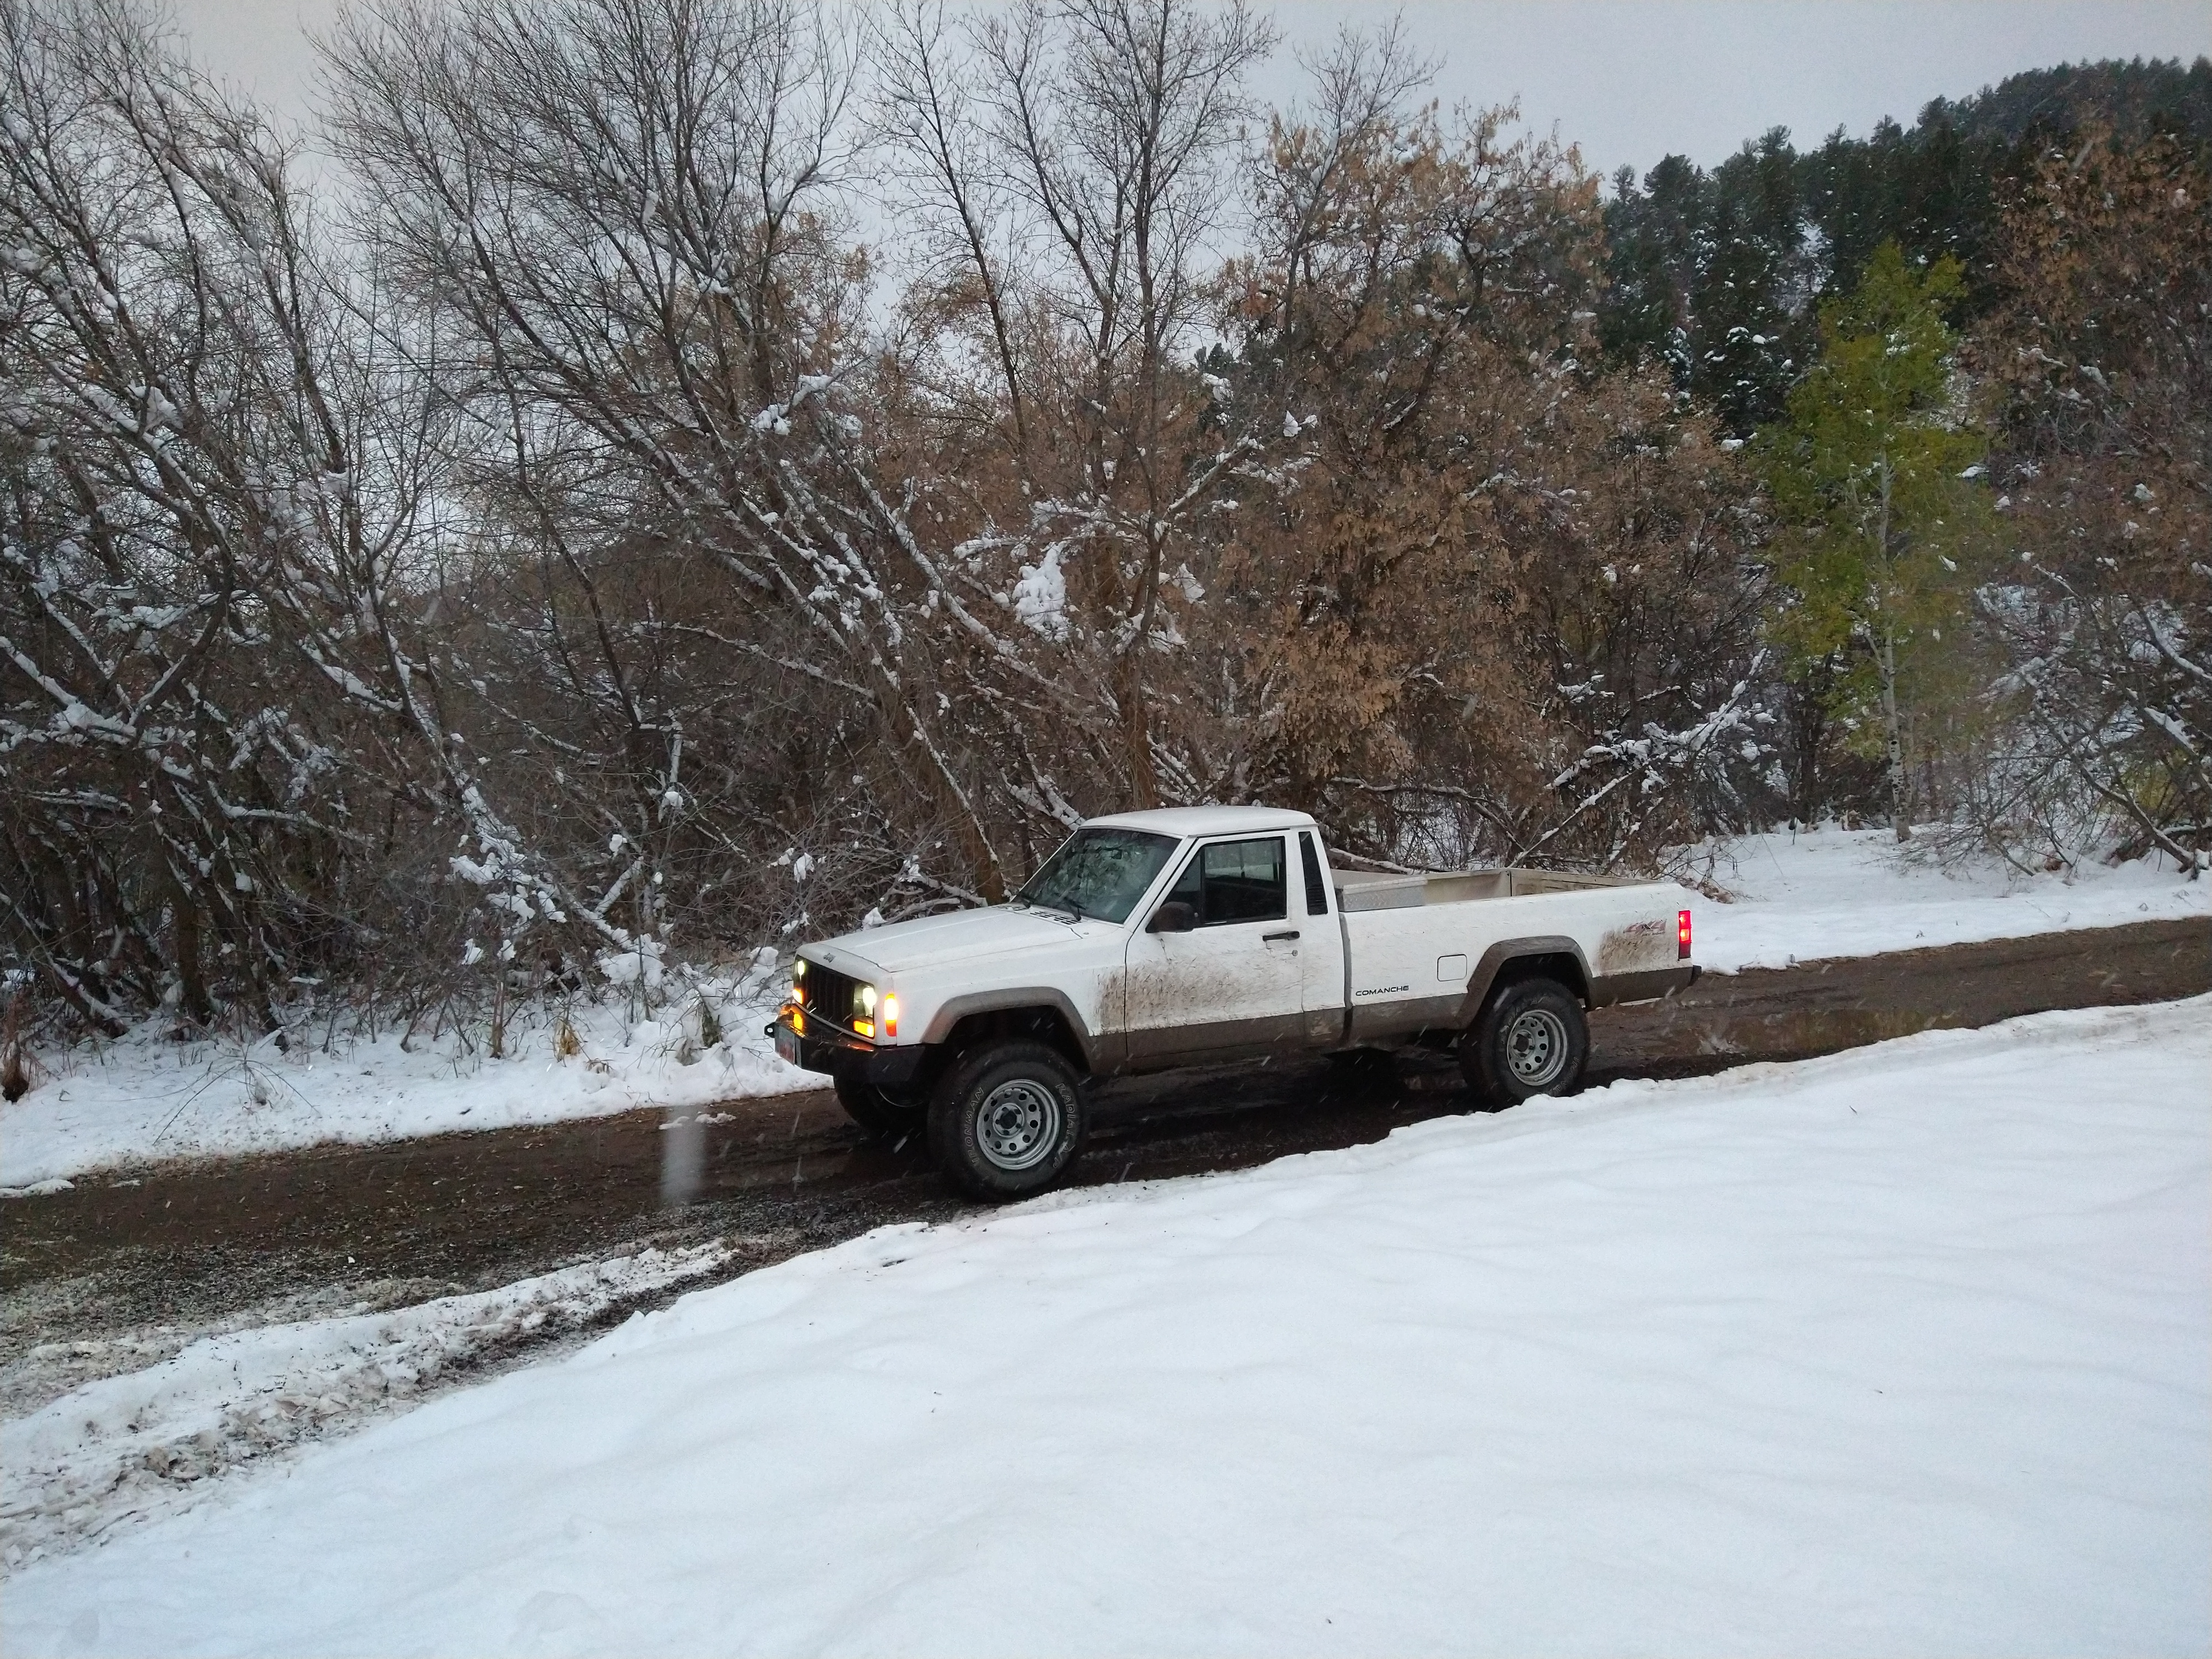
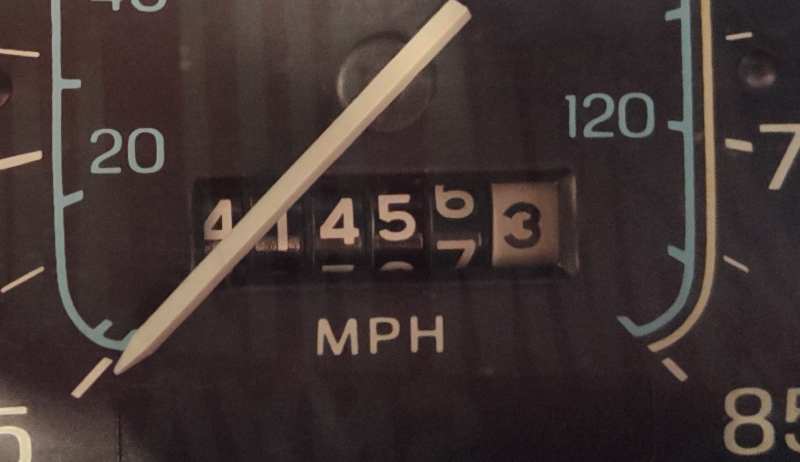
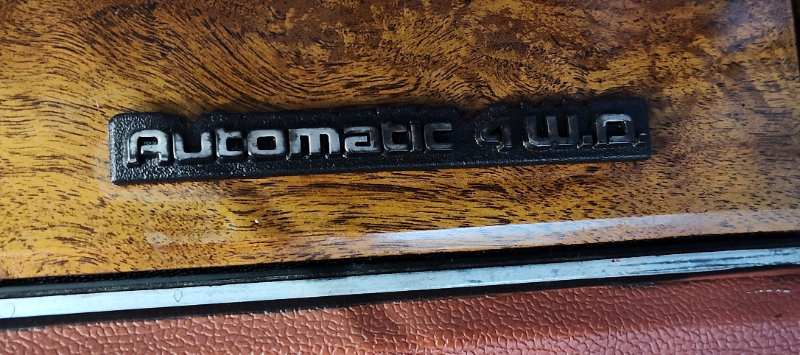
Only 5 whole digits on the odometer and AUTOMATIC 4W.D.
-
I pulled it from a 1980 Eagle 4 door sedan. NP119 full time transfer case with no shifter switch on the dash. Not a big deal I just need to cut a square hole for the switch.
-
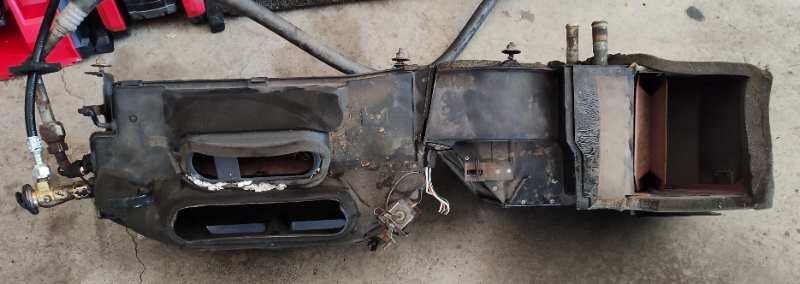
Huge win at the junkyard this weekend. I picked up a clean non cracked dash and ac/heater box with controls. I will finally have ac in the car. I need to get a compressor and condenser and wire up the switches.I will paint this dash black and get it installed with the new HVAC box hopefully later this summer.

-
Any thoughts on this load leveling device?
Eagle_SX4 replied to ghetdjc320's topic in MJ Tech: Modification and Repairs
Here is the the walk-around of his Mazda truck. -
Any thoughts on this load leveling device?
Eagle_SX4 replied to ghetdjc320's topic in MJ Tech: Modification and Repairs
I was also going to suggest this. Not sure how it would work on a Comanche with the springs under the frame though. -
They are quite hard to find it took me a couple of months going to junkyards to find a good one for my truck. It seems like either the breather or dipstick is broken off of most of the junkyard ones. Good luck on the hunt.
-
Booster upgrade questions
Eagle_SX4 replied to Eagle_SX4's topic in MJ Tech: Modification and Repairs
I got the brakes bleed yesterday and they are working great. I was doing some more searching on Rockauto and was looking a TJ Wrangler boosters. They might be the bolt in solution I am looking for. From the pics and specs listed the only difference appears to be the pushrod that bolts to the brake pedal. TJ Booster XJ booster Does anyone have a TJ that they could measure the booster rod? -
Here is a list of codes for the REM. If you scroll down to ECU codes section you should find what you are looking for. https://nickintimedesign.com/rem-codes-description/ No Injector 12V ECU did not detect 12V on Injector feed wire. -TIP: If this code shows with “KO Tests Not Run,” it can be ignored.
-
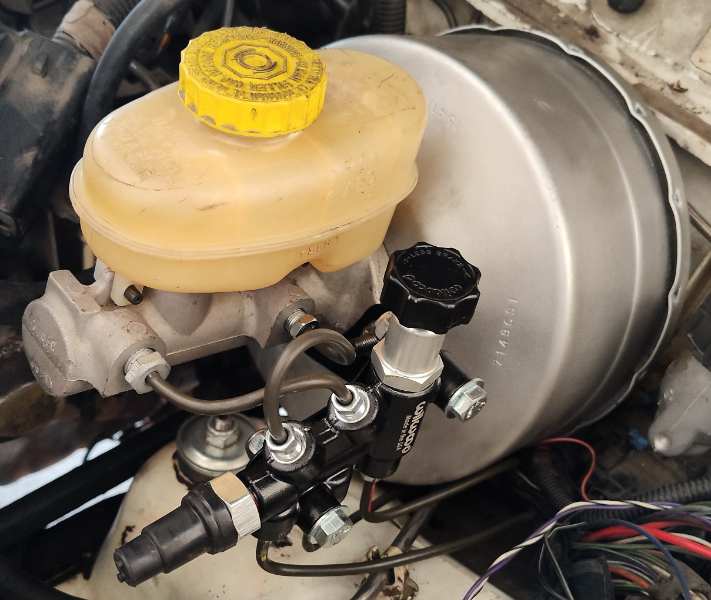
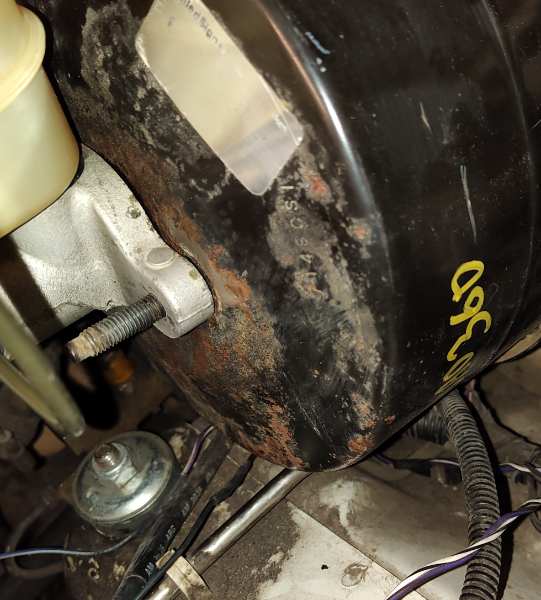
Replumbed the entire brake system. I used a dual diaphragm booster and master cylinder from a 98 XJ. New Wilwood distribution block with adjustable proptioning valve for the rear. Along with all new lines front to back. The master cylinder bolts right in place but the booster pushrod is too long. I cut out about 3/4" and welded it back together. The final length of the pushrod from the mounting surface should be 4-7/8" for stock pedal height. I am using the brake light switch built into the distribution block. So far it does the job. I might change that up and use a 95 XJ brake light switch later. Now the brakes are more than just a suggestion and actually function as they are supposed to. The old distribution block was clogged up with corrosion. I am surprised I had any brakes at all.
-
Booster upgrade questions
Eagle_SX4 replied to Eagle_SX4's topic in MJ Tech: Modification and Repairs
Thanks for the info. I got the truck fully plumbed with new lines today. I will bleed it tomorrow and see how it goes with the 98 booster.
-
Booster upgrade questions
Eagle_SX4 replied to Eagle_SX4's topic in MJ Tech: Modification and Repairs
I like this option better than what I did and will look into getting a 95-96 booster. I wish one of my local parts stores had one in stock so I could go and measure it to confirm proper length. -
Are my synchronizers toast?!
Eagle_SX4 replied to InTacosWeTrust's topic in MJ Tech: Modification and Repairs
Also when you change the fluid in your transmission look at the fluid closely. If your synchros have failed the fluid will be full of small pieces of brass. (gold colored metal pieces) -
Are my synchronizers toast?!
Eagle_SX4 replied to InTacosWeTrust's topic in MJ Tech: Modification and Repairs
I also think you should start by making sure the clutch is bleed properly. If you have an internal slave cylinder they are known to be an issue and don't last very long. It could be that is what has failed and not your synchros. As far as fluid goes what ever you use just make sure it is yellow metal safe. Most gear oils have sulfur in them which dissolves brass synchros. I am running Schaeffer's Supreme Gear Lube 75W-90. Redline MT90 is also a great option. Both of these are yellow metal safe -
Booster upgrade questions
Eagle_SX4 replied to Eagle_SX4's topic in MJ Tech: Modification and Repairs
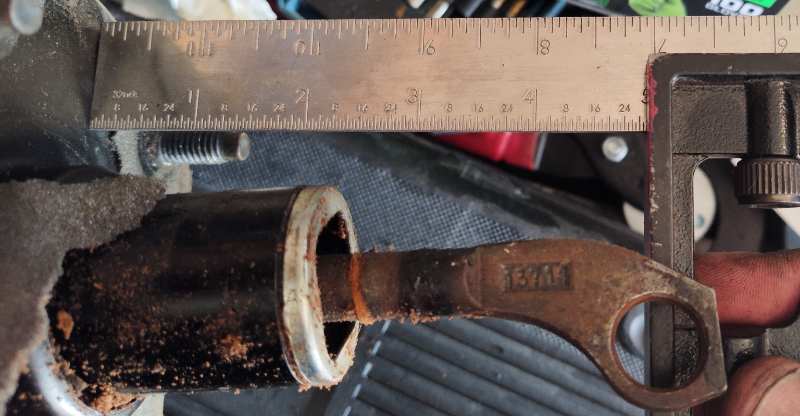
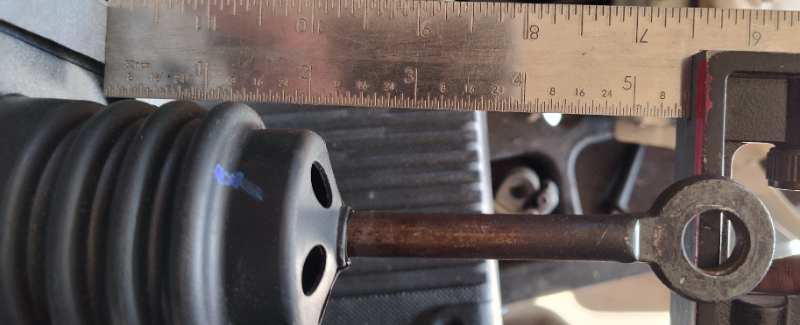
I got the booster rod modified. I cut and welded it back together with a piece of angle iron added to ensure it doesn't fail. If any one else does the dual diaphragm booster upgrade just make sure the center of the pedal mount on the booster rod is 4-7/8" away from the mounting surface of the booster. -
Booster upgrade questions
Eagle_SX4 replied to Eagle_SX4's topic in MJ Tech: Modification and Repairs
I just bolted it in with out any modifications to see if it would work. Cutting and welding the booster rod was going to be the next step if I couldn't find a bolt in solution. -
I am in the middle of swapping in a dual diaphragm booster with master cylinder. The problem I have run into is the pedal height. The pedal is 2 inches higher with the new booster with the 5/16 aluminum spacer. I got the booster/master out of a 98 XJ. The difference of the pushrod on the booster is only 1/2 inch. Is there a different booster I can get that this won't be a problem?
-
Brake distribution (proportioning) valve rebuild?
Eagle_SX4 replied to Eagle_SX4's topic in MJ Tech: Modification and Repairs
I soaked it overnight is some carb cleaner and was able to get it apart. I can't believe I still had front brakes. The front passenger brake is routed through the end port where the corrosion and build up was. I was still able to bleed both front calipers. The o-ring sizes as measured in inches are (id=internal diameter od=outside diameter) 1) thickness .07, id .407, od .545 2) thickness .07, id .243, od .375 3) thickness .07, id .181, od 317 4) thickness .07, id .153, od .286 Edit: O-ring sizes needed -012, -010, -008, and -007

-
Dual diaphragm booster clearance
Eagle_SX4 replied to Eagle_SX4's topic in MJ Tech: Modification and Repairs
I was able to move the fuel line 2.5 inches out board and that fixed the clearance issue. I drilled a new hole for the existing clip.
-
Any one done the upgrade on an '87 4.0. I test fit the booster (pulled from a '98 XJ) today and it rests on the fuel line. Do I need to move my fuel line?

-
Brake distribution (proportioning) valve rebuild?
Eagle_SX4 replied to Eagle_SX4's topic in MJ Tech: Modification and Repairs
Got my valve pulled out and opened up today and it is seized up. It is not repairable. The internal sliding pin is seized into the removable fitting. The mystery of why I could not get my bypass line to bleed is now very clear. Now I need to decide what I am going to do. I will get the o-rings measured tomorrow for anyone interested.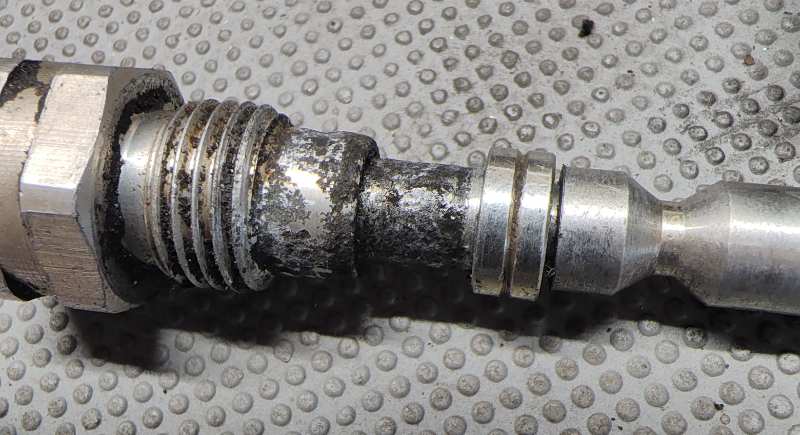
-
What year was this Transmission made?
Eagle_SX4 replied to JRam's topic in MJ Tech: Modification and Repairs
The transfer case was made on October 8, 1990. (The serial number is also the build date)